Category: Automation use cases

  • Triggers Explained

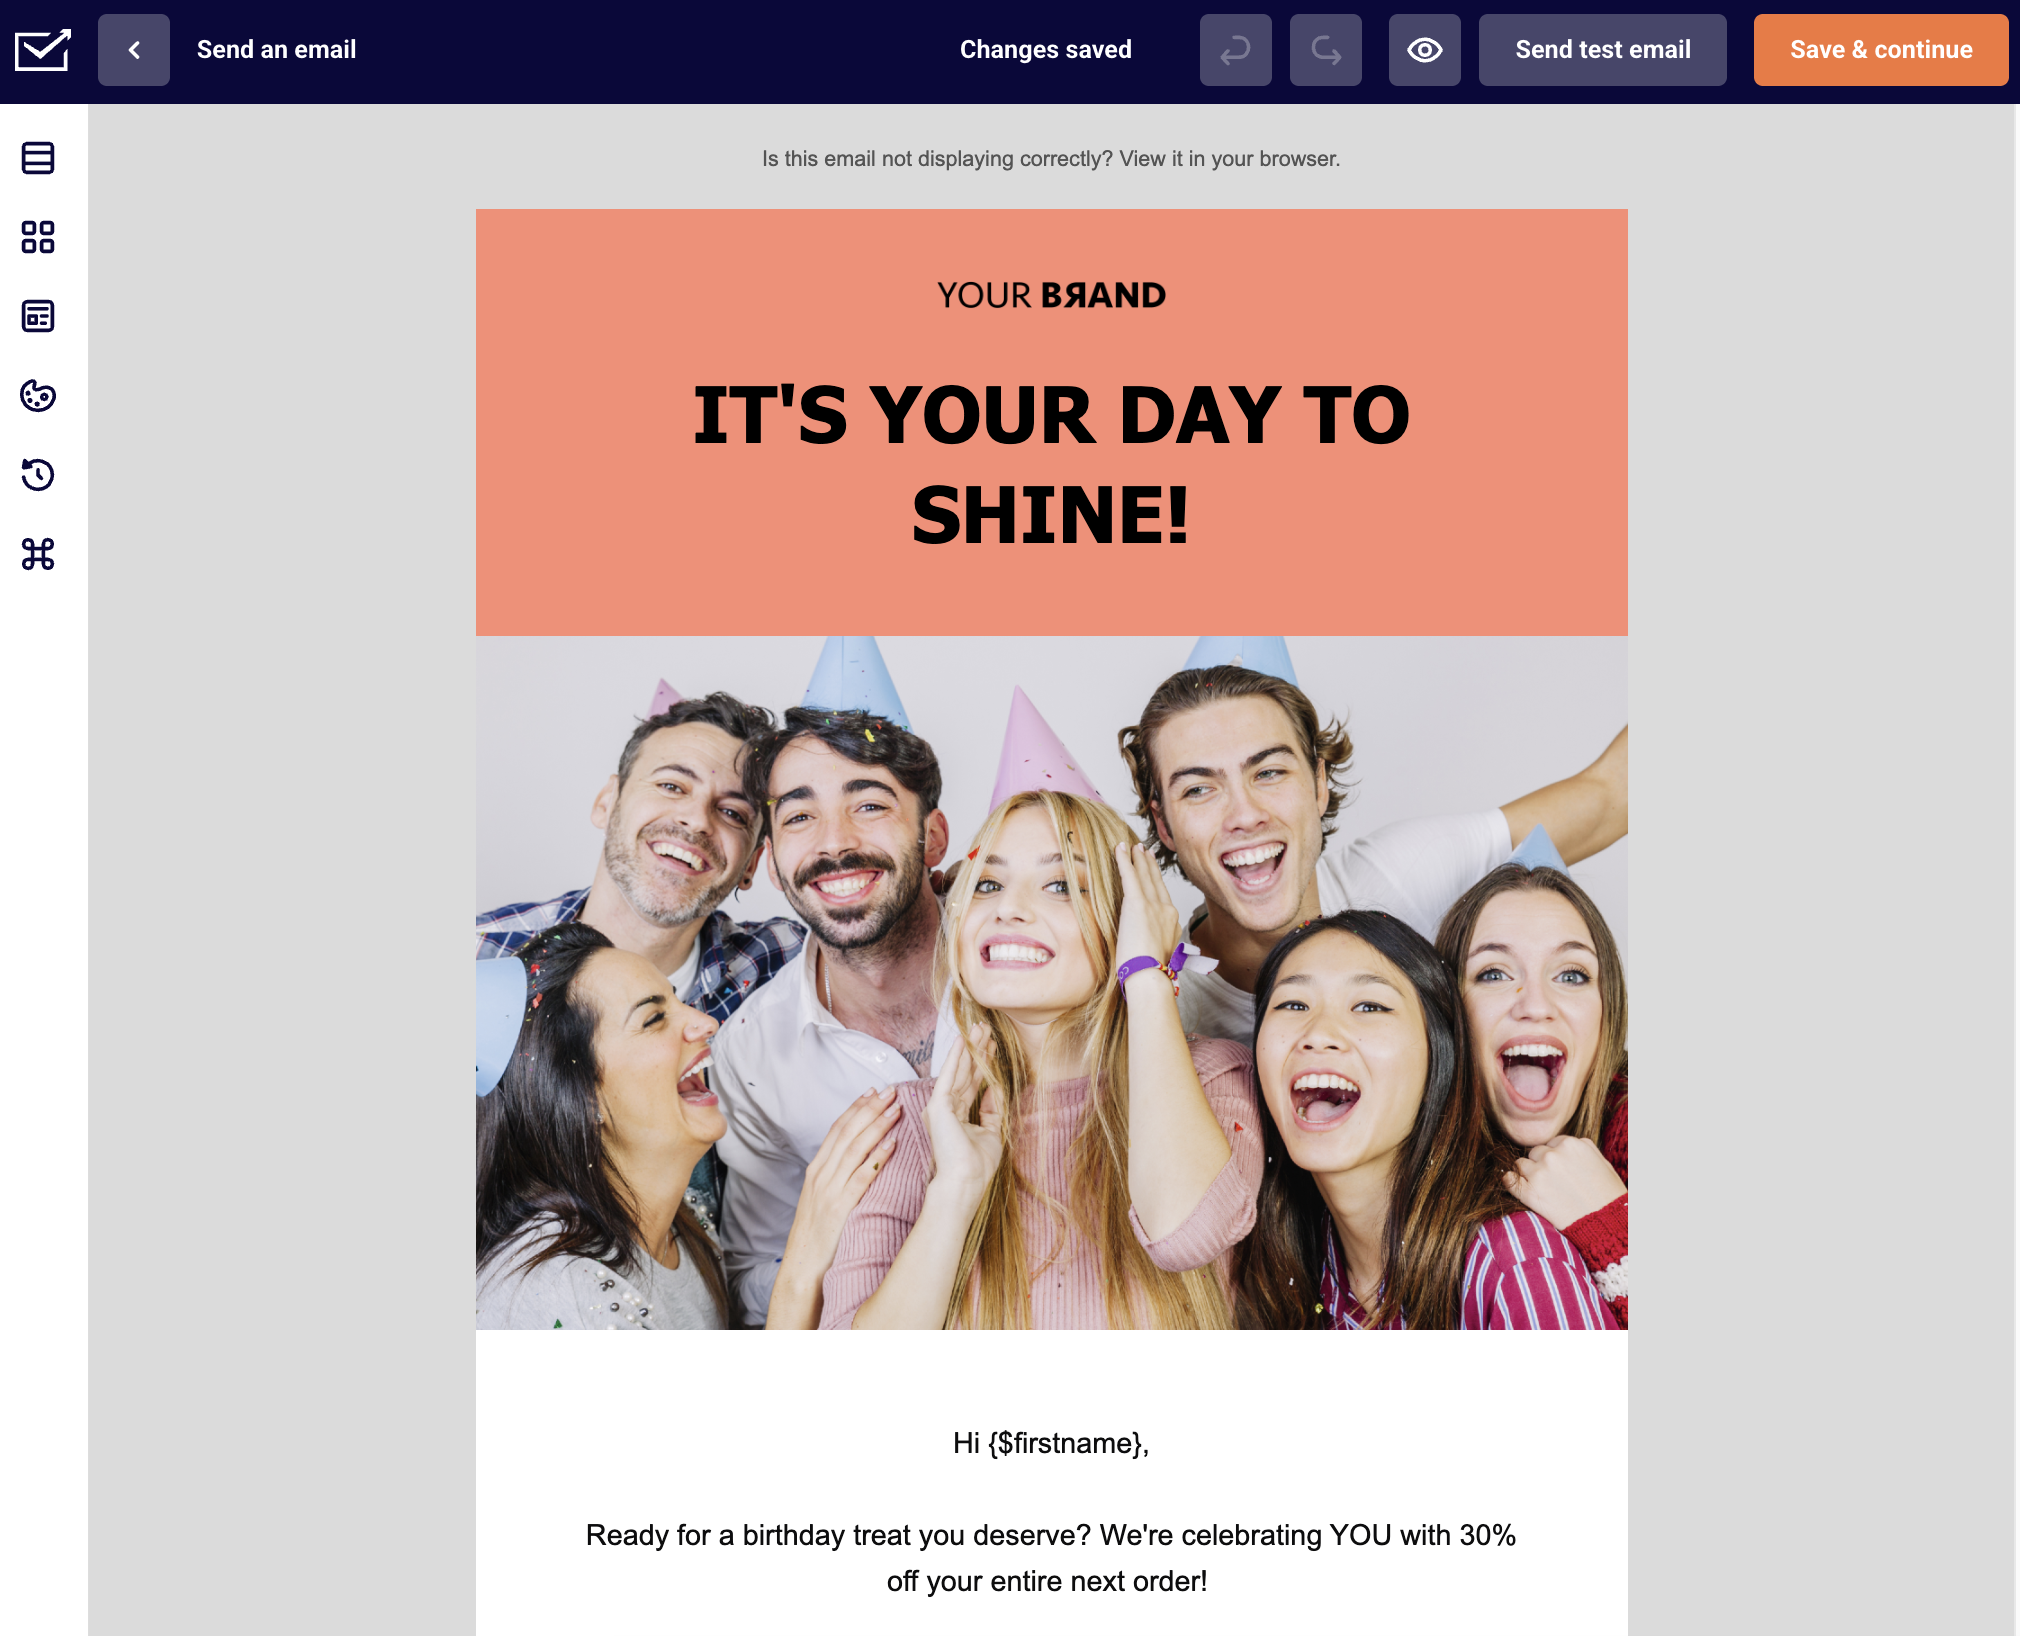
    This guide covers how triggers work in Sender automation workflows, including how to select, configure, and update them to control when and how contacts enter your automations.

    Where to Find This Setting

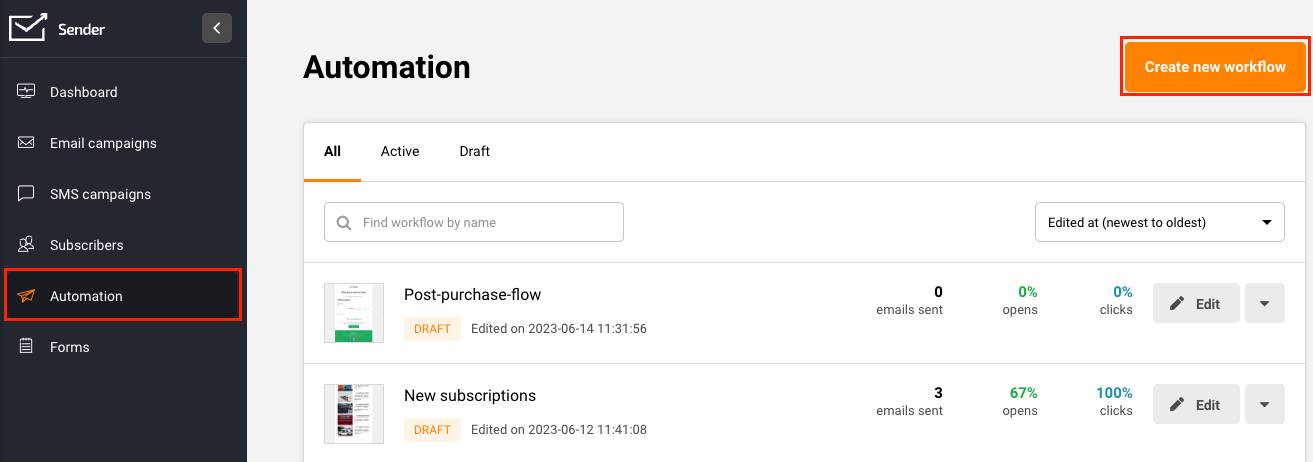
    In the Sender dashboard, go to Automations in the left sidebar. This opens the automation list view.

    edit-automation

    Click the edit (pencil) icon next to the workflow you want to modify, or open any existing workflow. The trigger is always the first block at the top of the workflow canvas. Click it to open the Trigger Setup panel on the right side of the screen.

    How Triggers Work

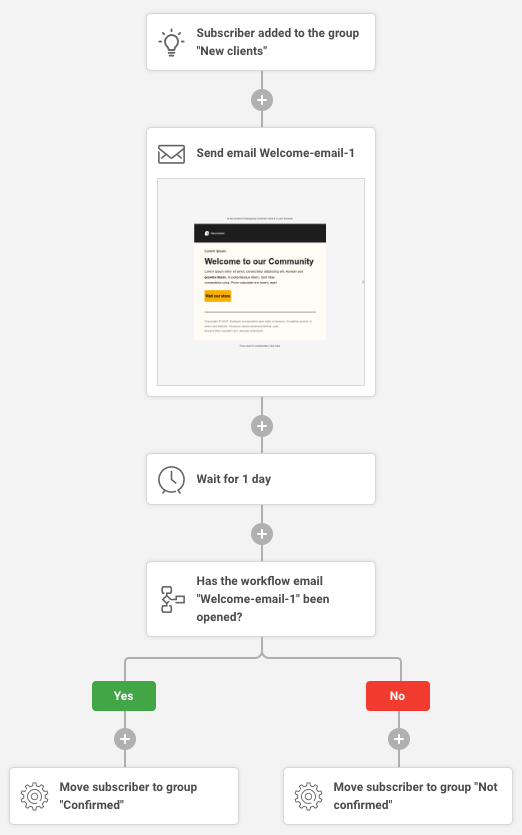
    A trigger defines the event that causes a contact to enter the workflow. Each automation has one trigger block, and it must be configured before the workflow can be activated.

    automation-trigger-setup

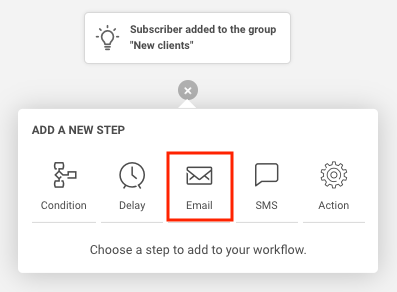
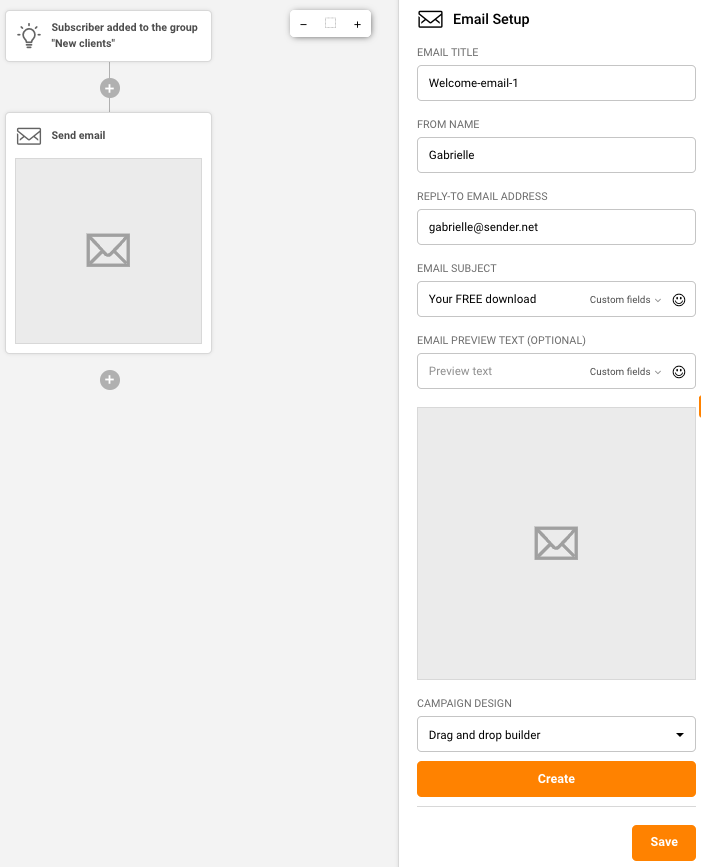
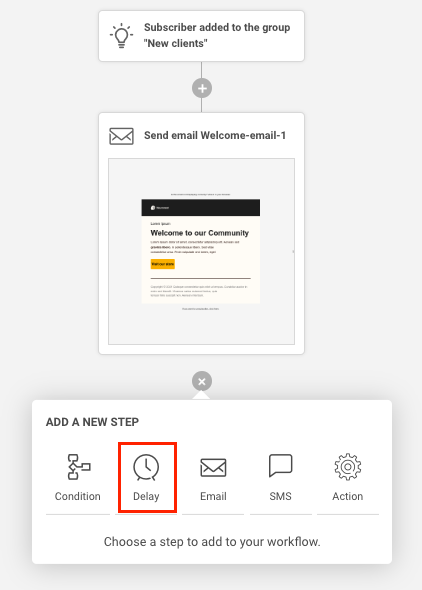
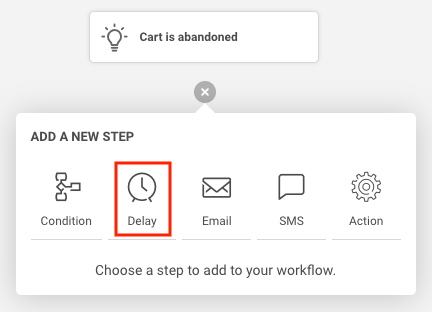
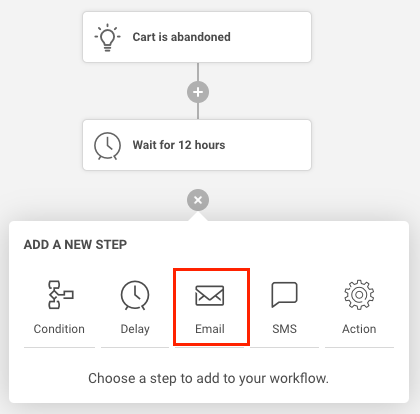
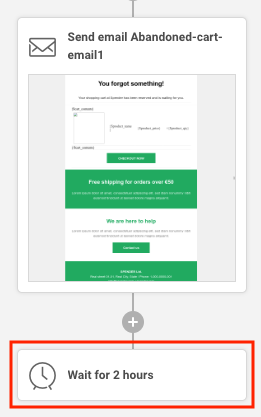
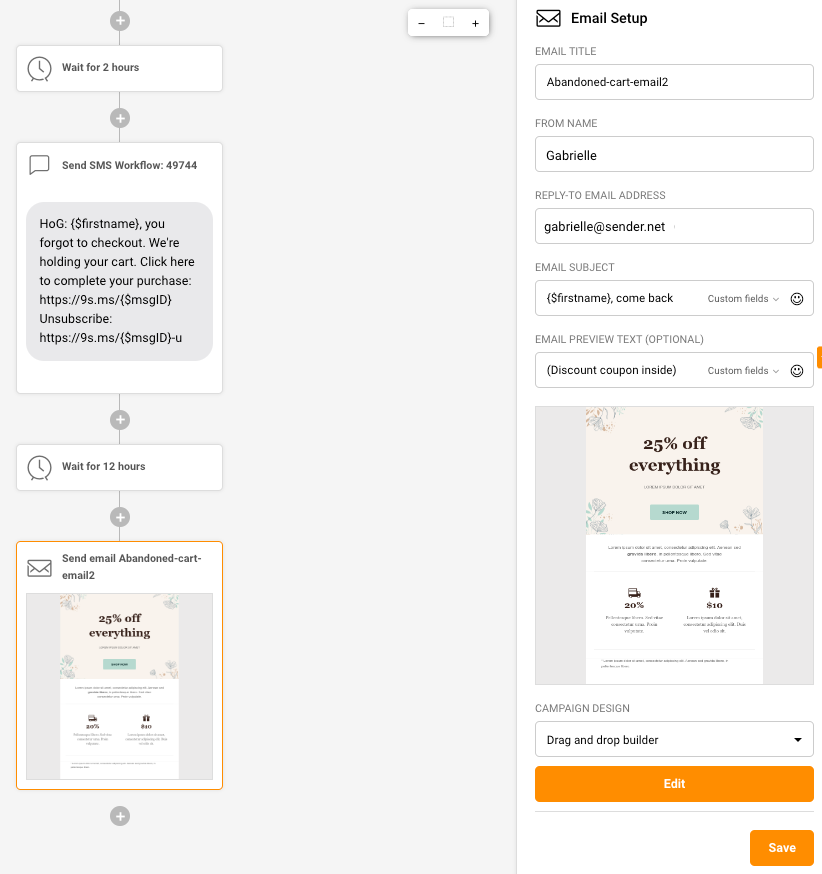
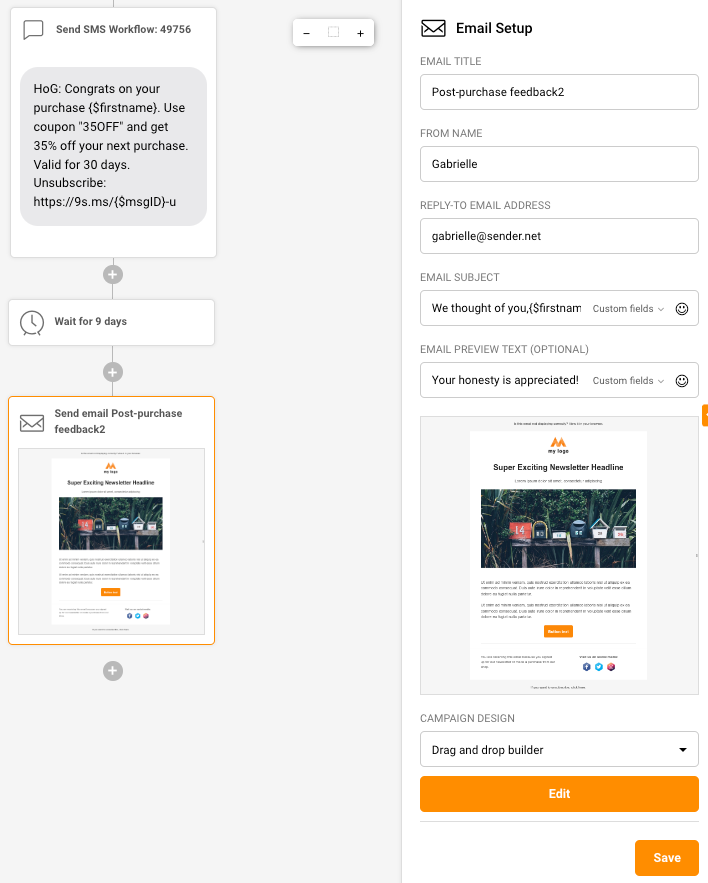
    The trigger block appears at the top of the canvas and is labeled with the selected trigger type. When a contact performs the event matching your trigger, they enter the workflow and proceed through the steps in order — emails, delays, conditions, and actions.

    Steps to Configure a Trigger

    Step 1 — Open the Trigger Block

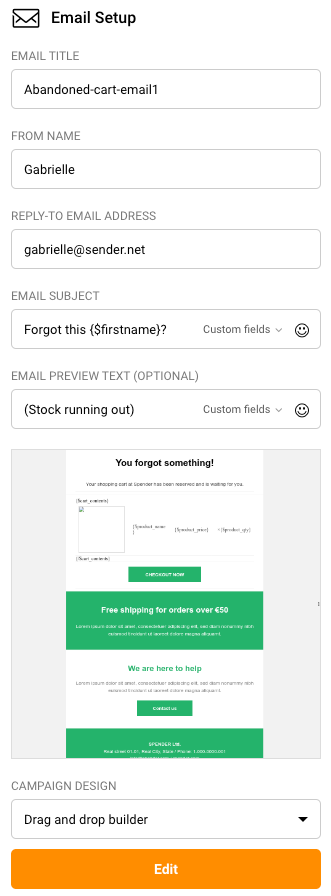
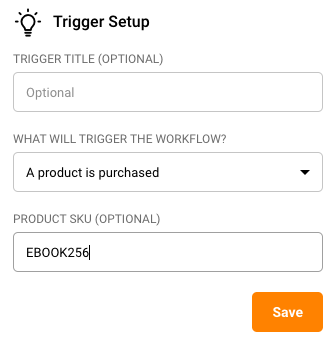
    Click the trigger block at the top of the workflow canvas. The Trigger Setup panel opens on the right. You will see the TRIGGER TITLE (OPTIONAL) field at the top, followed by the WHAT WILL TRIGGER THE WORKFLOW? dropdown. If a trigger type is already selected, its current settings are displayed below the dropdown.

    automation-trigger-type

    Step 2 — Select the Trigger Type

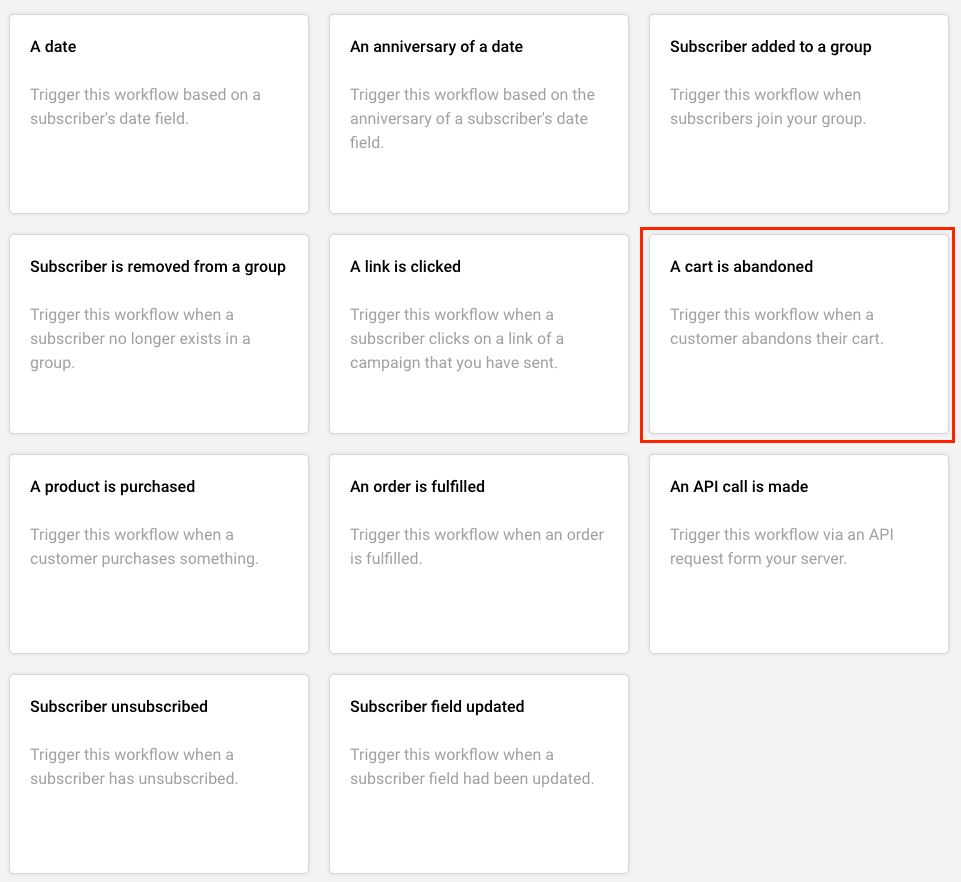
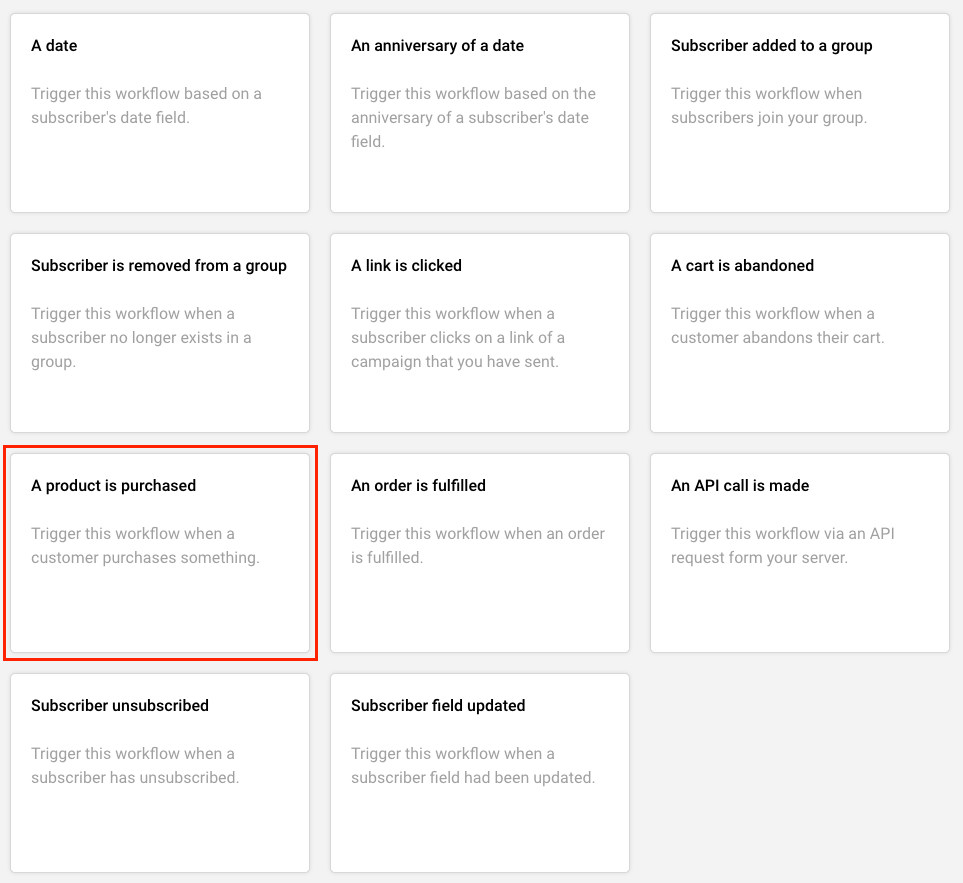
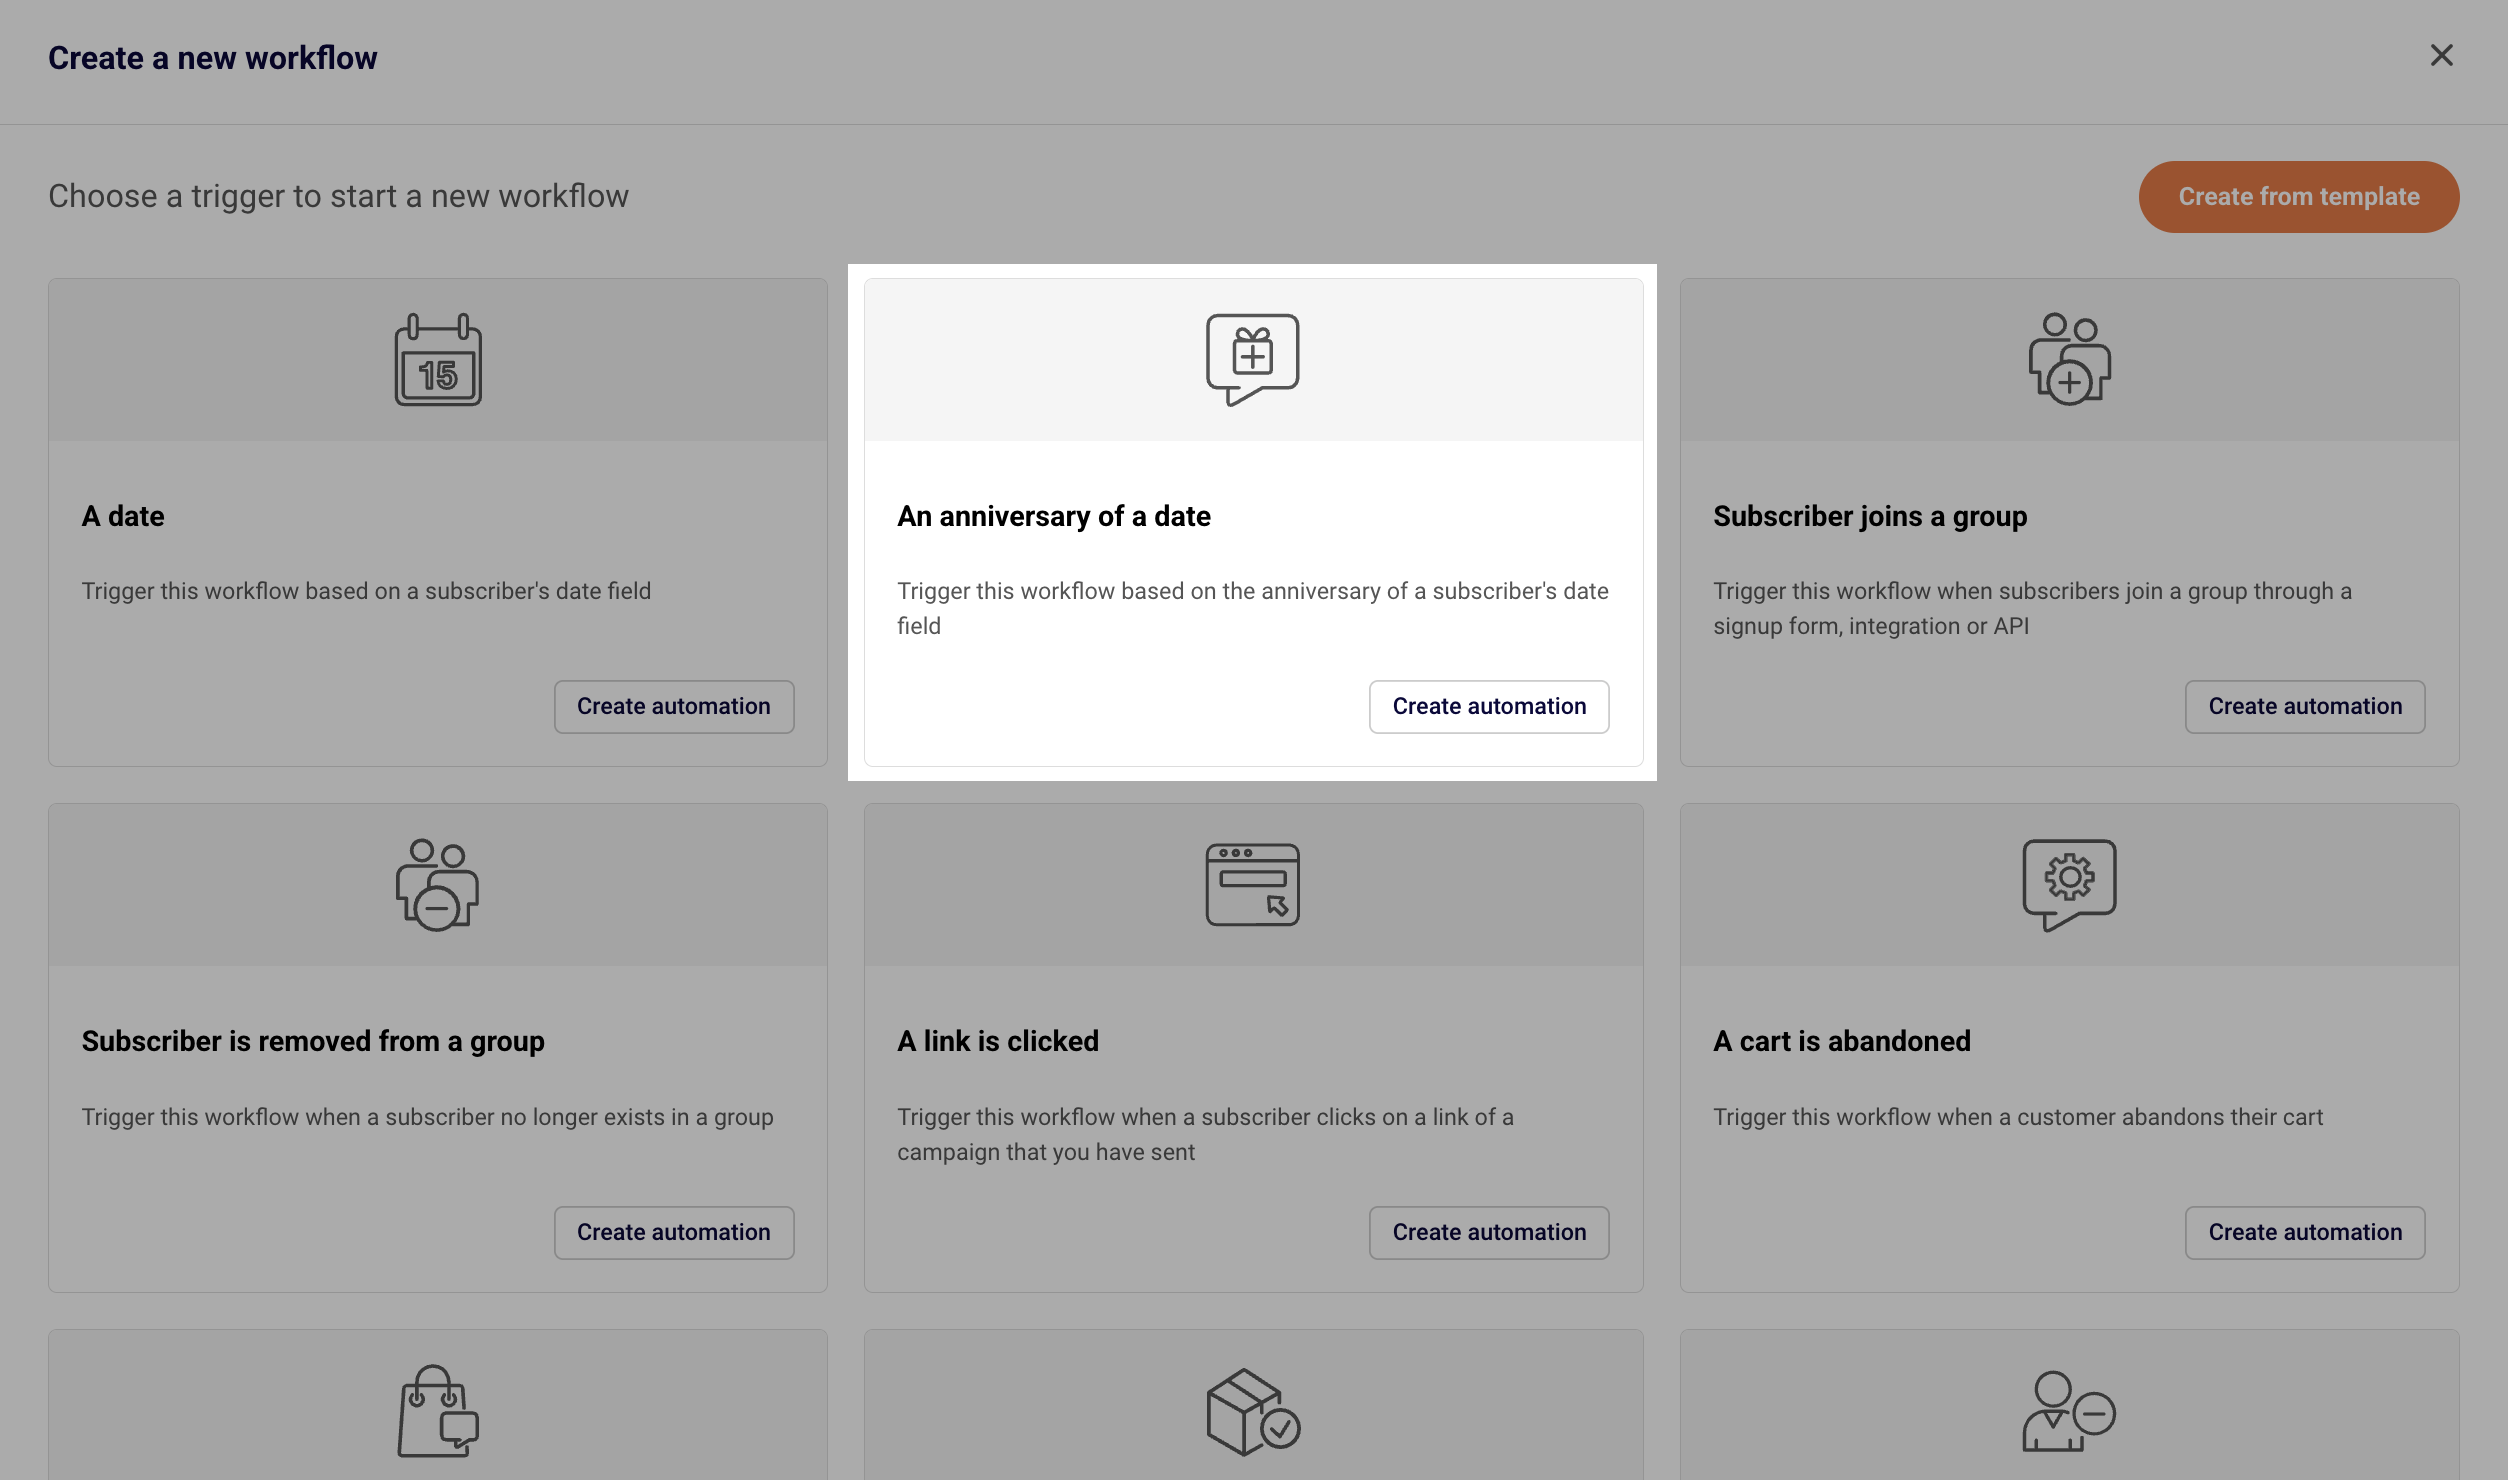
    Open the WHAT WILL TRIGGER THE WORKFLOW? dropdown. The available trigger types are:

    • A date — fires based on a date stored in a subscriber custom field.
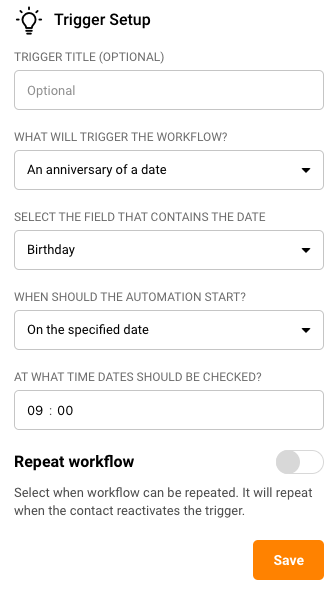
    • An anniversary of a date — fires on the recurring anniversary of a stored date.
    • Subscriber joins a group — fires when a contact is added to a selected group.
    • Subscriber is removed from a group — fires when a contact leaves a group.
    • A link is clicked — fires when a contact clicks a specific link.
    • A cart is abandoned — fires on an ecommerce cart abandonment event.
    • A product is purchased — fires when a purchase event is recorded.
    • An order is fulfilled — fires when an order fulfillment event occurs.
    • Subscriber unsubscribed — fires when a contact unsubscribes.
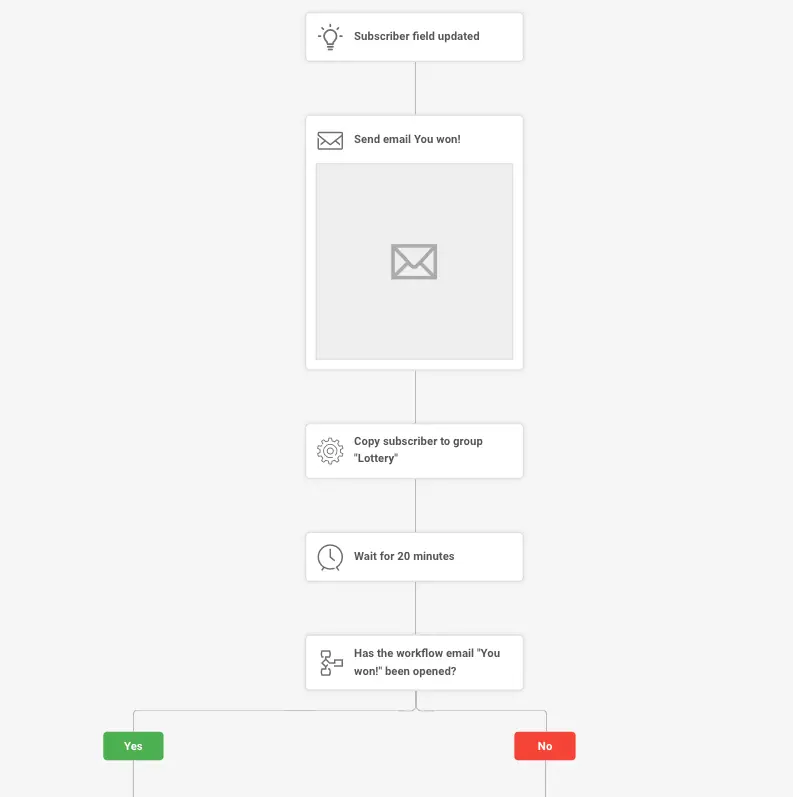
    • Subscriber field updated — fires when a subscriber custom field value changes.
    • Subscriber status changed — fires when a subscriber’s status changes. Select the type that matches the event you want to use.

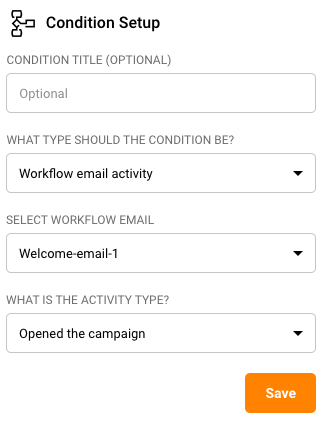
    Step 3 — Configure Trigger-Specific Settings

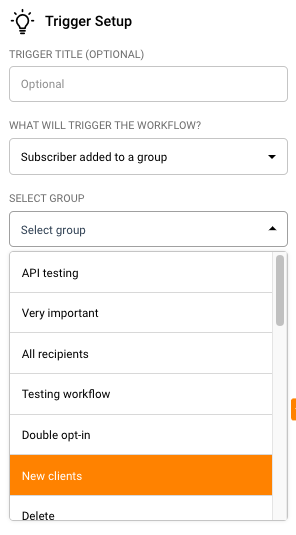
    Each trigger type reveals its own configuration fields once selected. For Subscriber joins a group, choose the target group from the SELECT GROUP dropdown.

    automation-trigger-setup

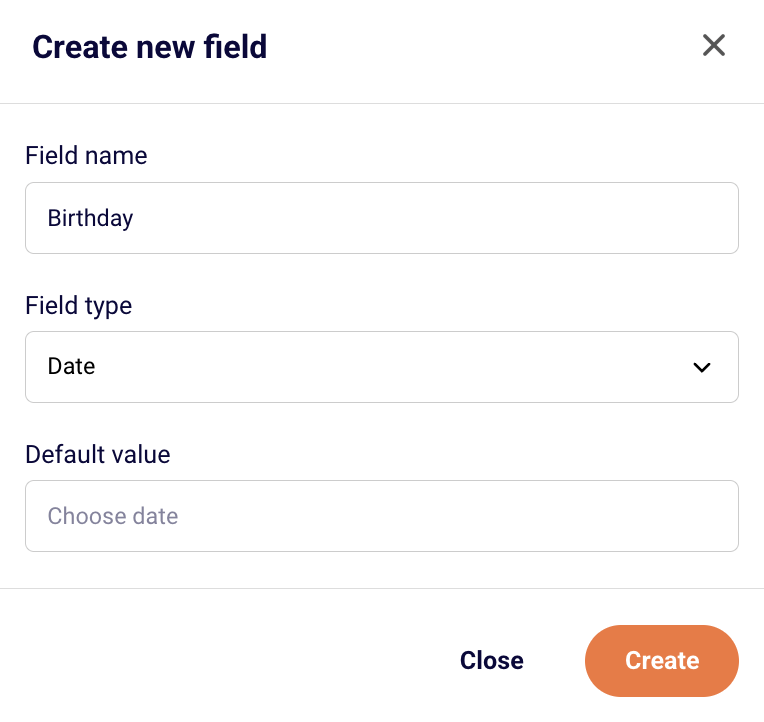
    For A date, select the custom field that contains the date under SELECT THE FIELD THAT CONTAINS THE DATE, choose the comparison type under WHEN SHOULD THE AUTOMATION START?, and set the check time under AT WHAT TIME DATES SHOULD BE CHECKED?. Other triggers follow a similar pattern — select the relevant group, link, field, or event that defines the trigger condition.

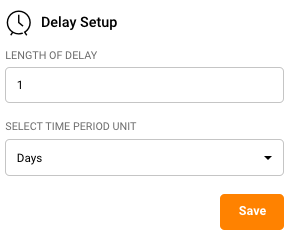
    Step 4 — Set the Repeat Workflow Option

    Below the trigger-specific fields, the Repeat workflow toggle controls whether a contact can re-enter the workflow if they activate the trigger again.

    automation-trigger-setup

    When disabled, each contact enters the workflow only once. Enable it if contacts should be able to re-enter when they re-trigger the event.

    Step 5 — Save the Trigger

    Click Save at the bottom of the panel. The trigger block on the canvas updates to reflect the selected type and settings. The Completion counter in the top-right corner of the builder advances when the trigger is fully configured.

    What Happens After You Save

    After saving, the updated trigger applies to new contacts who perform the trigger event going forward. Contacts already inside the workflow are not affected by trigger changes — they continue through the steps that were active when they entered. The workflow status remains Draft unless you manually activate it. A trigger must be fully configured (along with all other required steps) before the workflow can be set to Active.

    Common Issues

    Contacts are not entering the workflow — The trigger conditions may not be met. Verify the correct group, date field, or event is selected. Also confirm the workflow status is Active, not Draft.

    Trigger changes are not affecting existing contacts — This is expected. Trigger updates only apply to contacts who enter the workflow after the change is saved. Existing contacts follow the logic that was active when they entered.

    The Save button is grayed out — All required fields for the selected trigger type must be completed before Save becomes active. Check that every dropdown and field in the Trigger Setup panel has a value selected.

    Workflow does not start after activation — Confirm the trigger event is actually occurring. For example, if the trigger is Subscriber joins a group, verify that contacts are being added to the specified group.

    FAQs

    Can I change a trigger type after the workflow is active?

    Yes. Open the trigger block and select a new type from the WHAT WILL TRIGGER THE WORKFLOW? dropdown. Changes apply only to new contacts entering the workflow after you save.

    Do existing contacts follow updated trigger settings?

    No. Contacts already in the workflow continue based on the trigger configuration that was active when they entered.

    Can a workflow have more than one trigger?

    No. Each automation workflow has a single trigger block. To respond to multiple events, create separate workflows for each trigger type.

    What does the Repeat workflow toggle do?

    When enabled, contacts can re-enter the workflow each time they activate the trigger event. When disabled, each contact enters the workflow only once, regardless of how many times they trigger the event.

    What trigger types are available for ecommerce?

    Three ecommerce-specific triggers are available: A cart is abandoned, A product is purchased, and An order is fulfilled. These require an active ecommerce integration.

  • Conditions & Filters

    This guide shows how to configure conditions and filters in Sender automation workflows to control how contacts are routed through Yes/No logic branches.

    Where to Find This Setting

    In the Sender dashboard, go to: Automations (left sidebar) → select the workflow you want to edit → the workflow opens in the visual builder. Click any existing Define condition block on the canvas, or click a + icon between steps and select Condition from the ADD A NEW STEP menu. The Condition Setup panel opens on the right side of the screen.

    Steps to Configure Conditions & Filters

    Step 1 — Open the Condition Setup Panel

    Click the Define condition block in your workflow canvas. The Condition Setup panel appears on the right. To add a new condition, click the + icon between any two steps and select Condition from the step menu (alongside Delay, Email, SMS, Action, and Split). You can optionally enter a label in the CONDITION TITLE (OPTIONAL) field to identify the block in your workflow.

    Step 2 — Select a Condition Type

    Open the WHAT TYPE SHOULD THE CONDITION BE? dropdown and choose one of the seven available condition types:

    • Subscriber details — filter by contact field data (Email, Phone number, First name, Last name, Birthday).
    • Subscriber status — filter by the contact's current status (ACTIVE, BOUNCED, UNSUBSCRIBED, SPAM REPORT).
    • Workflow email activity — filter by whether a contact interacted with a specific email in the current workflow.
    • Workflow SMS activity — filter by SMS interaction within the current workflow.
    • Campaign activity — filter by engagement with a specific campaign.
    • Group membership — filter by whether a contact belongs to a selected group.
    • Segments — filter by segment membership.

    Step 3 — Define the Comparison Rules

    The fields that appear depend on the condition type you selected in Step 2.

    For Subscriber details: Select a field from the SELECT A FIELD dropdown. Then choose a comparison operator from the HOW SHOULD THE VALUE BE COMPARED? dropdown — options include Equals, Does not equal, Contains, Does not contain, Starts with, Ends with, Is provided, and Is one of. For most operators, enter the target value in the ENTER COMPARISON VALUE text field.

    For Subscriber status: Choose a comparison operator from HOW SHOULD THE VALUE BE COMPARED? (Is, Is not, or Is one of), then select a status from the WHICH STATUS? dropdown — ACTIVE, BOUNCED, UNSUBSCRIBED, or SPAM REPORT.

    For Workflow email activity / Workflow SMS activity: Select the specific workflow email or SMS message from the dropdown. The condition then evaluates whether the contact interacted with that message.

    For Campaign activity: Select a campaign from the SELECT CAMPAIGN dropdown.

    For Group membership: Select a group from the SELECT GROUP dropdown, then set the MATCHES field to Include (contact is in the group) or Exclude (contact is not in the group).

    Step 4 — Save and Review the Branch Paths

    Click Save to apply the condition. On the canvas, the condition block displays two branch paths — a green Yes path (condition is met) and a red No path (condition is not met). You can add further steps under each branch by clicking the + icon below Yes or No.

    What Happens After You Save

    After saving, the updated condition logic applies to new contacts entering the workflow. Contacts already past the condition block continue under the logic that was active when they reached it. The workflow status remains Draft or Active unless you change it manually. The Completion indicator in the top-right corner of the builder updates to reflect configured steps.

    Common Issues

    Contacts are not following the expected branch → The comparison operator or value may be misconfigured. Open the condition block, verify the WHAT TYPE SHOULD THE CONDITION BE? selection, and confirm that the field, operator, and value match the intended filter criteria.

    The Yes path receives no contacts → The condition may be too restrictive. Check that the comparison value is exact — for example, Equals is case-sensitive and requires an exact match, while Contains checks for partial matches.

    Condition block still shows "Define condition" → The block was not saved. Click the block to open Condition Setup, complete all required fields, and click Save.

    Group membership condition is not filtering correctly → Confirm the MATCHES field is set to Include or Exclude as intended, and verify that the correct group is selected in the SELECT GROUP dropdown.

    FAQs

    Can I use multiple conditions in sequence?

    Yes. Add additional Condition blocks under any branch by clicking the + icon and selecting Condition. Each block evaluates independently.

    What comparison operators are available for subscriber detail fields?

    Eight operators: Equals, Does not equal, Contains, Does not contain, Starts with, Ends with, Is provided, and Is one of (comma-separated values).

    Can I change a condition type after saving?

    Yes. Click the condition block, select a new type from the WHAT TYPE SHOULD THE CONDITION BE? dropdown, reconfigure the fields, and click Save. Changes apply only to new contacts reaching that block.

    Do existing contacts follow updated conditions?

    No. Contacts already past the condition block continue on the branch they were originally routed to.

    What happens if I delete a condition block?

    Click the  icon on the condition block to remove it. Any steps connected under the Yes/No branches will be disconnected. Review and reconnect your workflow before activating.

    Can I add a condition immediately after the trigger?

    Yes. Click the + icon directly below the trigger block and select Condition to filter contacts before any other step executes.

  • Delays & Timing Rules

    This guide shows how to configure delay blocks and timing rules in Sender automation workflows to control when contacts proceed to the next step.

    Where to Find This Setting

    In the Sender dashboard, go to: Automations (left sidebar) → select the workflow you want to edit → the workflow opens in the visual builder. Click any existing Define delay block on the canvas, or click a + icon between steps and select Delay from the ADD A NEW STEP menu. The Delay Setup panel opens on the right side of the screen.

    Steps to Configure Delays & Timing Rules

    Step 1 — Open the Delay Setup Panel

    Click the Define delay block in your workflow. The Delay Setup panel appears on the right. To add a new delay, click the + icon between any two steps and select Delay from the step menu (alongside Condition, Email, SMS, Action, and Split). You can optionally enter a label in the DELAY TITLE (OPTIONAL) field to identify the block in your workflow.

    Step 2 — Select a Delay Type

    Open the WAIT FOR dropdown and choose one of three delay types:

    • Time delay — pauses the workflow for a fixed duration (e.g., 2 days, 4 hours).
    • Specific date & time — pauses the workflow until a specific calendar date and time.
    • Custom date field — pauses the workflow relative to a date stored in a subscriber's custom field (e.g., a birthday or renewal date).

    Step 3 — Configure the Delay Duration

    The fields that appear depend on the delay type selected in Step 2. For Time delay: Enter a number in the OF field and select a unit from the SELECT TIME PERIOD UNIT dropdown — Minutes, Hours, Days, Weeks, or Months. Toggle SHOW ADVANCED SETTINGS to restrict when the workflow resumes. The advanced panel exposes RESUME FLOW ON day-of-week selectors (Sun through Sat) and a TIME field with hour, minute, and AM/PM inputs. For Specific date & time: Click the Choose date & time field to open a calendar picker. Select a date and set the time using the hour and minute inputs below the calendar. For Custom date field: Select a field from the CUSTOM DATE FIELD dropdown, then choose a timing rule from the UNTIL dropdown — Before, After, or Exact time. If you select Before or After, enter an offset number and unit (Minutes, Hours, Days, Weeks, or Months). Exact time resumes the workflow at the precise date stored in the field.

    Step 4 — Save the Delay Block

    Click Save to apply the delay configuration. The block label on the canvas updates to show the configured wait duration (e.g., "Wait 2 Days"). If advanced settings are enabled, the day-of-week and time restrictions also take effect.

    What Happens After You Save

    After saving, the delay applies to new contacts entering the block. Contacts already waiting in a previously configured delay continue under the original timing. The workflow status remains Draft or Active unless you change it manually. The Completion indicator in the top-right corner of the builder updates to reflect the configured step.

    Common Issues

    Contacts are not progressing past the delay → The delay duration may still be active. Verify the OF value and SELECT TIME PERIOD UNIT match your intended wait period. For Specific date & time, confirm the selected date has not already passed.

    Emails are sending at unexpected times → Advanced settings may be restricting delivery days. Toggle SHOW ADVANCED SETTINGS and check which days are selected under RESUME FLOW ON and what TIME is set.

    Custom date field delay is not working → The subscriber's custom date field may be empty or improperly formatted. Confirm the correct field is selected in the CUSTOM DATE FIELD dropdown and that subscribers have valid date values.

    Delay block still shows "Define delay" → The block was not saved. Click the block to open Delay Setup, complete all required fields, and click Save.

    FAQs

    Can I change a delay after activation?

    Yes. Click the delay block, update the settings, and click Save. Changes apply only to new contacts entering the block.

    What time units are available for Time delay? Five units: Minutes, Hours, Days, Weeks, and Months.

    What do the advanced settings control?

    The RESUME FLOW ON day selectors restrict the workflow to resume only on chosen days. The TIME field sets the exact hour and minute the workflow should continue. This is useful for ensuring contacts proceed during business hours or specific days.

    Do existing contacts follow updated delay settings?

    No. Contacts already waiting in the delay block continue under the timing that was active when they entered it.

    Can I use multiple delay blocks in a row?

    Yes. Add additional Delay blocks by clicking the + icon after any step and selecting Delay. Each block applies its own independent wait period.

    What happens if a Specific date & time has already passed?

    Contacts entering the delay block after the configured date has passed will proceed to the next step immediately.

  • Custom events

    Custom Events let you track any specific action a subscriber takes on your site or in your app — and instantly use it as a trigger for automated workflows. Whether someone visits a pricing page, completes an onboarding step, or performs any other action you care about, Custom Events capture it and make it actionable.

    What are Custom Events?


    A Custom Event is a tracked subscriber action that Sender records in real time. Once an event is captured, it:

    • Appears in the subscriber’s activity log
    • Shows up in a dedicated event dashboard with charts and an activity feed
    • Becomes available as a trigger in Automations

    Think of each Custom Event as a container — you define what it represents, and every time that action happens, Sender logs it and can kick off a workflow automatically.

    Two ways Custom Events work

    1. E-commerce stores (no developer needed)

    If your store is connected to Sender via one of our native integrations (WooCommerce, Shopify, etc.), common e-commerce events are synced automatically. You’ll find pre-defined events ready to use — no setup required on your end.

    Examples of auto-synced events:

    • Product viewed
    • Cart abandoned
    • Order placed
    • Checkout started

    2. Fully custom events (developer required)

    If you want to track an action that isn’t covered by a standard integration — like a specific in-app behavior, a custom funnel step, or a non-standard purchase flow — you can create your own event.

    Here’s how it works:

    1. You create an “empty” event container in Sender (just a name and description)
    2. Your developer connects it via the Sender API
    3. Every time that action occurs, it fires into Sender and gets logged

    This gives you full flexibility to track virtually any behavior, no matter how specific.

    Creating a Custom Event

    1. Go to Custom events in the left-hand sidebar
    2. Click New custom event (top right)
    3. Enter an Event name — use something clear and consistent, like checkout_started or plan_upgraded
    4. Add a Description to explain what this event tracks
    5. Click Create

    Your new event will appear in the Custom Events list immediately. From there, share the event name with your developer so they can connect it via API.

    Note: Event names are used in API calls, so keep them lowercase, without spaces, and descriptive. Once set, the name can’t be changed.

    Viewing event activity

    Each Custom Event has its own mini-dashboard. Click View next to any event to open it.

    You’ll find three tabs:

    • Chart — See event volume over time (hourly, daily, weekly, or monthly). Useful for spotting trends or confirming your integration is working correctly.
    • Activity feed — A real-time log of every time the event was triggered, including the subscriber profile and timestamp.
    • Best people — See which subscribers are triggering this event most frequently.

    Event activity also shows up directly on each Subscriber’s profile under Subscriber activity, along with any event payload data (such as the URL, campaign ID, or other parameters passed with the event).

    Using Custom Events in Automations

    Once a Custom Event is set up and receiving data, you can use it as a starting trigger in any automation workflow.

    1. Open Automations and create a new workflow (or edit an existing one)
    2. Set the starting trigger to Custom Event
    3. Select the specific event you want to use
    4. Optionally, add conditions based on the event’s payload parameters — for example, only trigger the automation if url contains /checkout or campaign_type equals a specific value
    5. Build out the rest of your workflow as usual

    This makes it possible to build very precise automations — for example, sending a follow-up email only to subscribers who visited the pricing page more than twice, or who triggered a specific in-app action.

    Event payload data

    When your developer sends a Custom Event via the API, they can include additional parameters (payload data) alongside it. This might look like:

    
    {
      "campaign_id": 0,
      "campaign_type": "email",
      "url": "https://yoursite.com/checkout/"
      "site_id": 1
    }

    These parameters are stored with each event occurrence and are visible in the subscriber’s activity log. They can also be used as conditions in your automation trigger to make workflows more targeted.

    Frequently asked questions

    Do I need a developer to use Custom Events? Not always. If your store is connected via a native integration, standard e-commerce events sync automatically. You only need a developer if you want to track non-standard, fully custom actions via the API.

    Can I use Custom Events in segments? Yes. Once events are flowing in, you can build segments based on subscribers who have (or haven’t) triggered specific events — making it easy to target audiences based on real behavior.

    Where can I find the API documentation? Head to Account settings → API access tokens to get your API credentials. Full API documentation is available at api.sender.net.

    Is there a limit to how many Custom Events I can create? The number of Custom Events available is currently unlimited.


    If you got stuck on a specific task or can’t find a way to execute a particular job, contact our support team via LiveChat or [email protected] – we’re here to help 24/7.

  • Set up spin-to-win flow

    First of all, make sure you already have a Spin to Win form before creating an associated automation workflow.

    This automation enables you to effortlessly streamline the distribution of coupon codes to your subscribers who have successfully engaged with the Spin to Win form and secured a winning slice. 

    The following tutorial provides a straightforward guide for implementing the most basic setup for sending out these winning coupons.

    Feel free to enhance the automation by adding extra steps. For instance, you might want to check whether the customer has opened the initial email containing the coupon. If not, consider setting up an automated process to resend the coupon for their convenience.

    Additionally, you can include an action that categorizes or assigns the subscriber to a specific group once they’ve successfully secured a coupon code.

    Here’s an illustration of a more intricate and detailed automation workflow:

    Based on whether a subscriber opens your email with the winner’s information, you can automatically nudge those who missed it with a follow-up or move those who engaged into a specific ‘Confirmed’ group.


    If you got stuck on a specific task or can’t find a way to execute a particular job, contact our support team via LiveChat or [email protected] – we’re here to help 24/7.

  • Build welcome series

    Use Sender’s step-by-step automation builder feature to build a welcome series automation in minutes.

    Click on “Automation” -> “Create New Workflow” to enter the automation flow builder.

    Give your welcome sequence a name that is easy to place.

    Choose the trigger. Your trigger is the event or action that will cause the automation to fire. In this case, let’s choose “Subscriber added to a group”.

    Screenshot 2023-06-14 at 13.37.52

    Select your trigger and choose the name of the group on the right hand side. This group name will be the one that your subscribers filling up your signup form are getting added to.

    You can verify the group name from the main dashboard -> “Forms” -> Edit your form -> “Settings” tab -> “Group”.

    Click the “+” sign at the bottom of the trigger you just created and choose the “Email” step.

    Next, configure your email settings to the right hand side.

    You can personalize the subject line and preview text with subscriber details such as their first name, custom field data you might have collected using forms etc.

    Hitting “Save” will save all the changes you just made.

    Clicking on “Create” will take you to the email editor screen to help you compose the first email of your welcome series.

    Clicking the “Save & continue” button will save your email design and bring you back to the automation map screen.

    Under the email step you just added, click the “+” sign and select “Delay”.

    Let’s add a delay of 1 day to wait for the subscriber to open the email.

    Next, let’s check to see if the subscriber has opened this email using the “Condition” step.

    Give your condition a name and choose the condition type as “Workflow email activity”.

    Under “Select Workflow Email” choose the welcome email you just created.

    Set the “Activity Type” to “Opened the campaign” since we want to check whether the said email was opened or not.

    Click “Save” to come back to the automation map which now shows two branches under the condition step you just added: Yes and No.

    Click the “+” sign below the “Yes” conditional branch and add an “Action” step.

    Configure the action step as under:

    We are moving those subscribers who’ve opened their welcome email into a separate group called “Confirmed”.

    Next click the “+” sign under the No conditional branch and add an “Action” step there too, to move subscribers who have not opened this same email, to a group called “Not Confirmed”.

    This is how your automation map will look now.

    You could add another email to this welcome sequence. Maybe you want to send this email only to those subscribers who opened the first email and let’s assume you would like to do this after a delay of 2 days.

    Your automation flows will forever be in “draft” mode until and unless you manually click “Activate” on the top right hand corner.

    Once activated, you can test the workflow on a particular email address by clicking the “Test workflow” button and entering the email address you would like to run it on.

    You can add as many email steps as you would like, interspaced with reasonable delays.

    We have not highlighted the use of SMS steps since it is a very personal medium and we do not recommend sending out SMSes to new subscribers at the beginning of their journey with you.

    Prefer a quick video to walk you through the exact same steps above? You can find it here.


    If you got stuck on a specific task or can’t find a way to execute a particular job, contact our support team via LiveChat or [email protected] we’re here to help 24/7.

  • Build abandoned cart series

    Sender’s automation builder feature helps you build a highly conversion-optimized abandoned cart automation sequence easily as shown below.

    NOTE: Below automation sequence will work only when you have correctly integrated your Sender account with your online store.

    1. Click on “Automation” -> “Create New Workflow” to enter the automation flow builder.

    2. Give your abandoned cart sequence a name that is easy to place.

    3. Choose your trigger as “A cart is abandoned”.

    4. Next, add a delay step of 12 hours. Say because we would like to wait for 12 hours from the time the cart is abandoned, before sending the first email or SMS.

    5. Choose an email step to go next. This will be your first cart abandonment email reminder.

    6. Configure the email settings as shown below.

    7. Click “Create” and use the email editor to create an abandoned email if you don’t already have one.

    8. Add a delay of 2 hours.

    9. After a delay of 2 hrs from the 1st reminder email, let’s now send the subscriber an SMS reminder.

    10. Compose your SMS using the dashboard on the right hand side.

    11. After the SMS step, add a 12hr delay step, again to be followed by your email reminder number 2.

    When done, below is how your automation map will look like.

    Remember that you can fully customize any aspect of the above abandoned cart sequence.

    For example, you could send your first abandonment message in as little as 6hrs and following this up with another email every 6 hrs, for the next 2 days, with no SMS involved.

    Just ensure that your emails are well-personalized and include irresistible incentives and discounts, or dire scarcity or urgency.

    Fancy a quick little video that walks you through the above steps? Find it here.

    That’s it!

    If you got stuck on a specific task or can’t find a way to execute a particular job, contact our support team via LiveChat or [email protected] we’re here to help 24/7.

  • Build post-purchase workflow

    NOTE: This automation, like the abandoned cart sequence, needs your online store to be integrated with your Sender account; the latter would not know when a purchase has been made.

    1. Click on “Automation” -> “Create New Workflow” and name your new workflow.

    2. Choose the trigger as “A product is purchased”.

    3. Click on the trigger to configure it with your product’s unique code (also called “SKU”) in case you are selling multiple products.

    4. Add an email step to send out a thank you email immediately post purchase of the product.

    Screenshot 2023-06-14 at 11.41.24

    5. Let us also set up an SMS to go out along with this email, with a special discount code that they can use for their next purchase with you.

    6. Now, lets add a delay of 9 days (for the purchased product to be delivered and for them to start using it). After the delay, you could send out a product feedback email to understand their pleasures and frustrations with their purchase.

    7. Post the product feedback email, you can add a delay of a few days and then send them an upsell or cross-sell opportunity at an irresistible price.

    Since they’ve already bought from you once, they know and trust you. So, it will be relatively easy for you to sell them more of what they just bought or products complementary to their most recent purchase.

    Let the sky be the limit when it comes to designing your automations.


    If you got stuck on a specific task or can’t find a way to execute a particular job, contact our support team via LiveChat or [email protected] we’re here to help 24/7.

  • Set up birthday/anniversary automation

    Setting up a celebratory email can be a great way to surprise and congratulate a customer on their birthday or another occasion. The setup takes little time.

    Firstly, go to Subscribers -> Fields and create a date type field for Birthday.

    Secondly, go to Automations -> Create new workflow -> Create from scratch and choose the “Anniversary of a date” trigger.

    Name your workflow accordingly and click Create.

    Fill in the trigger setup and choose the Custom Field you created initially. This trigger will check the set field every day at the set time, and if the date is today, the automation will start.

    Enable the “Repeat workflow” if you want the same subscriber to receive their birthday celebration email more than once (every year).

    After setting the trigger, you can add any additional steps, e.g. a congratulatory email to be sent. It can include a message with personalization and a discount code or some other perk to surprise the recipient.

    Do not forget to activate the automation workflow! 

    Once everything is set up, you can import your subscribers’ birthdays data or other anniversaries into the created field, and the automation will do its magic! Here is what the email might look in subscriber’s inbox:


    If you got stuck on a specific task or can’t find a way to execute a particular job, contact our support team via LiveChat or [email protected] – we’re here to help 24/7.

  • Create abandoned cart email

    Go to Automations -> Create new workflow. An automated abandoned cart email can be created by choosing the “A cart is abandoned” trigger. Then you should add a delay. Next, select the newsletter template called “Abandoned cart”. This template can be customized as needed – simply leave the section with {$cart_contents} script.

    However, don’t forget to activate the workflow – otherwise, it won’t work. Click on “Activate” button when you’re done.

    Here’s how the whole process looks in motion:


    Note: Abandoned cart trigger requires integration with your WordPress or Shopify ecommerce shop.


    If you are stuck on a specific task or can’t find a way to execute a particular job, contact our support team via LiveChat or [email protected] – we’re here to help 24/7.