Category: Manage Campaigns

  • Campaign Archiving or Deleting

    This guide explains how to remove unwanted campaigns and keep your campaign list organized in Sender. Sender does not have a dedicated archive feature, so this article covers deleting campaigns, deleting in bulk, and alternative ways to clean up your campaign list.

    Where to Find This Feature

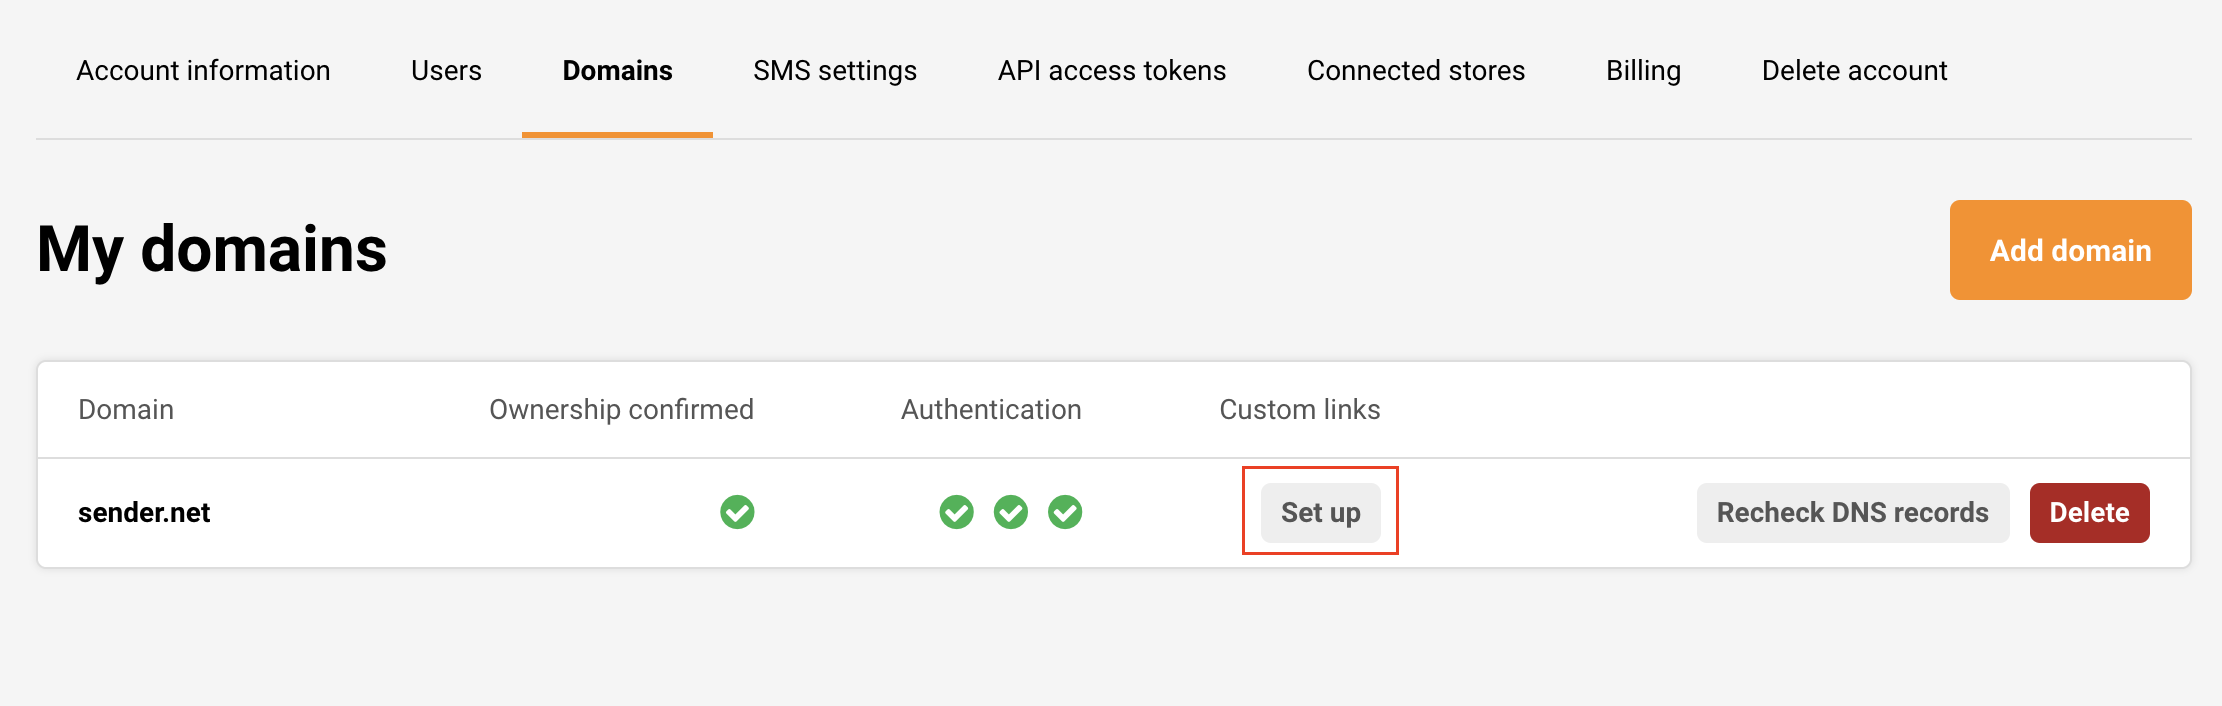
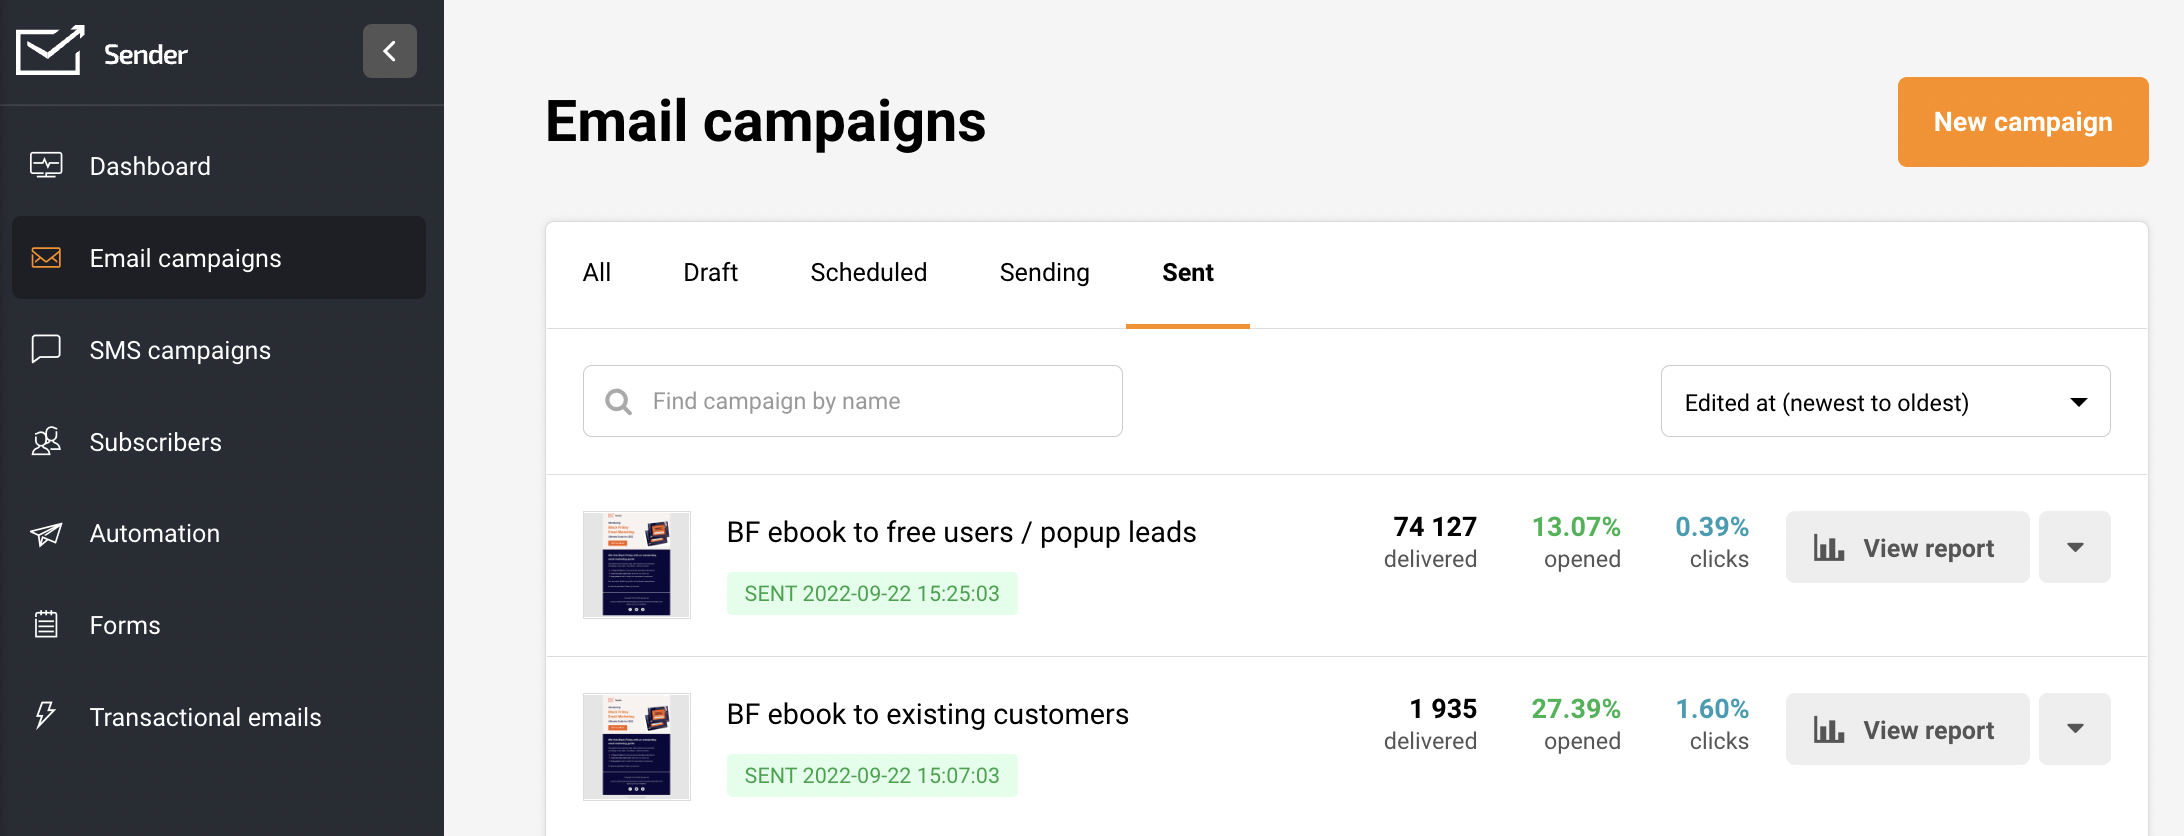
    In the Sender dashboard, go to: Email campaigns (left sidebar).

    all-email-campaigns

    You will see a list of all your campaigns with their names, status labels (such as Draft or Sent), assigned groups, and delivery stats. Each campaign row includes an edit icon and an actions menu (downward arrow) on the right side. Above the list, you will find a Find campaign by name search bar, a Filter button, and a Sort button.

    Steps to Clean Up and Delete Campaigns

    Step 1 — Locate the campaign you want to remove

    From the Email campaigns list, find the campaign you want to delete. Use the Find campaign by name search bar to search by name, or click Filter and select a status — Draft, Scheduled, Sending, or Sent — to narrow the list.

    campaign-sort

    You can also click Sort to reorder campaigns by name, subscriber count, edited date, or created date.

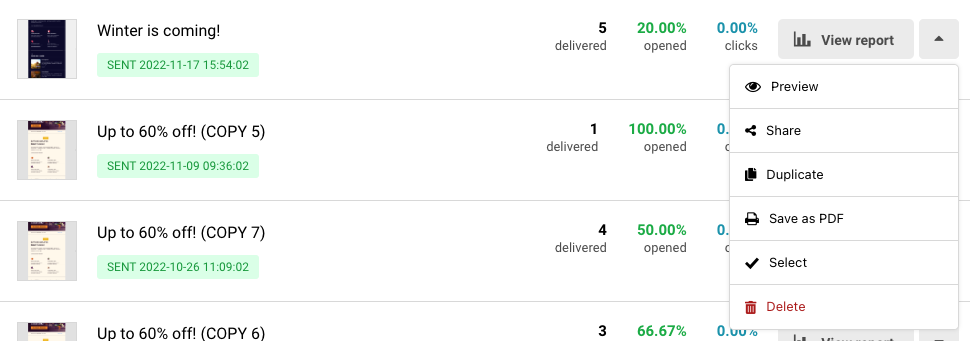
    Step 2 — Open the actions menu and select Delete

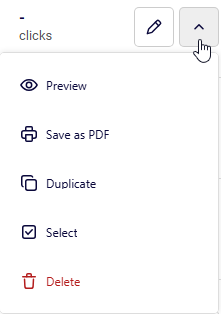
    Click the actions menu (downward arrow icon) on the right side of the campaign row. From the dropdown, select Delete.

    campaign-delete

    This option is available for campaigns in any status.

    Step 3 — Confirm the deletion

    A Delete campaign confirmation dialog appears, asking if you are sure you want to delete the campaign. Click Yes, I am sure to permanently remove the campaign. Click No, let’s keep it to cancel and return to the campaign list. Deletion is permanent and cannot be undone.

    Step 4 — Delete multiple campaigns in bulk

    To remove several campaigns at once, click the actions menu next to any campaign and select Select.

    campaign-selection

    Checkboxes appear next to every campaign. Select the campaigns you want to delete, or click Select all to select all campaigns on the current page. Then click Delete selected to remove all selected campaigns. Click Clear selection to deselect without deleting.

    Step 5 — Use alternatives to archiving

    Since Sender does not offer a dedicated archive feature, use these approaches to keep your list manageable. Click Filter and select Sent to hide drafts and focus only on completed campaigns.

    campaign-filter

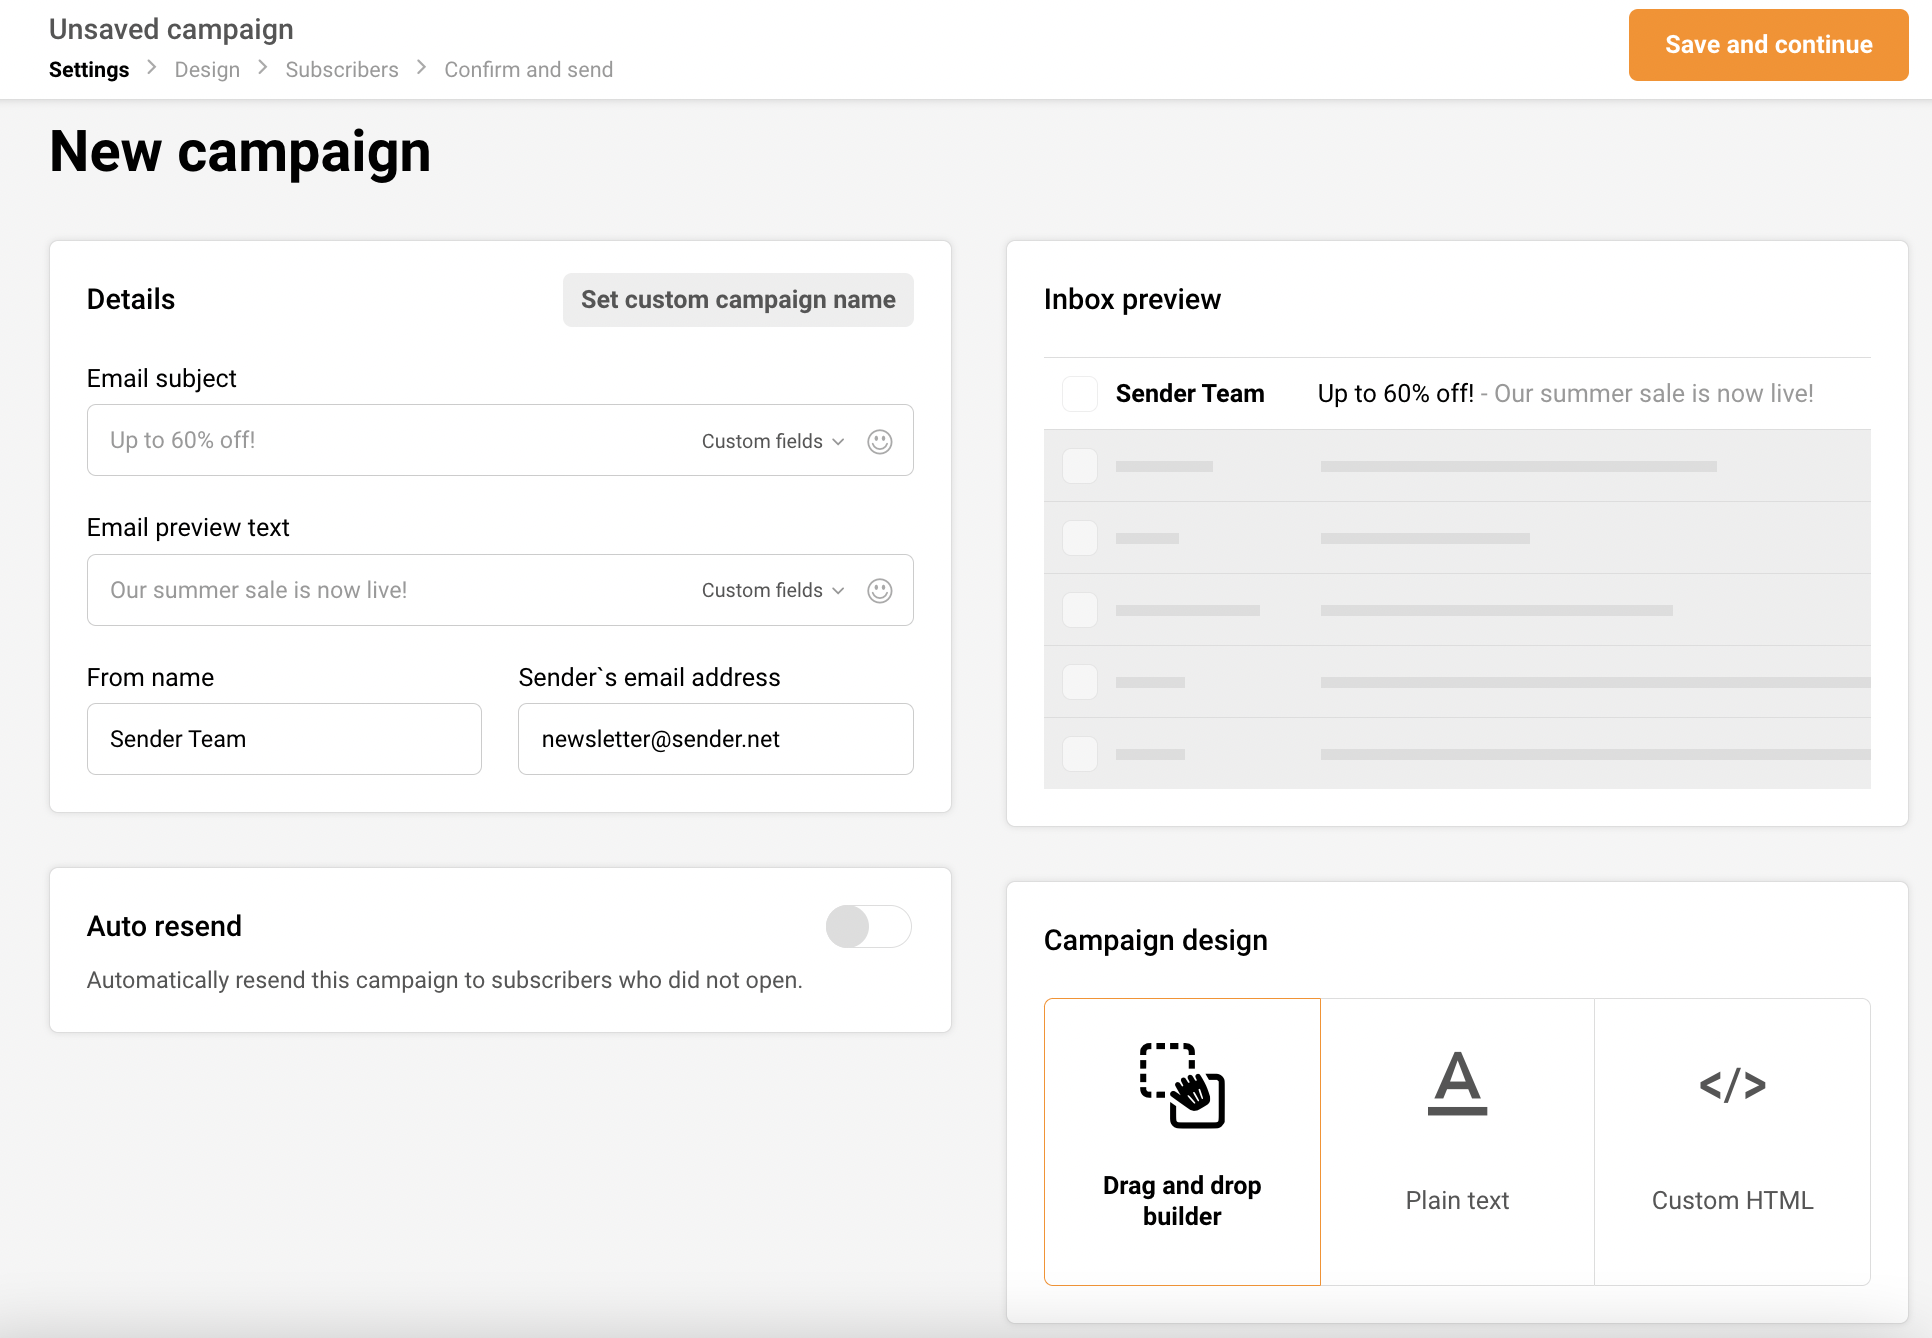
    Before deleting a campaign you may need later, open the actions menu and select Duplicate to create a copy in Draft status, or select Save as PDF to download a local copy of the campaign content.

    Campaign Status Reference

    Draft — The campaign has been created but has not been scheduled or sent. All actions are available, including Preview, Save as PDF, Duplicate, Select, and Delete.

    Scheduled — The campaign is set to send at a future date and time. You can delete a scheduled campaign to cancel it.

    Sending — The campaign is currently being delivered to subscribers. The campaign is in progress and limited actions may be available.

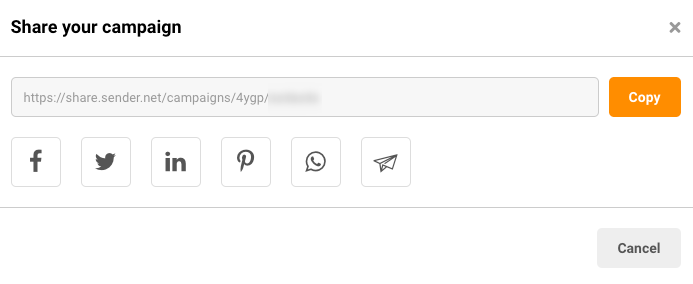
    Sent — The campaign has been delivered. All management actions are available, including Share, Preview, Save as PDF, Duplicate, Select, and Delete. Deleting a sent campaign removes it from your list but does not retract the delivered email.

    Management Tips

    Duplicate before you delete — If you want to preserve a campaign’s content or settings before removing it, select Duplicate from the actions menu first. This creates a copy in Draft status that you can keep or reuse.

    Save a PDF copy for your records — Select Save as PDF from the actions menu to download a local copy of the campaign. This is useful for record-keeping before deleting old campaigns.

    Use filters to focus your view — Click Filter and select a specific status to reduce clutter in the campaign list without deleting anything. This helps you focus on only the campaigns that need attention.

    Clean up in bulk — Use the Select option followed by Select all and Delete selected to remove multiple campaigns at once, rather than deleting them one by one.

    Sort to find old campaigns — Click Sort and choose Created at (oldest to newest) or Edited at (oldest to newest) to surface the oldest campaigns first, making it easier to identify which ones to remove.

    Common Issues

    Deleted campaign cannot be recovered → Deletion in Sender is permanent. There is no trash folder or undo option. Always duplicate or save a PDF copy before deleting if you may need the campaign later.

    Campaign still appears after deleting → Refresh the page if the deleted campaign is still visible in the list. If the campaign persists, check that you confirmed the deletion by clicking Yes, I am sure in the confirmation dialog.

    Cannot find a specific campaign to delete → Use the Find campaign by name search bar or apply a status filter using the Filter button. The campaign may be on another page if your list spans multiple pages.

    Delete option not responding → Make sure you are clicking Delete from the actions menu dropdown and not the edit icon. If the dropdown does not open, try refreshing the page.

    FAQs

    Can I archive a campaign in Sender? No. Sender does not currently offer a dedicated archive feature. To clean up your campaign list, you can delete campaigns you no longer need. Before deleting, consider duplicating the campaign or saving it as a PDF to preserve its content.

    Does deleting a campaign remove subscriber data? No. Deleting a campaign removes only the campaign itself from your list. Subscriber data, engagement history, and group assignments are not affected.

    Can I recover a deleted campaign? No. Deleted campaigns are permanently removed and cannot be restored. If you need to preserve a campaign before deleting, duplicate it first or download it as a PDF using Save as PDF from the actions menu.

    Does deleting a sent campaign retract the email from subscribers? No. Deleting a sent campaign removes it from your campaign list, but the email that was already delivered to subscribers is not affected.

    How do I delete multiple campaigns at once? Open the actions menu next to any campaign and select Select. Checkboxes appear next to all campaigns. Select the campaigns you want to remove, then click Delete selected at the top of the list.

    How do I filter my campaign list to find specific campaigns? Click Filter at the top of the Email campaigns list and select a status — Draft, Scheduled, Sending, or Sent — to show only campaigns with that status. You can also use the Find campaign by name search bar to search by name.

  • Changes in email campaign metrics over time

    This guide shows how to track and interpret email campaign metrics over time in Sender. It walks through locating your campaign report, reading performance statistics, and using time-based charts to spot trends.

    Where to Find This Feature

    In the Sender dashboard, go to:

    Email campaigns → select a sent campaign → click the report icon (bar chart) in the Actions column.

    campaign-report

    This opens the Campaign overview page where all metrics are displayed.

    campaign-overview

    Steps to Track Campaign Metrics Over Time

    Step 1 — Open the Campaign Report

    Go to Email campaigns from the left sidebar. Find the sent campaign you want to review. Sent campaigns display inline stats for delivered, opened, and clicks directly in the list. Click the report icon in the Actions column to open the full Campaign overview page.

    campaign-filter

    You can also use Filter to select Sent and narrow down the list.

    Step 2 — Review the Statistics Section

    On the Campaign overview page, scroll to the Statistics section. This displays eight metrics: total emails sent, total emails delivered, opened, unique clicks, hard bounced, soft bounced, unsubscribed, and spam reports.

    campaign-statistics

    Each metric shows a percentage and a count in parentheses. Click the arrow next to any metric to jump to the Subscriber actions page filtered to that specific action.

    Step 3 — Analyze the Time-Based Charts

    Below the Ecommerce section, two charts track engagement over time. Opens and clicks by day plots daily opens and clicks across a date range starting from the send date.

    campaign-opens-clicks

    Opens and clicks by hour breaks down engagement by hour of the day (0–22). Both charts use separate lines for OPENS and CLICKS, making it easy to compare the two over time.

    Step 4 — Drill Into Subscriber Actions

    Click View subscriber actions in the Statistics section, or expand Subscriber actions in the left sidebar. This reveals individual tabs: Opens, Clicks, Hard bounces, Soft bounces, Unsubscribes, Spam reports, Unopens, and Purchases.

    subscriber-actions

    Each tab lists subscribers with their Email address, First Name, Last Name, and Date / time of the action. Use the Find subscriber by email search field to locate specific subscribers.

    Step 5 — Export or Share the Report

    Click Print report at the top of the Campaign overview page to generate a printable version of all metrics. To share the campaign design or reuse it, click Create a copy. From the campaign list, the dropdown menu also offers Share, Preview, and Save as PDF options for additional export methods.

    What Happens After You Send

    After sending, the campaign appears in the Email campaigns list with a SENT status and the send timestamp. Metrics begin populating in the Campaign overview as subscribers interact with the email. The Opens and clicks by day and Opens and clicks by hour charts update to reflect engagement trends over the days and hours following delivery.

    Common Issues

    Metrics show 0.00% for all values — The campaign may have just been sent. Allow time for recipients to open and interact with the email.

    “No data found” on a Subscriber actions tab — No subscribers have performed that specific action yet. This is expected for newly sent campaigns.

    Ecommerce section shows no data — An ecommerce integration is not connected. Click Install integration and track your sales performance to set one up.

    Performance by group and Performance by inbox provider are locked — These reports require a PRO plan.

    FAQs

    Can I see which links were clicked in the campaign?

    Yes. Click Clicks report or View clicks report in the left sidebar to see a visual heatmap of clicked links within the email design.

    How do I filter the campaign list to show only sent campaigns?

    Click Filter above the campaign list and select Sent.

    Can I compare metrics across multiple campaigns?

    The report is per-campaign. Open each campaign’s report individually to compare metrics side by side.

    What is the difference between “opened” and “unique clicks”?

    Opened tracks how many recipients opened the email. Unique clicks tracks how many recipients clicked at least one link inside it.

    Can I export the full campaign report?

    Yes. Use Print report on the overview page, or select Save as PDF from the campaign’s dropdown menu in the list.

  • Bounce data in campaign reports

    This guide shows how to find and review bounce data in your email campaign reports in Sender. It walks through locating bounce statistics, viewing individual bounce details, and exporting the data.

    Where to Find This Feature

    In the Sender dashboard, go to:

    campaign-report

    Email campaigns → select a sent campaign → View report (bar chart icon)

    Steps to Review Bounce Data

    Step 1 — Open the Campaign Report

    Go to Email campaigns in the left sidebar. Find the sent campaign you want to review. Sent campaigns display a SENT badge with the send date. Click the View report icon (bar chart) in the Actions column to open the Campaign overview page.

    Step 2 — Check Bounce Statistics on the Overview

    On the Campaign overview page, scroll to the Statistics section. You’ll see a summary of all delivery metrics, including hard bounced and soft bounced.

    campaign-statistics

    Each shows a percentage and a count in parentheses. Click the arrow next to hard bounced or soft bounced to jump directly to the detailed bounce list.

    Step 3 — View Bounce Details in Subscriber Actions

    You land on the Subscriber actions page with the selected bounce tab active.

    subscriber-actions

    The left sidebar lists all action categories: Opens, Clicks, Hard bounces, Soft bounces, Unsubscribes, Spam reports, Unopens, and Purchases, each with a count. Switch between Hard bounces and Soft bounces to view either type.

    Step 4 — Review Individual Bounce Records

    The bounce list displays the Email address, the bounce reason message, and the Date / time the bounce occurred. For hard bounces, the reason typically indicates a permanent delivery failure (e.g., the email account does not exist). For soft bounces, additional columns include First Name and Last Name. Use the Find subscriber by email search field at the top to locate a specific address.

    Step 5 — Export or Print Bounce Data

    Click Export in the top-right corner to download the bounce list for the selected tab. Click Print to generate a printable version.

    campaign-bounce-report-export

    You can also return to the Overview tab and click Print report to get a full campaign report that includes bounce statistics.

    What Happens After You Save

    Bounce data is not something you save — it is recorded automatically after a campaign is sent. The statistics appear on the Campaign overview page under Statistics, and individual bounce records populate under Subscriber actions → Hard bounces or Soft bounces. This data remains available for as long as the campaign exists in your account.

    Common Issues

    Bounce percentage shows 0% but emails were not delivered — The campaign may still be processing. Allow time for delivery attempts to complete and for bounce data to update.

    Cannot find the report icon for a campaign — Only sent campaigns show the View report (bar chart) icon. Draft campaigns display an edit (pencil) icon instead.

    Bounce reason message is truncated — The full bounce reason may be cut off in the list view. Hover over or click the entry to reveal the complete message.

    FAQs

    What is the difference between a hard bounce and a soft bounce?

    A hard bounce is a permanent delivery failure, such as an invalid or nonexistent email address. A soft bounce is a temporary issue, such as a full mailbox or a server that is temporarily unavailable.

    Can I export only hard bounces or only soft bounces?

    Yes. Select the Hard bounces or Soft bounces tab under Subscriber actions, then click Export. The export includes only the data from the active tab.

    Are bounced subscribers automatically removed from my list?

    Hard-bounced addresses are typically flagged or deactivated to prevent future sends. Check your subscriber list for updated statuses after a campaign with bounces.

    Can I view bounce data for campaigns sent in the past?

    Yes. Navigate to Email campaigns, locate the sent campaign, and click the View report icon. Bounce data is retained for all sent campaigns.

  • Email campaign report update timing

    This guide explains when and how email campaign report data updates in Sender, how to access your report, and what to expect as statistics populate after sending.


    Where to Find This Feature

    In the Sender dashboard, go to: Email campaigns → select a sent campaign → click the report icon (bar chart) → Campaign overview

    campaign-report

    Steps to Check Report Update Timing

    Step 1 — Send the Campaign and Open the Report

    After your campaign is sent, return to Email campaigns in the left sidebar. Sent campaigns display a green SENT badge with a timestamp. In the Stats column, you can see inline delivered, opened, and clicks values. Click the report icon next to the sent campaign to open the Campaign overview page.

    campaign-overview

    Step 2 — Review the Statistics Section

    On the Campaign overview page, scroll to the Statistics section. This displays eight tracked metrics: total emails sent, total emails delivered, opened, unique clicks, hard bounced, soft bounced, unsubscribed, and spam reports. Each metric is clickable and links to a detailed Subscriber actions view.

    campaign-statistics

    Report data updates automatically every few minutes after the campaign is sent — no manual refresh is needed.

    Step 3 — Monitor Engagement Over Time

    Scroll further to view the Opens and clicks by day and Opens and clicks by hour charts.

    campaign-report-opens-clicks

    These charts update alongside the statistics and show how engagement trends develop over the hours and days following delivery. Use these to understand when your recipients are most active.

    Step 4 — Explore Detailed Report Tabs

    Use the left sidebar within the report to access additional views. Clicks report shows a visual click map of your email with per-link click data. Subscriber actions expands to show individual lists for Opens, Clicks, Hard bounces, Soft bounces, Unsubscribes, Spam reports, Unopens, and Purchases — each with subscriber-level detail and timestamps.

    campaign-detailed-report

    Performance by group and Performance by inbox provider are available on PRO plans.

    Step 5 — Export or Print the Report

    Click Print report in the top-right corner of the Campaign overview page to generate a printable version. On the Subscriber actions page, use the Export button to download subscriber-level data. You can also use the dropdown menu on the campaign list to select Save as PDF for an offline copy of the report.


    What Happens After You Send

    After sending, the campaign appears in Email campaigns with a SENT status badge and timestamp. Report data begins tracking immediately and updates every few minutes. The Statistics section on the Campaign overview page reflects delivery, open, click, bounce, unsubscribe, and spam report counts as they come in. The Ecommerce section (showing Total revenue, Number of orders, Revenue per customer, and ROI) also populates if a store integration is connected.


    Common Issues

    Stats show 0% after sending → Report data takes a few minutes to begin populating. Refresh the page or return shortly.

    Opened and clicks remain at 0.00% → Recipients may not have engaged yet, or email clients may be blocking tracking pixels. Allow more time for data to accumulate.

    Ecommerce data is empty → A store integration must be connected. Click Install integration and track your sales performance in the Ecommerce section to set one up.

    Hard bounce count is high → Review the Hard bounces list under Subscriber actions to identify invalid email addresses. These addresses could not be reached.


    FAQs

    How often do campaign reports update?

    Reports update automatically every few minutes after the campaign is sent.

    Do I need to refresh the page to see updated stats?

    Refreshing the page will show the latest data, but stats update on their own at regular intervals.

    Can I export report data?

    Yes. Use the Export button on the Subscriber actions page or choose Save as PDF from the campaign dropdown menu on the campaign list.

    Where can I see which links were clicked?

    Open the Clicks report tab in the left sidebar of the Campaign overview page. It shows a click map and per-link statistics.

    What is the difference between opened and unique clicks?

    Opened counts recipients who opened the email. Unique clicks counts recipients who clicked at least one link, regardless of how many times they clicked.

  • Download campaign as PDF

    Need to save or share your email campaign offline? You can easily download any of your email campaigns as a PDF file. This is perfect for archiving campaigns, sharing with team members who don’t have account access, or including in reports and presentations.

    How to Download Your Campaign as PDF

    Step 1: Go to Email Campaigns

    • Log into your Sender account.

    • Click Email campaigns in the left sidebar.

    • Find the campaign you want to download.

    Step 2: Download the PDF

    • Click the Little Arrow ( ^ ) next to your campaign.

    • Select “Save as PDF” from the dropdown menu.

    • Your campaign will be downloaded as a PDF file to your device.

    When to Use PDF Downloads

    • Team sharing – Share campaigns with colleagues who don’t have Sender access.
    • Client presentations – Include campaign mockups in proposals or reports.
    • Archive keeping – Save important campaigns for future reference.
    • Print purposes – Create physical copies for offline review.
    • Design approval – Send campaigns to stakeholders for approval before sending.

    What’s Included in the PDF

    The PDF download captures your complete email design exactly as recipients would see it, including:

    • All text content and formatting
    • Images and graphics
    • Layout and styling
    • Header and footer elements
    • All of the links that were used in the campaign

    The Bottom Line

    Downloading campaigns as PDFs is a simple way to share, archive, and present your email designs outside of the Sender platform. It’s especially useful for getting approvals, creating documentation, or sharing work with people who don’t need full account access.

    That’s it!

    If you got stuck on a specific task or can’t find a way to execute a particular job, contact our support team via LiveChat or [email protected] – we’re here to help 24/7.

  • Create custom campaign links

    Custom link feature allows you to send campaigns with links tailored to your subdomain. This approach not only enhances the likelihood of your subscribers clicking on them but also gives you full control over the links’ reputation.

    By taking care of the reputation of your own links, you can prevent them from being flagged as phishing or spam, increasing the chances that your subscribers will be more engaging.

    Setting up custom links is simple. Go to your Settings -> Domains and click “Set up” next to Custom links.

    You’ll be prompted to enter the subdomain name that will be used for email link tracking.

    Ensure that the subdomain you choose isn’t currently in use and is dedicated solely as a custom domain for your emails sent through Sender.net.

    After entering the subdomain name, go to your domain’s DNS panel and create a CNAME record with the values provided.

    This will change how your links look to your subscribers, making them match your domain and appear more trustworthy.

    Finally, remember to follow best email marketing practices to maintain great reputation of your domain and subdomains as well as your overall campaign deliverability.

    That’s it!

    If you got stuck on a specific task or can’t find a way to execute a particular job, contact our support team via LiveChat or [email protected] – we’re here to help 24/7.

  • Share a sent campaign

    After you send your campaign, you have the option to obtain a link to send it to whomever you want or you can share it straight from Sender.

    Go to Email campaigns, click the arrow next to the campaign in question and choose “Share”.

    You can copy the link or choose a social platform that you want to share your email campaign to. 


    If you still struggle with domain verification – contact your support team via LiveChat or [email protected] – we’ll help you with verification. We’re ready to help 24/7.

  • Manage email campaigns

    Campaigns

    Here you will start creating email campaigns. When the campaign section is opened, users will access campaign library, which contains sent campaigns, drafts, scheduled campaigns, etc. Moreover, you can open campaign reports as well. More on them here.

    Let’s start by clicking on a “New campaign” button on the top. After the button is clicked, you will be brought to the first step of campaign creation called “Settings” – Here, you will need to input the email subject, sender’s name, etc.

    First of all, I would like to mention that navigation bar can be accessed all the time. You can move from one section to another without losing progress. Therefore if you decide to change sender’s name, just hit the “Settings” and change it.

    Next, the first tablet called “Details” is where you type email subject, reply-to address, and “from name”. The second piece, named “Inbox preview” renders how an email will look in the inbox. That’s a handy feature helping to create the best engaging and clickable email preview.

    The auto-resend option is next. If you have a paid plan, you can automatically follow up with recipients who didn’t open a newsletter. Pick a delay and subject line, and continue.

    Alright, we’re left with the last piece. Here you will need to pick which editor you’ll use for the newsletter:

    • Drag & Drop – advanced and easy-to-use design editor. Detailed guide here.
    • Plain text – only text, no design options.
    • Custom HTML ( HTML coded newsletters can be imported choosing this option ).

    In this case I will choose Drag & drop editor and continue the creating process.

    When the design editor loads, you will need to select a template that will be used for a design. You can use a pre-made template or continue with a blank sheet.

    Next, continue with newsletters design – when you finish with design, click on “Save and continue” and proceed to the next step. A comprehensive guide on Drag & Drop editor is found here.

    At this step, you will need to select a group(s) that will receive the campaign, then click the “Save and continue” button. 

    Now we’re in the last step of campaign creation. The system will check your newsletter for possible errors like invalid links, default links, mistypes, etc. Also, from here, you’ll be able to revisit and change newsletters settings, like subject line and selected groups.

    Also, the campaign’s scheduling is set here as well. Schedule a campaign button resting on the top of the dashboard besides “Send now” button.

    That’s it!

    If you got stuck on a specific task or can’t find a way to execute a particular job, contact our support team via LiveChat or [email protected] – we’re here to help 24/7.