Category: Testing and Preview

  • A/B testing campaigns

    This guide shows how to preview, verify, and validate your A/B test experiment before sending in Sender.

    Where to Find This Feature

    In the Sender dashboard, go to:

    a-b-testing-campaign-experiments

    Experiments (sidebar) → New experiment

    What to Check Before Sending Your Experiment

    Your experiment follows a four-stage workflow: Settings → Content variations → Select recipients → Review and send. Each stage must show a green checkmark before you can proceed. Below is what to verify at every stage.

    Step 1 — Verify Experiment Settings

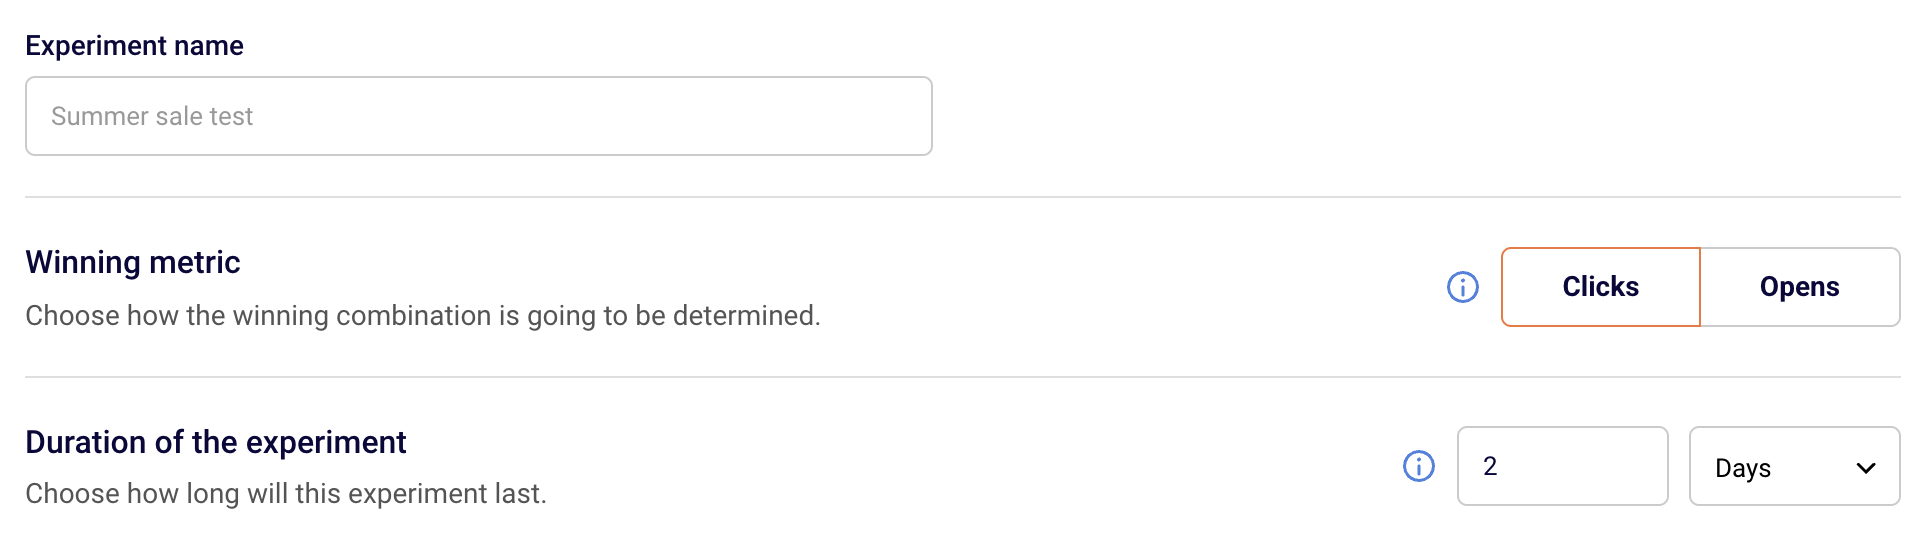
    Open your experiment and confirm the Settings stage. Check that your Experiment name clearly identifies what you are testing. Make sure the Winning metric is set correctly — choose Opens when testing subject lines, sender names, or sending times, and choose Clicks when testing email content. Verify the Duration of the experiment value and unit. The minimum is 4 hours for clicks and opens.

    campaign-experiment-settings

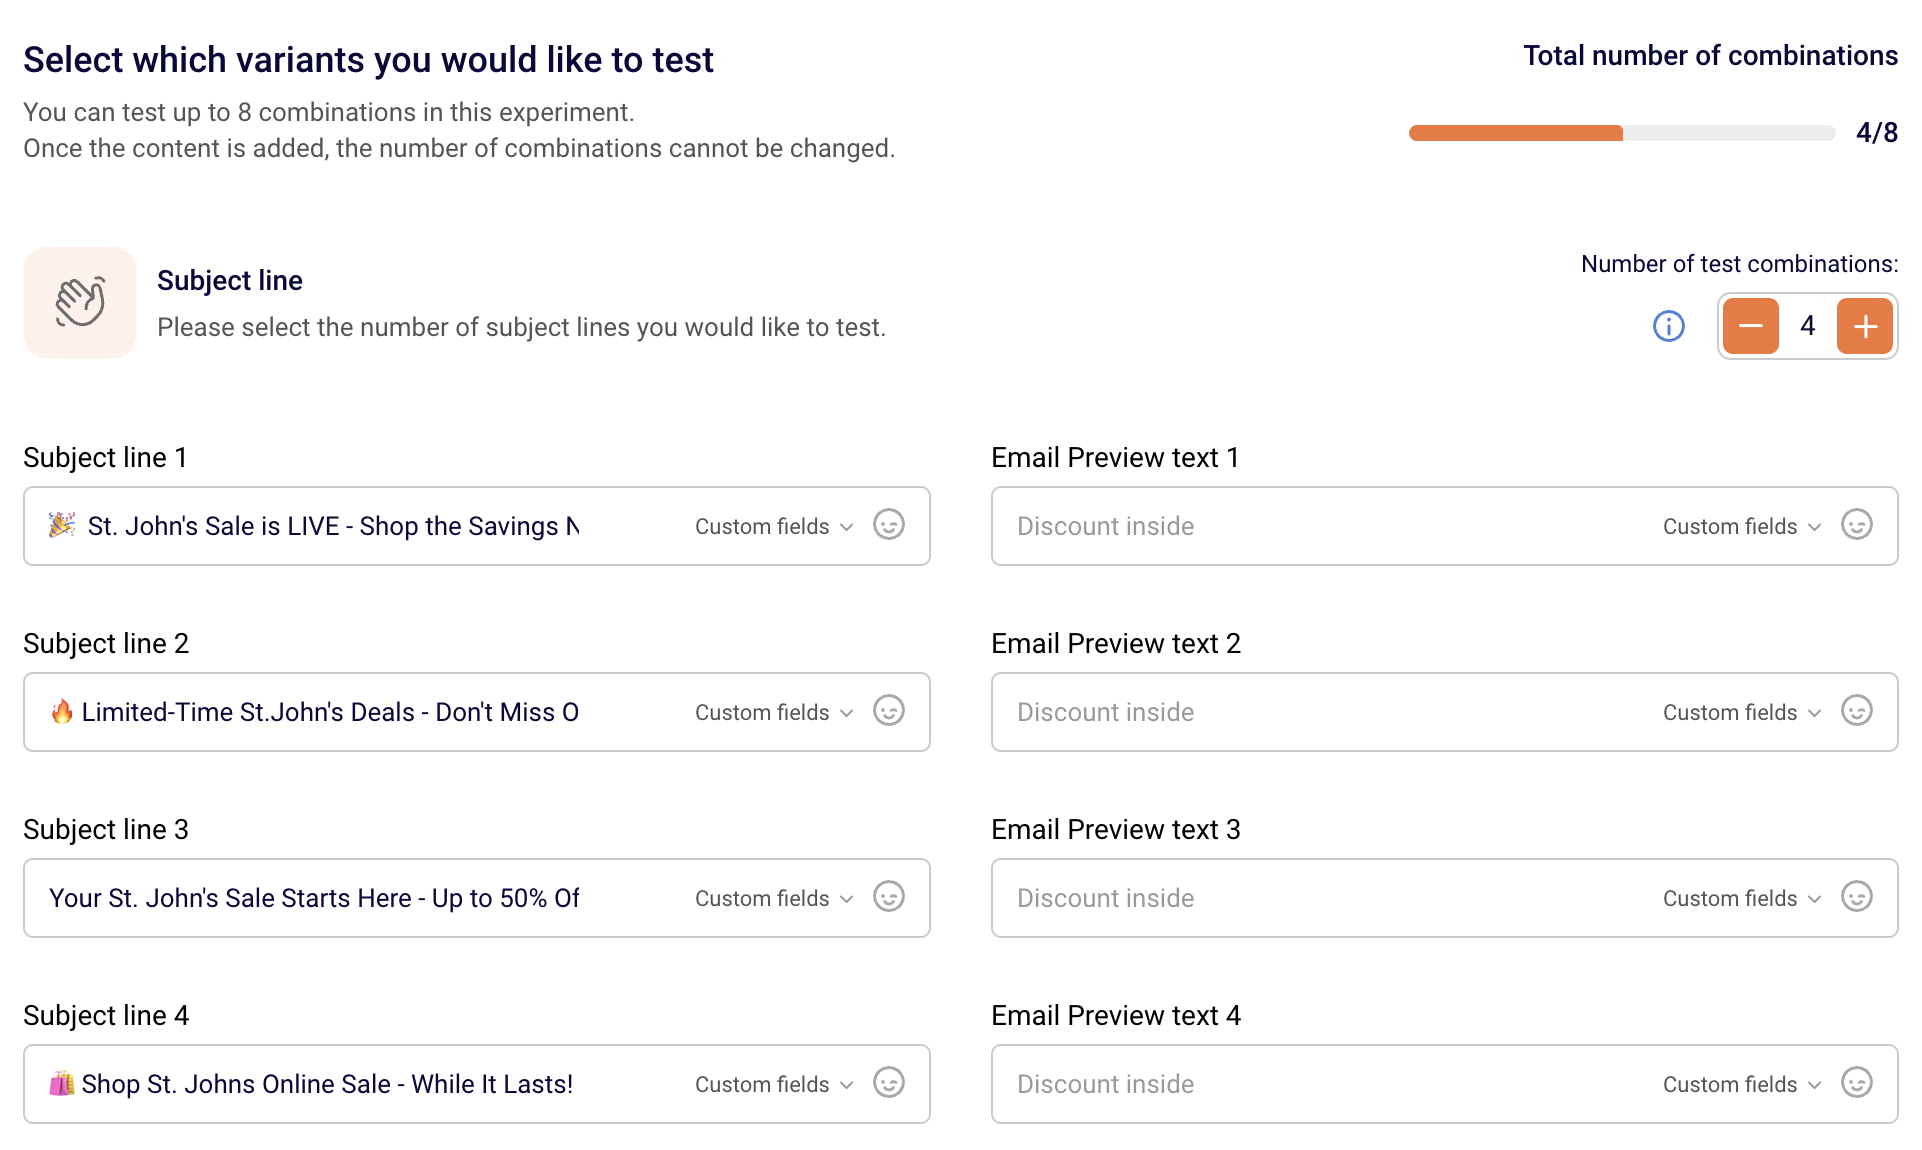
    Under Select which variants you would like to test, confirm the Total number of combinations counter (up to 8). Check that only the intended variant types have more than 1 combination — Subject line, Sender name, Sending time, or Content. Use the + and  controls next to Number of test combinations to adjust. Make sure each Subject line and Email Preview text field is filled in correctly for every variation.

    Step 2 — Preview Content Variations

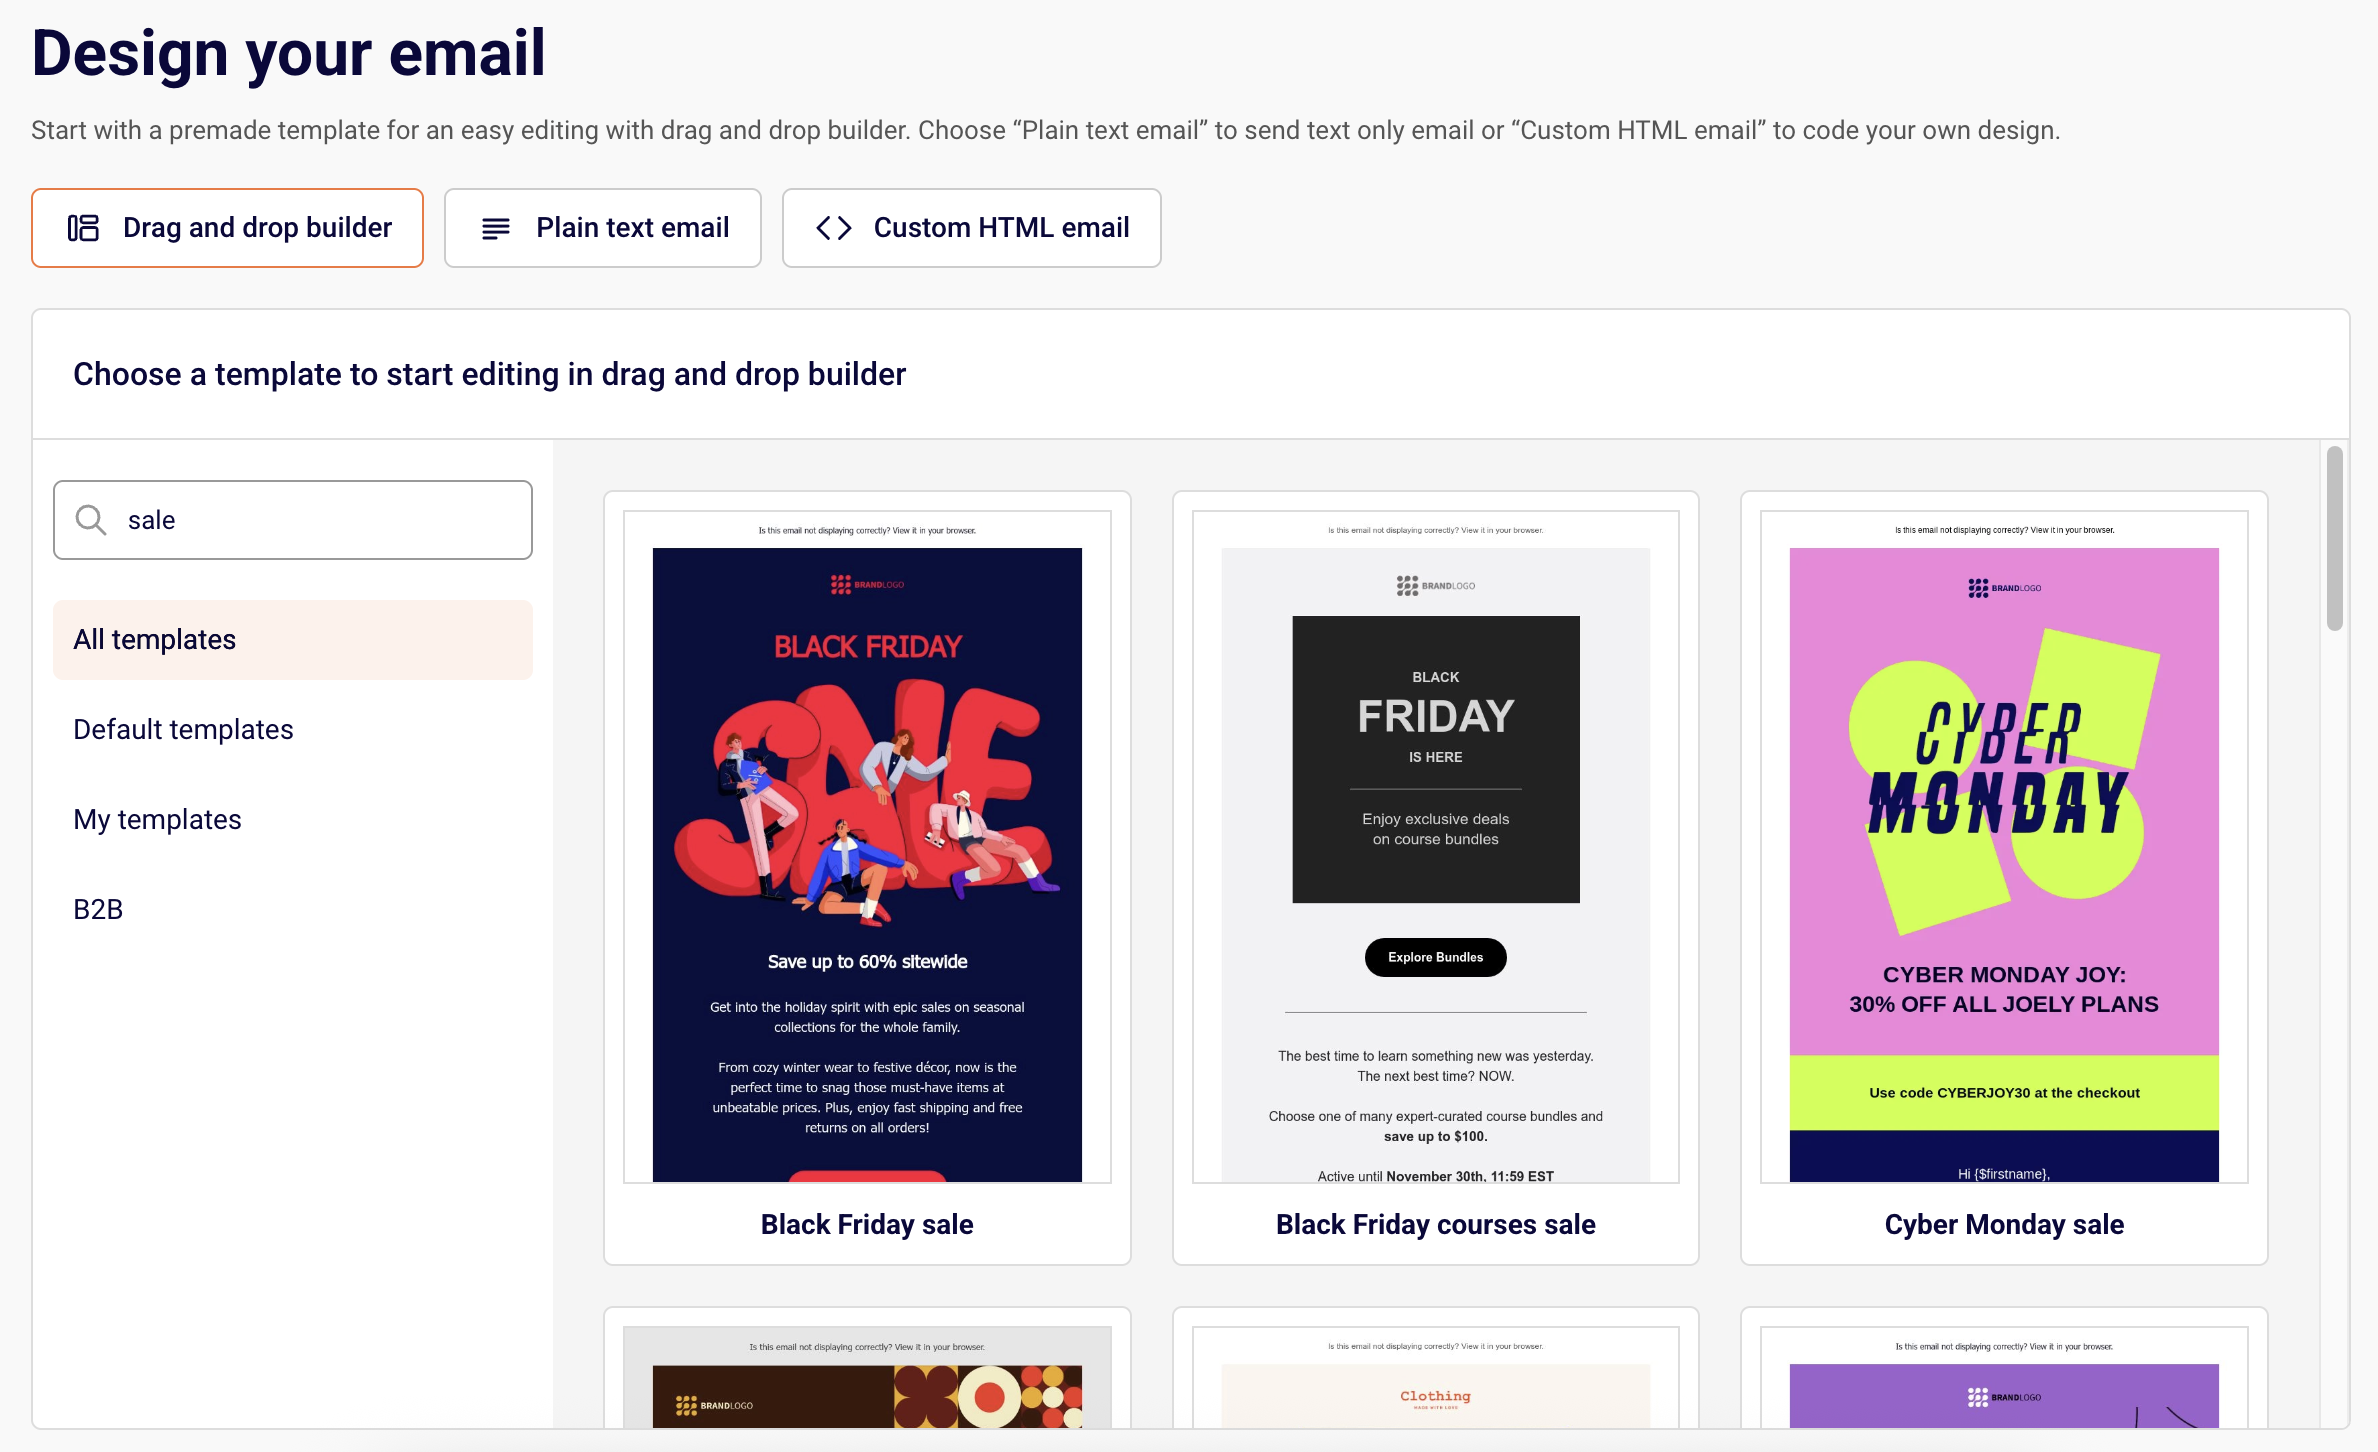
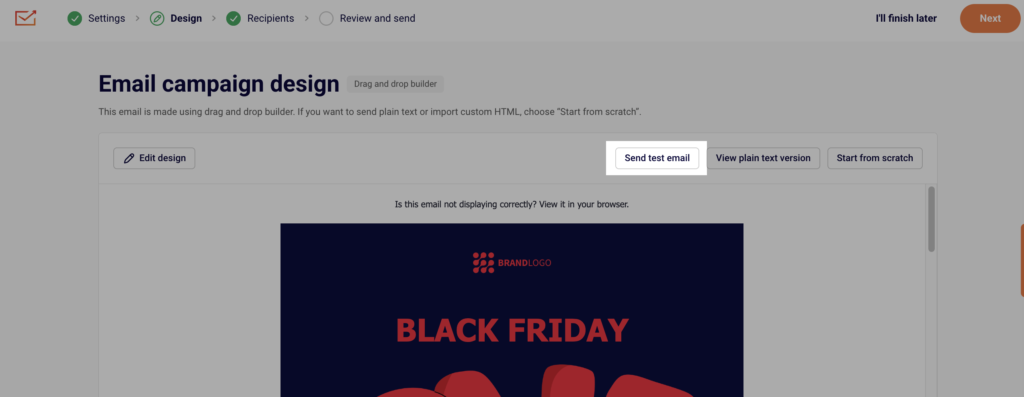
    On the Content variations stage, you design or edit email content for each combination. After building your email in the Drag and drop builder, Plain text email, or Custom HTML email editor, use the preview and test tools in the top toolbar.

    campaign-design-phase

    Click the eye icon to open the preview panel. This shows your email in both desktop and mobile views side by side. Toggle Dark mode preview to check rendering in dark mode. The panel also displays Email size so you can confirm it stays within deliverability limits.

    campaign-preview-and-sending-test-email

    Click Send test email to deliver a live test to your inbox. Verify that subject lines, preview text, images, links, and buttons all render as expected across both views before clicking Save & continue.

    Step 3 — Confirm Recipients and Group Sizes

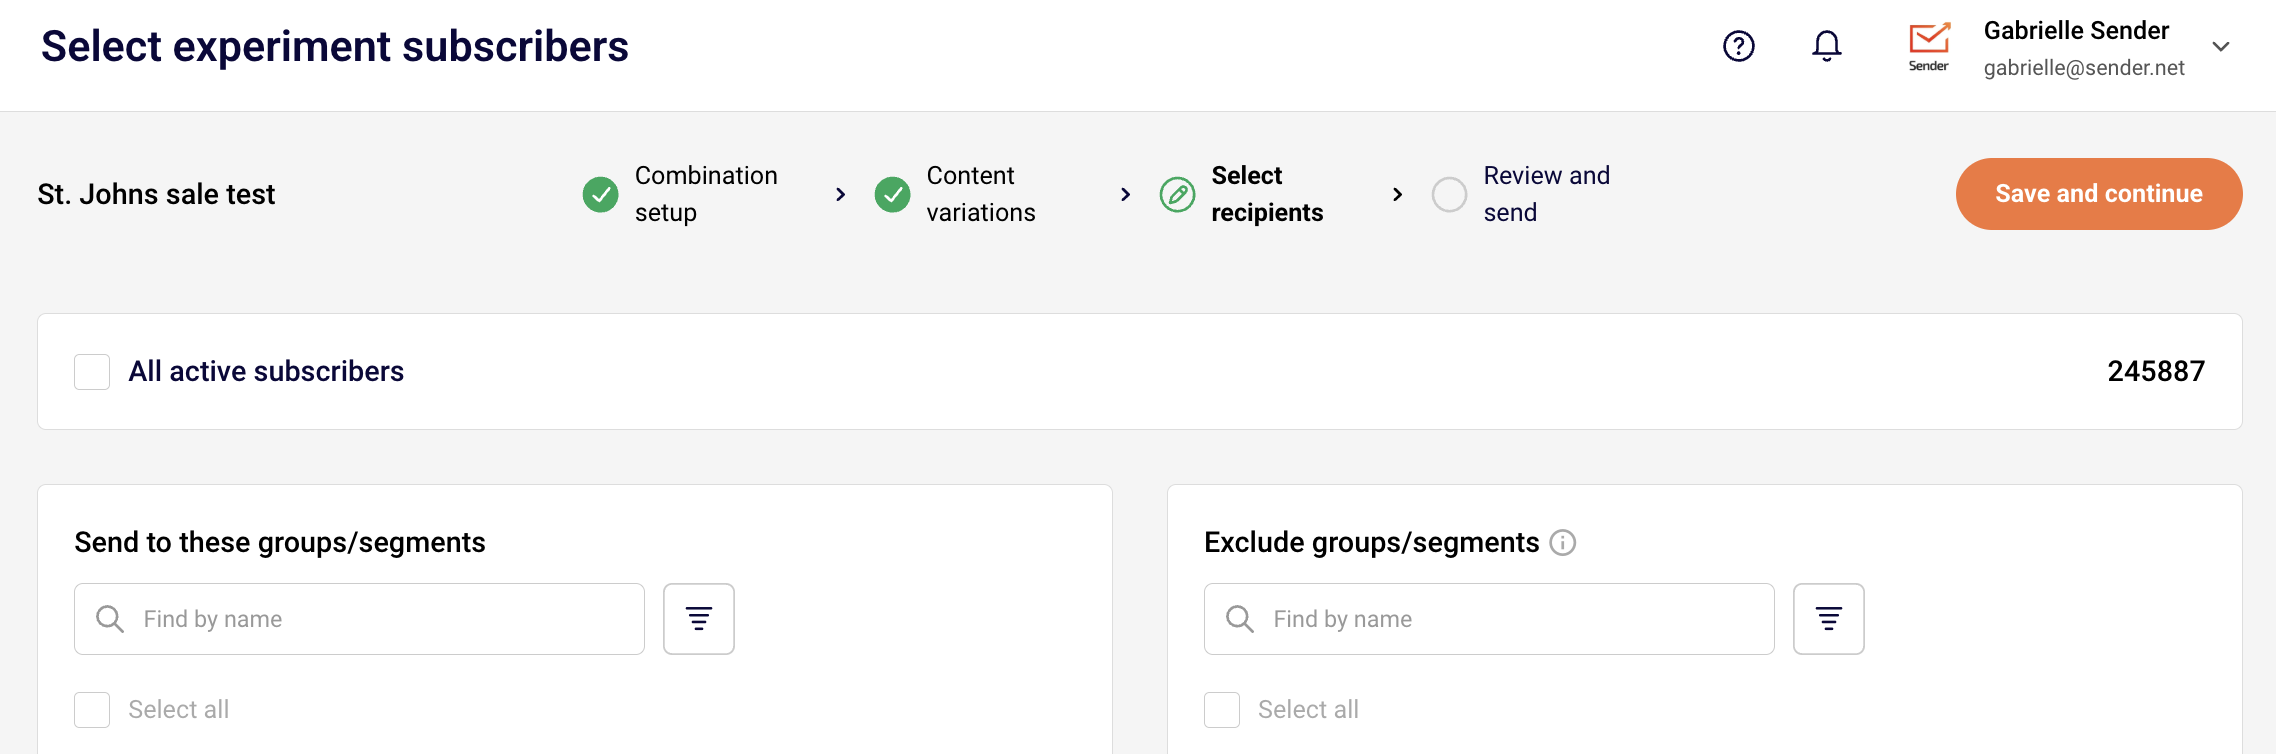
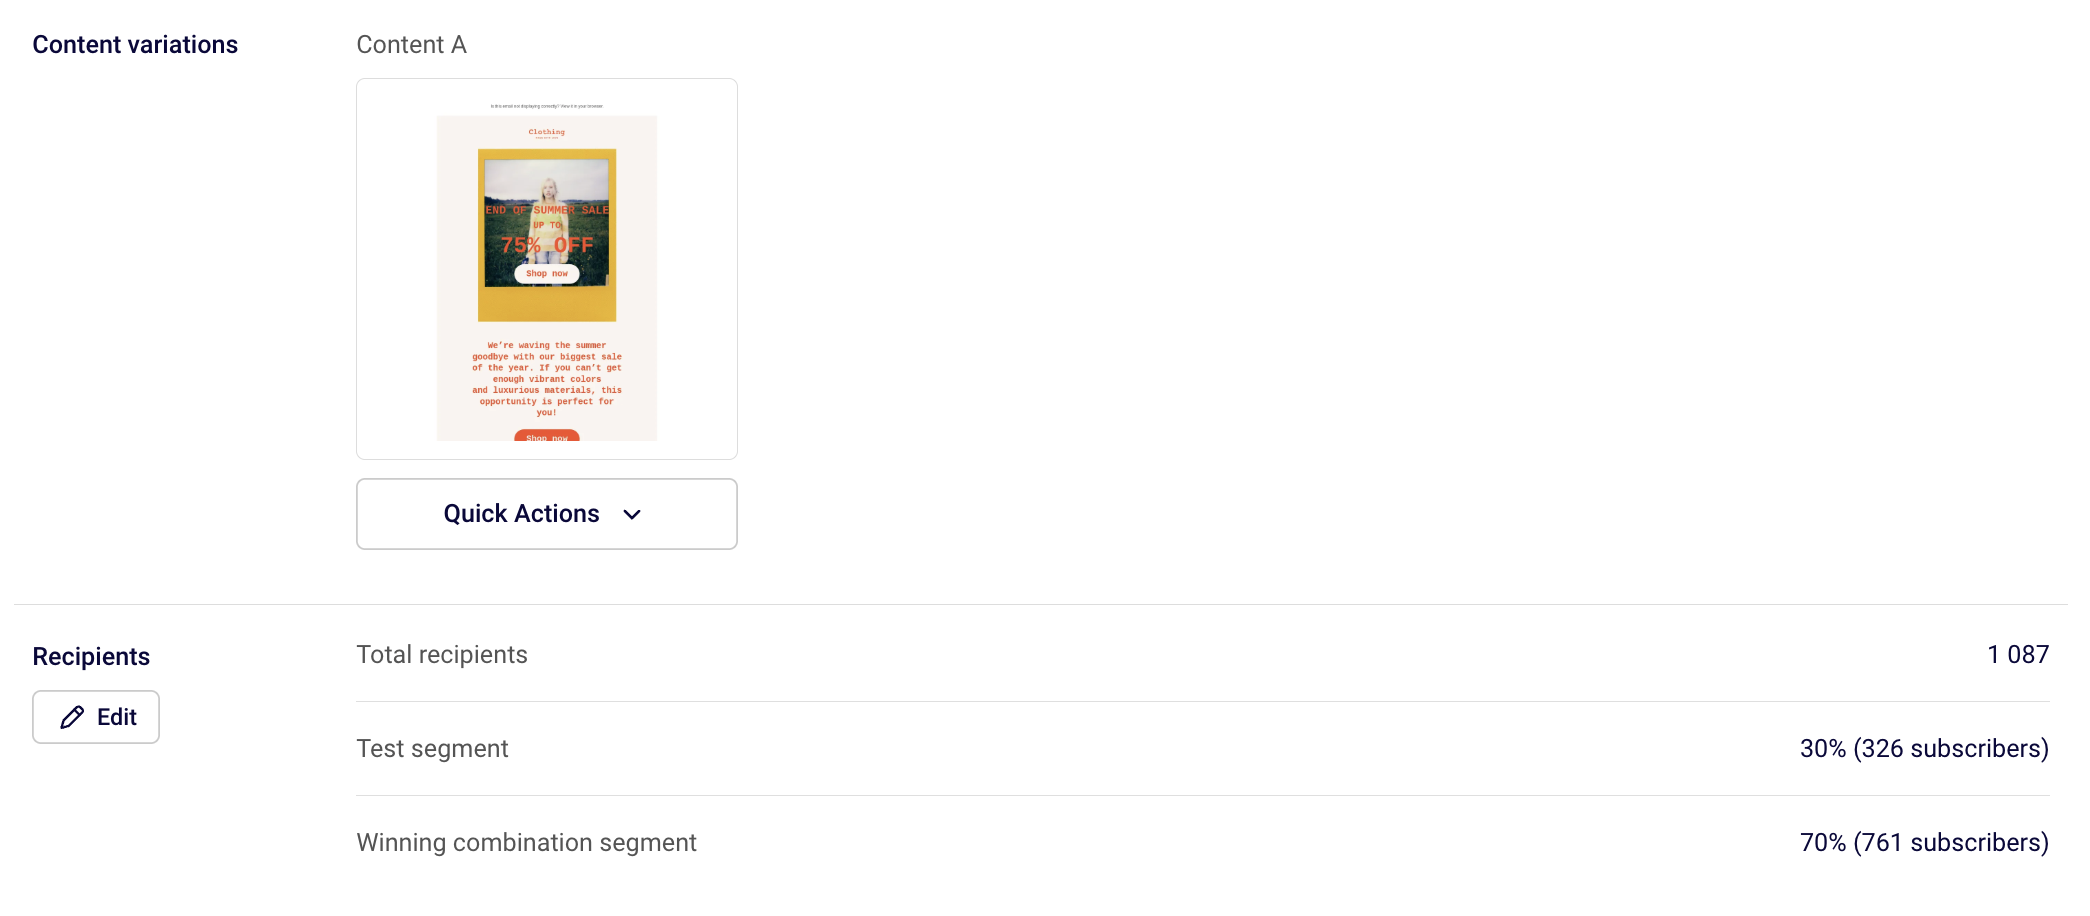
    On the Select recipients stage, check that the correct audience is selected. You can choose All active subscribers or pick specific entries under Send to these groups/segments. Use Exclude groups/segments to remove any audiences that should not receive the test. The Total recipients count at the bottom of the page must be at least 1,000 for an automatic winner to be selected.

    campaign-recipients

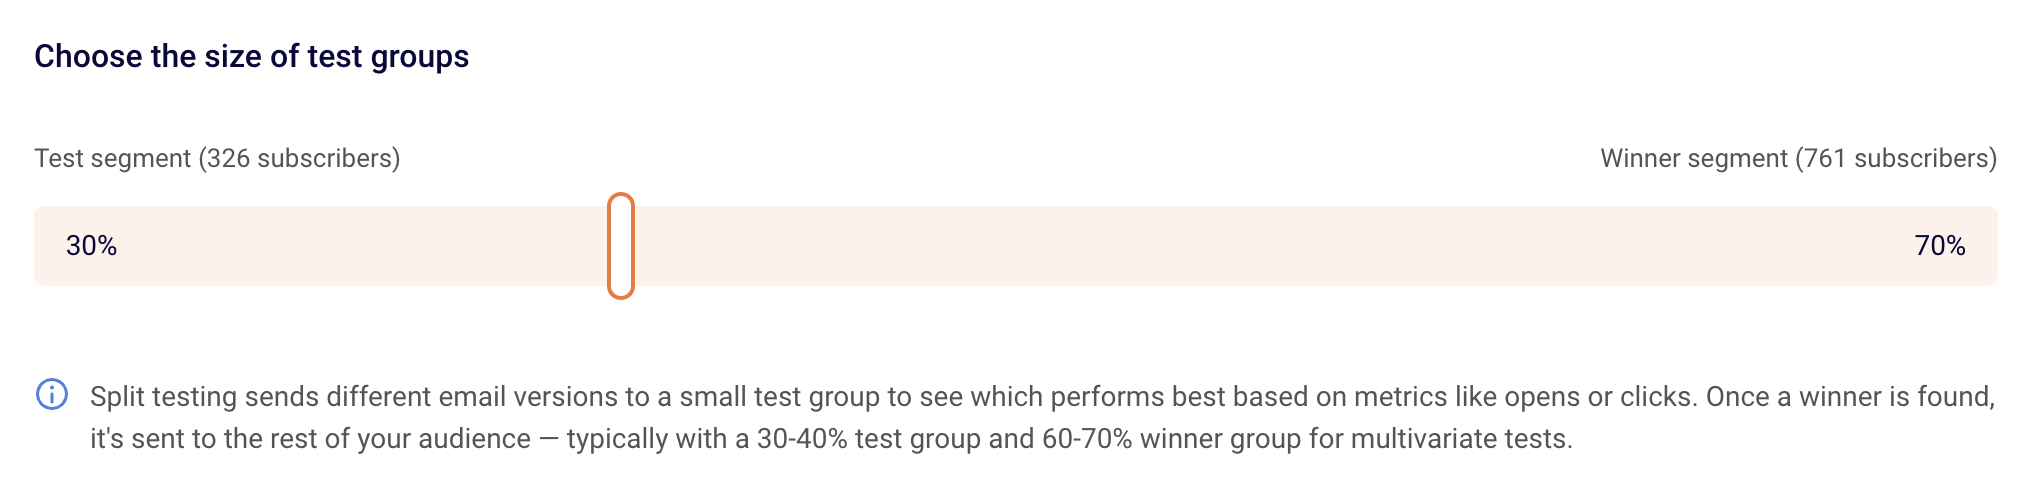
    When you have 1,000 or more recipients, you will be prompted to set the Test Group Size and Winning Group Size percentages. Make sure the test group is large enough to produce meaningful results and that the winning group percentage accounts for the rest of your audience.

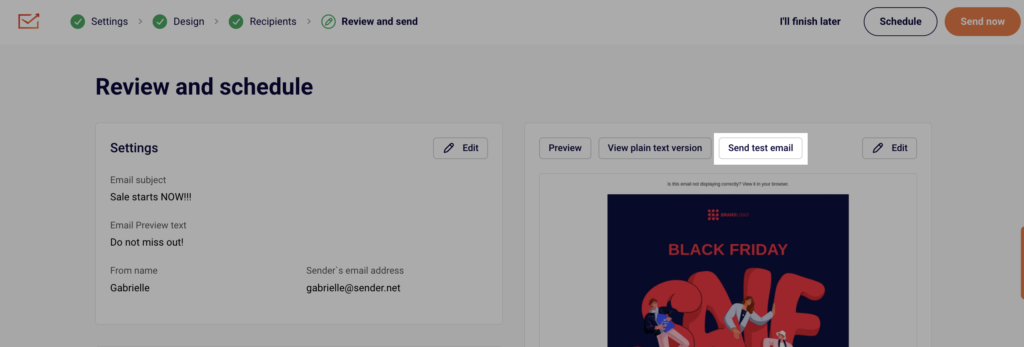
    Step 4 — Review and Send

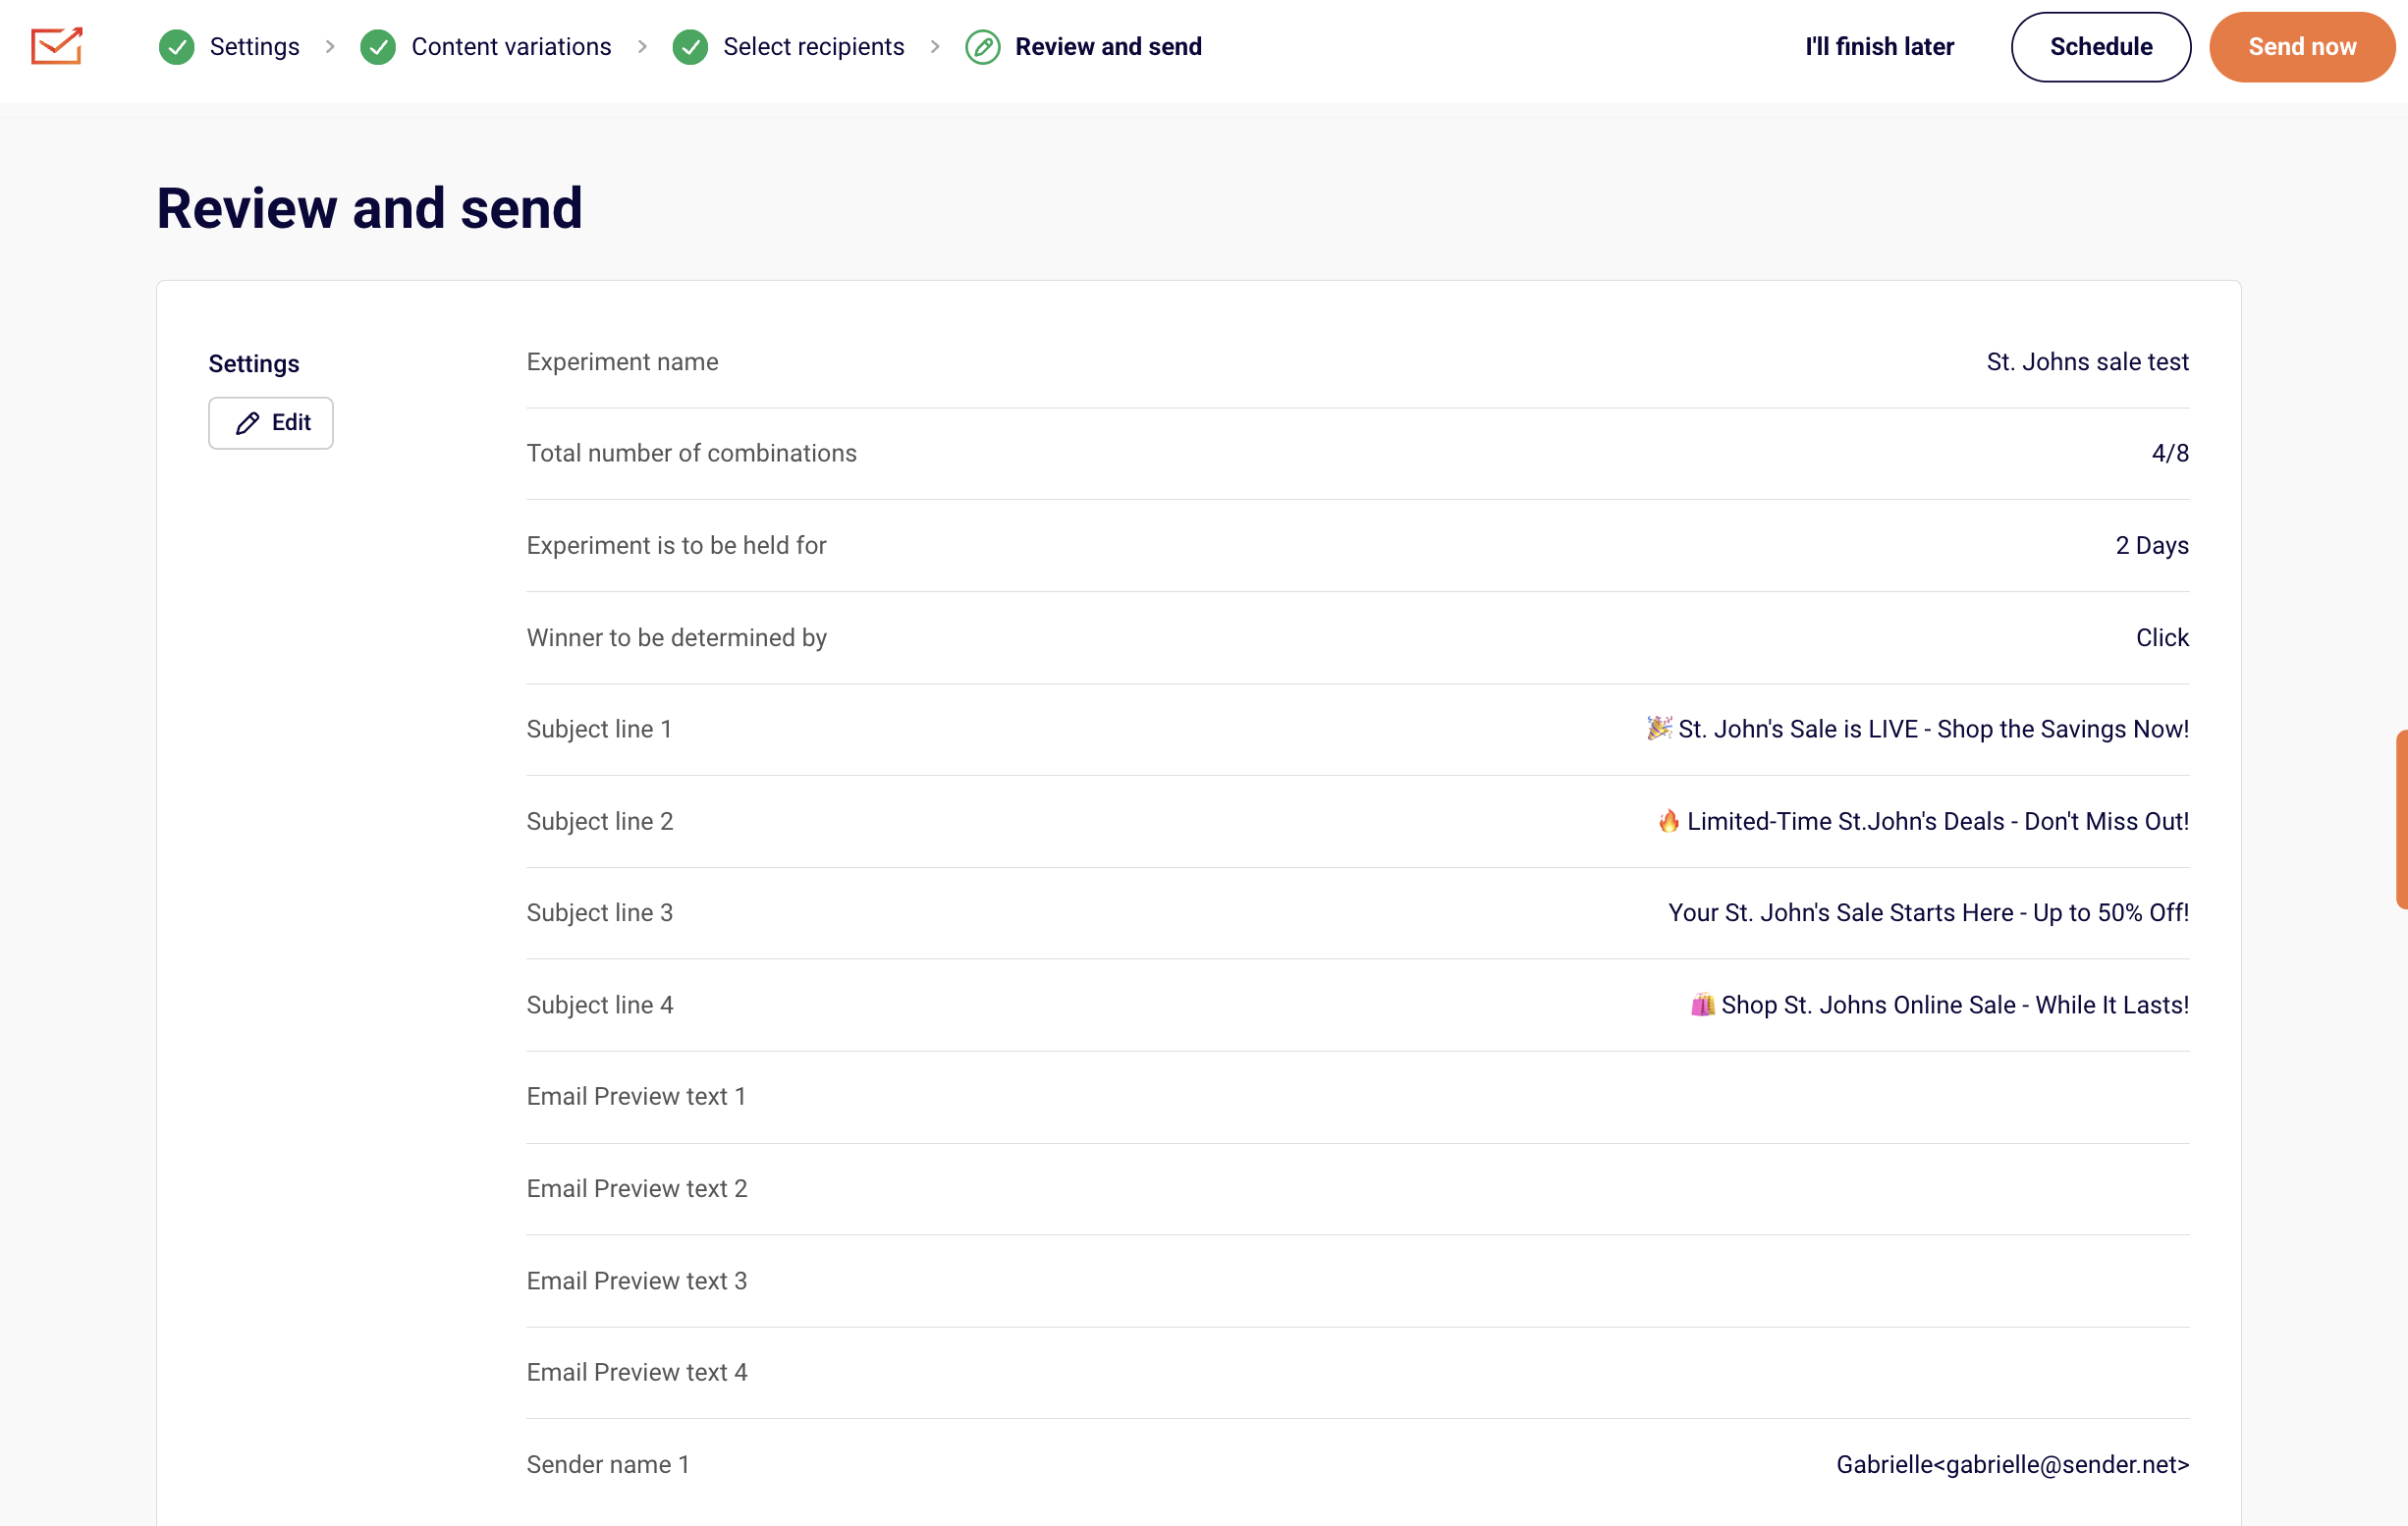
    On the Review and send stage, you see a summary of all your experiment settings: subject lines, sender names, content variations, recipient groups, test/winner group split, and duration.

    experiment-review-send

    Check that every detail matches your intent. You can either send immediately or schedule the experiment for a specific date and time. If you are testing Sending time variations, this is where the different send times are configured.

    What Happens After You Save

    After sending or scheduling, the experiment appears in the Experiments list with a status reflecting its current state (such as DRAFT before sending). Performance stats — delivered, opened, and clicks — become available in the Experiments list once the test begins. After the duration ends, Sender automatically selects the winning variation and sends it to the winning group.

    Common Issues

    “Save and continue” button is greyed out on Select recipients — You have 0 recipients selected. Select at least one group, segment, or All active subscribers.

    No winner is selected after the experiment ends — Your recipient count was below 1,000. Make sure to select at least 1,000 recipients for automatic winner selection.

    Combination count not updating — Content has already been added. The number of combinations cannot be changed after content is saved in the Content variations stage.

    Preview looks different from the actual send — Toggle Dark mode preview and check both desktop and mobile views in the preview panel. Also use Send test email to verify rendering in real email clients.

    FAQs

    How many combinations can I test?

    Up to 8 total combinations across all variant types.

    Which winning metric should I choose?

    Use Opens for subject line, sender name, preview text, and sending time tests. Use Clicks for content and layout tests.

    How long should the experiment run?

    The minimum is 4 hours. For audiences up to 5,000, run up to 24 hours. For 5,000–20,000, aim for around 12 hours. For 20,000+, 4–8 hours is typically sufficient.

    Can I test more than one variable at a time?

    You can combine variants, but testing one variable at a time is recommended for clear, actionable results.

    Where do I find results after the experiment finishes?

    Go to Experiments in the sidebar. Stats appear in the delivered, opened, and clicks columns next to each experiment.

  • Previewing and testing emails

    This guide shows how to preview and test your email campaign before sending it to subscribers in Sender.


    Where to find this feature

    In the Sender dashboard, go to: Email campaigns → select a campaign → Design

    Preview and testing tools are available across the Settings and Design stages of the campaign workflow.


    What to check before sending

    Step 1 — Review the inbox preview

    On the Settings page, check the Inbox preview panel on the right side. It shows how your email will appear in a recipient’s inbox, including the From name, Email subject, and Email Preview text.

    Make sure the subject line is not truncated and the preview text reads clearly alongside it. If the preview text is missing, add it in the Email Preview text field below the subject line.

    Sender-emailcampaigns-settings

    Step 2 — Preview your design on desktop and mobile

    In the email builder, click the preview icon (eye icon) in the top toolbar. This opens a side-by-side view showing how your email renders on desktop (left) and mobile (right).

    Check that your layout, images, and text display correctly on both screen sizes. The Email size indicator at the top left shows the approximate file size of your email with a color-coded bar — green means the size is within recommended limits.

    Sender-emailcampaigns-design-preview

    Step 3 — Check the dark mode rendering

    While in preview mode, toggle Dark mode preview in the top right corner. This simulates how your email appears when a recipient uses dark mode in their email client.

    Make sure text remains legible, images don’t blend into the dark background, and button colors still stand out. Toggle it off to return to the standard preview.

    Sender-emailcampaigns-darkmode-preview

    Step 4 — Send a test email

    Click Send test email — available both in the email builder toolbar and on the Design page. A dialog appears asking where you want the test email to be sent. Enter your email address and click Send.

    Check the test email in your own inbox. Verify that links work, images load, personalization tags (custom fields) render correctly, and the unsubscribe link is functional.

    Sender-emailcampaigns-testemail

    Step 5 — Verify the plain text version

    On the Design page, click View plain text version. This opens an overlay showing the plain text fallback of your email — what recipients see if their email client does not support HTML.

    Check that the content is readable, links are visible as full URLs, and no broken merge tags appear.

    Sender-emailcampaigns-plaintext

    What happens after you save

    After saving, the campaign remains in Draft status under Email campaigns until you complete the Recipients and Review and send stages. You can return to preview and test again at any time by reopening the campaign.


    Common issues

    Inbox preview text not showing → The Email Preview text field on the Settings page is empty. Add preview text to control what appears after the subject line.

    Dark mode preview looks broken → Some background colors or images may not adapt automatically. Adjust your design to use transparent backgrounds or test with contrasting text colors.

    Test email not arriving → Check your spam or junk folder. Make sure the email address entered in the Send test email dialog is correct and can receive mail from your sender domain.

    Email size indicator shows red or yellow → Your email file is large, which can cause clipping in some inboxes (especially Gmail). Remove unnecessary images or reduce image file sizes.

    Plain text version shows broken tags → Custom field tags like merge fields may appear as raw code in the plain text view. This is expected in preview — they resolve when the email is actually sent.


    FAQs

    Can I send a test email to multiple addresses? 

    Yes. Enter multiple email addresses in the Send test email dialog, separated by commas.

    Does the test email show real subscriber data? 

    No. Custom fields and personalization tags display placeholder values in test emails, not actual subscriber data.

    Can I preview without saving first? 

    Yes. The preview icon in the email builder shows your current design in real time without requiring a save.

    Where do I find the preview icon in the email builder? 

    It is the eye icon in the top toolbar, between the redo button and the Send test email button.

    Does dark mode preview reflect all email clients?

     No. It provides an approximation. Actual rendering varies across email clients like Gmail, Outlook, and Apple Mail.

  • Pre-send checklist for email campaigns

    This guide covers what to verify across each stage of the email campaign workflow before sending in Sender.

    Where to find this feature

    In the Sender dashboard, go to Email campaigns → select a campaign → follow the Settings > Design > Recipients > Review and send workflow at the top of the page.

    What to check before sending

    Step 1 — Verify campaign settings

    On the Campaign settings page, check that Campaign name and Email subject are accurate and finalized. Make sure you have added Email Preview text — the line subscribers see next to the subject in their inbox. Use the Inbox preview panel on the right to confirm how the sender name, subject, and preview text appear together.

    Under Sender details, confirm the From name and Sender’s email address are correct. If you want to automatically re-send to subscribers who do not open, toggle Auto resend on before proceeding.

    Sender-emailcampaigns-settings

    Step 2 — Review email design and send a test

    On the Email campaign design page, click the preview icon (eye) in the editor toolbar to open the visual preview. This displays your email in both desktop and mobile views side by side. Check that the layout renders correctly on both. Toggle Dark mode preview to verify readability in dark-mode email clients.

    Note the Email size indicator in the top-left corner of the preview — a green bar means the file size is within acceptable limits. Click Send test email in the toolbar, enter a recipient address, and click Send to deliver a test copy to your inbox. On the Design page, use View plain text version to confirm the fallback plain text is readable.

    Sender-emailcampaigns-design

    Step 3 — Confirm recipients

    On the Recipients page, check that the correct subscriber groups are selected and that the total under Selected recipients matches your intended audience. If the count shows 0 or a warning such as “You don’t have any active subscribers” appears, resolve this before continuing. The Save and continue button remains disabled until at least one recipient is selected.

    Step 4 — Review and send

    On the Review and send page, verify all campaign details one final time — subject line, preview text, sender information, design, and recipient count. Confirm everything is correct, then send or schedule the campaign.

    Sender-emailcampaigns-review

    What happens after you save

    After sending, the campaign appears in Email campaigns with a status of SENT and a timestamp. Stats for delivered, opened, and clicks become available in the Campaign overview report. You can access the report by clicking the chart icon next to the campaign. The overview displays total emails sent, total delivered, open rate, unique clicks, hard bounced, soft bounced, unsubscribed, and spam reports.

    Common issues

    Send test email not arriving — Check that the recipient address is correct and look in spam or junk folders. Sending to your own Sender account address may cause delivery issues.

    Preview looks different from the test email — The in-app preview is an approximation. Always confirm rendering through an actual test send in the email client you want to verify.

    Save and continue is greyed out on Recipients — At least one subscriber group with active subscribers must be selected before you can proceed.

    Email size indicator shows a long bar — Large emails may be clipped by inbox providers. Reduce image sizes or remove unnecessary content blocks to bring the size down.

    FAQs

    Can I preview my email in dark mode? 

    Yes. Open the preview in the editor by clicking the eye icon, then enable the Dark mode preview toggle in the top-right corner.

    How do I check the plain text version?

    On the Design step, click View plain text version above the email preview.

    Can I save my campaign as a PDF before sending?

    Yes. From the Email campaigns list, click the dropdown arrow next to a campaign and select Save as PDF.

    Does the Inbox preview show the exact appearance in all email clients?

    No. The Inbox preview on the Settings page shows an approximation of how the subject, sender name, and preview text appear. Use Send test email for exact rendering in a specific client.

  • Differences Between Test Emails and Live Campaign Sends

    This guide explains what to check when comparing a test email to a live campaign send, and what behaves differently between the two in Sender.


    Where to Find This Feature

    In the Sender dashboard, go to: Email campaigns → select a campaign → Design

    The Send test email button appears at the top of the Design step. You can also access it during the final Review and send step of campaign creation.


    What to Check in a Test Email vs. a Live Send

    Step 1 — Send a Test Email from the Design Step

    On the Design page, click Send test email in the top-right toolbar. A modal appears asking “Where do you want test email to be sent?” Enter your email address and click Send. The test email is delivered to that single address only. It does not go to any subscriber groups or lists.

    Sender-emailcampaigns-testemail

    Step 2 — Check What the Test Email Includes

    The test email contains your current email design, subject line, and sender details exactly as configured on the Settings and Design pages. Check that the From name, Email subject, and Email Preview text display correctly in your inbox. Use the Inbox preview panel on the Settings page to compare what you see in your actual inbox against the expected layout.


    Step 3 — Understand What the Test Email Does Not Include

    Test emails do not resolve subscriber-specific Custom fields (such as first name or other personalized tags). They also do not trigger tracking for opens, clicks, bounces, or unsubscribes. Make sure you understand that any custom field merge tags will appear as placeholder text or remain unresolved in a test send.


    Step 4 — Compare Against a Live Campaign Send

    A live campaign send goes through the full workflow: Settings → Design → Recipients → Review and send. The campaign is delivered to all selected subscriber groups. After sending, the campaign moves from DRAFT to SENT status in the Email campaigns list, and full statistics become available on the Campaign overview page — including total emails sent, total emails delivered, opened, unique clicks, hard bounced, soft bounced, unsubscribed, and spam reports.

    Sender-emailcampaigns-overview

    Step 5 — Verify Preview and Plain Text Versions

    Before sending live, also check the View plain text version button on the Design page to confirm your email is readable without HTML. Use the Preview option from the campaign list dropdown (click the arrow icon next to any campaign) to view a full rendered preview of your email in a modal window.

    Sender-emailcampaigns-plaintext

    What Happens After You Save

    After sending a live campaign, the campaign appears in the Email campaigns list with a SENT status badge and a timestamp. Performance data becomes available on the Campaign overview page, accessible by clicking the bar chart icon next to the sent campaign. Test emails do not appear as separate campaigns and do not generate any report data.


    Common Issues

    Custom fields show raw tags in test emails → Test emails do not resolve subscriber-specific custom fields. This is expected. Custom fields populate correctly only in live sends.

    Test email not arriving → You can send up to 10 test emails per hour. If you exceed this limit, wait before trying again.

    Stats show dashes for a draft campaign → Delivered, opened, and clicks columns remain empty until the campaign is actually sent to subscribers.

    Test email counts toward my plan limit → Test emails are not counted toward your total sent emails. Testing your campaign will not cause you to exceed your email limit.


    FAQs

    Where can I send a test email?

    On the Design step of the campaign editor, click Send test email and enter any email address.

    Do test emails count toward my sending limit?

    No. Test emails are excluded from your total sent email count.

    How many test emails can I send?

    Up to 10 test emails per hour.

    Will custom fields work in a test email?

    No. Custom fields only resolve with actual subscriber data during a live campaign send.

    Can I see open or click stats from a test email?

    No. Test emails do not generate tracking data. Only live campaign sends produce statistics on the Campaign overview page.

    What is the difference between Preview and Send test email?

    Preview opens a rendered view of your email inside the Sender dashboard. Send test email delivers the actual email to an inbox so you can check how it renders in a real email client.

  • Personalization behavior in test emails

    This guide explains how personalization tags behave when you send a test email in Sender, and what to check before launching your campaign.


    Where to Find This Feature

    In the Sender dashboard, go to:

    Email campaign → Design → Send test email

    You can also access test emails from within the drag-and-drop email builder by clicking Send test email in the top navigation bar.


    What to Check Before Sending

    Check 1 — Verify custom field placement in the editor

    Open your campaign and click Edit design to enter the email builder. When you select a text block (such as Paragraph or Headline), the inline toolbar appears. Click the Custom fields icon to insert personalization tags like firstname, lastname, email, phone, or birthday. Inside the editor, inserted tags display as readable labels (e.g., “First name”). Make sure tags are placed where you expect them in your content.

    Sender-emailcampaigns-customfields

    Check 2 — Review tags in the Design preview

    Go back to the Design step to see your email outside the editor. Here, personalization tags display in their raw syntax — for example, {{ firstname }}. This is the actual merge tag format that Sender uses. Check that tags appear in the correct position within your text, subject line, and preview text. If you see broken or misplaced {{ }} tags, return to Edit design to fix them.

    Sender-emailcampaigns-syntax

    Check 3 — Preview across devices and dark mode

    In the email builder, click the Preview icon (eye) in the top bar. The preview shows your email in both desktop and mobile views side by side. Use the Dark mode preview toggle to verify your layout holds across rendering modes. Personalization tags remain unresolved in this preview — they still show as {{ fieldname }}. Focus on checking layout, spacing, and readability around your tags.

    Sender-emailcampaigns-preview

    Check 4 — Understand test email behavior

    Click Send test email and enter the recipient address in the dialog. Test emails are sent to a specific email address you provide — not to your subscriber list. Because the test recipient is not a subscriber in your contact list, personalization tags are not replaced with actual data. The test email will display the raw tag syntax (e.g., {{ firstname }}). This is expected behavior.

    Check 5 — Confirm subject line and preview text personalization

    On the Settings step, both the Email subject and Email Preview text fields support personalization via the Custom fields dropdown. The Inbox preview panel on the right shows how the sender name, subject, and preview text appear together. If you added custom fields to the subject or preview text, verify the tag placement here before proceeding.

    Sender-emailcampaigns-settings

    What Happens After You Send a Test Email

    The test email arrives in the inbox you specified. Personalization tags appear as raw {{ fieldname }} placeholders — they are not populated with subscriber data. When you send the actual campaign to your subscriber list from the Review and send step, Sender resolves each tag using the matching data from each subscriber’s contact profile. If a subscriber’s field is empty, the tag renders as blank unless a fallback value is configured.


    Common Issues

    Tags show as {{ firstname }} in the test email — This is expected. Test emails do not resolve personalization because they are not sent to a subscriber record. The tags will populate correctly in the live campaign send.

    Tags appear as raw code in the Design preview — Normal behavior. The Design step and the preview mode display the merge tag syntax, not resolved values.

    Custom field is missing from the dropdown — The Custom fields list in the email builder includes subscriber fields (e.g., firstname, lastname, email, phone, birthday) and account-level fields (e.g., account.title, account.address). If a field doesn’t appear, confirm it exists in your subscriber data or account settings.

    Empty space appears in the live email where a tag was used — The subscriber does not have data for that field. Check your subscriber list to confirm the relevant field is populated for your recipients.


    FAQs

    Will personalization work when I send the actual campaign?

    Yes. When you send from the Review and send step, Sender replaces each {{ fieldname }} tag with the corresponding value from the subscriber’s contact profile.

    Can I add custom fields to the subject line?

    Yes. On the Settings step, click Custom fields next to the Email subject or Email Preview text field and select a tag.

    Where can I send a test email from?

    You can send a test email from the Design step (via the Send test email button) or from inside the drag-and-drop email builder (via Send test email in the top bar).

    How many test emails can I send?

    Up to 10 test emails per hour. Test emails do not count toward your sending limit.

    Does the preview mode show resolved personalization?

    No. The preview (desktop, mobile, and dark mode) shows the raw {{ fieldname }} tag syntax, not actual subscriber data.

  • A/B test email campaigns

    Our new Experiments feature is here to help you get the most out of every email campaign you send! With Experiments, you can easily test different versions of your emails—whether it’s the subject line, the sender name, the send time, or even the content itself.

    Think of it like this: instead of guessing what might work best, you’ll actually know what works, because your audience will show you with their opens and clicks.

    Why Use Experiments?

    Here are just a few reasons why using Experiments can seriously improve your email marketing results:

    • Find what your audience loves: Understand what types of subject lines, content, or sender details drive better engagement.
    • Avoid low-performance sends: Instead of sending one version to everyone, you test a few and only send the winning version to most of your audience.
    • Make data-backed decisions: Stop guessing. Start sending smarter.
    • Improve future campaigns: Use your learnings to keep growing and optimizing.

    Setting up an Experiment

    Setting up your first experiment is simple and intuitive. Just follow these steps:

    Head over to Experiments and click Create your first experiment. 

    You’ll begin by naming your experiment—choose something descriptive so you can quickly identify what you’re testing (e.g. Subject Line Test – Summer Promo or Content Test – New Template).

    You will also have to choose the Winning metric and the Duration of the experiment.

    You can test up to 8 combinations. You can mix them up if you see fit:

    • Subject lines
    • Sender names
    • Send times
    • Content variations

    However, we strongly recommend testing only one variable at a time to clearly identify what’s making the impact—whether it’s opens or clicks.

    • Winning Metric: Select what metric will determine the winning variation—opens or clicks. (See below for tips on which to use.)
    • Duration: Set how long you want the experiment to run. You can choose from hours, days, weeks, or even months—but we recommend keeping it under 24 hours for most experiments.

    Here is an example of testing subject lines. Choose the Subject Line option, then enter all the variations you want to test.

    After that, select one sender name and email address that will stay consistent across all variations (since we’re only testing subject lines here). When you’re done, click Save and continue.

    Next, set up the content for your campaign. Choose between:

    • Drag & Drop Builder,
    • Plain Text Email,
    • Custom HTML.

    Pick a template or start from scratch, then customize it as needed and save the changes.

    In the next step, choose the groups and/or segments you want to include in your experiment. You can also exclude specific groups or segments to narrow down your audience, or simply select all active subscribers if you’d like to reach your full list. 

    This step ensures you’re targeting the right audience for meaningful results.

    Make sure to select at least 1000 recipients to have a winner selected.

    Once you select your recipients (if the selected amount is 1000 or more) you will be asked to edit the experiment settings and select the test and winning group sizes.

    • Test Group Size: Define what percentage of your total audience will receive the test. For example, if you’re sending to 1,000 subscribers, you might choose 30% (300 people) for testing.

    • Winning Group Size: The remaining percentage (e.g., 70%) will receive the winning variation once a winner is selected.

    Once the test group receives all the selected combinations and the duration ends, Sender will automatically determine the winner based on your chosen metric and send it to the remaining (Winning) audience.

    In the final step, you’ll see an overview of your experiment setup: all the subject lines, sender names, content variations, and testing settings. 

    If everything looks good, you can either send your experiment immediately or schedule it for a later time that best suits your audience.

    Best Practices for Experiments

    Which metric to choose?

    Use Opens as your winning metric when testing:

    • Subject lines

    • Preview text

    • Sender names

    • Reply-to email addresses

    • Sending time

    Use Clicks as your winning metric when testing:

    • Email content (e.g. layout, images, CTAs, offers)

    • Send time (if you want to see who actually engaged beyond just opening)

    How long should your experiment run?

    Duration depends on the size of your audience:

    • Up to 5,000 subscribers → Run for up to 24 hours

    • 5,000–20,000 subscribers → Run for around 12 hours

    • 20,000+ subscribers → Run for 4–8 hours (your list is big enough to get fast data)

    IMPORTANT: Avoid low-activity periods, like weekends or late nights, when subscribers are less likely to engage. Testing during these times could give you misleading results.

    How many variations should I test?

    • Up to 5,000 subs → Stick to 2 variations

    • 5,000–20,000 subs → You can try 3 variations

    • 20,000+ subs → You can go bigger and test more complex setups

    The goal is to test efficiently—not overwhelm your audience or stretch the test too thin.

    Start small, keep it simple, and use your learnings to send smarter campaigns every time.

    That’s it!

    If you got stuck on a specific task or can’t find a way to execute a particular job, contact our support team via LiveChat or [email protected] – we’re here to help 24/7.

  • Troubleshoot test email sending

    If you cannot send a test email you have probably exceeded the limit of 10 test emails per hour to prevent abuse. Simply wait a bit for the counter to reset. Usually the limit resets in 30-60 minutes, depending on how many test emails you’ve sent so far.

     If that does not happen, get in touch via live support or email us at [email protected].


    If you got stuck on a specific task or can’t find a way to execute a particular job, contact our support team via LiveChat or [email protected] – we’re here to help 24/7.

  • Understand test email feature

    Sometimes, you might want to send yourself a test version of the campaign you’re creating before sending it out to your subscribers. We call it the Test email.

    We allow you to send up to 10 test emails per hour to prevent abuse. As they are not counted into your total sent emails, testing your campaign will not cause you to go over your email limit. 

    You can send a test email from the design part of the email campaign creation:

    You can also send a test email directly from the Drag and Drop editor:

    Lastly, you can send a test email from the last step before sending the actual campaign to your selected subscriber group:

    If you notice any inconsistencies between the campaign you created and the test email you received, you can also test by sending the actual campaign to yourself only. This would require you to add yourself to a separate group and choose that group as the recipients of the campaign.

    If th issues are still consistent, please do not hesistate to contact support for further help.


    If you got stuck on a specific task or can’t find a way to execute a particular job, contact our support team via LiveChat or [email protected] – we’re here to help 24/7.