Category: Migration to Sender

  • Migrating from Mailchimp

    This guide walks you through migrating from Mailchimp to Sender, covering subscriber data, templates, automations, and domain setup.

    Before You Start

    • An active Sender account with a verified email address.
    • Admin or Manager-level access to your Mailchimp account (required for exporting audiences and generating API keys).
    • A list of what you want to migrate: subscribers, tags/groups, email templates, automations, signup forms, suppression lists, and sending domains.
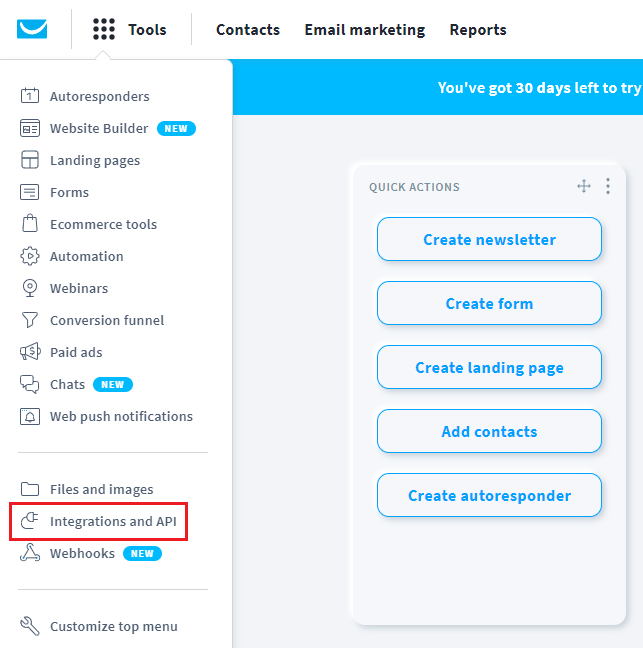
    • A Mailchimp API key if you plan to use Sender's direct import feature (generated under Profile → Extras → API keys in Mailchimp).
    • Recommended migration order: domains → subscribers → custom fields → templates → automations → forms → test → deactivate Mailchimp.

    Migration Checklist

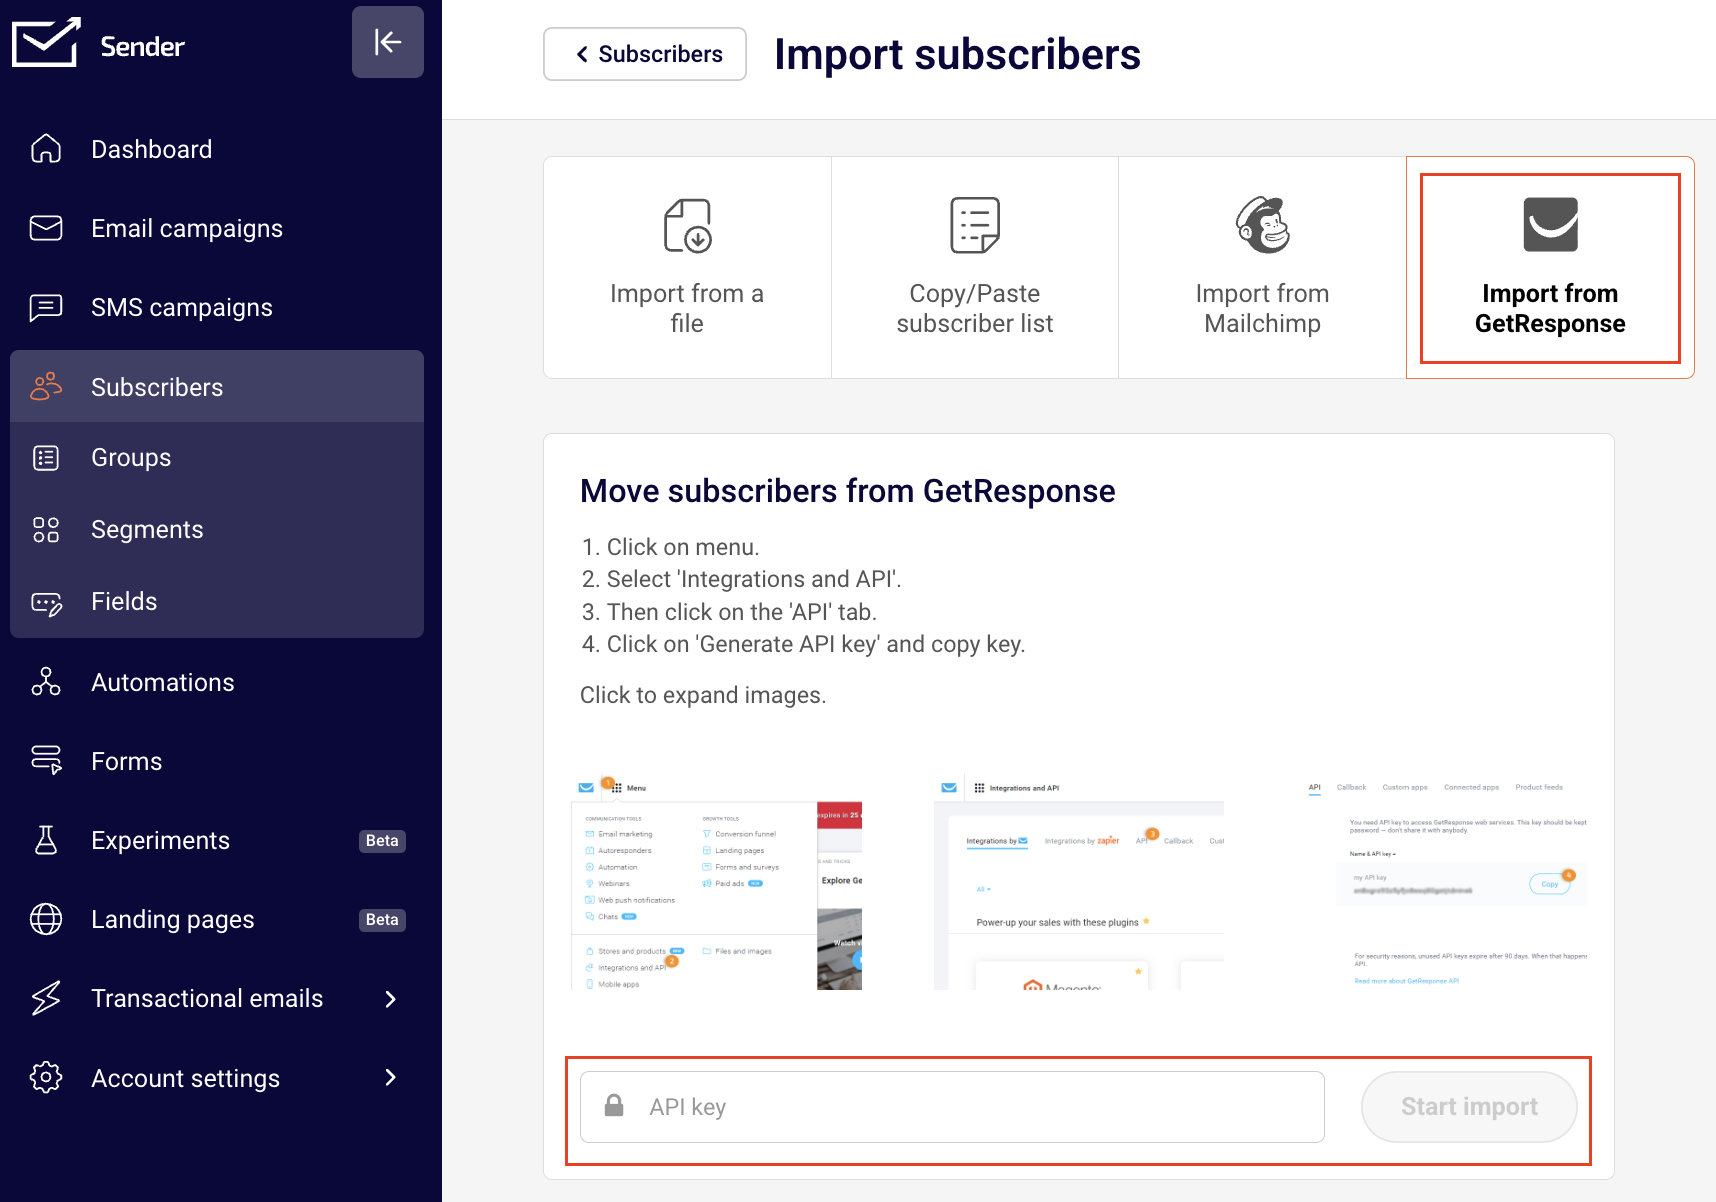
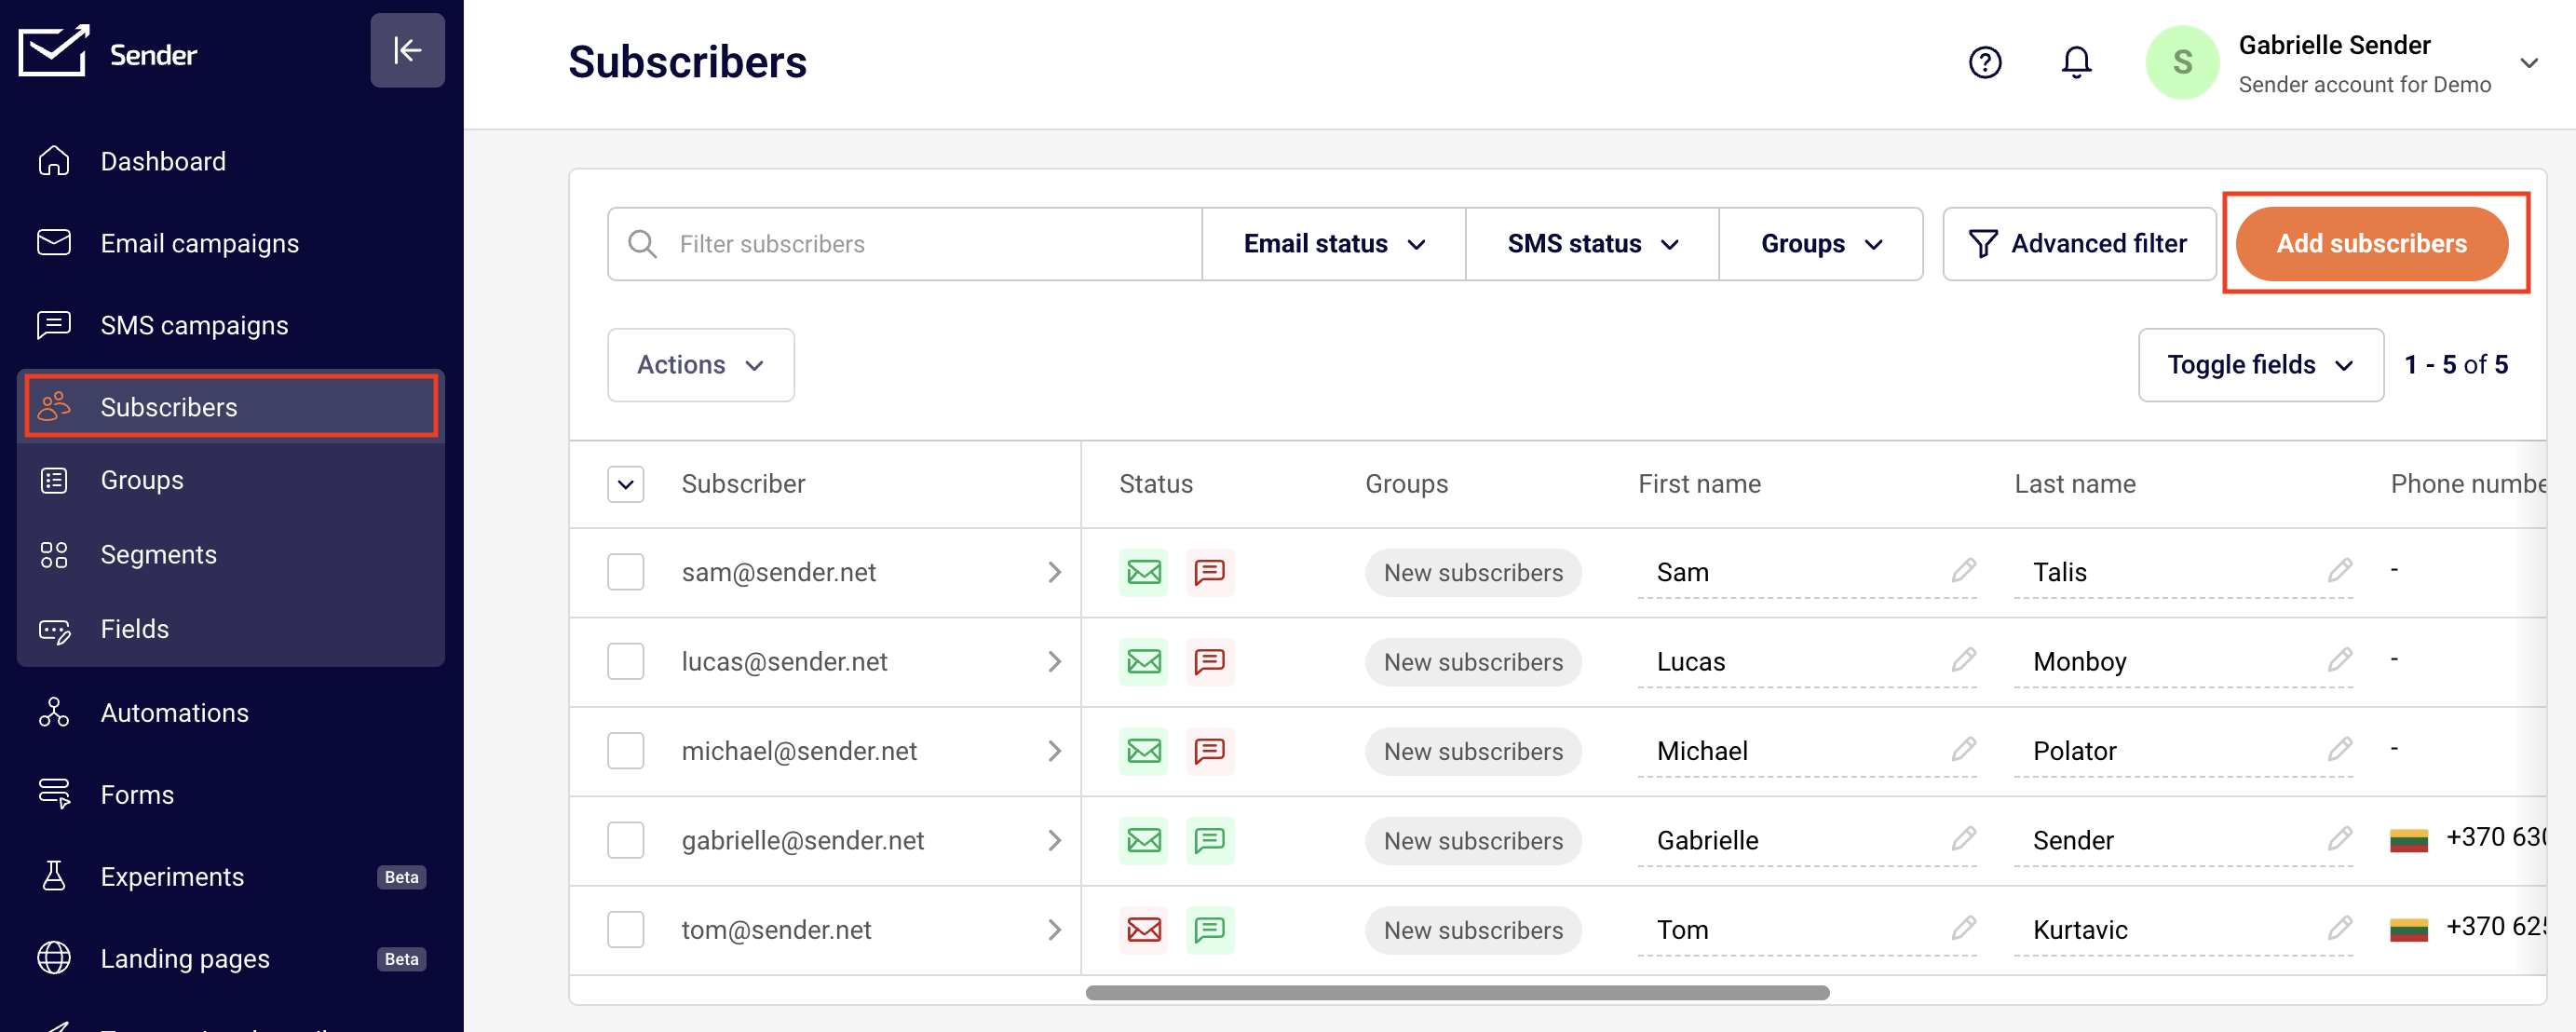
    Subscribers — In Mailchimp, go to Audience → select your audience → Export audience → Export CSV to download your contacts. In Sender, go to Subscribers → Add subscribers and use either Import from a file or Import from Mailchimp (direct API import) to bring your contacts in.

    Custom fields — Review the merge fields you use in Mailchimp (such as FNAME, LNAME, BIRTHDAY, or any custom merge tags). In Sender, go to Subscribers → Fields → Create new field to recreate any fields that do not already exist before importing subscribers. Sender includes Email, Phone number, First name, Last name, and Birthday by default.

    Tags and groups — Mailchimp uses tags and groups to segment audiences. In Sender, the equivalent is Groups. Go to Subscribers → Groups → Create new group to set up your groups before importing. When importing via CSV, you can assign subscribers to a specific group during the import process.

    Email templates — Mailchimp includes template HTML files when you export your account data via Account → Settings → Manage my data → Export Data. In Sender, go to Email campaigns → New campaign → proceed to the Design step and select Custom HTML email to paste your exported HTML code. Alternatively, rebuild your templates using Sender's Drag and drop builder.

    Automations — Mailchimp automations (welcome sequences, abandoned cart, win-back flows) cannot be exported and must be recreated. In Sender, go to Automations → Create new workflow and choose from ready-made templates like Welcome, Abandoned cart recovery, Win-back customers, or Onboarding — or select Create from scratch.

    Signup forms — Mailchimp signup forms and pop-ups cannot be exported. In Sender, go to Forms → Create a new form and choose between Pop-up or Embedded form types. Recreate your form fields, design, and connected subscriber groups manually.

    Suppression lists (unsubscribes and bounces) — In Mailchimp, your audience export includes separate CSV files for subscribed, unsubscribed, non-subscribed, and cleaned contacts. Import unsubscribed and bounced contacts into Sender with their correct status to protect your sender reputation.

    Sending domain authentication — In Sender, go to Account settings → Domains → Add domain and configure the SPF, DKIM, and DMARC DNS records Sender provides. Mailchimp's DNS records will not work for Sender — new records must be added to your domain's DNS settings.

    Steps to Migrate Subscribers

    Step 1 — Export your audience from Mailchimp

    In Mailchimp, click Audience in the left navigation. If you have multiple audiences, click the Audience drop-down and select the one you want to export. Click Export audience. In the Export all contacts? pop-up, click Export CSV. Mailchimp will prepare a ZIP file containing separate CSV files for subscribed, unsubscribed, non-subscribed, and cleaned contacts. You will receive an email when the export is ready.

    Step 2 — Prepare your file and create custom fields in Sender

    Unzip the downloaded file and open the subscribed_contacts.csv in a spreadsheet application. Review the columns — these correspond to Mailchimp merge fields. In Sender, go to Subscribers → Fields and verify that matching fields exist. Click Create new field for any custom data columns (such as company name or address) that are not part of Sender's default fields: Email, Phone number, First name, Last name, and Birthday.

    Step 3 — Import subscribers into Sender using a file

    In Sender, go to Subscribers → Add subscribers → Import from a file. Drag and drop your CSV file or click Import file to upload it. Supported file types are .csv, .txt, and .xlsx with a maximum size of 64MB. After uploading, map the columns from your file to the corresponding fields in Sender. Select the group to add the subscribers to, then complete the import. Verify the subscriber count matches your exported file.

    Step 4 — Alternative: Use Sender's direct Mailchimp import

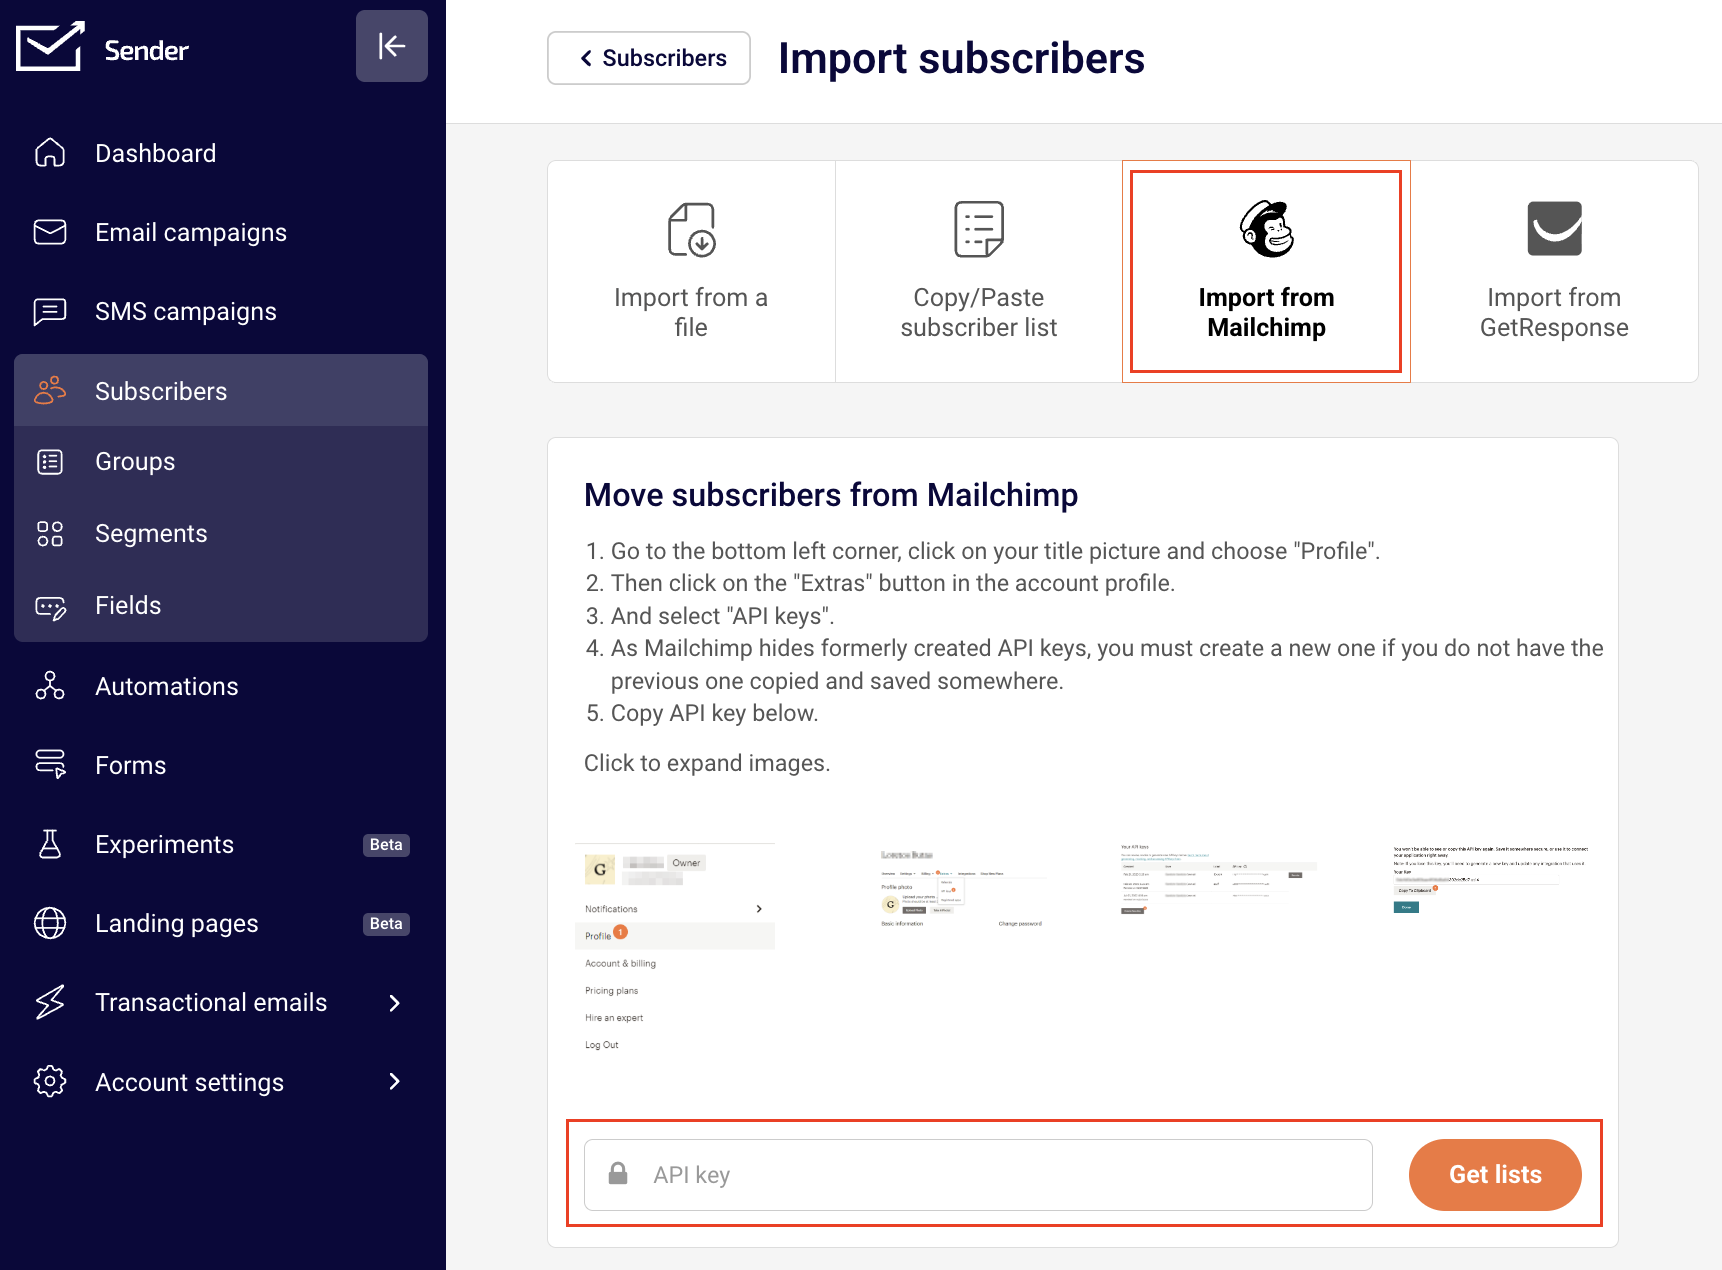
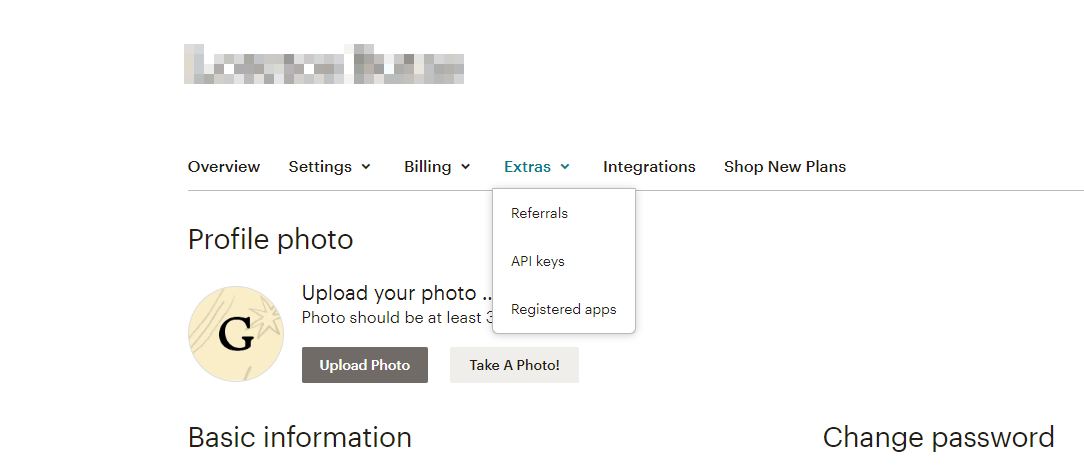
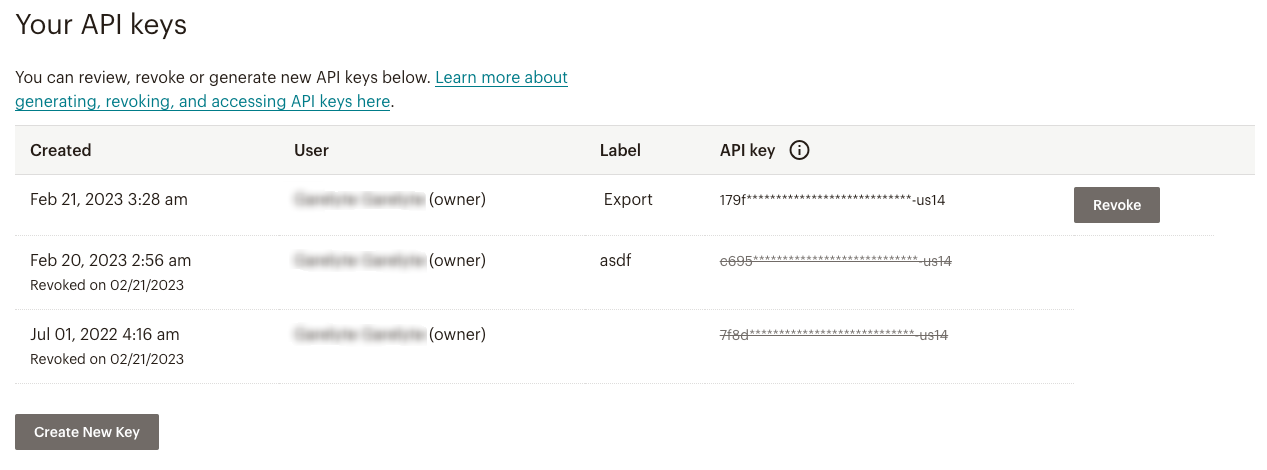
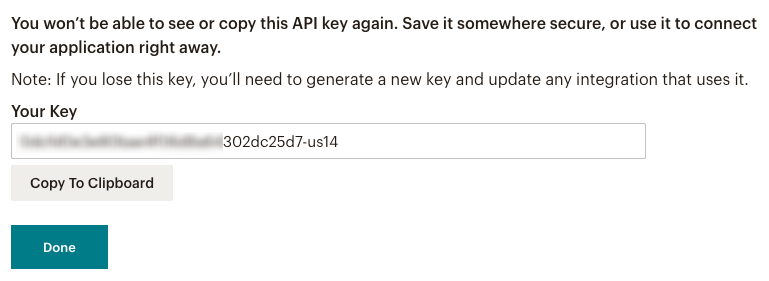
    Instead of a file upload, you can use Sender's built-in Mailchimp integration. In Sender, go to Subscribers → Add subscribers → Import from Mailchimp. To get your API key, go to Mailchimp and click your profile icon → Profile → Extras → API keys → Create A Key → Generate Key → Copy Key to Clipboard. Paste the API key into Sender and click Get lists. Select the audience lists you want to import.

    Step 5 — Import your suppression list

    Open the unsubscribed_contacts.csv and cleaned_contacts.csv files from your Mailchimp export. Import these into Sender via Subscribers → Add subscribers → Import from a file and ensure contacts are marked with the correct unsubscribed or bounced status. This prevents Sender from sending to contacts who previously opted out and protects your deliverability.

    What Cannot Be Migrated

    Campaign performance history — Open rates, click rates, send history, and campaign analytics from Mailchimp cannot be transferred to Sender. Export your Mailchimp reports before migrating by going to your profile icon → Account → Settings → Manage my data → Export Data and selecting Reports. Save these files for your records.

    Automation analytics — Performance data tied to your Mailchimp automations (such as revenue attributed, conversion rates, and per-email open rates) does not carry over. Note your key metrics from Mailchimp before recreating automations in Sender. New analytics will begin tracking from the first send in Sender.

    Form submission history — Historical data about who signed up through specific Mailchimp forms, including submission timestamps and source URLs, cannot be migrated. Sender will begin tracking form submissions from the point you publish new forms.

    Mailchimp-specific features — Features unique to Mailchimp, such as Customer Journey Builder maps, postcards, social media ad campaigns, website/landing page builder content, and Content Studio assets, do not have a direct migration path. Evaluate which features have equivalents in Sender and recreate them where applicable.

    Email template drag-and-drop designs — Templates built with Mailchimp's visual editor cannot be exported as editable design files. Only the final HTML output is available via account export. You can paste this HTML into Sender's Custom HTML email editor, but interactive editing will require rebuilding the template in Sender's Drag and drop builder.

    Post-Migration Verification

    Subscriber count — Compare the total number of active subscribers in Sender under Subscribers with the count from your Mailchimp audience export. The numbers should match. Check that unsubscribed and bounced contacts also imported with the correct status under Subscribers → Groups.

    Domain authentication — In Sender, go to Account settings → Domains and confirm that your domain shows green checkmarks under Ownership confirmed and Authentication. If records are not verified, click Recheck DNS records after allowing time for DNS propagation (up to 48 hours).

    Test email — Create a test campaign in Sender via Email campaigns → New campaign. Send it to an internal email address using Send test email in the design editor. Verify that the email arrives, renders correctly, and that the sender name, reply-to address, and unsubscribe link all function as expected.

    Automation triggers — For each automation you recreated in Sender, trigger a test by adding a test subscriber or performing the trigger action (such as joining a group for a welcome sequence). Verify that the automation fires, emails are sent in the correct order, and delays between steps work as configured.

    Form rendering — For each form recreated in Sender, preview it on your website or use Sender's built-in preview. Submit a test entry and confirm the subscriber appears in the correct group in Sender with the right field data populated.

    Migration Tips

    Migrate domains first — Set up and verify your sending domain in Sender under Account settings → Domains before importing subscribers or sending any campaigns. DNS propagation can take up to 48 hours, so starting early avoids delays.

    Clean your list during migration — Use the migration as an opportunity to remove inactive or disengaged subscribers. Filter your Mailchimp export to exclude contacts who have not opened or clicked in the last 6–12 months before importing into Sender.

    Map Mailchimp merge tags to Sender fields — Mailchimp uses merge tags like *|FNAME|* and *|BIRTHDAY|*, while Sender uses field codes like {{firstname}} and {{birthday}}. After importing, update any merge tags in your email templates to use Sender's field syntax.

    Test automations before going live — After recreating automations in Sender, keep them in Draft status and trigger test runs before activating. This ensures triggers, delays, and email content all work as intended without affecting real subscribers.

    Keep Mailchimp active during testing — Do not cancel your Mailchimp account until you have fully verified subscribers, domain authentication, templates, automations, and forms in Sender. Run both platforms in parallel during your testing period.

    Common Issues

    Subscriber count mismatch after import → Mailchimp exports separate files for subscribed, unsubscribed, non-subscribed, and cleaned contacts. If your total in Sender does not match, verify you imported the correct file (subscribed_contacts.csv for active subscribers) and check whether duplicate email addresses were merged during import.

    Custom fields not mapping correctly → Column headers in your Mailchimp CSV may not match Sender's default field names. During import, use the field mapping step to manually match each column to the correct Sender field. Create any missing custom fields under Subscribers → Fields before starting the import.

    Domain authentication failing → Sender provides specific SPF, DKIM, and DMARC records that are different from Mailchimp's. Ensure you added Sender's records (not Mailchimp's) to your DNS settings. Allow up to 48 hours for propagation and use Recheck DNS records under Account settings → Domains to verify.

    Mailchimp merge tags not rendering in Sender → If your imported HTML templates display tags like *|FNAME|* instead of subscriber names, replace them with Sender's field codes (for example, {{firstname}}). Search your HTML for *| to find all Mailchimp merge tags that need updating.

    API key not working for direct import → Mailchimp hides previously created API keys. If you cannot find your key, generate a new one under Profile → Extras → API keys → Create A Key. Copy the key immediately after generation — it will not be fully visible again.

    FAQs

    How long does migration typically take?

    This depends on the volume of data and the number of assets to recreate. Subscriber imports take minutes using either file upload or the direct Mailchimp API import. Recreating templates, automations, and forms may take several hours to a few days depending on complexity. Plan ahead and test before deactivating Mailchimp.

    Will I lose my email sending history?

    Campaign performance data (open rates, click rates, send history) from Mailchimp cannot be transferred to Sender. Export and save your historical reports from Mailchimp via your profile icon → Account → Settings → Manage my data before migrating. New performance data will begin tracking in Sender from your first send.

    Should I import unsubscribed contacts?

    Yes. Import your suppression list (unsubscribed and bounced contacts) into Sender with the correct status to avoid sending to contacts who have opted out. This protects your sender reputation and ensures compliance with anti-spam regulations.

    Do I need to re-verify my sending domain in Sender?

    Yes. Even if your domain was verified in Mailchimp, you need to add it in Sender under Account settings → Domains and configure the SPF, DKIM, and DMARC records that Sender provides. Mailchimp's DNS records will not work for Sender.

    Can I keep both platforms running during migration?

    Yes. Keep Mailchimp active until you have fully tested your Sender setup — subscriber data, templates, automations, forms, and domain authentication. Only deactivate Mailchimp after verifying everything works in Sender.

    Should I use the direct Mailchimp import or a CSV file?

    The direct Import from Mailchimp option in Sender (under Subscribers → Add subscribers) is faster and pulls your lists automatically using an API key. However, a CSV import gives you more control over which contacts and fields to include, and lets you clean your list before importing. Use the direct import for speed or the CSV method for more granular control.

    Can Sender's support team help with migration?

    Check Sender's support options for assisted migration services. Some plan tiers may include migration assistance. Contact Sender support with details about your Mailchimp account size and the volume of data to discuss available options.

  • Migrating from Klaviyo

    This guide walks you through migrating from Klaviyo to Sender, covering subscriber data, templates, automations, and domain setup.

    Before You Start

    • An active Sender account with access to the dashboard.
    • Admin, Owner, or Analyst access to your Klaviyo account (required for exporting lists and segments).
    • A list of what you plan to migrate: subscribers, templates, automations, signup forms, suppression lists, and sending domains.
    • Exported files stored locally before importing into Sender — do not delete anything from Klaviyo until migration is fully tested.
    • Recommended migration order: domains → subscribers and suppression lists → custom fields → templates → automations → forms → test → deactivate Klaviyo.

    Migration Checklist

    Subscribers — In Klaviyo, go to Audience → Lists & segments, click into each list, open the Manage list dropdown, and select Export list to CSV. In Sender, go to Subscribers → Add subscribers → Import from a file and upload the exported CSV file.

    Custom fields — In Klaviyo, custom properties are included in your CSV export when you choose to export all properties. In Sender, go to Subscribers → Fields → Create new field to create matching custom fields before importing, so columns map correctly during the import process.

    Tags and groups — Klaviyo uses lists and segments to organize contacts. In Sender, the equivalent is Groups. Go to Subscribers → Groups → Create new group to recreate your Klaviyo lists as groups. Assign subscribers to groups during import.

    Email templates — In Klaviyo, go to Content → Templates, click the additional options menu next to a template, and select Export to download the HTML. In Sender, create a new campaign via Email campaigns → New campaign, choose the Custom HTML design type on the Design step, and paste the exported HTML into the code editor.

    Automations — Klaviyo flows cannot be exported as files. Document the trigger, filters, timing, and email content for each flow. In Sender, go to Automations → Create new workflow to rebuild each automation from scratch.

    Signup forms — Klaviyo forms cannot be exported. Note the form type (popup, embedded), fields collected, and connected list for each form. In Sender, go to Forms → Create a new form to recreate them as pop-ups or embedded forms.

    Suppression lists (unsubscribes and bounces) — In Klaviyo, go to Audience → Profiles, click Suppressed Profiles in the upper right, then click Export CSV. Import this file into Sender with the correct unsubscribed status to protect your sender reputation.

    Sending domain authentication — Klaviyo's DNS records will not work for Sender. In Sender, go to Account settings → Domains → Add domain and configure the new SPF, DKIM, and DMARC records that Sender provides in your domain's DNS settings.

    Steps to Migrate Subscribers

    Step 1 — Export your subscriber lists from Klaviyo

    In Klaviyo, navigate to Audience → Lists & segments. Click into the list you want to export. Open the Manage list dropdown in the upper right and select Export list to CSV. Choose whether to export all properties or only specific ones. The export file will be available under Settings → Other → Downloads within a few minutes. Repeat this process for each list you want to migrate.

    Step 2 — Prepare your file and create matching fields in Sender

    Open your exported CSV file and review the column headers. In Sender, go to Subscribers → Fields and check that each column from your Klaviyo export has a matching field. If your Klaviyo data includes custom properties (such as company name or purchase date), click Create new field to add them before importing. Also go to Subscribers → Groups → Create new group to create groups that correspond to your Klaviyo lists.

    Step 3 — Import subscribers into Sender

    In Sender, go to Subscribers → Add subscribers → Import from a file. Drag and drop your CSV file or click Import file to upload it. Supported file types are .csv, .txt, and .xlsx with a maximum size of 64MB. On the next screen, map each column from your file to the corresponding field in Sender. Select the group to assign subscribers to, then confirm the import.

    Step 4 — Import your suppression list

    In Klaviyo, go to Audience → Profiles, click Suppressed Profiles, and click Export CSV. Import this file into Sender through Subscribers → Add subscribers → Import from a file. Ensure that unsubscribed and bounced contacts retain their suppressed status so Sender does not send emails to contacts who have opted out.

    What Cannot Be Migrated

    Campaign performance history — Open rates, click rates, send history, and revenue attribution data from Klaviyo cannot be transferred to Sender. Export and save any historical reports from Klaviyo's Analytics tab before deactivating your account. New performance data will begin tracking in Sender from your first send.

    Flow and automation analytics — Performance data for individual Klaviyo flows (send counts, conversion data, revenue per flow) cannot be moved. Export flow analytics from Klaviyo before migration if you need to retain them for reference.

    Form submission history — Klaviyo tracks form views, submissions, and conversion rates for each signup form. This data does not transfer. Your forms in Sender will start collecting fresh analytics from the moment they go live.

    Segments with behavioral conditions — Klaviyo segments built on event-based conditions (such as purchase history, site activity, or email engagement) cannot be exported as dynamic segments. Export these as static CSV lists and import them as groups in Sender. Rebuild dynamic segments in Sender under Subscribers → Segments using Sender's segment conditions.

    Klaviyo-specific integrations and tracking scripts — Direct integrations between Klaviyo and your ecommerce platform or other tools do not carry over. Set up new integrations in Sender. Remove Klaviyo's tracking snippets from your website after migration is complete.

    Post-Migration Verification

    Subscriber count match — Compare the total number of active subscribers in each Klaviyo list with the corresponding group in Sender under Subscribers → Groups. The Active count in Sender should match the count from your Klaviyo export.

    Custom field mapping — Open several individual subscriber profiles in Sender by clicking on them under Subscribers. Verify that custom field values (such as first name, last name, and any custom properties) imported correctly and appear in the expected fields.

    Suppression list accuracy — Confirm that unsubscribed and bounced contacts show the correct status in Sender. Filter subscribers by Email status on the Subscribers page to verify that suppressed contacts are not marked as active.

    Domain authentication — Go to Account settings → Domains and confirm that your domain shows green checkmarks under Ownership confirmed and Authentication. Click Recheck DNS records if the status has not yet updated.

    Test email delivery — Create a test campaign in Email campaigns → New campaign and send it to yourself using Send test email on the Design step. Verify the email arrives in your inbox, displays correctly, and that links and images work.

    Automation trigger test — Activate one automation in Automations and trigger it with a test subscriber. Verify that the workflow fires correctly and the subscriber receives the expected email.

    Form rendering — Publish a form from Forms, visit the page where it is embedded or triggered, and verify that it appears correctly and successfully adds a test subscriber to the assigned group in Sender.

    Migration Tips

    Migrate domains first — Verify your sending domain in Sender under Account settings → Domains before importing subscribers or sending any campaigns. DNS propagation can take up to 48 hours.

    Export everything from Klaviyo before canceling — Download all lists, suppression lists, templates, and analytics reports before you downgrade or close your Klaviyo account. Once your account is closed, you may lose access to this data.

    Import suppression lists early — Importing unsubscribed and bounced contacts into Sender before sending any campaigns prevents accidental sends to opted-out contacts and protects your sender reputation.

    Test with a small group first — Before sending campaigns to your full list, send to a small test group to confirm that templates render correctly, personalization fields populate, and links work as expected.

    Keep Klaviyo active during migration — Do not cancel your Klaviyo plan or delete flows and forms until you have fully tested your Sender setup and confirmed everything works.

    Common Issues

    Import fails or shows errors → This usually happens when the CSV file has formatting issues, such as extra commas, mismatched column counts, or encoding problems. Open the file in a text editor, remove any blank rows or special characters, save as UTF-8 encoded CSV, and try the import again.

    Subscriber count is lower after import → Sender may deduplicate contacts based on email address. If the same email appeared in multiple Klaviyo lists, it will appear once in Sender. Duplicate emails within a single file are also merged. Check the import summary for skipped or duplicate entries.

    Custom fields did not map correctly → If custom field data appears in the wrong column or is missing, the column headers in your CSV may not have matched the field names in Sender. Go to Subscribers → Fields, verify field names, and re-import the file with corrected column headers.

    Domain authentication not passing → DNS record changes can take up to 48 hours to propagate. Verify that you added the correct SPF, DKIM, and DMARC records provided by Sender to your domain's DNS settings. Click Recheck DNS records under Account settings → Domains after allowing time for propagation.

    Emails landing in spam after migration → A new sending platform means your domain is building reputation with a new sending infrastructure. Start by sending to your most engaged subscribers, gradually increase volume over several days, and ensure your domain authentication is fully verified.

    FAQs

    How long does migration typically take? This depends on the volume of data and the number of assets to recreate. Subscriber imports take minutes. Recreating templates, automations, and forms may take several hours to a few days depending on complexity. Plan ahead and test before deactivating Klaviyo.

    Will I lose my email sending history? Campaign performance data (open rates, click rates, send history) from Klaviyo cannot be transferred to Sender. Export and save your historical reports from Klaviyo before migrating. New performance data will begin tracking in Sender from your first send.

    Should I import unsubscribed contacts? Yes. Import your suppression list (unsubscribed and bounced contacts) into Sender with the correct status to avoid sending to contacts who have opted out. This protects your sender reputation and ensures compliance.

    Do I need to re-verify my sending domain in Sender? Yes. Even if your domain was verified in Klaviyo, you need to add it in Sender under Account settings → Domains and configure the SPF, DKIM, and DMARC records that Sender provides. Klaviyo's DNS records will not work for Sender.

    Can I keep both platforms running during migration? Yes. Keep Klaviyo active until you have fully tested your Sender setup — subscriber data, templates, automations, forms, and domain authentication. Only deactivate Klaviyo after verifying everything works in Sender.

    Can I import my Klaviyo email templates directly into Sender? You can export the HTML of each template from Klaviyo under Content → Templates → additional options → Export. In Sender, create a campaign with the Custom HTML design type and paste the HTML code into the editor. Templates built with Klaviyo's drag-and-drop builder will need design adjustments, as Klaviyo-specific template syntax is not compatible with Sender's editor.

    Can Sender's support team help with migration? Check Sender's support options for assisted migration services. Some plan tiers may include migration assistance. Contact Sender support with details about your source platform and the volume of data to discuss options.

  • Migrating from Brevo

    This guide walks you through migrating from Brevo to Sender, covering subscriber data, templates, automations, and domain setup.

    Before You Start

    • An active Sender account with a verified email address
    • Admin or account-owner access to your Brevo account
    • A plan for what to migrate: subscribers, templates, automations, forms, and sending domains
    • Access to your domain provider's DNS settings for re-verifying domain authentication in Sender
    • Exported copies of any Brevo campaign performance reports you want to keep for your records

    Recommended migration order: Domains → Subscribers (including suppression lists) → Templates → Automations → Forms → Test → Deactivate Brevo.

    Migration Checklist

    Subscribers — In Brevo, export contacts from CRM → Contacts → More actions → Export as a CSV file. In Sender, import the file at Subscribers → Add subscribers → Import from a file.

    Custom fields — Review your Brevo contact attributes under the export settings and note any custom attributes beyond standard fields. In Sender, create matching fields at Subscribers → Fields → Create new field before importing.

    Tags and groups — Brevo organizes contacts into lists and segments. In Sender, the equivalent structure is Groups. Create matching groups at Subscribers → Groups → Create new group, then assign subscribers to the appropriate group during import.

    Email templates — Brevo does not offer a direct HTML export for templates built in the Drag & Drop editor. Copy the HTML source from each template at Marketing → Templates → Email in Brevo. In Sender, paste the code into a new campaign or automation email using the Custom HTML email editor.

    Automations — Brevo automations at Automations → Workflows cannot be exported. Document each workflow's triggers, conditions, delays, and email content, then recreate them in Sender at Automations → Create new workflow.

    Signup forms — Brevo forms at Marketing → Forms cannot be transferred. Recreate them in Sender at Forms → Create a new form, choosing between Pop-up and Embedded form types.

    Suppression lists (unsubscribes, bounces, complaints) — In Brevo, filter contacts by subscription status during export to isolate blocklisted and unsubscribed contacts. Import them into Sender with the correct unsubscribed or bounced status to protect your sender reputation.

    Sending domain authentication — Brevo's DNS records (Brevo code, DKIM, DMARC) are specific to Brevo and will not authenticate your domain in Sender. Add and verify your domain in Sender at Account settings → Domains → Add domain, then add the new SPF, DKIM, and DMARC records Sender provides to your DNS.

    Steps to Migrate Subscribers from Brevo to Sender

    Step 1 — Export Your Contacts from Brevo

    In Brevo, go to CRM → Contacts. To export all contacts, make sure no list or segment is loaded and no filters are applied. Select the checkbox in the CONTACT column, then click Select all contacts. Click More actions → Export. Under Attributes, select all standard and custom contact attributes you need. Expand the Subscriptions section and include subscription status. Choose comma (,) as the CSV field separator, then click Start export. Download the file from the bell icon notification.

    Step 2 — Prepare and Import Subscribers into Sender

    In Sender, go to Subscribers → Fields and verify that a matching field exists for each custom attribute in your exported file. Click Create new field to add any missing fields. Next, go to Subscribers → Groups and create groups that correspond to your Brevo lists. Then go to Subscribers → Add subscribers → Import from a file. Drag and drop your CSV file or click Import file to upload it. Sender accepts .csv, .txt, and .xlsx files up to 64 MB.

    Step 3 — Map Fields and Assign Groups

    After uploading, Sender displays a field-mapping screen. Match each column from your Brevo export to the corresponding Sender field (for example, map EMAIL to Email, FIRSTNAME to First name, LASTNAME to Last name). Assign the imported subscribers to the appropriate Group. Review the mapping summary, then confirm the import. After processing completes, go to Subscribers and verify that subscriber counts and field data match your Brevo export.

    Step 4 — Import Your Suppression List

    Return to Brevo and export a separate file for suppressed contacts. In CRM → Contacts, click Add filter → Email → Email campaigns subscriptions and select contacts who are blocklisted or unsubscribed. Export this filtered list as a CSV file. In Sender, import this file following the same upload process, ensuring these contacts retain their unsubscribed or bounced status. This prevents Sender from emailing contacts who have previously opted out.

    Step 5 — Verify Domain Authentication in Sender

    Go to Account settings → Domains → Add domain in Sender. Enter your sending domain and follow the on-screen instructions to add the required SPF, DKIM, and DMARC DNS records to your domain provider. Click Recheck DNS records to verify. All three Authentication checkmarks should appear as confirmed. Do not remove your Brevo DNS records until you have fully deactivated your Brevo account, as both sets of records can coexist.

    What Cannot Be Migrated

    Campaign performance history — Open rates, click rates, send counts, and other engagement data from Brevo campaigns cannot be transferred to Sender. Export and save historical reports from Brevo before deactivating your account. New performance tracking begins in Sender from your first send.

    Automation analytics — Workflow statistics such as the number of contacts who entered, completed, or exited automations in Brevo are not transferable. Screenshot or export these reports from Brevo if you need them for reference.

    Form submission history — Data about how many contacts subscribed through specific Brevo forms cannot be migrated. Only the form design and configuration need to be recreated in Sender.

    Brevo-specific features — Features unique to Brevo such as the CRM deals pipeline, Conversations live chat, transactional SMS templates, or WhatsApp campaigns have no direct equivalent import path in Sender. Review your usage of these features and identify alternative solutions within Sender's feature set.

    Drag & Drop template structure — Templates built in Brevo's Drag & Drop editor cannot be exported as editable design files. You can only extract the compiled HTML and paste it into Sender's Custom HTML email editor, which means future edits require working directly with HTML code or rebuilding the template using Sender's Drag and drop builder.

    Post-Migration Verification

    Subscriber count match — Compare the total number of active subscribers in Sender under Subscribers with the total you exported from Brevo. The counts should match. If there is a discrepancy, check for duplicates, formatting errors in the CSV file, or invalid email addresses that Sender may have rejected during import.

    Custom field data integrity — Open several subscriber profiles in Sender by clicking on them under Subscribers. Verify that custom field values (phone numbers, birthdays, custom attributes) imported correctly and appear in the right fields.

    Group assignments — Go to Subscribers → Groups and confirm that each group contains the expected number of subscribers. The Active, Unsubscribed, and Bounced columns should reflect the correct distribution.

    Domain authentication status — Navigate to Account settings → Domains and confirm that your domain shows checkmarks under Ownership confirmed and Authentication. If any record is missing, re-add it through your DNS provider and click Recheck DNS records.

    Test email delivery — Create a test campaign at Email campaigns → New campaign, send a test email from the Design step using Send test email, and verify it arrives in your inbox without spam folder placement. Check the email headers to confirm DKIM and SPF are passing.

    Automation trigger test — If you recreated automations, trigger each one manually by adding a test subscriber to the relevant group or performing the triggering action. Verify in Automations that the workflow activates and the test email is sent.

    Form rendering — If you recreated signup forms, preview each form from Forms and test the submission flow. Confirm that new subscribers appear in the correct group after submitting.

    Migration Tips

    Export everything before you start — Download all contacts, suppression lists, and campaign reports from Brevo before making any changes. Having complete backups ensures you can reference historical data after migration.

    Recreate templates in the drag and drop builder when possible — Rather than pasting Brevo's compiled HTML into the Custom HTML email editor, consider rebuilding key templates in Sender's Drag and drop builder. This makes future editing easier and takes advantage of Sender's design features.

    Migrate in phases — If you have a large subscriber base, consider importing contacts in batches organized by group. This makes it easier to verify data accuracy at each stage and troubleshoot any import issues.

    Keep Brevo active during transition — Do not cancel your Brevo account until every aspect of your Sender setup has been tested and verified. Run both platforms in parallel during the transition period to avoid disruptions.

    Clean your list during migration — Use the migration as an opportunity to remove outdated or unengaged contacts. Filter out subscribers who have not opened an email in 12 or more months before importing into Sender.

    Common Issues

    Import fails or skips rows → This typically happens when the CSV file contains formatting errors, unsupported characters, or columns that do not match Sender's expected format. Open the file in a spreadsheet application, verify that email addresses are in a single column with no extra spaces, save as UTF-8 encoded CSV, and re-upload.

    Custom fields not mapping correctly → Field names in your Brevo export may not match Sender's default field names. During the mapping step, manually match each column header to the corresponding Sender field. Create any missing custom fields at Subscribers → Fields → Create new field before re-importing.

    Domain authentication fails → DNS record propagation can take up to 48 hours. Verify that you copied the exact record values provided by Sender, including any trailing periods in CNAME records. Check for duplicate or conflicting records in your DNS provider. Return to Account settings → Domains and click Recheck DNS records after propagation.

    Unsubscribed contacts showing as active → If suppressed contacts were imported without the correct status flag, they may appear as active subscribers. Re-import the suppression list and ensure the status column is correctly mapped to mark them as unsubscribed in Sender.

    Emails landing in spam after migration → This usually indicates incomplete domain authentication or a new sending reputation with Sender's infrastructure. Confirm all DNS records are verified, start by sending to your most engaged subscribers first, and gradually increase volume over several days.

    FAQs

    How long does migration typically take?

    This depends on the volume of data and the number of assets to recreate. Subscriber imports take minutes. Recreating templates, automations, and forms may take several hours to a few days depending on complexity. Plan ahead and test before deactivating Brevo.

    Will I lose my email sending history?

    Campaign performance data (open rates, click rates, send history) from Brevo cannot be transferred to Sender. Export and save your historical reports from Brevo before migrating. New performance data will begin tracking in Sender from your first send.

    Should I import unsubscribed contacts?

    Yes. Import your suppression list (unsubscribed and bounced contacts) into Sender with the correct status to avoid sending to contacts who have opted out. This protects your sender reputation and ensures compliance.

    Do I need to re-verify my sending domain in Sender?

    Yes. Even if your domain was verified in Brevo, you need to add it in Sender under Account settings → Domains and configure the SPF, DKIM, and DMARC records that Sender provides. Brevo's DNS records will not authenticate your domain in Sender.

    Can I keep both platforms running during migration?

    Yes. Keep Brevo active until you have fully tested your Sender setup — subscriber data, templates, automations, forms, and domain authentication. Only deactivate Brevo after verifying everything works in Sender.

    Can Sender's support team help with migration?

    Check Sender's support options for assisted migration services. Some plan tiers may include migration assistance. Contact Sender support with details about your source platform and the volume of data to discuss options.

  • Import Contacts from GetResponse

    To transfer subscribers from GetResponse to Sender, go to Subscribers tab, then select the “Add Subscribers”:

    Then click on the GetResponse icon and enter your GetResponse account’s API key in the area below.

    After you paste in the API key and hit “Start import” button your mailing lists will be imported from GetResponse. The whole process will take up to few minutes

    How to find API key in at GetResponse?

    To find your API key, log in to GetResponse, click the Menu button and switch to ‘Integrations and API’. 

    Switch to the ‘API’ section and click the ‘Generate API key’ button. Copy your new API key. If you don’t have one, click generate API key.

    That’s it!

    If you got stuck on a specific task or can’t find a way to execute a particular job, contact our support team via LiveChat or [email protected] – we’re here to help 24/7.

  • Import Contacts from Mailchimp

    The transitioning between providers should be easy and straightforward, so we created a sophisticated tool, especially for that.

    First of all, to transfer subscribers from Mailchimp to Sender, you will need to open the Sender dashboard and head to the Subscribers section. Then click “Add subscribers”.

    Then click on the Mailchimp icon and enter your Mailchimp account’s API key in the area below and click Get lists.

    How to find API key in Mailchimp?

    Log into your Mailchimp account. Go to the bottom left corner, click on your title picture and choose “Profile”

    Then click on “Extras” > API key 

    As Mailchimp hides formerly created API keys, you must create a new one if you do not have the previous one copied and saved somewhere.

    After creating and naming your new API code, you will be able to copy the full code and use it to export your subscribers from Mailchimp.

    That’s it!

    If you got stuck on a specific task or can’t find a way to execute a particular job, contact our support team via LiveChat or [email protected] – we’re here to help 24/7.