Category: SMS campaign creation and management

  • SMS character limits and message segmentation

    This guide explains how SMS character limits and message segmentation work in Sender, and how they affect your campaigns and credit usage.

    Where to Find This Feature

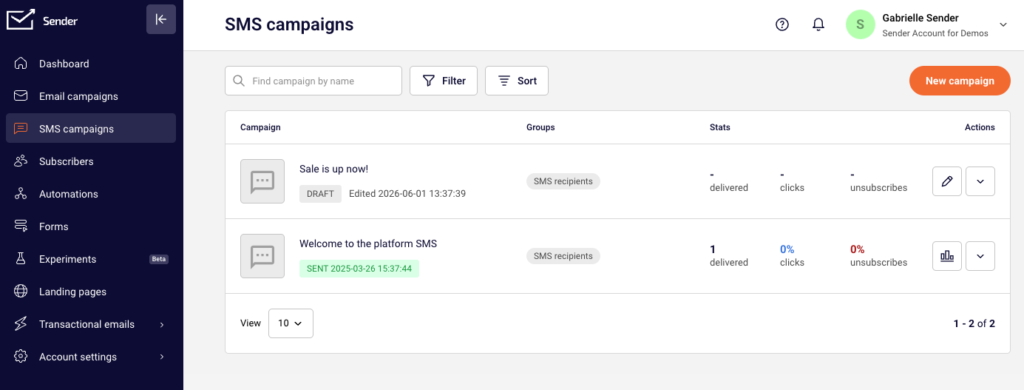
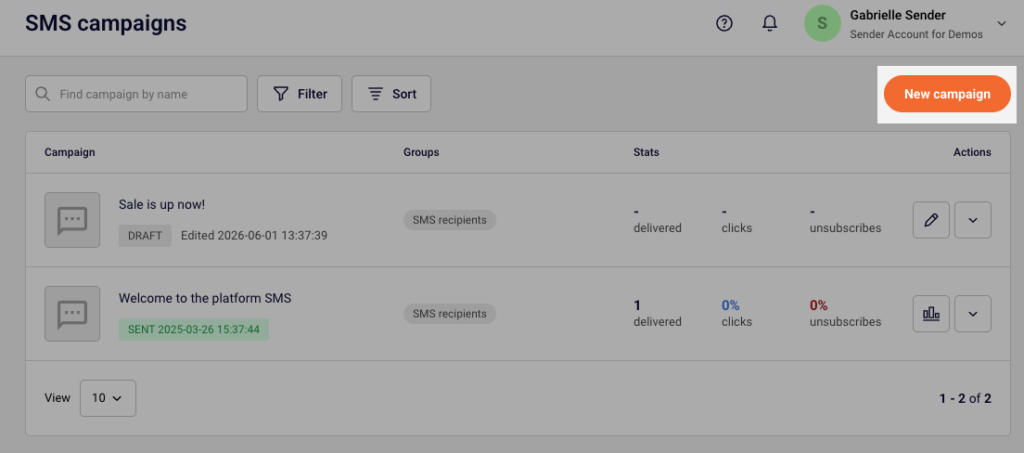
    In the Sender dashboard, go to: SMS campaigns

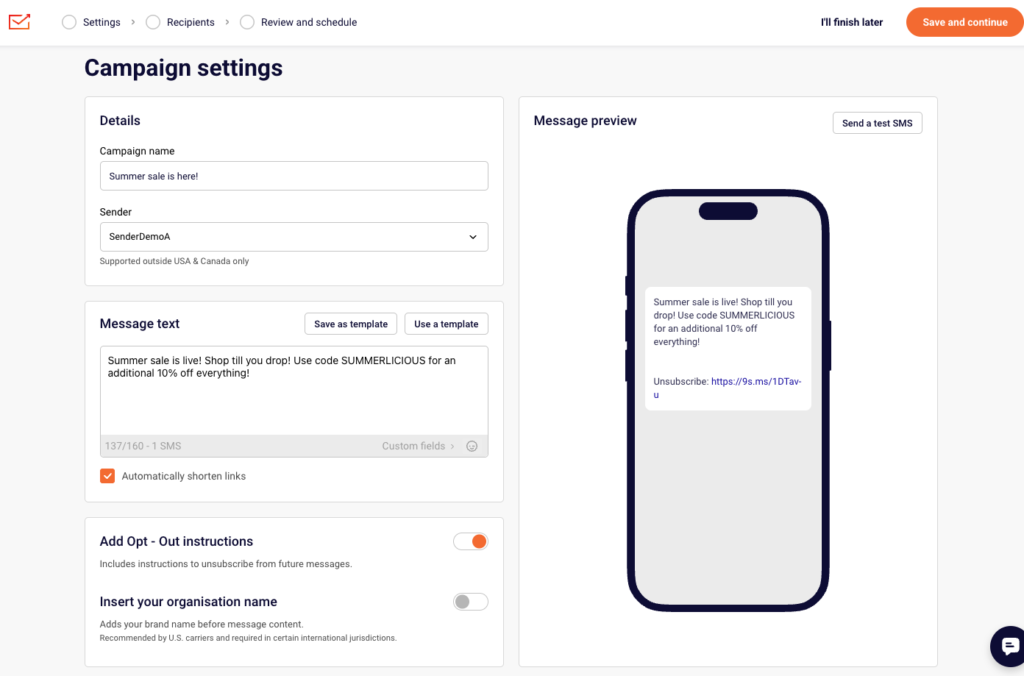
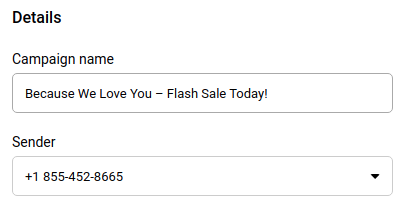
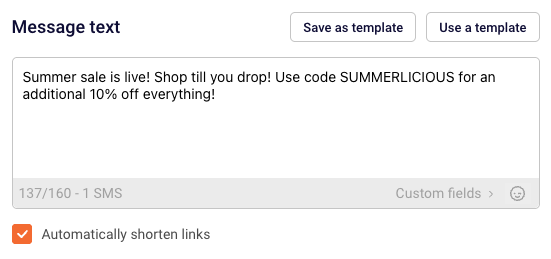
    Click New campaign to open the Campaign settings page. The Message text section displays a character counter below the text area in the format X/160 - 1 SMS. This counter updates in real time as you type and reflects the current encoding mode, character count, segment limit, and total number of SMS segments your message will use.

    Steps to Understand and Manage SMS Character Limits

    Step 1 — Check the character counter while composing your message

    In the Message text field, begin typing your SMS content. The counter below the text area displays your current character count, the per-segment limit, and the number of SMS segments. For standard text, it shows a format like 24/160 - 1 SMS. If your message stays within 160 characters using GSM-7 encoding (standard letters, numbers, and common punctuation), it sends as a single SMS segment and uses one credit.

    Step 2 — Monitor how the counter changes for longer messages

    When your message exceeds 160 characters, the counter automatically adjusts to show multi-segment values. For example, it may display 82/153 - 2 SMS. The per-segment limit drops from 160 to 153 because 7 characters in each segment are reserved for concatenation headers that allow the recipient's device to reassemble the full message. Each additional segment of up to 153 characters adds one more SMS credit to the total cost of that message.

    Step 3 — Watch for Unicode encoding when using emojis or special characters

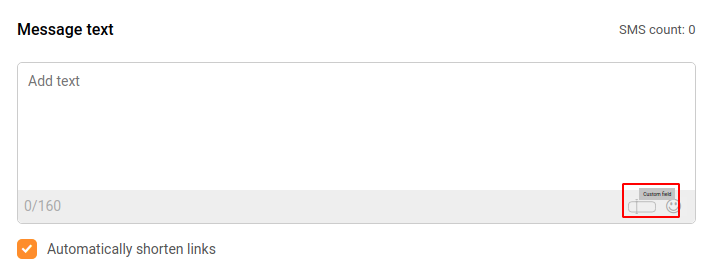
    If you add an emoji from the emoji picker (the smiley icon beside Custom fields) or type special characters outside the GSM-7 character set, the encoding switches to Unicode. The counter changes to reflect the reduced limit — for example, 23/70 - 1 SMS. A single Unicode SMS segment supports only 70 characters. If a Unicode message exceeds 70 characters, it splits into segments of 67 characters each (3 characters per segment are used for concatenation headers).

    Step 4 — Account for opt-out text and organisation name in your character count

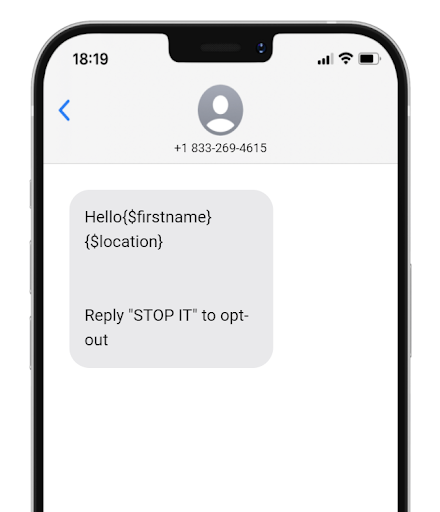
    Enabling Add Opt – Out instructions appends "Reply STOP to optout" to your message, and enabling Insert your organisation name prepends your brand name before the message content. Both options add characters that count toward the segment limit. The character counter updates automatically when you toggle either option. Check the counter after enabling these settings to confirm your message still fits within your intended number of segments.

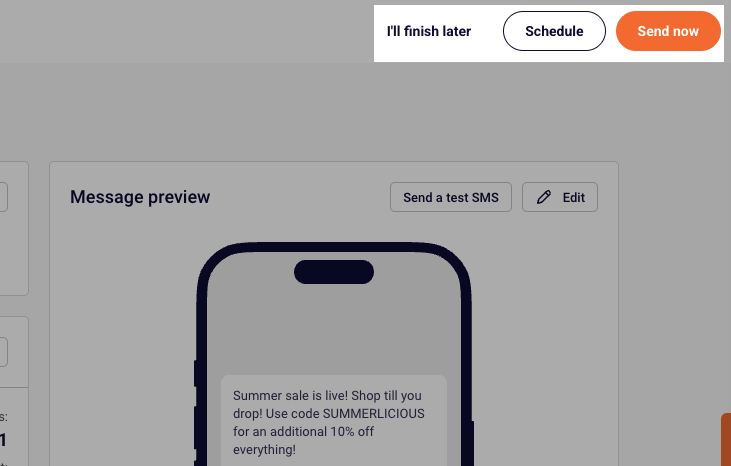
    Step 5 — Preview and test before sending

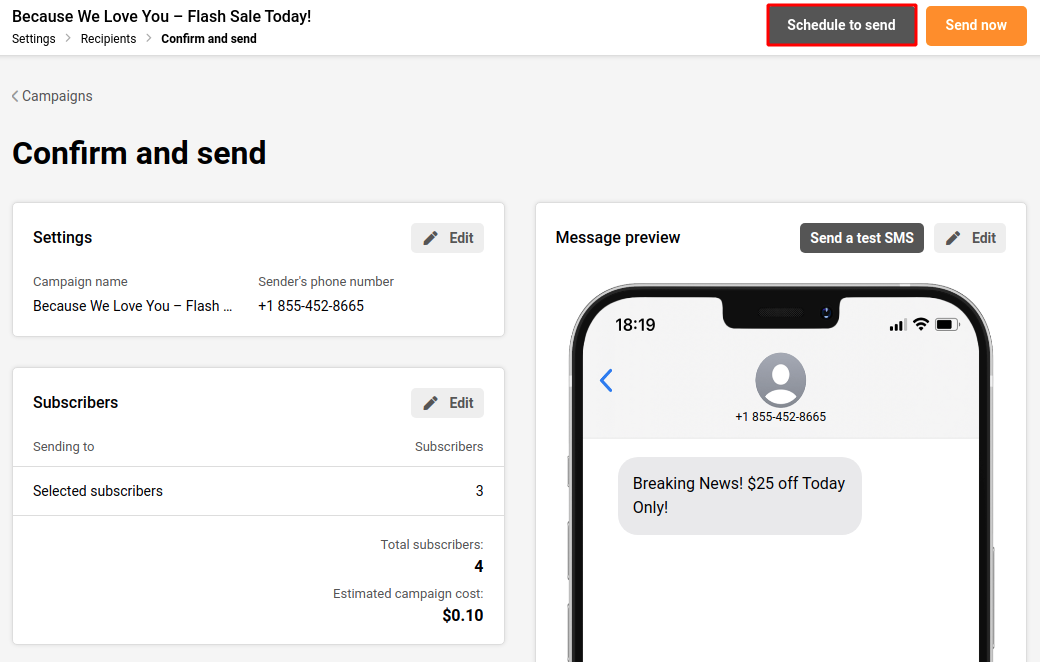
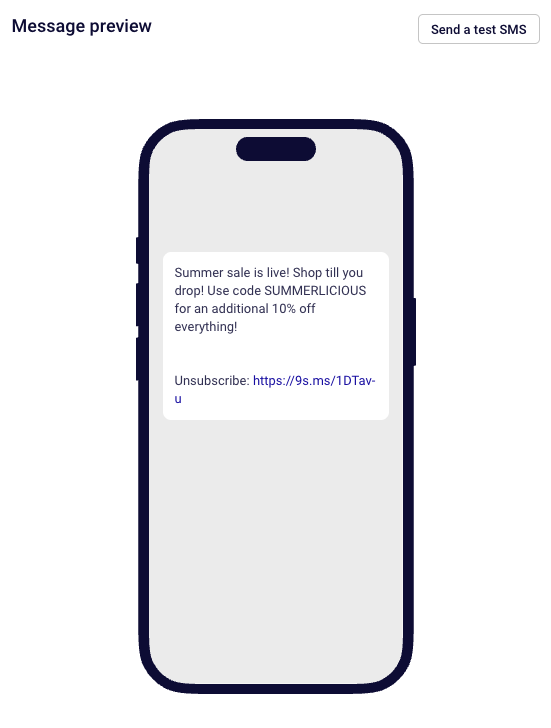
    The Message preview panel on the right side of the Campaign settings page shows how your message appears on a device, including any appended opt-out text or prepended organisation name. Click Send a test SMS to deliver the message to a phone number and verify its content, length, and segmentation before sending to your full audience.

    Message Writing Guide

    GSM-7 character limit — A single SMS segment supports up to 160 characters when using standard GSM-7 encoding. GSM-7 includes Latin letters, digits, and common punctuation. Stay within this set to maximize the characters available per segment.

    Multi-segment messages (GSM-7) — Messages longer than 160 characters split into segments of 153 characters each. The remaining 7 characters per segment are used for concatenation headers so the recipient's phone can reassemble the full message in order.

    Unicode encoding — Using emojis, accented characters outside GSM-7, or characters from non-Latin scripts switches the message to Unicode encoding. A single Unicode segment holds 70 characters. Multi-segment Unicode messages use 67 characters per segment, with 3 characters reserved for concatenation headers.

    Personalization variables — Click Custom fields below the Message text area to insert variables like {{ firstname }}, {{ lastname }}, or {{ email }}. The variable tag itself (e.g., {{ firstname }}) counts toward the character limit at its full tag length, but the actual characters used at send time depend on each subscriber's data.

    Opt-out text — Enabling Add Opt – Out instructions appends unsubscribe text to every message. This text counts toward your character and segment totals, so factor it into your message length when composing.

    Organisation name — Enabling Insert your organisation name prepends your brand name before the message body. These additional characters also count toward the segment limit shown in the counter.

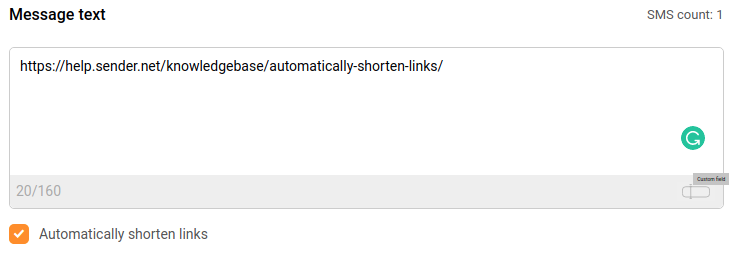
    Link shortening — The Automatically shorten links checkbox (enabled by default) replaces full URLs with shortened versions. Shortened links use fewer characters, which helps keep your message within a single segment.

    Campaign Management Actions

    Edit a draft campaign — From the SMS campaign list, click the edit icon (pencil) next to a draft campaign to reopen it in the Campaign settings editor. You can modify the message text, recipients, and scheduling before sending.

    Duplicate a campaign — Open the actions menu (dropdown arrow) next to a campaign and select Duplicate. A copy is created in Draft status with the same content and settings, ready to edit and send as a new campaign.

    Delete a campaign — Open the actions menu next to a campaign and select Delete. This removes the campaign from your list. Deleted campaigns cannot be recovered.

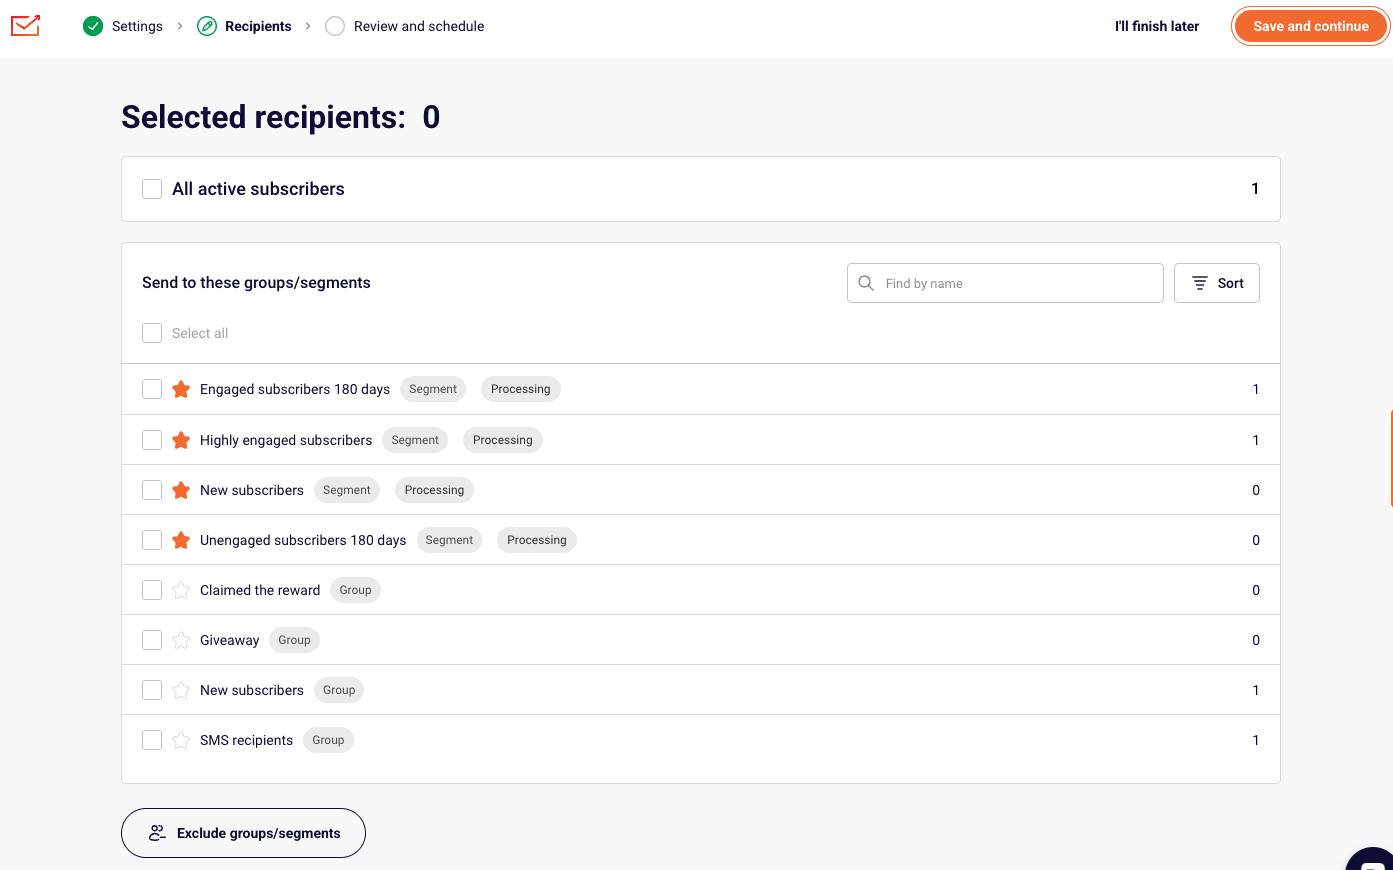
    Save as draft — Click I'll finish later at any point during the campaign creation workflow to save your progress and return to it later. The campaign appears in the SMS campaign list with a Draft status.

    Campaign Tips

    Keep messages under 160 characters — Staying within the single-segment GSM-7 limit of 160 characters uses only one SMS credit per recipient and avoids segmentation.

    Avoid emojis when character count matters — A single emoji switches the entire message to Unicode encoding, reducing the limit from 160 to 70 characters per segment. Remove emojis if you need more space for text content.

    Test personalization variables — Variable tags like {{ firstname }} may expand to different lengths for each subscriber. Use Send a test SMS to verify the message reads correctly and does not split unexpectedly when real subscriber data replaces the tags.

    Factor in opt-out and organisation text — If you enable Add Opt – Out instructions or Insert your organisation name, check the updated character counter before finalizing. These additions may push your message into an additional segment.

    Use templates for recurring messages — Click Save as template after writing a message you plan to reuse. When creating a new campaign, click Use a template to load a saved message and avoid rewriting content from scratch.

    Common Issues

    Message splits into more segments than expected → This typically happens when emojis or special characters trigger Unicode encoding, which reduces the per-segment limit from 160 to 70 characters. Remove non-GSM-7 characters and check the counter to confirm the encoding returns to X/160.

    Character counter shows a higher number than the visible text → Enabled toggles for Add Opt – Out instructions or Insert your organisation name add hidden characters that count toward the total. Disable these toggles temporarily to see the count for your message text alone.

    Personalization variables increase segment count → Variable tags like {{ firstname }} occupy a fixed number of characters in the editor, but the actual subscriber data inserted at send time may be longer. If a subscriber's first name is 15 characters, it replaces the tag and may push the message into an additional segment. Write shorter messages to leave room for variable expansion.

    Message preview does not match expected output → The Message preview panel reflects your current message text, opt-out instructions, and organisation name in real time. If the preview looks incorrect, verify that the correct toggles are enabled and that no unintended characters were pasted into the Message text field.

    FAQs

    How many characters can an SMS message contain? A single SMS segment supports 160 characters using standard GSM-7 encoding. If your message exceeds 160 characters, it is split into multiple segments of 153 characters each (7 characters per segment are used for concatenation headers). Using emojis or special characters switches to Unicode encoding, which reduces the limit to 70 characters per single segment or 67 characters per segment in multi-segment messages.

    How does the character counter work in Sender? The counter below the Message text field displays the format characters/limit - segments SMS. For a standard message, it shows values like 24/160 - 1 SMS. When the message exceeds the single-segment limit, it updates to reflect the multi-segment per-segment limit, such as 82/153 - 2 SMS. If Unicode characters are detected, the limit adjusts to X/70 for a single segment.

    Can I personalize SMS messages with subscriber data? Yes. Click Custom fields below the Message text area to open the field selector. Choose from available fields such as First name, Last name, Email, Phone number, or Birthday. Sender inserts the variable tag (e.g., {{ firstname }}) into your message and replaces it with the subscriber's actual data at send time.

    Does opt-out text count toward my character limit? Yes. Enabling Add Opt – Out instructions appends text such as "Reply STOP to optout" to your message. These characters are included in the counter and count toward your segment total. Check the counter after enabling this toggle to verify your message still fits within the intended number of segments.

    How are SMS credits charged for multi-segment messages? Each SMS segment counts as one credit. A message under 160 characters (GSM-7) uses one credit. A message that splits into two segments uses two credits per recipient. Unicode messages use more credits because the lower character limit per segment means more segments are needed to deliver the same amount of text.

    Can I duplicate an existing SMS campaign? Yes. From the SMS campaign list, open the actions menu (dropdown arrow) next to the campaign and select Duplicate. A copy is created in Draft status with the same content and settings, ready to edit and send.

  • SMS Automation

    This guide explains how to create and configure SMS automation workflows in Sender so that SMS messages are sent automatically when subscribers meet specific trigger conditions.

    Where to Find This Feature

    In the Sender dashboard, go to: Automations (left sidebar)

    You will see the Automations list page displaying all existing workflows. Each workflow shows its name, status badge (Draft or Active), last edited date, and stats columns for emails sent, opens, and clicks. At the top of the page, use the Find workflow by name search bar to locate a specific workflow, or click Filter to show only Active or Draft workflows. Click Create new workflow in the top-right corner to start building a new automation.

    Steps to Create an SMS Automation Workflow

    Step 1 — Choose a Trigger

    Click Create new workflow. You can select a prebuilt template by browsing the template gallery, or click Create from scratch to choose a trigger manually. Select the event that starts the workflow, such as Subscriber joins a group, A cart is abandoned, A date, or A product is purchased. Enter a name in the Name your workflow dialog and click Create. The workflow builder opens with your selected trigger displayed on the canvas and the Trigger Setup panel on the right. Configure the trigger settings, such as selecting a subscriber group from the Select group dropdown, and optionally enable the Repeat workflow toggle to allow the automation to run again when the same subscriber reactivates the trigger. Click Save.

    Step 2 — Add and Configure an SMS Step

    Click the + icon below the trigger on the canvas to open the Add a new step menu. Select SMS. The SMS Setup panel opens on the right side. Enter a descriptive label in the Step name field, then choose a registered sender from the Sender dropdown. Type your message in the Message text field — the character counter below displays your usage in the format 35/160 - 1 SMS. Click Custom fields to insert personalization variables such as First name, Last name, Email, Phone number, or Birthday. The checkboxes below the message field let you enable Automatically shorten links, Add Opt – Out instructions, and Insert your organisation name. Click Send a test SMS to verify your message before activating, or click Use a template to load a prewritten message from the template library. Click Save to confirm the step.

    Step 3 — Add Delays, Conditions, or Additional Steps

    Click the + icon between or after any step on the canvas to insert additional steps. Select Delay to pause the workflow before the next action — in the Delay Setup panel, choose Time delay, Specific date & time, or Custom date field and set the duration using the Of field and the Select time period unit dropdown (options include Minutes, Hours, Days, Weeks, and Months). Select Condition to create a branching path with Yes and No outcomes based on criteria like Subscriber details, Workflow SMS activity, Group membership, or Segments. Select Action to perform subscriber management tasks such as Move subscriber to another group, Mark subscriber as unsubscribed, or Send webhook. You can also add a Split step to divide traffic between different paths. Add as many steps as your workflow requires.

    Step 4 — Review and Activate the Workflow

    Check the Completion indicator in the top-right corner of the builder, which shows how many steps are fully configured (for example, 4/4). Ensure every step displays a completed configuration — unconfigured steps show labels like Define delay or Define action and must be set up before activating. The Status badge next to the workflow name shows Draft until you activate. When all steps are configured, return to the Automations list, open the actions menu (dropdown arrow) next to your workflow, and click Activate. The workflow begins running automatically when subscribers meet the trigger condition.

    Message Writing Guide

    Character limits — A single SMS segment supports 160 characters using standard GSM-7 encoding. The character counter below the Message text field displays your current usage and segment count in real time (for example, 35/160 - 1 SMS). Keep messages concise to minimize credit usage.

    Message segmentation — If your message exceeds 160 characters, it splits into multiple segments of 153 characters each because 7 characters per segment are reserved for concatenation headers. Each segment counts as one SMS credit, so longer messages cost more.

    Personalization variables — Click Custom fields below the Message text field to insert subscriber data such as First name, Last name, Email, Phone number, or Birthday. Sender replaces these variables with the subscriber's actual data when the SMS sends.

    Opt-out text — Enable the Add Opt – Out instructions checkbox to automatically append opt-out language (such as "Reply STOP to optout") to your message. This text counts toward your character limit, so factor it into your message length.

    Unicode and special characters — Using emojis or non-GSM characters switches encoding to Unicode, which reduces the segment limit to 70 characters per segment (67 for concatenated messages). Avoid special characters when possible to keep credit costs low.

    Organisation name — Enable the Insert your organisation name checkbox to prepend your business name to the message. This helps recipients identify the sender immediately.

    Campaign Management Actions

    Editing a draft workflow — From the Automations list, click the edit icon (pencil) next to a Draft workflow to open the builder. Modify any trigger, SMS step, delay, condition, or action, then click Save on each updated step.

    Duplicating a workflow — Click the dropdown arrow next to any workflow and select Duplicate. A copy is created in Draft status with the same steps and configuration, ready to modify and activate independently.

    Renaming a workflow — Click the dropdown arrow next to the workflow and select Rename. Enter the new name in the dialog and confirm. You can also click the pencil icon next to the workflow name inside the builder.

    Activating a workflow — Click the dropdown arrow and select Activate to start the automation. The status changes from Draft to Active and the workflow begins processing subscribers who meet the trigger condition.

    Deleting a workflow — Click the dropdown arrow and select Delete. This action removes the workflow permanently. Only delete workflows you no longer need.

    Filtering workflows — Click Filter on the Automations list page and select All, Active, or Draft to narrow the list by workflow status.

    Campaign Tips

    Test before activating — Always click Send a test SMS in the SMS Setup panel to preview your message on a real device before activating the workflow. This confirms personalization variables resolve correctly and character counts are accurate.

    Use delays strategically — Insert Delay steps between trigger events and SMS sends to control timing. For example, set a 5-minute delay after a subscriber joins a group before sending a welcome SMS.

    Keep messages within one segment — Aim to keep SMS messages under 160 characters (including opt-out text and organisation name) to use a single credit per recipient and reduce costs.

    Use conditions to target the right subscribers — Add a Condition step with criteria such as Group membership or Subscriber details before an SMS step to ensure only qualifying subscribers receive the message.

    Name your steps clearly — Enter descriptive labels in the Step name field for every SMS, delay, and action step. This makes complex workflows easier to manage and troubleshoot later.

    Common Issues

    SMS step shows "The list is empty" for Sender → Your account has no registered sender IDs configured for SMS. Go to your SMS settings to add and verify a sender ID before configuring SMS automation steps.

    Character counter shows more segments than expected → Special characters or emojis in your message triggered Unicode encoding, which reduces the per-segment limit to 70 characters. Remove non-GSM characters to return to the standard 160-character limit.

    Completion indicator does not reach full count → One or more steps in the workflow are not fully configured. Look for steps labeled Define delay, Define action, or Define condition on the canvas, click them, complete their setup in the right panel, and click Save.

    Workflow is not sending messages after activation → Verify the trigger condition is met by subscribers, confirm the Select group field is set in the Trigger Setup, and check that the SMS step has a valid sender and message text saved.

    Custom fields insert blank values → The subscriber record is missing data for the selected field. Ensure subscribers have the relevant field populated (for example, First name) before they enter the workflow.

    FAQs

    What triggers can start an SMS automation workflow?

    Sender offers multiple trigger types including A date, An anniversary of a date, Subscriber joins a group, Subscriber is removed from a group, A link is clicked, A cart is abandoned, A product is purchased, An order is fulfilled, Subscriber unsubscribed, Subscriber field updated, Subscriber status changed, and Custom event is triggered. Select the trigger that matches the event you want to automate.

    What step types can I add to an SMS automation workflow?

    The workflow builder supports six step types: Condition (branching logic with Yes/No paths), Delay (timed pause), Email (send an email), SMS (send a text message), Action (subscriber management such as moving groups or updating fields), and Split (divide traffic between paths).

    How do I personalize an SMS message in a workflow?

    In the SMS Setup panel, click Custom fields below the Message text field. A dialog appears with available fields such as First name, Last name, Email, Phone number, and Birthday. Click a field to insert it into your message. Sender replaces the variable with the subscriber's actual data at send time.

    Can I use SMS templates in automation workflows?

    Yes. In the SMS Setup panel, click Use a template to open the SMS templates library. Browse categories such as Promotional, Holiday, Feedback, or Saved templates, and select a template to load it into the Message text field for further editing.

    How are SMS credits charged in automations?

    Each SMS segment sent by the automation counts as one credit. A message under 160 characters (GSM-7 encoding) uses one credit per recipient. Longer messages split into multiple segments, and each segment uses one credit. Unicode messages (with emojis or special characters) have a lower per-segment limit of 70 characters, which may result in more segments and higher credit usage.

    Can I add conditions to send SMS only to certain subscribers?

    Yes. Add a Condition step before the SMS step and select a condition type such as Subscriber details, Group membership, Workflow SMS activity, or Segments. The condition creates Yes and No branching paths, and you can place the SMS step on the appropriate path so only qualifying subscribers receive the message.

    What is the Repeat workflow option?

    The Repeat workflow toggle in the Trigger Setup panel allows the same subscriber to enter the workflow again if they reactivate the trigger condition. For example, if the trigger is A cart is abandoned, enabling repeat allows the workflow to run each time that subscriber abandons a cart.

  • Automatically shorten SMS links

    The “Automatically shorten links” option helps you to save on symbols count. For example, there is this link with a lot of characters:

    When you enable the “Automatically shorten links,” the system automatically generates a link like this:

    That’s it!

    If you got stuck on a specific task or can’t find a way to execute a particular job, contact our support team via LiveChat or [email protected] – we’re here to help 24/7.

  • Add dynamic text to SMS

    The dynamic text can be used with any custom field: first name, surname, order number, location, or any other information that has been collected about subscribers in the custom fields section.

    Here is how the dynamic text looks like:

    Here is a tutorial on how to insert the dynamic text:

    While creating a new SMS campaign, there is a tiny custom field icon in the bottom right corner of the “Message text” box. Once it is clicked, all custom fields appear. Then the desired custom field can be selected.

    Here’s a short video guide on how it’s done:

    That’s it!

    If you got stuck on a specific task or can’t find a way to execute a particular job, contact our support team via LiveChat or [email protected] – we’re here to help 24/7.

  • Schedule an SMS campaign

    The SMS campaign scheduling option appears at the last step of the campaign creation. Once everything with the SMS campaign is done, click on the “Save & Continue” button, select your desired subscriber list, click continue to get into the final step.

    Click on “Schedule to send”

    When the schedule button is clicked, a calendar appears, where a date and time can be picked for when the SMS should be delivered.

    Scheduled SMS appears in the SMS campaign section together with the delivery date and time.


    If you got stuck on a specific task or can’t find a way to execute a particular job, contact our support team via LiveChat or [email protected] – we’re here to help 24/7.

  • Manage SMS campaigns

    Creating the SMS campaign

    Once the SMS campaign section is opened, the campaign library can be accessed. It contains scheduled and sent campaigns as well as their drafts.

    Click the “New campaign” button to start creating a new SMS campaign.

    The first stage of creating an SMS campaign:

    Moving from one stage to another will not cause any loss to the progress that has been made. Therefore, if the Campaign name needs to be changed, simply press on the “Settings” stage and go back to change it:

    Settings is where the editing of the SMS campaign is done. This stage contains:

    Details (example):

    Message text (example):

    The preview of the SMS campaign and the option to Add Opt-Out instructions:

    Once everything is completed in the Settings stage, the “Save and continue” button needs to be clicked to save the progress and move to the next stage – Recipients. Here recipients can be selected by choosing specific Groups or Segments that have been created:

    After the recipients (subscribers) are selected, the last thing that is left is to “Confirm and send”. Here the estimated cost of the campaign is displayed together with the total number of subscribers that has been selected and the settings that have been set:

    Please note: our SMS pricing is character-based. Once you exceed the 160-character limit, the message is billed as two SMS, if you exceed two SMS character limit, the SMS will be charged as two SMS and so on.

    If you include custom fields into the SMS, final price might be more than the estimated one due to various length of customer data that will be included instead of the custom field code.

    If you include non latin characters, it will drastically change the number of characters used in the SMS campaign.

    At the last stage, the SMS campaign can be sent as a test SMS, scheduled to be sent later or sent immediately. You can also click “I’ll finish later,” and all of your progress will be saved.


    If you are stuck on a specific task or can’t find a way to execute a particular job, contact our support team via LiveChat or [email protected] – we’re here to help 24/7.