Category: General Integrations

  • Common API errors

    This guide helps you diagnose and resolve the most frequently encountered HTTP error responses when using Sender’s REST API.

    Symptoms

    Your API request returns a 4xx or 5xx HTTP status code instead of the expected 200 or 201 response.

    The response body contains a “success”: false value or a “message” field describing the failure.

    The errors object in the response body lists one or more fields that failed validation.

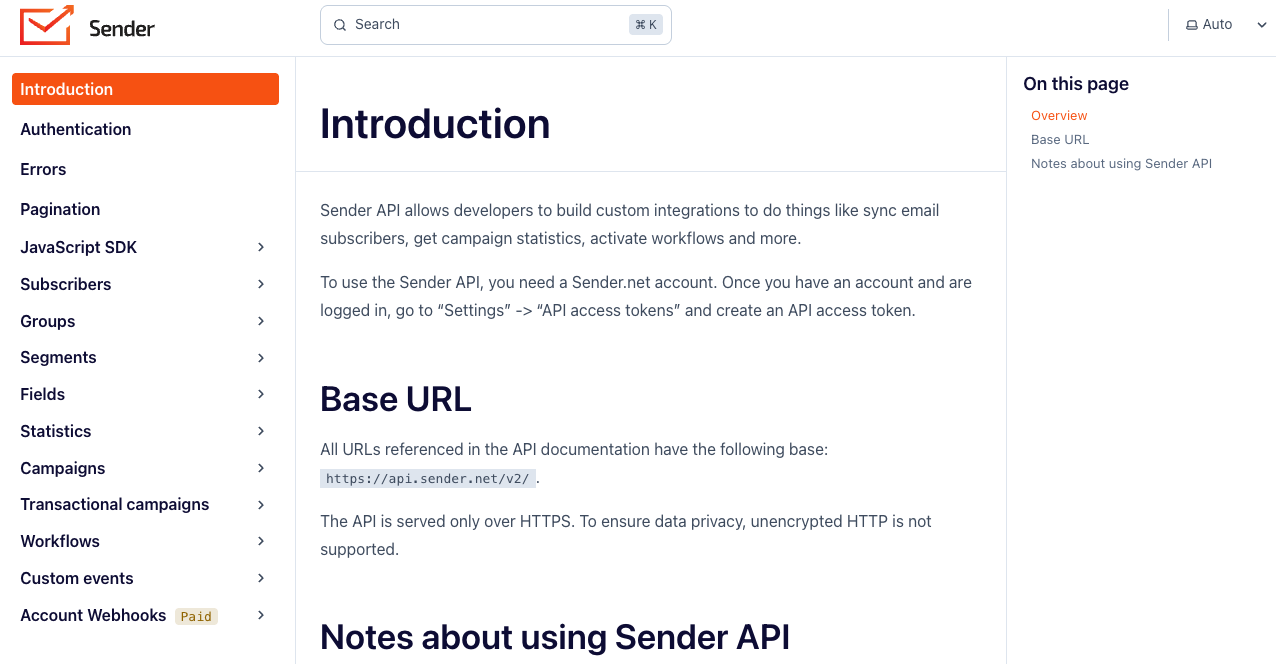
    Your application receives no response or a timeout when calling https://api.sender.net/v2/ endpoints.

    Possible Causes

    Missing or invalid API token — The Authorization: Bearer {token} header is absent, malformed, or contains a revoked token, resulting in a 401 Unauthorized response.

    Malformed request body or invalid parameters — Required fields are missing or contain incorrect data types, causing a 400 Bad Request or 422 Bad request parameters response with details in the message or errors field.

    Rate limit exceeded — Too many requests were sent in a short period, triggering a 429 Too Many Requests response with rate limit details in the X-RateLimit-Limit, X-RateLimit-Remaining, and Retry-After headers.

    Incorrect endpoint or resource ID — The request targets a nonexistent URL or references a resource ID that does not exist, returning a 404 Not Found response.

    Server-side issue — A 5xx response indicates a temporary problem on Sender’s servers, not an issue with your request.

    Steps to Resolve

    Step 1 — Fix authentication errors (401 Unauthorized)

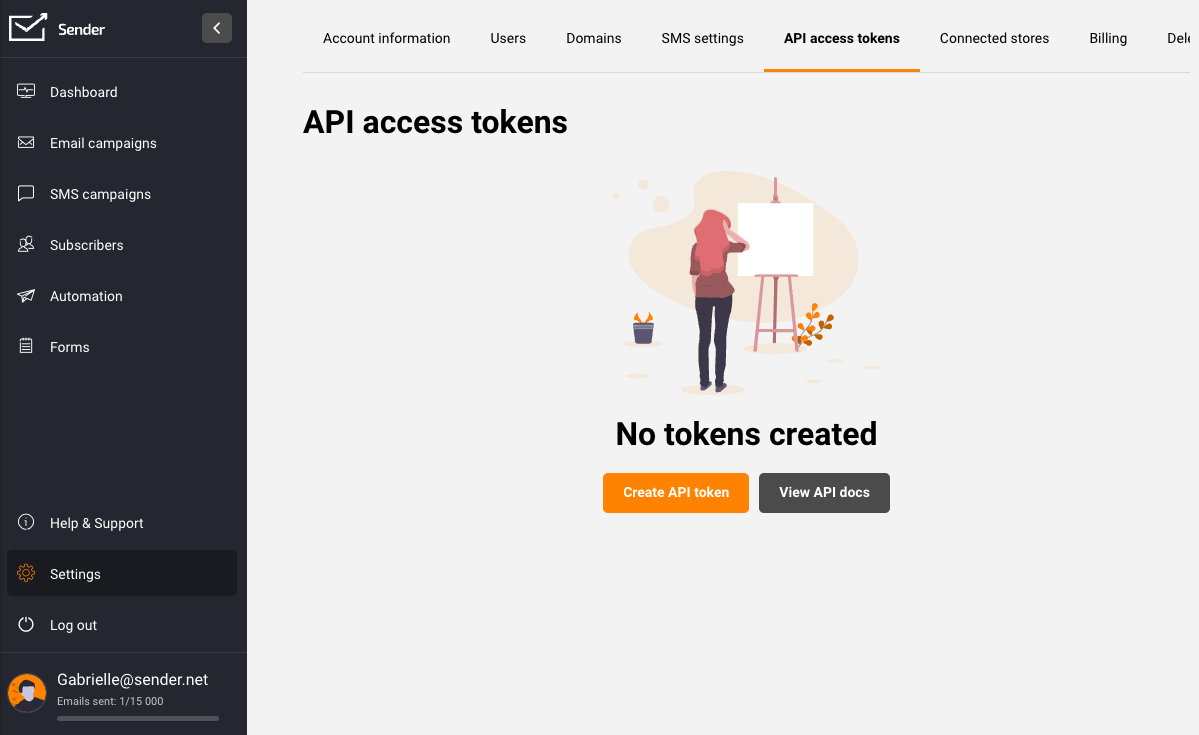
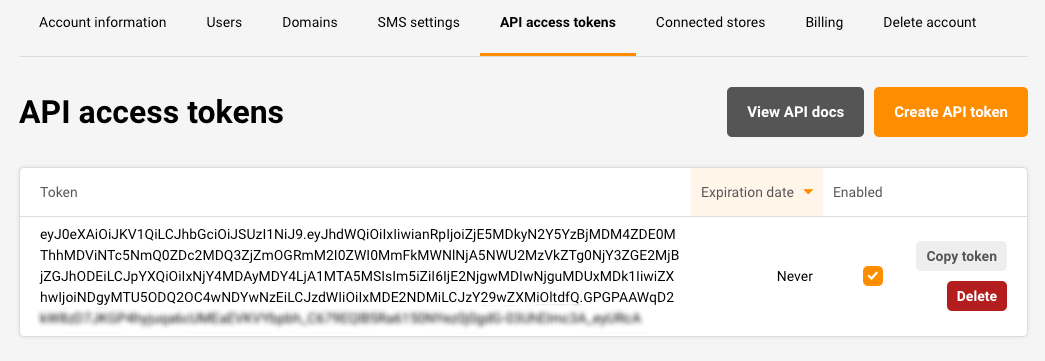
    If the API returns 401, verify that your request includes the Authorization header in the format Authorization: Bearer {token}. Confirm that the token has not been revoked by navigating to Account settings → API access tokens in your Sender dashboard. If the token is missing from the list, generate a new one and update the header in your application. Also verify that the request is sent over HTTPS — plain HTTP requests will fail.

    Step 2 — Resolve validation errors (400 and 422)

    For a 400 response, inspect the message field in the response body to identify the issue. For a 422 response, inspect the errors object — each key corresponds to a field name, and its value describes what is invalid. For example, “email”: [“Required value, email”] means the email field was missing or not a valid email address. Correct the flagged fields in your request body and ensure required parameters like email for POST /v2/subscribers or title for POST /v2/groups are included.

    Step 3 — Handle rate limiting (429 Too Many Requests)

    When you receive a 429 response, read the Retry-After header to determine how many seconds to wait before retrying. Check X-RateLimit-Limit for your maximum requests per minute and X-RateLimit-Remaining for how many you have left. Implement exponential backoff in your code so that consecutive rate limit hits progressively increase the delay between retries. Avoid sending bulk requests in tight loops.

    Step 4 — Correct endpoint and resource errors (404 Not Found)

    A 404 response means the requested resource does not exist. Verify that the endpoint URL matches the documented paths — for example, https://api.sender.net/v2/subscribers not https://api.sender.net/v2/subscriber. If the endpoint includes a resource ID such as POST /v2/campaigns/{id}/send, confirm the {id} value corresponds to an existing resource in your account. Check for typos and ensure you are using the v2 base URL.

    Step 5 — Address server errors (5xx)

    A 5xx response indicates a server-side issue on Sender’s end. Wait 30–60 seconds and retry the same request. If the error persists across multiple retries, contact Sender support at [email protected] with the full request details, response body, and timestamps. Do not modify your request — the issue is not caused by your input.

    Error Response Reference

    400 — Bad Request — The request structure is valid but contains a logical error. The response body includes “success”: false and a “message” field explaining the issue, such as “You must activate workflow first”. Review the message value and correct the precondition or parameter it references.

    401 — Unauthorized — Authentication failed. The Authorization: Bearer {token} header is missing, malformed, or contains an invalid token. Verify the token exists in Account settings → API access tokens and that the header format is correct.

    404 — Not Found — The requested resource or endpoint does not exist. Verify the URL path and any resource IDs included in the request. Ensure you are using the https://api.sender.net/v2/ base URL.

    422 — Bad Request Parameters — One or more parameters failed validation. The response body contains “message”: “The given data was invalid.” and an errors object where each key is a field name and each value is an array of validation messages. Fix the fields listed in the errors object and resend.

    429 — Too Many Requests — The rate limit has been exceeded. The response includes X-RateLimit-Limit, X-RateLimit-Remaining, X-RateLimit-Reset, and Retry-After headers. Wait the number of seconds specified in Retry-After before sending another request.

    5xx — Server Error — A server-side error occurred on Sender’s infrastructure. Retry the request after a short delay. If 5xx errors persist, contact Sender support with the request method, endpoint, and response timestamps.

    How to Verify the Fix

    After applying the fix, resend the original request and confirm you receive a 200 or 201 status code. Inspect the response body for “success”: true and the expected data object. If the request created or updated a resource (such as a subscriber or group), navigate to the corresponding section in your Sender dashboard to confirm the change is reflected. If the error persists after following the resolution steps, contact Sender support with the request details and full response body.

    Debugging Tips

    Log full responses — Always log the HTTP status code, response headers, and the complete response body for every API call. This captures the message and errors fields needed for diagnosis.

    Validate headers before sending — Confirm every request includes Authorization: Bearer {token}, Content-Type: application/json, and Accept: application/json. Missing any of these headers is a common source of 401 and 400 errors.

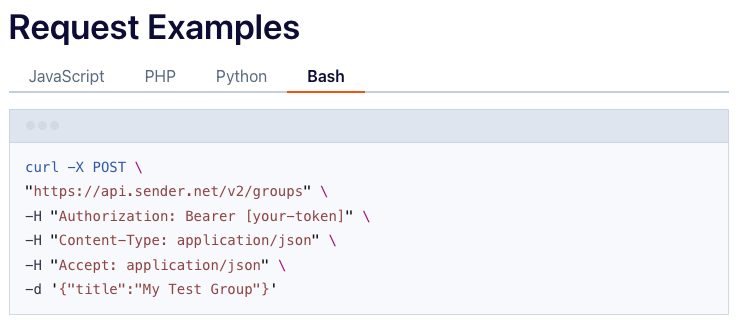
    Test with cURL first — Reproduce the failing request using curl on the command line. This isolates whether the issue is in your application code or the request itself.

    Monitor rate limit headers — Track X-RateLimit-Remaining in successful responses to anticipate 429 errors before they occur. Throttle your requests when the remaining count approaches zero.

    Use HTTPS exclusively — All requests to https://api.sender.net/v2/ must use HTTPS. Requests sent over plain HTTP will fail silently or return unexpected errors.

    Related Issues

    Subscriber creation returns 422 with field-specific errors → The email field is either missing or not a valid email address. Inspect the errors object in the response to identify which parameter failed and correct its value.

    Campaign send returns 400 with a precondition message → The campaign may not be fully configured. Check the message field for details such as “You must activate workflow first” and complete the required setup before retrying the POST /v2/campaigns/{id}/send request.

    Pagination requests return empty data arrays → The requested page may exceed the total number of available pages. Check the meta.last_page value in previous responses and ensure your ?page parameter does not exceed it.

    FAQs

    How do I find the specific field that caused a 422 error?

    Inspect the errors object in the response body. Each key in the object corresponds to a field name, and the value is an array describing what is invalid. For example, “email”: [“Required value, email”] means the email field was missing or malformed.

    My API token was working yesterday but now returns 401. What happened?

    The token may have been revoked or deleted. Go to Account settings → API access tokens and verify the token still exists. If not, create a new one and update your application’s Authorization header.

    How long should I wait after a 429 rate limit error?

    Check the Retry-After header in the response. It specifies the number of seconds to wait before retrying. Implement exponential backoff in your code so that consecutive rate limit hits increase the wait time progressively.

    The API returns 200 but the data in Sender does not update. Why?

    A 200 response confirms the request was accepted, but the data may take a moment to propagate. Refresh the relevant page in your Sender dashboard. If the data still does not appear, verify that the request body contained the correct field values and that you targeted the right resource ID.

    I keep getting 500 Internal Server Error. Is it my fault?

    A 500 error typically indicates a server-side issue on Sender’s end, not a problem with your request. Retry the request after a short wait. If 500 errors persist across multiple requests, contact Sender support with the request details and timestamps.

  • Webhooks explained

    This guide explains how to configure webhooks in Sender so you can receive real-time HTTP notifications when subscriber, group, campaign, and bounce events occur in your account.

    Prerequisites

    • An active Sender account
    • A publicly accessible HTTPS endpoint that can receive POST requests
    • Access to Account settings → Webhooks in the Sender dashboard
    • Server-side code capable of parsing JSON payloads and validating signatures

    Where to Find This Setting

    In the Sender dashboard, go to: Account settings → Webhooks

    On this page you will see a table listing all existing webhooks with the columns Topic, Total deliveries, Total failures, and Response time. An Add webhook button is located in the top-right corner. Below the webhook table, the Signing secret section displays your masked secret with options to reveal, copy, or rotate it.

    Steps to Configure a Webhook

    Step 1 — Open the Webhooks page

    In the left sidebar, click Account settings to expand the submenu, then click Webhooks. You will see the webhooks table and the Signing secret section. If you have no webhooks yet, the table will be empty.

    Step 2 — Add a new webhook

    Click the Add webhook button in the top-right corner. A dialog titled Add webhook will appear with two fields: URL and Topic.

    Step 3 — Enter your endpoint URL

    In the URL field, enter the full HTTPS address of your receiving endpoint — for example, https://yourdomain.com/webhooks/sender. This is the address Sender will send POST requests to when the selected event occurs.

    Step 4 — Select a topic

    Click the Topic dropdown and choose the event type you want to subscribe to. Available topics include subscribers/new, groups/new-subscriber, groups/unsubscribed, subscribers/updated, subscribers/unsubscribed, campaigns/new, groups/new, and bounces/new. Each webhook supports one topic, so create additional webhooks if you need to track multiple event types.

    Step 5 — Save the webhook

    Click Add to create the webhook. The dialog will close and the new webhook will appear in the table. Confirm the correct Topic and endpoint URL are displayed in the row.

    Step 6 — Copy your signing secret

    In the Signing secret section below the webhook table, click the copy icon next to the masked secret to copy it to your clipboard. Store this value securely in your server configuration — you will use it to verify that incoming payloads originate from Sender.

    Step 7 — Verify delivery on your endpoint

    Trigger the event you subscribed to — for example, add a new subscriber if you chose subscribers/new. Check your endpoint's incoming request log to confirm a POST request arrived from Sender. The Total deliveries counter in the webhooks table should increment, and Total failures should remain at 0.

    Event Types and Payload Reference

    subscribers/new — Fires when a new subscriber is added to your account. The payload includes subscriber details such as email address and the timestamp of creation.

    subscribers/updated — Fires when an existing subscriber's data is modified. The payload includes the updated subscriber fields and the timestamp of the change.

    subscribers/unsubscribed — Fires when a subscriber opts out globally. The payload includes the subscriber's email address and the unsubscribe timestamp.

    groups/new — Fires when a new subscriber group is created in your account. The payload includes the group name and creation timestamp.

    groups/new-subscriber — Fires when a subscriber is added to a specific group. The payload includes the subscriber's email address, the group identifier, and the timestamp.

    groups/unsubscribed — Fires when a subscriber is removed or unsubscribes from a specific group. The payload includes the subscriber's email, the group identifier, and the timestamp.

    campaigns/new — Fires when a new email campaign is created. The payload includes campaign details such as the campaign name and creation timestamp.

    bounces/new — Fires when a bounce event is recorded for a sent email. The payload includes the recipient email address, the bounce type, and the timestamp.

    Security and Verification

    Signing secret — Sender provides a unique Signing secret on the Webhooks page. Use this secret on your server to compute an HMAC hash of each incoming payload body and compare it against the signature included in the webhook request headers. If the values match, the payload is authentic.

    Rotate secret — If your signing secret is compromised, click Rotate secret on the Webhooks page to generate a new one. Update your server configuration with the new secret immediately, as the old secret will stop working once rotated.

    HTTPS only — Always use an HTTPS endpoint URL to ensure payloads are encrypted in transit. Sender's URL field accepts HTTPS addresses, and using plain HTTP exposes event data to interception.

    Webhook Tips

    One topic per webhook — Each webhook is bound to a single topic. To receive multiple event types at the same endpoint, create a separate webhook for each topic pointing to that URL.

    Return a 200 response promptly — Your endpoint should respond with a 2xx status code as quickly as possible. Perform heavy processing asynchronously after acknowledging receipt to avoid timeouts.

    Monitor the webhooks table — Check the Total failures and Response time columns on the Webhooks page regularly. A rising failure count indicates your endpoint is not responding correctly.

    Use View error logs for debugging — Click the dropdown arrow next to Pause on any webhook row and select View error logs to open the Webhook logs page. This page lists failed deliveries with the Date / time and Error code for each failure.

    Pause webhooks during maintenance — Click Pause on a webhook row to temporarily stop deliveries while your server is undergoing maintenance. This prevents failures from accumulating.

    Common Issues

    Webhook not appearing in the table → You may have closed the Add webhook dialog without clicking Add. Reopen the dialog, fill in the URL and Topic fields, and click Add.

    Total failures incrementing → Your endpoint is not returning a 2xx status code. Verify that your server is reachable, the URL is correct, and your endpoint returns 200 after processing the request. Open View error logs from the webhook row dropdown to check the specific Error code.

    Signing secret mismatch → The secret stored on your server does not match the current secret in Sender. Copy the Signing secret from the Webhooks page again and update your server. If you recently clicked Rotate secret, make sure the new value is deployed.

    Endpoint receives no requests → Confirm the webhook is not paused — the row should display a Pause button, not a Resume button. Also verify that the event you expect has actually occurred in your Sender account.

    Duplicate payloads received → If your endpoint takes too long to respond, Sender may retry the delivery. Ensure your server responds with 200 within a few seconds, and implement idempotency checks using the event timestamp or a unique identifier in the payload.

    FAQs

    What webhook topics are available in Sender? Sender supports eight topics: subscribers/new, subscribers/updated, subscribers/unsubscribed, groups/new, groups/new-subscriber, groups/unsubscribed, campaigns/new, and bounces/new. All topics are listed in the Topic dropdown inside the Add webhook dialog.

    Can I send the same event to multiple endpoints? Yes. Create a separate webhook for each endpoint and select the same Topic in each. Every webhook operates independently.

    How do I verify that a webhook payload came from Sender? Use the Signing secret displayed on the Webhooks page. Compute an HMAC hash of the incoming payload body using that secret and compare it to the signature value in the request header. A match confirms the payload originated from Sender.

    What happens if my endpoint is down when Sender sends a webhook? If your endpoint does not respond with a 2xx status code, the delivery is recorded as a failure. Check the Total failures column and open View error logs to review the Error code and Date / time of each failed attempt.

    Can I edit an existing webhook? Yes. Click the dropdown arrow next to Pause on the webhook row and select Edit. The Edit webhook dialog lets you update the URL and Topic. Click Add to save your changes.

    Can I temporarily disable a webhook without deleting it? Yes. Click the Pause button on the webhook row. The webhook remains in the table but stops receiving deliveries until you resume it.

    How do I delete a webhook? Click the dropdown arrow next to Pause on the webhook row and select Delete. The webhook is permanently removed from the table.

    Can I test a webhook without triggering a real event? Trigger a real event in your account — for example, add a test subscriber — and monitor your endpoint for the incoming payload. Alternatively, use a service like webhook.site or RequestBin as your endpoint URL to inspect payloads without building a server.

  • REST API authentication

    This guide explains how to generate an API access token and authenticate requests to Sender's REST API.

    Prerequisites

    • An active Sender account
    • An API access token generated from Account settings → API access tokens
    • A tool or environment for making HTTP requests (e.g., cURL, Postman, or application code)

    Authentication

    All Sender API v2 requests use the base URL https://api.sender.net/v2/. The API is served only over HTTPS — calls made over plain HTTP will fail.

    Include three headers with every request:

    ``Authorization: Bearer YOUR_API_TOKEN

    Content-Type: application/json

    Accept: application/json

    Here is a minimal authenticated request using cURL:

    bash

    ``curl -X GET \

      "https://api.sender.net/v2/subscribers" \

      -H "Authorization: Bearer YOUR_API_TOKEN" \

      -H "Content-Type: application/json" \

      -H "Accept: application/json"

    A successful response returns a 200 status code with the requested resource data in the response body. If the token is missing or invalid, the API returns a 401 Unauthorized response.

    Steps to authenticate with the API

    Step 1 — Generate an API access token

    Go to Account settings → API access tokens in the Sender dashboard. Click Create API token. In the Select token validity time dialog, choose how long the token should remain valid — the options are Forever, 30 days, 7 days, or 1 day. Click Create. Copy the token immediately and store it securely. The token may not be displayed again after you navigate away from the page.

    Step 2 — Add the token to your API requests

    Include the Authorization: Bearer YOUR_API_TOKEN header in every request you send to https://api.sender.net/v2/. Also include Content-Type: application/json and Accept: application/json as headers. Here is an example using JavaScript:

    javascript

    ``const url = "https://api.sender.net/v2/campaigns/";

    let headers = {

        "Authorization": "Bearer YOUR_API_TOKEN",

        "Content-Type": "application/json",

        "Accept": "application/json",

    };

    fetch(url, {

        method: "GET",

        headers,

    }).then(response => response.json());

    Step 3 — Verify that authentication works

    Send a GET request to https://api.sender.net/v2/subscribers with your token in the Authorization header. A successful response returns a 200 status code with a JSON body containing a data array of subscriber objects, along with links and meta pagination objects. If you receive a 401 Unauthorized response, your token is invalid or missing — regenerate it from Account settings → API access tokens.

    Step 4 — Handle token expiration

    If you selected a limited validity period (e.g., 30 days, 7 days, or 1 day) when creating your token, the token expires after that duration. Expired tokens return a 401 Unauthorized response. To resolve this, go to Account settings → API access tokens, create a new token, and update the Authorization header in your application code with the new value.

    Endpoint reference

    GET /v2/subscribers — Returns a paginated list of all subscribers in your account. No required body parameters. Supports page, limit, order, and direction query parameters for pagination and sorting.

    GET /v2/subscribers/{email}or{phone}or{ID} — Returns a single subscriber profile. Replace the path parameter with the subscriber's email address, phone number, or subscriber ID. No request body required.

    GET /v2/campaigns — Returns a paginated list of all campaigns. Supports optional limit and status query parameters. Accepted status values are SCHEDULED, SENDING, SENT, or DRAFT.

    Error handling

    401 — Unauthorized — The API could not authenticate your request. This means the Authorization header is missing, the token value is incorrect, or the token has expired. Regenerate a token from Account settings → API access tokens and update your request header.

    400 — Bad request — The request was malformed or contained invalid data. The response body includes a "success": false field and a "message" field with details about what went wrong.

    404 — Not found — The requested resource does not exist. Verify that the endpoint path and any resource IDs in the URL are correct.

    422 — Bad request parameters — One or more request parameters failed validation. The response body includes a "message" field and an "errors" object where each key is the invalid field name and the value is an array of validation messages.

    429 — Too many requests — You exceeded the API rate limit. The response includes X-RateLimit-Limit, X-RateLimit-Remaining, X-RateLimit-Reset, and Retry-After headers. Wait for the number of seconds specified in Retry-After before retrying.

    API tips

    Store your token securely — Save your API token in an environment variable or secrets manager. Never hardcode it in client-side code or commit it to public repositories.

    Use the shortest valid token lifetime — If your integration runs a one-time migration, choose 1 day or 7 days instead of Forever to limit exposure if the token is compromised.

    Always set both content headers — Include Content-Type: application/json and Accept: application/json on every request, even for GET requests, to ensure consistent response formatting.

    Implement exponential backoff for rate limits — When you receive a 429 response, read the Retry-After header and wait before retrying. Increase the delay on consecutive 429 responses to avoid further throttling.

    Verify responses programmatically — Check the HTTP status code before processing the response body. Only parse data from responses with a 200 or 201 status code.

    Common issues

    Requests return 401 immediately after token creation → The token was not copied correctly or includes extra whitespace. Go to Account settings → API access tokens, create a new token, and copy the full value without leading or trailing spaces.

    Requests fail with a connection error → You are using http:// instead of https:// in the base URL. The API only accepts HTTPS connections. Change your base URL to https://api.sender.net/v2/.

    422 errors on POST or PATCH requests → Required fields are missing or contain invalid values. Check the "errors" object in the response body to identify which fields failed validation, then correct the request body and retry.

    Rate limiting triggered during bulk operations → Sending too many requests per minute causes 429 responses. Reduce your request frequency, batch operations where possible, and check the X-RateLimit-Remaining header before sending the next request.

    Token stops working after a period → The token was created with a limited validity time (1 day, 7 days, or 30 days) and has expired. Generate a new token from Account settings → API access tokens and update your application configuration.

    FAQs

    Where do I find my API access token?

    Go to Account settings → API access tokens in the Sender dashboard. Click Create API token to generate a new one. Copy the token immediately — it may not be displayed again after you navigate away.

    What is the base URL for all API requests?

    All Sender API v2 requests use the base URL https://api.sender.net/v2/. Append the specific endpoint path after this base URL.

    What token validity options are available?

    When creating a token, you can choose Forever, 30 days, 7 days, or 1 day. Select the validity period that matches your use case — shorter durations are more secure for temporary integrations.

    What happens if I exceed the API rate limit?

    The API returns a 429 Too Many Requests response with a Retry-After header. Wait for the specified number of seconds before retrying. Implement exponential backoff in your code to handle rate limits gracefully.

    Can I have multiple active API tokens?

    Yes. You can create multiple tokens from Account settings → API access tokens. Each token authenticates independently. Use separate tokens for different applications or environments so you can revoke one without affecting others.

    How do I paginate through large lists of subscribers?

    List endpoints return paginated results. Use the page and limit query parameters to control which page of results is returned. Check the meta object in the response for current_page, last_page, and total values to iterate through all records.

  • API Rate Limits

    This guide explains how to monitor, manage, and handle API rate limits when using Sender's REST API.

    Prerequisites

    • An active Sender account
    • An API access token generated from Account settings → API access tokens
    • A tool or environment for making HTTP requests (e.g., cURL, Postman, or application code)
    • Familiarity with reading HTTP response headers

    Authentication

    All Sender API v2 requests use the base URL https://api.sender.net/v2/. Include the Authorization: Bearer header and content-type headers with every request. The API is served only over HTTPS — unencrypted HTTP requests will fail.

    bash

    curl -X GET \

      "https://api.sender.net/v2/subscribers" \

      -H "Authorization: Bearer YOUR_API_TOKEN" \

      -H "Content-Type: application/json" \

      -H "Accept: application/json"

    “`

    ## Steps to Monitor and Handle API Rate Limits

    ### Step 1 — Check rate limit headers in API responses

    Every API response from Sender includes rate limit headers. After making any request, inspect the response headers for `X-RateLimit-Limit`, `X-RateLimit-Remaining`, and `X-RateLimit-Reset`. The `X-RateLimit-Limit` header shows the maximum number of requests you can make per minute. The `X-RateLimit-Remaining` header shows how many requests you have left in the current window. Use these values to track your consumption before you hit the limit.

    “`

    X-RateLimit-Limit: 60

    X-RateLimit-Remaining: 45

    X-RateLimit-Reset: 2026-03-18T13:02:00Z

    “`

    ### Step 2 — Detect a rate limit response

    When you exceed the allowed number of requests per minute, the API returns a `429 Too Many Requests` status code. The response includes a `Retry-After` header that specifies the number of seconds to wait before sending a new request. Stop making requests immediately when you receive a `429` response to avoid further rejections.

    “`

    HTTP/1.1 429 Too Many Requests

    Retry-After: 30

    X-RateLimit-Limit: 60

    X-RateLimit-Remaining: 0

    X-RateLimit-Reset: 2026-03-18T13:02:00Z

    Step 3 — Implement exponential backoff retry logic

    When a 429 response is returned, read the Retry-After header value and wait at least that many seconds before retrying. If the Retry-After header is not present, use exponential backoff — start with a 1-second delay, then double it on each consecutive 429 response (1s, 2s, 4s, 8s, and so on). Cap the maximum delay at a reasonable ceiling such as 60 seconds. Resume normal request intervals once a successful 2xx response is received.

    python

    import time

    import requests

    def make_request_with_backoff(url, headers, max_retries=5):

        delay = 1

        for attempt in range(max_retries):

            response = requests.get(url, headers=headers)

            if response.status_code == 429:

                wait = int(response.headers.get("Retry-After", delay))

                time.sleep(wait)

                delay = min(delay * 2, 60)

            else:

                return response

        return response

    Step 4 — Throttle requests proactively using remaining count

    Instead of waiting for a 429 response, monitor the X-RateLimit-Remaining header after each request. When the remaining count drops below a threshold (for example, fewer than 5 requests remaining), introduce a delay before the next call. Check the X-RateLimit-Reset header to determine when the window resets, and pause until that time. This approach prevents rate limit errors and keeps your integration running smoothly.

    python

    remaining = int(response.headers.get("X-RateLimit-Remaining", 1))

    if remaining < 5:

        reset_time = response.headers.get("X-RateLimit-Reset")

        # Parse reset_time and sleep until the window resets

        time.sleep(10)

    Step 5 — Verify rate limit handling is working

    Send a GET request to any endpoint, such as GET https://api.sender.net/v2/subscribers, and confirm the response includes the X-RateLimit-Limit and X-RateLimit-Remaining headers. Verify that X-RateLimit-Remaining decrements with each request. If your backoff logic is in place, simulate rapid requests in a test environment and confirm your code pauses and retries correctly when a 429 status is returned.

    Endpoint Reference

    GET /v2/subscribers — Returns all subscribers in your account. Supports pagination with ?page, ?limit, ?order, and ?direction query parameters. Use this endpoint to verify rate limit headers are returned in the response.

    GET /v2/campaigns — Returns all campaigns in your account. Paginated. Rate limit headers are included in every response, making any list endpoint suitable for testing your rate limit handling.

    GET /v2/groups — Returns all subscriber groups. Paginated. Like all Sender API endpoints, responses include X-RateLimit-Limit, X-RateLimit-Remaining, and X-RateLimit-Reset headers.

    Error Handling

    429 — Too Many Requests — You have exceeded the allowed number of API requests per minute. Read the Retry-After header for the number of seconds to wait before retrying. Implement exponential backoff in your retry logic.

    401 — Unauthorized — Your API token is missing, invalid, or expired. Go to Account settings → API access tokens to verify or regenerate your token. Include the Authorization: Bearer YOUR_API_TOKEN header in every request.

    400 — Bad Request — The request was malformed or contained invalid data. The response body includes a message field with details about the error. Review the message value and correct the request before retrying.

    422 — Bad Request Parameters — One or more required parameters are missing or invalid. The response includes an errors object with per-field details. Check each field listed in the errors object and provide valid values.

    5xx — Server Error — An unexpected error occurred on Sender's servers. Do not retry immediately — wait a few seconds and try again. If the error persists, contact [email protected].

    API Tips

    Read headers on every response — Check X-RateLimit-Remaining after every API call, not just when errors occur. This lets you proactively throttle requests before hitting the limit.

    Use the Retry-After header — Always prefer the Retry-After value over a hardcoded delay when handling 429 responses. This gives you the exact wait time the server requires.

    Batch your operations — Reduce the total number of API calls by using list endpoints with the ?limit parameter to fetch more records per request, rather than making many small requests.

    Log rate limit data — Record the X-RateLimit-Limit, X-RateLimit-Remaining, and X-RateLimit-Reset values from each response. This helps you identify usage patterns and adjust your request frequency over time.

    Cap your retry attempts — Set a maximum number of retries (e.g., 5) in your backoff logic. If the limit is still exceeded after the maximum retries, log the failure and alert your team rather than retrying indefinitely.

    Common Issues

    Requests fail with 429 despite low traffic → Multiple API tokens or parallel processes may be sharing the same rate limit window. Coordinate request timing across all services that use your Sender API credentials.

    X-RateLimit-Remaining shows 0 but no 429 returned → The remaining counter may reset between your check and the next request. Always handle a 429 response in your code, even if the remaining count appeared positive on the prior call.

    Retry logic causes duplicate operations → Non-idempotent requests (such as POST to create subscribers) can result in duplicate records if retried after a 429. Check whether the resource already exists before retrying create operations.

    Rate limit headers are missing from the response → Ensure you are sending requests to https://api.sender.net/v2/ over HTTPS with a valid Authorization: Bearer header. Unauthenticated or malformed requests may not return rate limit headers.

    Backoff delay grows too large → If you do not cap your exponential backoff, delays can become unreasonably long. Set a maximum wait time (e.g., 60 seconds) and fall back to that ceiling once the calculated delay exceeds it.

    FAQs

    Where do I find my API access token?

    Go to Account settings → API access tokens in the Sender dashboard. Click Create API token to generate a new one. Copy the token immediately — it may not be displayed again after you navigate away.

    What is the rate limit for Sender's API?

    Sender enforces a per-minute rate limit on API requests. The exact limit for your account is returned in the X-RateLimit-Limit response header with every API call. Monitor this header to know your current allowance.

    What happens if I exceed the API rate limit?

    The API returns a 429 Too Many Requests response with a Retry-After header. Wait for the number of seconds specified in Retry-After before retrying. Implement exponential backoff in your code to handle rate limits gracefully.

    Are rate limit headers included in every API response?

    Yes. Every successful and error response from the Sender API includes the X-RateLimit-Limit, X-RateLimit-Remaining, and X-RateLimit-Reset headers. Use these to track your usage in real time.

    Does the rate limit apply per API token or per account?

    The rate limit is tracked per account. If you use multiple API tokens, all tokens share the same rate limit window. Coordinate request timing across all tokens and services to stay within the limit.

  • Testing API Calls

    This guide explains how to test your API calls to Sender's REST API, verify authentication, validate request and response patterns, and confirm that your integration works correctly before deploying to production.

    Prerequisites

    • An active Sender account
    • An API access token generated from Account settings → API access tokens
    • A tool or environment for making HTTP requests (e.g., cURL, Postman, or application code)
    • Familiarity with reading JSON response bodies and HTTP status codes

    Authentication

    All requests to the Sender API require a Bearer token passed in the Authorization header. The base URL for all API v2 endpoints is https://api.sender.net/v2/. Every request must also include Content-Type: application/json and Accept: application/json headers.

    A minimal authenticated request looks like this:

    bash

    curl -X GET \

      "https://api.sender.net/v2/subscribers" \

      -H "Authorization: Bearer YOUR_API_TOKEN" \

      -H "Content-Type: application/json" \

      -H "Accept: application/json"

    Replace YOUR_API_TOKEN with the token you generated from Account settings → API access tokens. If the token is valid, you receive a 200 response with data. If it is invalid or missing, you receive a 401 response.

    Steps to Test API Calls

    Step 1 — Verify your authentication with a read-only request

    Start by sending a GET request to https://api.sender.net/v2/subscribers to confirm your API token works. This is a safe, read-only call that returns your subscriber list without modifying any data.

    bash

    curl -X GET \

      "https://api.sender.net/v2/subscribers" \

      -H "Authorization: Bearer YOUR_API_TOKEN" \

      -H "Content-Type: application/json" \

      -H "Accept: application/json"

    A successful 200 response returns a JSON body with data, links, and meta objects. If you receive a 401 status code, your token is invalid — generate a new one from Account settings → API access tokens.

    Step 2 — Test a GET request with query parameters

    Send a GET request to https://api.sender.net/v2/groups to retrieve your subscriber groups. Add pagination parameters to test parameterized requests. Append ?page=1&limit=5 to the URL to return only the first five results.

    bash

    curl -X GET \

      "https://api.sender.net/v2/groups?page=1&limit=5" \

      -H "Authorization: Bearer YOUR_API_TOKEN" \

      -H "Content-Type: application/json" \

      -H "Accept: application/json"

    The 200 response includes a data array of group objects and a meta object showing current_page, per_page, total, and last_page values. Verify these pagination fields reflect your parameters.

    Step 3 — Test a POST request with a request body

    Send a POST request to https://api.sender.net/v2/subscribers to test creating a resource. Include a JSON request body with at least the required email field. Set trigger_automation to false to prevent triggering any automations during testing.

    bash

    curl -X POST \

      "https://api.sender.net/v2/subscribers" \

      -H "Authorization: Bearer YOUR_API_TOKEN" \

      -H "Content-Type: application/json" \

      -H "Accept: application/json" \

      -d '{

        "email": "[email protected]",

        "firstname": "Test",

        "lastname": "User",

        "trigger_automation": false

      }'

    A successful response returns a 200 status with "success": true and the full subscriber object in the data field. If the email field is missing or invalid, the API returns a 422 status with an errors object detailing the validation failure.

    Step 4 — Test error handling by sending an invalid request

    Intentionally send a malformed request to verify your code handles errors correctly. Send a POST request to https://api.sender.net/v2/subscribers with an invalid email value or omit the required email field entirely.

    bash

    curl -X POST \

      "https://api.sender.net/v2/subscribers" \

      -H "Authorization: Bearer YOUR_API_TOKEN" \

      -H "Content-Type: application/json" \

      -H "Accept: application/json" \

      -d '{"email": "not-a-valid-email"}'

    The API returns a 422 status code with a response body containing a message field and an errors object. Each key in errors is a field name, and its value is an array of validation messages. Confirm your code parses this structure correctly.

    Step 5 — Verify the result in the Sender dashboard

    After a successful POST test, confirm the data persists by retrieving it with a GET request. Send a GET request to https://api.sender.net/v2/subscribers/{email} replacing {email} with the email address you used in Step 3.

    bash

    curl -X GET \

      "https://api.sender.net/v2/subscribers/[email protected]" \

      -H "Authorization: Bearer YOUR_API_TOKEN" \

      -H "Content-Type: application/json" \

      -H "Accept: application/json"

    The 200 response returns the subscriber's full profile in the data object, including id, email, firstname, lastname, status, and subscriber_tags. You can also log in to the Sender dashboard, navigate to Subscribers, and confirm the test subscriber appears there.

    Endpoint Reference

    GET /v2/subscribers — Returns a paginated list of all subscribers in your account. Supports page, limit, order, and direction query parameters. No request body required.

    GET /v2/subscribers/{email}or{phone}or{ID} — Returns a single subscriber's full profile. Replace the path parameter with the subscriber's email address, phone number, or subscriber ID. No request body required.

    POST /v2/subscribers — Creates a new subscriber. The email field is required in the request body. Optional fields include firstname, lastname, groups, fields, phone, and trigger_automation.

    GET /v2/groups — Returns a paginated list of all subscriber groups. Supports page, limit, order, and direction query parameters. No request body required.

    Error Handling

    401 — Unauthorized — The API could not authenticate your request. Verify that your Authorization header uses the format Bearer YOUR_API_TOKEN and that the token is active in Account settings → API access tokens.

    400 — Bad request — The request is malformed or references an invalid action. The response body includes a message field with details. Check that your request URL and HTTP method are correct.

    404 — Not found — The requested resource does not exist. Verify the endpoint path and any resource IDs or email addresses in the URL are correct.

    422 — Bad request parameters — One or more fields failed validation. The response includes a message field and an errors object where each key is a field name mapped to an array of error messages. Fix the invalid fields and retry.

    429 — Too many requests — You have exceeded the API rate limit. The response includes X-RateLimit-Limit, X-RateLimit-Remaining, X-RateLimit-Reset, and Retry-After headers. Wait for the number of seconds specified in Retry-After before sending another request.

    5xx — Server error — An internal error occurred on Sender's servers. Retry the request after a short delay. If the issue persists, contact [email protected].

    API Tips

    Use read-only endpoints first — Start testing with GET requests like GET /v2/subscribers or GET /v2/groups to verify authentication and connectivity without modifying any data.

    Disable automations during testing — When creating subscribers via the API during testing, set "trigger_automation": false in the request body to prevent unintended automation triggers.

    Check response headers for rate limits — Every API response includes X-RateLimit-Remaining and X-RateLimit-Limit headers. Monitor these during testing to understand your usage and implement backoff strategies before hitting limits.

    Test pagination with small limits — Use ?page=1&limit=2 to return minimal data while verifying that your pagination logic correctly reads the meta object fields like current_page, last_page, and total.

    Log full responses during development — Capture the complete HTTP status code, response headers, and body during testing. This gives you full visibility into errors, rate limit state, and response structure before writing production error handling.

    Common Issues

    401 on every request → The API token may be expired, revoked, or incorrectly formatted. Ensure the Authorization header value is exactly Bearer YOUR_API_TOKEN with a single space after Bearer. Regenerate the token from Account settings → API access tokens if needed.

    422 when creating a subscriber → The email field is either missing or contains an invalid value. Verify the request body is valid JSON with "email" set to a properly formatted email address.

    Empty data array in response → The account has no resources of the requested type, or the pagination parameters point beyond the available results. Check the meta.total value and adjust your page parameter.

    Connection refused or timeout → The API only accepts HTTPS connections at https://api.sender.net/v2/. Ensure you are not using http:// and that your network allows outbound HTTPS traffic on port 443.

    Response body is not JSON → The Accept: application/json header may be missing from your request. Include both Content-Type: application/json and Accept: application/json in every request.

    FAQs

    Where do I find my API access token? Go to Account settings → API access tokens in the Sender dashboard. Click Create API token to generate a new one. Copy the token immediately — it may not be displayed again after you navigate away.

    What is the base URL for all API requests? All Sender API v2 requests use the base URL https://api.sender.net/v2/. Append the specific endpoint path after this base URL. The API is served only over HTTPS.

    What tools can I use to test API calls? You can use cURL from the command line, Postman as a graphical client, or write test scripts in any language that supports HTTP requests (JavaScript, Python, PHP, etc.). The Sender API docs provide code examples in JavaScript, PHP, Python, and Bash.

    How do I know if my API call was successful? Successful responses return a 200 or 201 status code with the resource data in the response body. Error responses return 4xx or 5xx status codes with a message field and, for validation errors, an errors object describing each invalid field.

    What happens if I exceed the API rate limit? The API returns a 429 Too Many Requests response with a Retry-After header. Wait for the specified number of seconds before retrying. Implement exponential backoff in your code to handle rate limits gracefully.

    Can I test write operations without affecting my live data? Use the trigger_automation parameter set to false when creating subscribers to prevent automations from firing. You can delete test subscribers after testing. There is no sandbox environment, so all API calls operate on your live account data.

  • Google Tag Manager Integration (Tracking Script)

    Google Tag Manager (GTM) is a free tool that allows you to manage and deploy marketing and analytics tags on your website without modifying code. 

    By integrating GTM with Sender, you can track key events such as email sign-ups and conversions, helping you optimize your marketing efforts. 

    To add your Sender script to Google Tag Manager do the following:

    Go to Forms.

    Choose a pop-up or embedded form and click Overview next to it.

    Scroll down to the Integration instructions and copy the Javascript code of the form.

    Now, head to Google Tag Manager and log in to your account.

    Once you are in, select “Add a new tag”.

    Name the tag and click “Tag Configuration” to choose the tag type.

    For the tag type choose “Custom HTML” from the list.

    Paste the copied Javascript into the “HTML” section.

    Continue by choosing a trigger.

    Choose “All Pages” from the trigger list.

    Once all is setup, make sure to save the progress.

    And submit the changes that you have made by clicking “Submit” button at the right-top corner.

    Your Google Tag Manager integration with Sender is now successfully configured. With this setup, you can efficiently track user interactions, optimize your marketing efforts, and gain valuable insights into your audience’s behavior.


    If you got stuck on a specific task or can’t find a way to execute a particular job, contact our support team via LiveChat or [email protected] – we’re here to help 24/7.

  • Zapier Integration Setup

    Try it out

    Zapier is an online automation tool that connects your favorite apps, such as Gmail, Slack, Shopify, Squarespace, and 3000+ others with Sender.net. 

    You can connect two or more apps to automate repetitive tasks. It’s easy enough that anyone can create workflows with just a few clicks.

    Use cases

    Due to the integration between Sender.net and Zapier, you can move new contacts straight to your Sender’s contact list and/or activate custom events based on particular triggers. Here are several different examples on automated workflows between Sender.net and Zapier:

    • Start automation workflow based on the custom event, e.g., send welcome emails each time clients fill in a survey.
    • New contacts from in the Google Form are automatically moved to your contacts list on Sender.net
    • Use Zapier to integrate with LinkedIn Lead Gen Forms and automatically move new subscribers to Sender.net
    • And much more.

    How to connect Sender and Zapier

    First, log in to your Zapier account and click on Make a Zap! 

    With Zapier, you can create custom and individual connections with your favorite apps. Each automation sequence is named “Zap” which includes a trigger and action steps.

    Triggers

    • New campaign. Triggers when a new campaign is created.
    • New subscriber. Triggers when a new subscriber is added.
    • New unsubscriber. Trigger when a subscriber unsubscribes.
    • New group. Triggers when a new group is created.
    • New subscriber in the group. Triggers when the subscriber is added to the group.
    • New unsubscriber from the group. Triggers when a subscriber is removed from the group.
    • Updated subscriber. Triggers when subscriber is updated.


    Actions

    • Add/Update Subscriber. Add a new subscriber or update subscriber’s data.
    • Create campaign. Creates a draft campaign.
    • Unsubscribes an email address.
    • Add subscriber to the group. Adds a subscriber to the group.
    • Remove a subscriber from a group.
    • Send campaign. Send a drafted campaign.

    Next, choose the app that will begin the automated sequence and the action trigger. Continue by authenticating the application’s account on the appeared popup and continue building the sequence.

    zapier trigger

    Proceed by selecting a different app and the action step that will be performed according to the workflow – the equivalent procedure applies.

    action

    Here’re the shortcuts to the ready-to-use Zapier templates – click on “Try It” to proceed with a Zap. 

    Add subscribers in Sender for new spreadsheet rows in Google Sheets

    Try It


    Add Shopify customers to Sender

    Try It


    Add Sender subscribers for new records in Salesforce

    Try It


    Add or update new HubSpot contacts to Sender

    Try It


    Add or update Magento 2.X customers to Sender

    Try It


    Create Drupal contents from new Sender campaigns

    Try It


    Add new BigCommerce customers to Sender as subscribers

    Try It


    Add or update Facebook subscribers to Sender

    Try It


    Add or update LinkedIn Lead Gen Forms subscriber to Sender

    Try It


    Add Sender subscribers for new form submission in Squarespace

    Try It

    See all templates


    If you got stuck on a specific task or can’t find a way to execute a particular job, contact our support team via LiveChat or [email protected] – we’re here to help 24/7.

  • Ecommerce Integrations Overview

    Integrations with various platforms and gadgets considerably enhance the product’s overall experience due to continuous and smooth transitioning between systems. Here you’ll find a list of commonly used integrations with Sender.

    Product import

    Product block is designed mainly for e-commerce clients but can be used by all users. With product block, you can easily import items from any online store. The most significant part about that – no integrations are needed.

    Click here to learn more.

    Subscription forms / Popups

    Gathering subscribers was never an easy task, though comprehensive subscription forms or functioning popups help with the matter. With Sender, you’re able to create customizable and easy-to-integrate opt-in forms with ease.

    Click here for a tutorial.

    E-commerce automation

    The best way to save time and increase your revenue is to automate your email marketing. Automation is an irreplaceable feature for creating automated abandoned cart or post-purchase email sequences and keeping profits growing.

    Click here for a tutorial.

    automaiton example

    Integrations with most popular web-platforms

    Sender instantly integrates with leading CRMs and ecommerce platforms, including WordPressPrestaShopWooCommerceZapier.

    Integrate with custom systems using advanced yet easy-to-use API.


    If you are stuck on a specific task or can’t find a way to execute a particular job, contact our support team via LiveChat or [email protected] – we’re here to help 24/7.

  • API Access Tokens (Authentication)

    Authentication is required when activating the Sender.net plugin or validating API requests. Both ways, you’ll need to include an API access token. 

    To generate an API access token, go to Settings > API access tokens or by clicking here.

    Continue by clicking “Create API token” and picking the validation period “Forever.” After that, a unique access token is generated. It authenticates your API requests and is used for plugin activation. 


    If you got stuck on a specific task or can’t find a way to execute a particular job, contact our support team via LiveChat or [email protected] – we’re here to help 24/7.

  • Sender API Documentation

    The new platform came with an entirely re-engineering and more capable API software mediator that makes communication between software more manageable and straightforward. Complete documentation of a new API is found and accessed via api.sender.net.

    What is found on the documentation?

    The documentation intends to present all the information you need to work with our API. As you scroll through the page, you’ll see possible requests on the left side of the screen. 

    The code examples of API requests with different programming languages.

    Authentication

    To authenticate requests, include an Authorization header with the value “Bearer {API_ACCESS_TOKEN}”.All authenticated endpoints are marked with a requires authentication badge in the documentation.

    In order to generate a bearer code go a-head to Settings > API access tokens or by clicking here.


    If you got stuck on a specific task or can’t find a way to execute a particular job, contact our support team via LiveChat or [email protected] – we’re here to help 24/7.