Category: Content and Design

  • Email Display on Mobile Devices

    This guide shows how to optimize your email for mobile devices in Sender. It walks you through previewing, adjusting, and fine-tuning your email campaign design so it looks great on smaller screens.

    Where to Find This Feature

    In the Sender dashboard, go to:

    Email campaigns → select your campaign → Design → Edit design

    campaign-design

    drag-and-drop-builder

    This opens the drag-and-drop builder, where all mobile display controls are located.

    Steps to Optimize Email Display on Mobile

    Step 1 — Preview Your Email on Desktop and Mobile

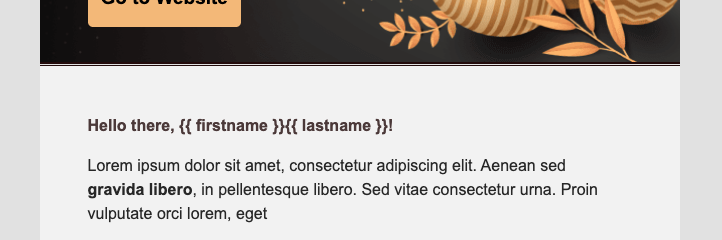
    In the top toolbar of the email builder, click the Preview icon (eye icon). This opens a split-screen view showing your email on a desktop frame (left) and a mobile phone frame (right) simultaneously.

    campaign-preview

    campaign-desktop-mobile-preview

    Use the Dark mode preview toggle in the upper-right corner to check how your design renders in dark mode on both views. The Email size indicator at the top left shows the approximate file weight, which affects mobile load times.

    Step 2 — Adjust Mobile Spacing for Sections

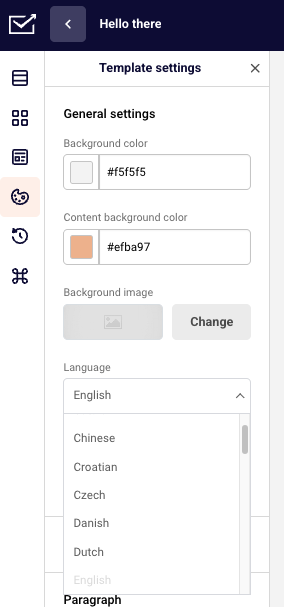
    Open Template settings by clicking the palette icon in the left sidebar, then scroll to Section settings. Below the standard SPACING controls, you will find a separate MOBILE SPACING section.

    campaign-template-settings

    Set the Top, Bottom, Left, and Right values independently for mobile screens. Adjust the mobile Column spacing to control the gap between columns when they stack on smaller devices.

    Step 3 — Control Column Visibility and Alignment on Mobile

    Click any content block in the editor to open its settings on the right. Scroll down to Column settings and use the Visibility on mobile toggle to choose Show or Hide for that column on mobile devices.

    campaign-mobile-visibility

    For blocks like Logo, you will also see an Alignment on mobile option, which lets you set a different alignment (left, center, or right) specifically for mobile screens.

    Step 4 — Optimize Buttons and Images for Mobile

    Select a Buttons block and expand Button styles in the right panel. Use the Width option to choose full-width for buttons, making them easier to tap on mobile screens.

    button-width

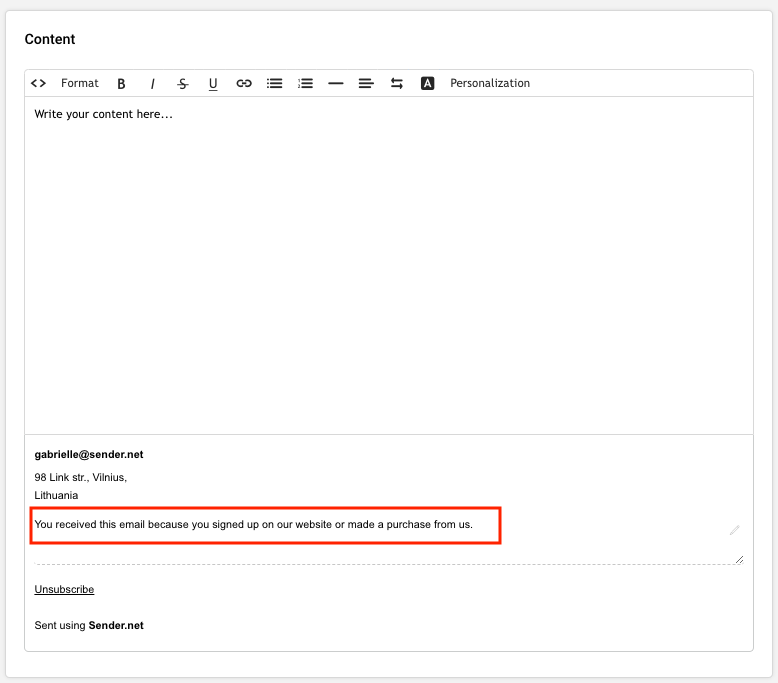
    For images, add descriptive Alternative text in the image settings so content remains accessible if images are slow to load on mobile connections.

    Step 5 — Send a Test Email to a Mobile Device

    Click Send test email in the top toolbar. Enter your email address in the dialog and click Send.

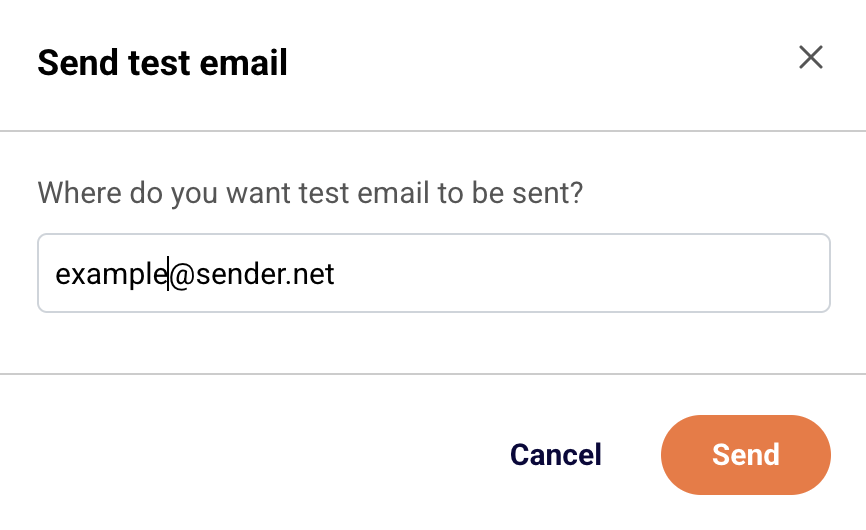
    Open the test email on your phone to verify the layout, spacing, font sizes, and button tap targets look correct on an actual mobile device.

    What Happens After You Save

    After saving, your email is stored as a draft in Email campaigns. You can continue editing or move to the next step. Use the Preview icon in the builder or Send test email to verify your mobile adjustments before proceeding to Recipients and Review and send.

    Common Issues

    Email looks different on mobile than in the builder preview — Mobile email clients apply their own rendering rules. Send a test email and open it on an actual device to confirm the layout.

    Columns appear too narrow on mobile — Reduce the mobile Column spacing value in Section settings under MOBILE SPACING, or hide non-essential columns using the Visibility on mobile toggle in Column settings.

    Buttons are hard to tap on mobile — Set the button Width to full-width in Button styles and increase the Vertical padding value for a larger tap target.

    Images load slowly on mobile — Keep the total Email size under 100 KB where possible. Compress images before uploading and always add Alternative text so readers see a description while images load.

    FAQs

    Can I set different spacing for desktop and mobile separately?

    Yes. Under Template settings → Section settings, use the SPACING controls for desktop and the MOBILE SPACING controls for mobile independently.

    How do I hide a block on mobile only?

    Select the block, scroll to Column settings in the right panel, and set Visibility on mobile to Hide.

    Does the builder preview match how emails actually look on phones?

    The mobile preview in the builder provides a close approximation. For the most accurate check, use Send test email and open it on your mobile device.

    Can I preview dark mode for mobile?

    Yes. Click the Preview icon in the top toolbar and enable the Dark mode preview toggle to see how your email renders in dark mode on both desktop and mobile frames.

  • Image Display Behavior in Emails

    This guide shows how to control image display behavior in Sender. It walks you through customizing how images appear, scale, and respond across devices in the drag-and-drop email builder, so your campaigns look great in every inbox.

    Where to Find This Feature

    In the Sender dashboard, go to:

    Email campaigns → select a campaign → Design → Edit design

    campaign-edit-design

    This opens the drag-and-drop builder where you can add and configure Image, Logo, and other visual blocks.

    Steps to Configure Image Display

    Step 1 — Add or Select an Image Block

    In the builder, drag the Image block from the Building blocks panel on the left into your email layout. To edit an existing image, click directly on it in the canvas.

    image-block

    image-library

    The image settings panel appears on the right side. Click Change to open the Image Library, where you can upload files via drag and drop or Browse, or choose from My images, Giphy, Unsplash, or Patterns.

    Step 2 — Adjust Image Properties

    With the image selected, configure display options in the right panel. Use the Alternative text field to add a description shown when images are blocked by email clients. Enter a URL in the Link field to make the image clickable.

    image-customization

    Drag the Corner radius slider or enter a pixel value to round the image corners. To resize the image width, drag the orange handle on the right edge of the image in the canvas.

    Step 3 — Configure the Rollover Effect

    Toggle Rollover effect to On to display a second image when recipients hover over the original. Click Change next to Rollover image to upload the alternate image. Use the same dimensions as the original for the best result. Note: this feature works only in select email clients — Yahoo! Mail, AOL, Gmail, iCloud Mail, Outlook 2003, and MacOS Apple Mail. In unsupported clients, only the primary image displays.

    Step 4 — Set Block and Column Display Options

    Expand Block settings to adjust Spacing values (Top, Bottom, Left, Right) and the block Background color. Expand Column settings to set Vertical alignment (Bottom, Middle, or Top), a column Background color, and Visibility on mobile — toggle between Show and Hide to control whether the image appears on mobile devices.

    image-block-settings-column-settings

    For Logo blocks specifically, you also get Alignment and Alignment on mobile options (left, center, or right).

    Step 5 — Preview Across Devices and Modes

    Click the preview icon (eye) in the top toolbar to see your email rendered side by side in desktop and mobile views. Images automatically scale down to fit the mobile container width.

    preview-campaign

    Toggle Dark mode preview to check how your images appear against a dark background. The Email size indicator at the top left helps you monitor total weight — keep images optimized to avoid slow load times.

    What Happens After You Save

    After saving, your email design is stored as a draft on the Design step of your campaign. You can reopen the builder at any time by clicking Edit design. Use Send test email to verify image rendering in a real inbox before finalizing. Continue editing or click Next to proceed to Recipients.

    Common Issues

    Images appear broken in some inboxes — The recipient’s email client may block remote images by default. Always add descriptive Alternative text so context displays even when images are not loaded.

    Rollover effect not working — The rollover feature is only supported in a limited number of email clients. In unsupported clients, recipients see only the primary image.

    Image looks different on mobile — Images scale to fill the available container width on smaller screens. If Visibility on mobile is set to Hide under Column settings, the image will not display on mobile devices at all.

    Image appears stretched or pixelated — Use source images that match or exceed the display width of the email content area. Resize using the drag handle in the editor rather than uploading undersized files.

    FAQs

    What image sources are available in the builder?

    You can upload your own images, or pick from the built-in Giphy, Unsplash, and Patterns libraries directly inside the Image Library.

    Can I hide an image on mobile only?

    Yes. Select the image block, expand Column settings, and set Visibility on mobile to Hide.

    Does the rollover effect work in all email clients?

    No. It is supported in Yahoo! Mail, AOL, Gmail, iCloud Mail, Outlook 2003, and MacOS Apple Mail only. Other clients display the primary image.

    How do I add alt text to an image?

    Select the image block and enter your description in the Alternative text field in the right-side settings panel.

    Can I add a link to an image?

    Yes. Enter a destination URL in the Link field within the image settings panel to make the image clickable.

  • Dark Mode Impact on Email Design

    This guide shows how to design dark mode–friendly email campaigns in Sender. It walks you through customizing the content and design of your email campaign so it remains readable and visually consistent when subscribers view it with dark mode enabled.

    Where to Find This Feature

    In the Sender dashboard, go to:

    Email campaigns → click the edit (pencil) icon on any draft campaign → Design → Edit design.

    campaign-edit

    This opens the drag-and-drop builder where you adjust colors, backgrounds, images, and text for dark mode compatibility.

    Steps to Design for Dark Mode

    Step 1 — Review Your Color Choices in Template Settings

    In the drag-and-drop builder, click the Template settings icon (globe) in the left sidebar. Under General settings, check your Background color and Content background color. Avoid pure white (#ffffff) backgrounds and pure black (#000000) text, as these create harsh contrast inversions in dark mode.

    campaign-template-settings

    Use slightly off-white backgrounds (e.g., #f6f6f6) and dark gray text (e.g., #333333) instead. These softer values produce smoother transitions when email clients apply dark mode color shifts.

    Step 2 — Adjust Text and Button Colors for Contrast

    Expand the Headlines, Paragraph, and Buttons sections in Template settings to review global typography and color settings.

    template-settings

    Set Text color and Font color values that maintain readability on both light and dark backgrounds. For buttons, check the Color under BUTTON STYLES and the button Font color — ensure the button fill and label text have enough contrast to remain legible when the surrounding background inverts. Avoid using background colors that match your text, as dark mode may invert only one of them.

    Step 3 — Prepare Images and Logos

    Click any Image or Logo block in the email to open its settings panel. Add descriptive Alternative text so content remains accessible if images are hidden or fail to load.

    image-alt-text

    For logos and icons, use images with solid (non-transparent) backgrounds, or add padding around transparent PNGs — dark mode can expose transparent areas against a dark canvas, making light-colored logos invisible. You can swap images using the Change button in the block settings panel.

    Step 4 — Preview in Dark Mode

    Click the preview icon (eye) in the top toolbar. The preview screen shows your email in both desktop and mobile views side by side.

    campaign-preview

    Toggle Dark mode preview in the upper-right corner to see an approximation of how your email renders with inverted colors. Review text legibility, button visibility, image appearance, and overall layout. Note that this preview is an approximation — actual rendering varies across email clients, browsers, and devices.

    Step 5 — Send a Test Email

    Click Send test email in the top toolbar (available in both the builder and the Design page).

    test-email-campaign

    Enter your email address and click Send. Open the test email on a device or client with dark mode enabled to verify real-world rendering. Check the email in multiple clients if possible, since Gmail, Apple Mail, and Outlook each handle dark mode differently.

    What Happens After You Save

    After saving, your email design is stored as a draft under Email campaigns. You can reopen the builder anytime by clicking the edit icon on the campaign and selecting Edit design. Continue refining colors, images, and text until the dark mode preview and test emails look correct. When ready, move forward through the Recipients and Review and send steps.

    Common Issues

    Text disappears in dark mode preview — The text color is too close to the inverted background. Adjust Text color in Template settings or in the individual block’s Headline settings / Paragraph settings to a value that contrasts well on both light and dark surfaces.

    Logo becomes invisible on a dark background — The logo uses a transparent PNG with light-colored artwork. Replace it with a version that includes a solid background, or add padding and a background fill via the Block settings on the Logo element.

    Button blends into the background — The button Color is too similar to the dark mode background. Choose a brighter or more saturated button color under Buttons in Template settings and verify the Font color inside the button remains readable.

    Dark mode preview looks different from actual email clients — The in-app preview is an approximation. Use Send test email to verify rendering in actual email clients with dark mode enabled.

    FAQs

    Does Sender let me set separate designs for light and dark mode?

    No. Sender does not provide separate light-mode and dark-mode templates. You design one version and use the Dark mode preview toggle to check how email clients will alter it.

    Which email clients apply dark mode changes?

    Most major clients — including Apple Mail, Gmail (mobile), and Outlook — apply their own dark mode transformations. Each handles color inversion differently, which is why testing with Send test email across multiple clients is recommended.

    Will my images be altered by dark mode?

    Email clients generally do not modify image pixels. However, transparent areas in PNGs will show the dark background underneath, which can hide light-colored logos or icons. Use opaque backgrounds on critical images.

    Where is the Dark mode preview toggle?

    Click the preview icon (eye) in the builder’s top toolbar. The Dark mode preview toggle appears in the upper-right corner of the preview screen.

  • Personalization Basics

    This guide shows how to add personalization to your email campaigns in Sender. It walks you through inserting custom fields into your subject line and email body so each subscriber receives content tailored to them.


    Where to Find This Feature

    In the Sender dashboard, go to: Email campaigns → click the edit icon on any draft campaign (or click New campaign) → navigate to Settings.

    campaign-edit

    Personalization is available in two places: the Email subject and Email Preview text fields on the Settings step, and inside any text block in the drag-and-drop editor on the Design step.

    campaign-settings

    Steps to Add Personalization

    Step 1 — Insert Custom Fields in the Subject Line

    On the Settings step, locate the Email subject field. Click the Custom fields dropdown on the right side of the field. A searchable list appears with options like First name, Last name, Email, Phone number, and Birthday.

    email-subject-preview-field

    Select a field to insert it at your cursor position. You can do the same in the Email Preview text field directly below it.

    Step 2 — Open the Email Design Editor

    Click Design in the top navigation bar, then click Edit design to open the drag-and-drop builder.

    email-template-builder

    If you need a text block, drag a Headline or Paragraph block from the Building blocks panel on the left into the canvas area.

    Step 3 — Add Custom Fields in the Email Body

    Double-click on any text block to enter editing mode. An inline toolbar appears above the block. Click the Custom fields icon in the toolbar — it opens a dropdown with subscriber fields such as firstname, lastname, email, phone, and birthday, as well as account-level fields like account.title, account.address, account.city, account.country, and account.signature.

    custom-fields

    Select a field to insert it at the cursor position. Each field is rendered as a merge tag in the format {{ fieldname }}.

    Step 4 — Preview Your Personalization

    Click the Preview icon (eye icon) in the top-right toolbar of the editor. A side-by-side desktop and mobile preview appears, showing how the email will look. Merge tags display as {{ fieldname }} in the preview — they are replaced with actual subscriber data when the email is sent.

    campaign-preview

    Use this view to confirm your custom fields are placed correctly and look good across screen sizes.


    What Happens After You Save

    After clicking Save & continue, your design is saved and you move to the next step. You can return to the Design step at any time to edit personalization. On the Review and send step, the email preview also displays your merge tags so you can double-check placement before sending.


    Common Issues

    Custom field shows as blank when sent — The subscriber’s profile does not have a value stored for that field. Ensure your subscriber list includes data for the fields you use.

    Merge tag appears as raw text in the inbox — The tag was likely typed manually with incorrect formatting. Always insert custom fields using the Custom fields dropdown rather than typing the tags by hand.

    Custom fields dropdown is not visible — You need to be in text editing mode. Double-click the text block to activate the inline toolbar where the Custom fields button appears.


    FAQs

    Where can I use custom fields?

    In the Email subject, Email Preview text, and inside any text block (Headline or Paragraph) in the drag-and-drop editor.

    What subscriber fields are available?

    The default fields include firstname, lastname, email, phone, birthday, and unsubscribe_link. Account-level fields like account.title, account.address, account.city, account.zip_code, account.state, account.country, and account.signature are also available in the email body editor.

    Can I search for a specific custom field?

    Yes. The Custom fields dropdown on the Settings step includes a search bar. Type a field name to filter the list.

    What format do merge tags use?

    Merge tags follow the format {{ fieldname }} with double curly braces. They are inserted automatically when you select a field from the dropdown.

    What happens if a subscriber has no data for a custom field?

    The merge tag is replaced with an empty value. Consider placing custom fields within a sentence so the email still reads naturally if a value is missing.

  • Email Rendering Differences Across Inbox Providers

    Different inbox providers interpret and display email HTML in their own way. This guide walks you through the tools available in Sender to preview, test, and adjust your email campaign design so it renders consistently across providers like Gmail, Outlook, Apple Mail, and Yahoo.


    Where to Find This Feature

    In the Sender dashboard, go to:

    Email campaigns → select a campaign → Design

    campaign-edit-design

    From the Design step, click Edit design to open the drag-and-drop builder or the custom HTML editor, where all preview and testing tools are accessible.


    Steps to Handle Email Rendering Differences

    Step 1 — Preview Desktop and Mobile Rendering

    Inside the email editor, click the Preview icon (eye icon) in the top toolbar. Sender displays your email in both a desktop and a mobile view side by side.

    campaign-preview
    campaign-desktop-mobile-preview

    Check that your layout, images, and text scale properly at each width. The preview also shows the Email size indicator — keeping emails under 102 KB helps avoid clipping in Gmail.

    Step 2 — Check Dark Mode Appearance

    On the preview screen, toggle Dark mode preview in the upper-right corner. Many inbox providers such as Outlook, Apple Mail, and Gmail offer dark mode, which can invert background colors and alter text contrast. Review whether your content background, text colors, and images remain legible. Return to the editor to adjust Background color and Content background color under Template settings if needed.

    Step 3 — Review and Edit the Plain Text Version

    Back on the Design step, click View plain text version. Some inbox providers or subscriber settings fall back to plain text when HTML cannot be rendered.


    campaign-plain-text-version

    plain-text-editor

    Verify that the plain text version includes all essential content and links in a readable format. This ensures subscribers who receive plain text still get a complete message.

    Step 4 — Send a Test Email to Multiple Providers

    Click Send test email from the editor toolbar or the Design step.

    send-test-email

    send-test-email

    Enter an email address in the dialog and click Send. Repeat this for addresses on different providers — such as a Gmail address, an Outlook address, and a Yahoo address — to see exactly how each provider renders your design. Check for image loading behavior, font substitutions, button alignment, and spacing.

    Step 5 — Adjust Design for Consistency

    Return to the editor and make adjustments based on your test results. Use Template settings to modify global styles like Headlines, Paragraph, Buttons, and Section settings. Stick to web-safe fonts, use inline-friendly layout blocks from the Building blocks panel, and set explicit widths on images. If you use custom HTML, switch to the Custom HTML editor and toggle between the desktop and mobile preview icons in the top toolbar to verify changes at both sizes.


    What Happens After You Save

    After saving, your email is stored as a draft under Email campaigns. You can reopen it at any time to continue editing or run additional test sends. Before moving to the Review and send step, use the Preview and Send test email tools one more time to confirm the design looks correct across providers.


    Common Issues

    Images not displaying — Some providers block images by default. Add descriptive alt text to every image block so recipients understand the content before loading images.

    Layout breaks in Outlook — Outlook uses a different rendering engine that does not support certain CSS properties. Avoid CSS floats and flexbox; rely on table-based layouts or the drag-and-drop builder’s structured blocks instead.

    Email is clipped in Gmail — Gmail clips messages larger than 102 KB. Check the Email size indicator in the preview screen and reduce content or image weight if the size is close to or exceeds that limit.

    Dark mode inverts colors unexpectedly — Inbox providers may override light backgrounds with dark ones. Use the Dark mode preview toggle to identify issues, then set explicit background colors on content sections in Template settings to maintain contrast.

    Fonts look different across clients — Not all providers support custom or Google Fonts. Define fallback web-safe fonts (e.g., Arial, Helvetica) in your Template settings under Paragraph and Headlines to ensure readable typography everywhere.


    FAQs

    Can I preview my email in a specific inbox provider inside Sender?

    Sender offers desktop, mobile, and dark mode previews. To see how a specific provider renders your email, use Send test email to send it to an actual inbox on that provider.

    Does the drag-and-drop builder produce inbox-compatible HTML?

    Yes. The Drag and drop builder generates table-based HTML designed for broad compatibility. Custom HTML campaigns give you full control but require you to manage compatibility yourself.

    Should I always include a plain text version?

    Sender automatically generates a plain text version. Review it by clicking View plain text version on the Design step to ensure it reads well for recipients whose inbox providers default to plain text.

    How do I fix rendering issues in a specific provider?

    Send a test email to that provider, identify the problem, then adjust your design in the editor. Common fixes include using web-safe fonts, adding alt text to images, and simplifying layout structures. Re-send the test after each change to confirm the fix.

    What is the recommended maximum email size?

    Keep your email under 102 KB to avoid clipping in Gmail. The Email size indicator on the preview screen shows your current size in real time.

  • Set subject and preview

    In order to maximize email engagement and opening rates, one must effectively address all parts of the campaign, especially the subject line and preview text. It’s the first thing any recipient sees, and we all know what is said about first impressions. 

    The email subject and preview text are set up in the first step of campaign creation.

    Here’s how email subject and preview text reflects on Gmail application. 

    Use the chart below to find an optional preview text length for different platforms.


    If you got stuck on a specific task or can’t find a way to execute a particular job, contact our support team via LiveChat or [email protected] – we’re here to help 24/7.

  • Add signature to newsletter

    Yes, you can add a signature to a “plain text” newsletter. The signature is set in the main settings section “Account information.”

    Here is how the signature transfers to “Plain text” editor – the signature can be changed in editor as well. 

    That’s it!

    If you are stuck on a specific task or can’t find a way to execute a particular job, contact our support team via LiveChat or [email protected] – we’re here to help 24/7.

  • Add “view in browser” link

    All the templates from our template library have the static block at the top that has the text ‘Is this email not displaying correctly? View it in your browser’. The content of the text in the templates cannot be changed but you are free to change the language and design. Click here to read more on how to do that.

    If you import your own HTML coded template and want to add a ‘View this email in your browser’ link. You can create a link in your HTML with the merge tag that is provided below:

    <a href=”[BROWSER_PREVIEW]”>
    ’Is this email not displaying correctly? View it in your browser
    </a>

    Keep in mind that the link ‘View this email in your browser can’t be tested in the HTML Builder, so simply send a test email to see if it works properly.

    That’s it!

    If you got stuck on a specific task or can’t find a way to execute a particular job, contact our support team via LiveChat or [email protected] – we’re here to help 24/7.

  • Change link language and design

    Here’s how you can change the language of the unsubscribe and preview links.

    Go to Template settings and choose the language under General settings.

    As you can see there’re additional buttons to hide both of these links. However, to do so and be able to send out a campaign you’ll need to add this code: {$unsubscribe_text} to it.

    All of the supported languages:

    • Catalan
    • Chinese
    • Croatian
    • Czech
    • Danish
    • Dutch
    • English
    • Estonian
    • Finnish
    • French
    • German
    • Greek
    • Hungarian
    • Italian
    • Japanese
    • Latvian
    • Lithuanian
    • Norwegian
    • Persian
    • Polish
    • Portuguese (Brazilian)
    • Portuguese (Portugal)
    • Romanian
    • Russian
    • Serbian
    • Slovak
    • Slovenian
    • Spanish
    • Swedish
    • Turkish

    If the language you need is not in the list – you can send us proper translations to [email protected] and we will implement the language for you with no additional cost. The list below consists of sentences that we need you to translate:

    • Is this email not displaying correctly? View it in your browser.
    • If you want to unsubscribe, click here.
    • You have successfully unsubscribed.
    • From now on you won’t receive our newsletters.
    • Error occurred.

    That’s it!

    If you got stuck on a specific task or can’t find a way to execute a particular job, contact our support team via LiveChat or [email protected] – we’re here to help 24/7.

  • Personalize with custom fields

    To make your email campaigns a lot more personal, you can use any of your collected subscribers’ custom fields: first name, surname, order number, location, shoe size, preferences, etc., in the email subject line, email preview text and the campaign body itself.

    Here is how the dynamic text looks like:

    Here is how to insert the dynamic text:

    That’s it!

    If you got stuck on a specific task or can’t find a way to execute a particular job, contact our support team via LiveChat or [email protected] – we’re here to help 24/7.