Below are our top recommended practices for email sending that will help maintain and improve your email deliverability scores:
Warming up. Always start with lower volumes of sending, especially when you have just migrated to a new ESP or are emailing after a long layoff;
Sending to engaged segments. Sending to your most engaged set of subscribers is a great idea. An engaged subscriber is anyone who has opened your email or clicked the link inside it at least once. For instance, you could choose to focus your campaign on only those who’ve engaged with your emails over the last 30, 60, or 90 days;
Maintaining list hygiene. Ensure that you clean your list of any invalid or inactive email addresses from time to time;
Welcoming unsubs. Include at least one clear unsubscribe link in your emails offering disinterested folks who would otherwise have marked you spam, an easier way out;
Personalizing your content. Including personalization (for example, using the reader’s name in the subject line or email body) not only engages them more but also tells mailbox providers such as Gmail and Yahoo that you know them, increasing respect and trust;
No cold emailing. Only send to those contacts who know your business and have consented to receiving your communications by opting in;
Configuring security mechanisms such SPF and DKIM to signal trust.
That’s it!
If you got stuck on a specific task or can’t find a way to execute a particular job, contact our support team via LiveChat or [email protected] we’re here to help 24/7.
Warming up your sending IP address and sender reputation is a crucial first step towards ensuring higher email deliverability.
This is how you can get started, even if you have never done something like this before:
Design high-engagement automation flows for both emails and SMS such as Welcome, Abandoned Cart, etc., and let these run for at at least 3-10 days;
Migrating from another email marketing tool? Follow the steps below:
Create a segment of contacts who engaged (opens and clicks) with your emails and SMS over the last 180 days;
Send your first email and SMS campaigns to the above segment and new subscribers from over the last 45 days only;
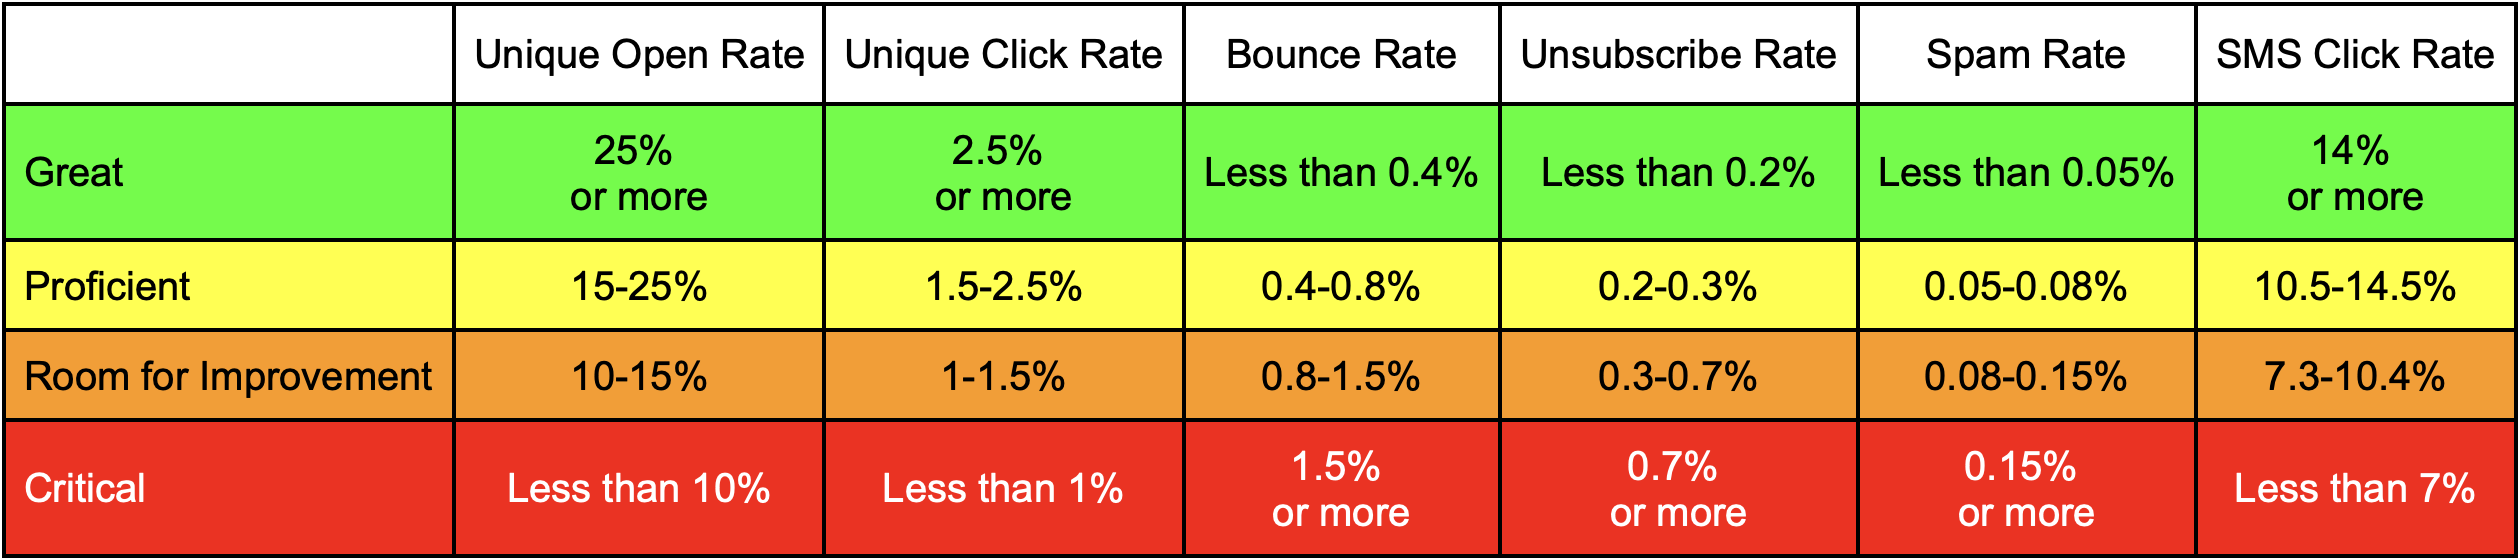
Actively track key engagement metrics for each campaign. The following chart can help you understand where your campaign performance stands:
If your campaigns consistently trend towards the orange or red zones indicated in the above chart, we’d recommend you to verify if you are indeed following the best deliverability practices described here.
That’s it!
If you got stuck on a specific task or can’t find a way to execute a particular job, contact our support team via LiveChat or [email protected] we’re here to help 24/7.
Sender ensures strict policies for the content that can be sent using our platform and infrastructure;
We follow clear and established thresholds for the permissible percentage of unsubscribes, spam reports, and hard-bounces before the account gets temporarily or permanently suspended;
Cold emailing any scraped or purchased lists i.e. contacts who have not opted into your lists is strictly prohibited;
Any abuse of these guidelines attracts an instant temporary or permanent suspension of the said account.
All said and done, even with a shared account you are in very good hands since we maintain optimal infrastructure to facilitate world-class deliverability for your business.
Dedicated IP address
The dedicated IP address allocated to your account is already pre warmed-up so you can start sending from the get-go;
This point on, your IP address reputation rests completely on your best sending practices.
That’s it!
If you are stuck on a specific task or can’t find a way to execute a particular job, contact our support team via LiveChat or [email protected] – we’re here to help 24/7.
Introducing an exciting new method to gather subscribers – the QR code. This QR code can be printed and strategically placed at the cash register, changing rooms, or any location where your clients might be enticed to subscribe to the content you wish to share.
To get started, make sure you have created a form using the provided tutorial. If you already have a form, you can skip this step and jump to the instructions on how to access the QR code.
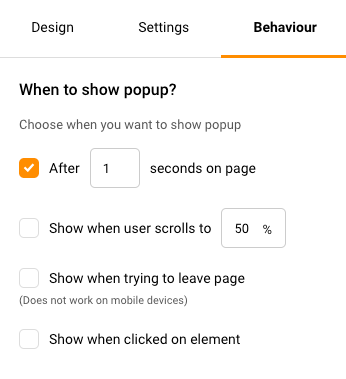
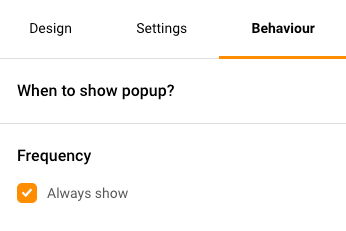
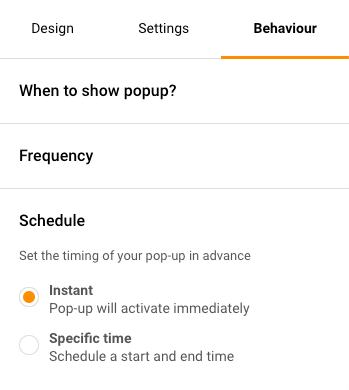
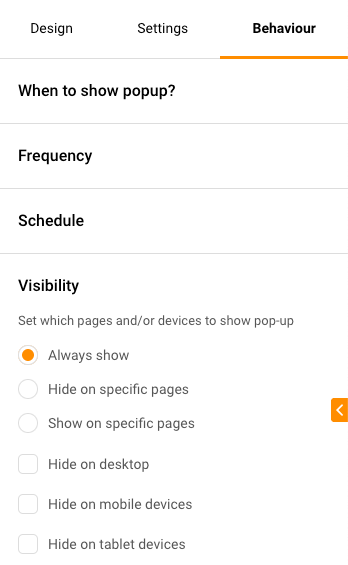
NOTE: If you decide to use the QR code for a pop-up form, you need to make sure that the set behaviors of the form allow for it to be visible instantaneously.
To ensure your pop-up form appears immediately, follow these steps to adjust its behavior:
To obtain the QR code for a created form, go to “Forms” and select “Overview” next to the form you want the QR code for.
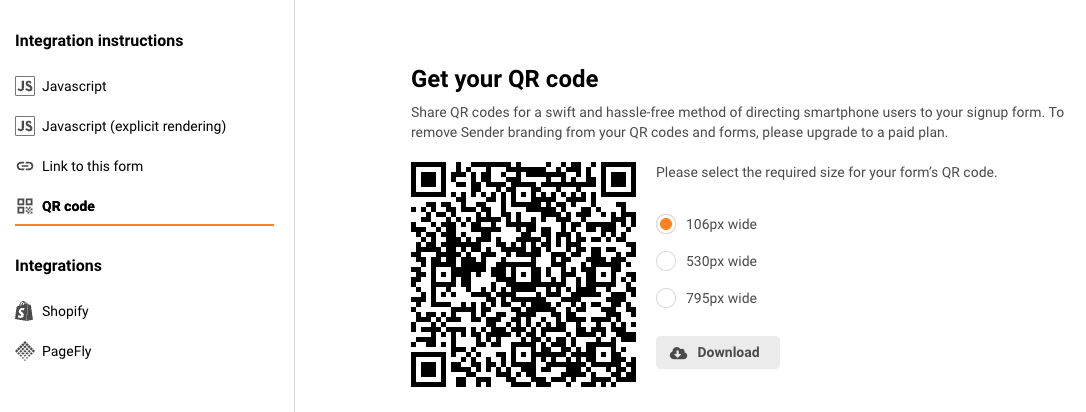
You’ll find the QR code already generated under the Integration instrutions.
Choose from three sizes: small, medium, or large. Click on your preferred size, and the QR code will be downloaded to your device in PNG format.
This is how it would look like from the subscriber’s side:
Now you’re all set to deploy the QR code and start gathering subscribers effortlessly.
If you want to remove the Sender branding from your QR codes and forms, you can do that by upgrading to any paid plan.
That’s it!
If you got stuck on a specific task or can’t find a way to execute a particular job, contact our support team via LiveChat or [email protected] – we’re here to help 24/7.
The ability to reorder subscriber custom fields, provides enhanced customization and organization for your management process. It allows you to move and rearrange custom fields as per your preference.
Email, first name, last name, and contact number are fixed fields, however, all user-generated fields can be rearranged.
To reorder the subscriber fields, navigate to ‘Subscribers’, select ‘Fields’, and then choose ‘Reorder Fields’.
Then, move each field to your preferred location and secure the alterations made. This reordering modifies the display of subscriber information within your main subscribers’ list.
That’s it!
If you got stuck on a specific task or can’t find a way to execute a particular job, contact our support team via LiveChat or [email protected] – we’re here to help 24/7.
Your comments, suggestions, and critiques are like the north star to our ship – they guide us towards constant improvement. Here’s a snapshot of how we use your feedback:
Making Current Features Better: Your feedback helps us to spot any bumps in your journey, and smoothen them out for a better experience.
Inventing New Features: Your fantastic ideas often light the bulb for us, leading to new, innovative features on our platform.
Prioritizing Developments: Your feedback helps us understand what’s most important to you, and we ensure those things top our list.
Boosting Your Satisfaction: We aim to put a smile on your face! By listening to and addressing your needs, we can make your experience with us even more enjoyable.
How to Share Your Feedback with Us
We’ve made it super easy for you to share your thoughts:
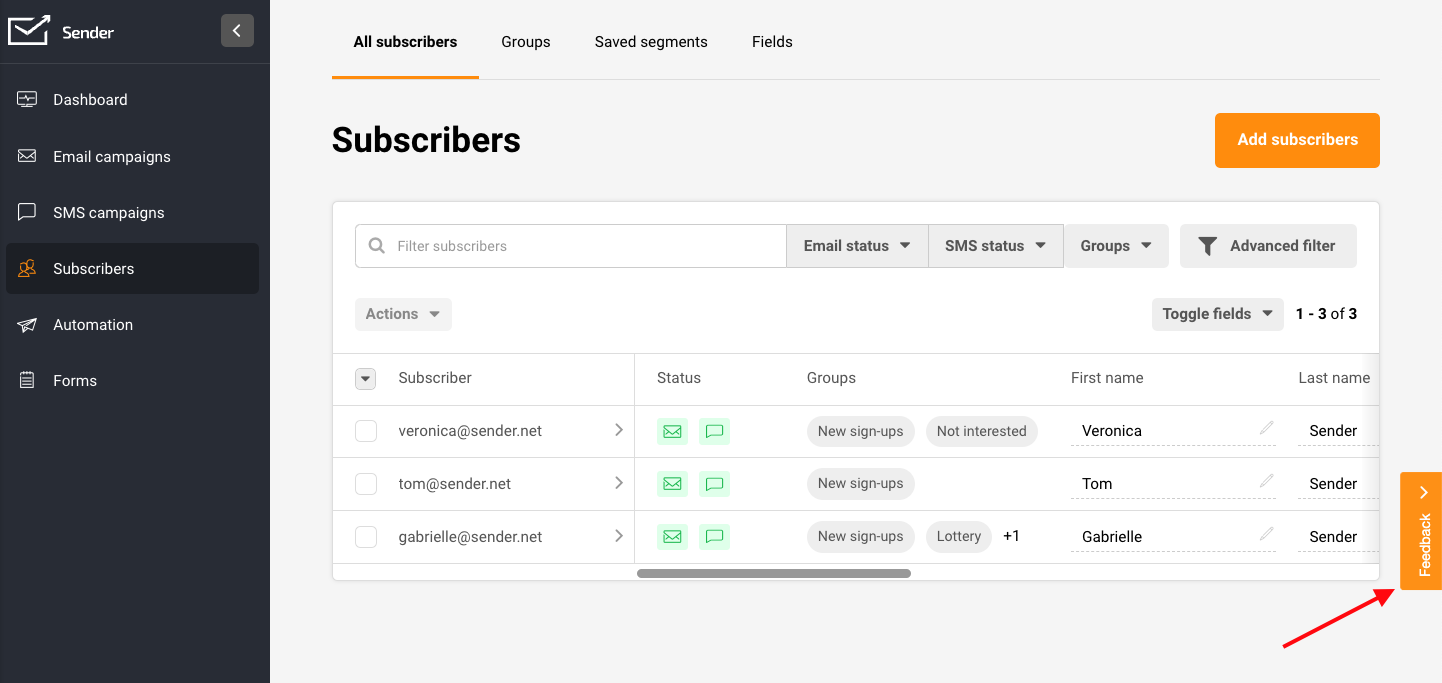
Via the Feedback Button – The feedback button is conveniently available on each page of our platform. Regardless of your current location within our site, you have the opportunity to express your thoughts instantly. And if you’re open to us reaching out to discuss your feedback further, kindly leave your contact email – we look forward to connecting with you!
Conceal or Reveal the Button: If you prefer an unobstructed full-screen view, you can quickly hide the feedback button using the arrow icon. Similarly, the same arrow icon allows you to display the button when you wish to provide feedback.
Via Email: Prefer a more personal approach? No worries! You can directly email our dedicated customer support team via [email protected]
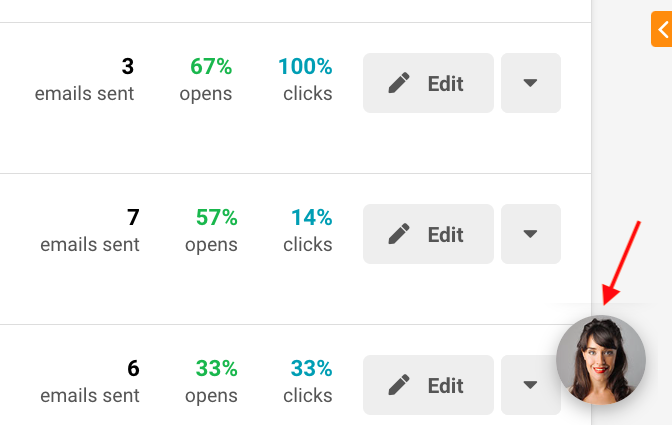
Live Chat Support: For real-time assistance, simply click on the head icon located in the bottom right corner of your screen to initiate a Live Chat with one of our friendly support agents.
That’s it!
If you got stuck on a specific task or can’t find a way to execute a particular job, contact our support team via LiveChat or [email protected] – we’re here to help 24/7.
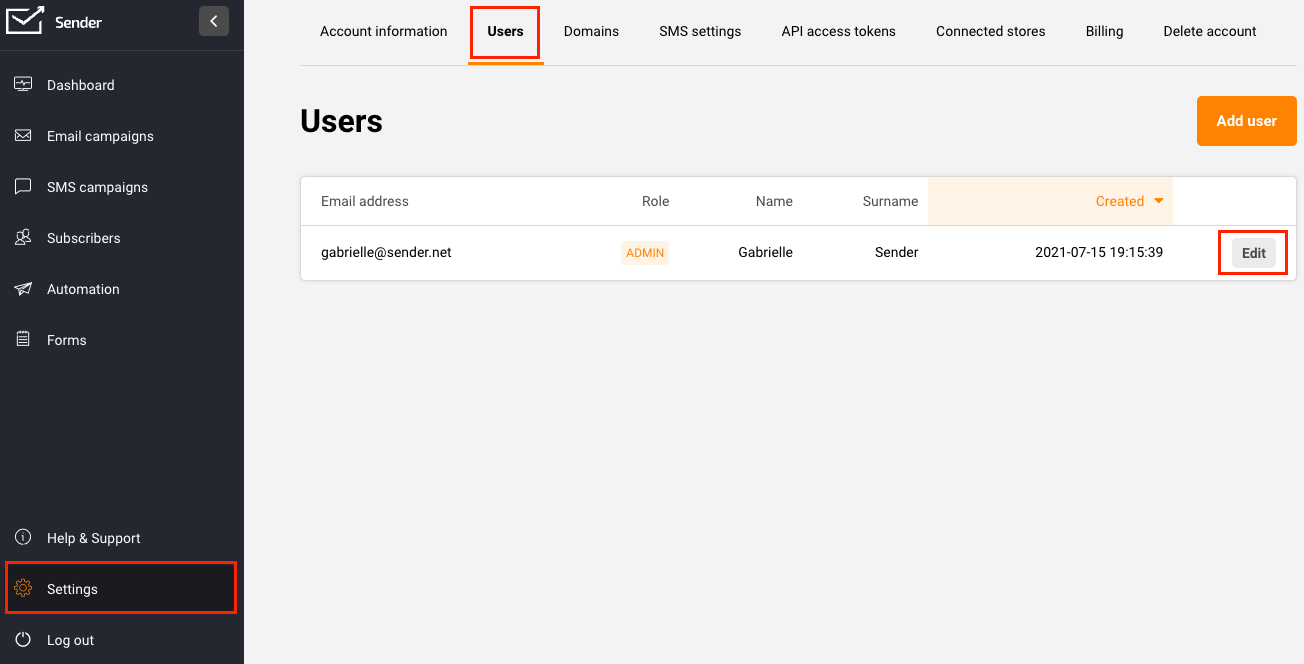
Two-Factor Authentication (2FA) needs to be set for each account user separately.
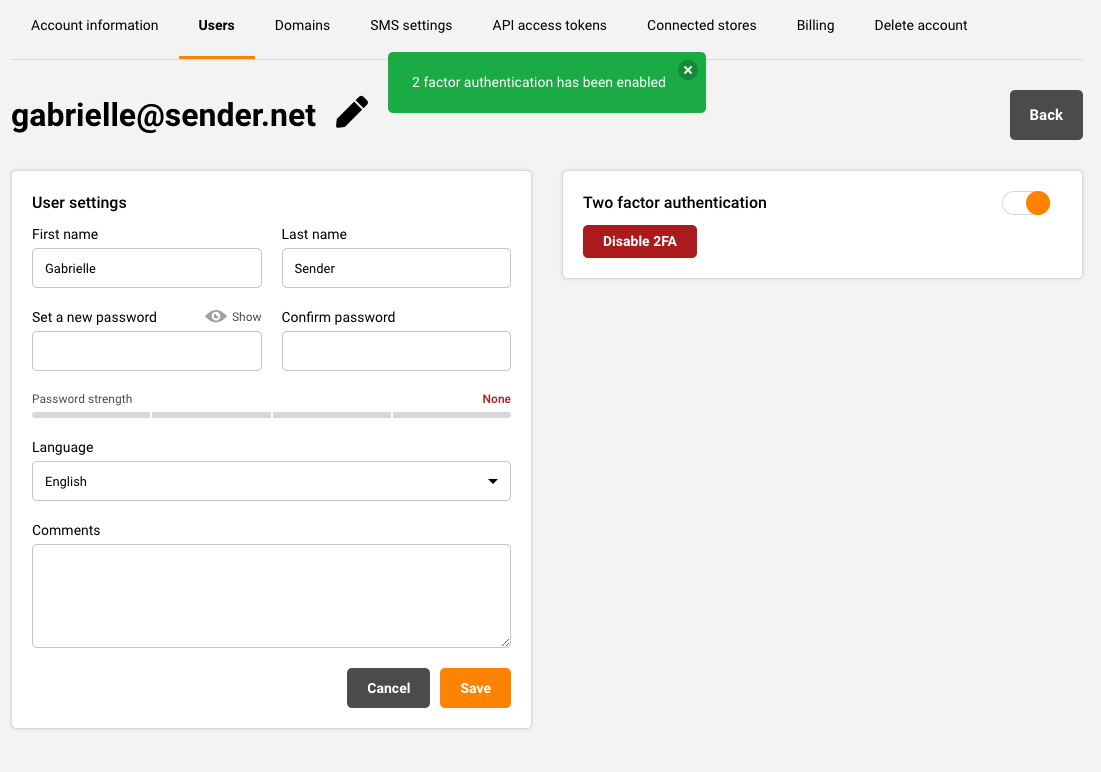
To set up the 2FA, go to Settings -> Users and click Edit next to the user you want to set up the 2FA for.
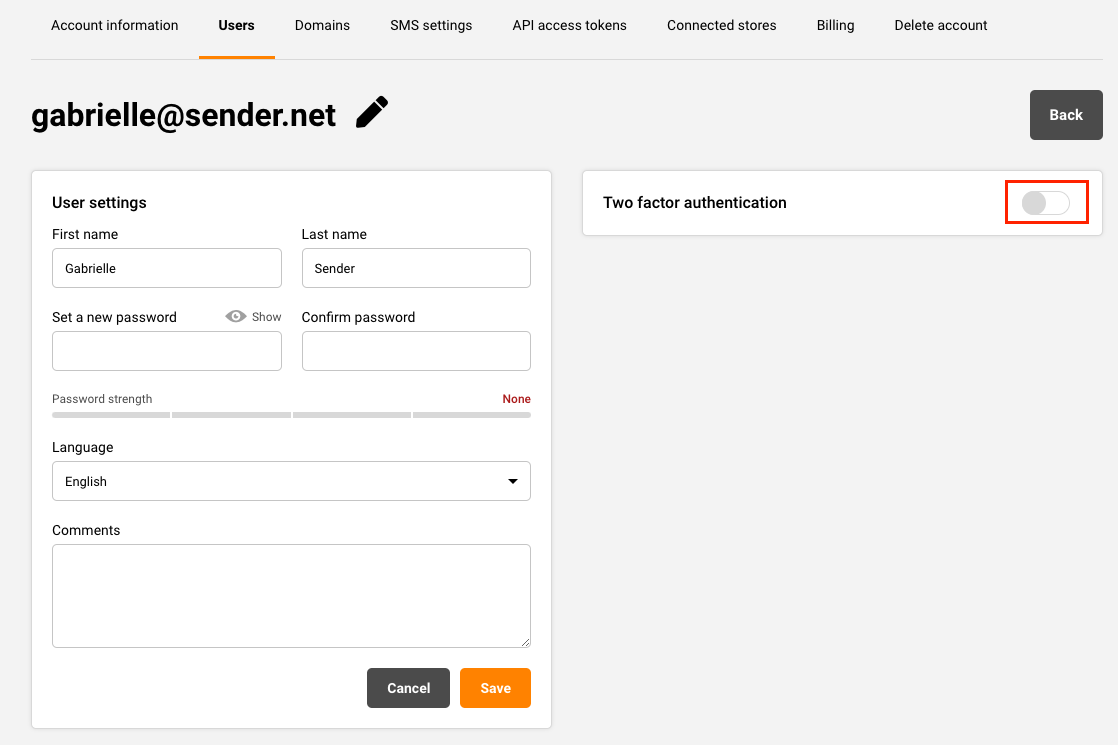
After that, enable the “Two factor authentication” feature by switching the toggle and follow the provided instructions.
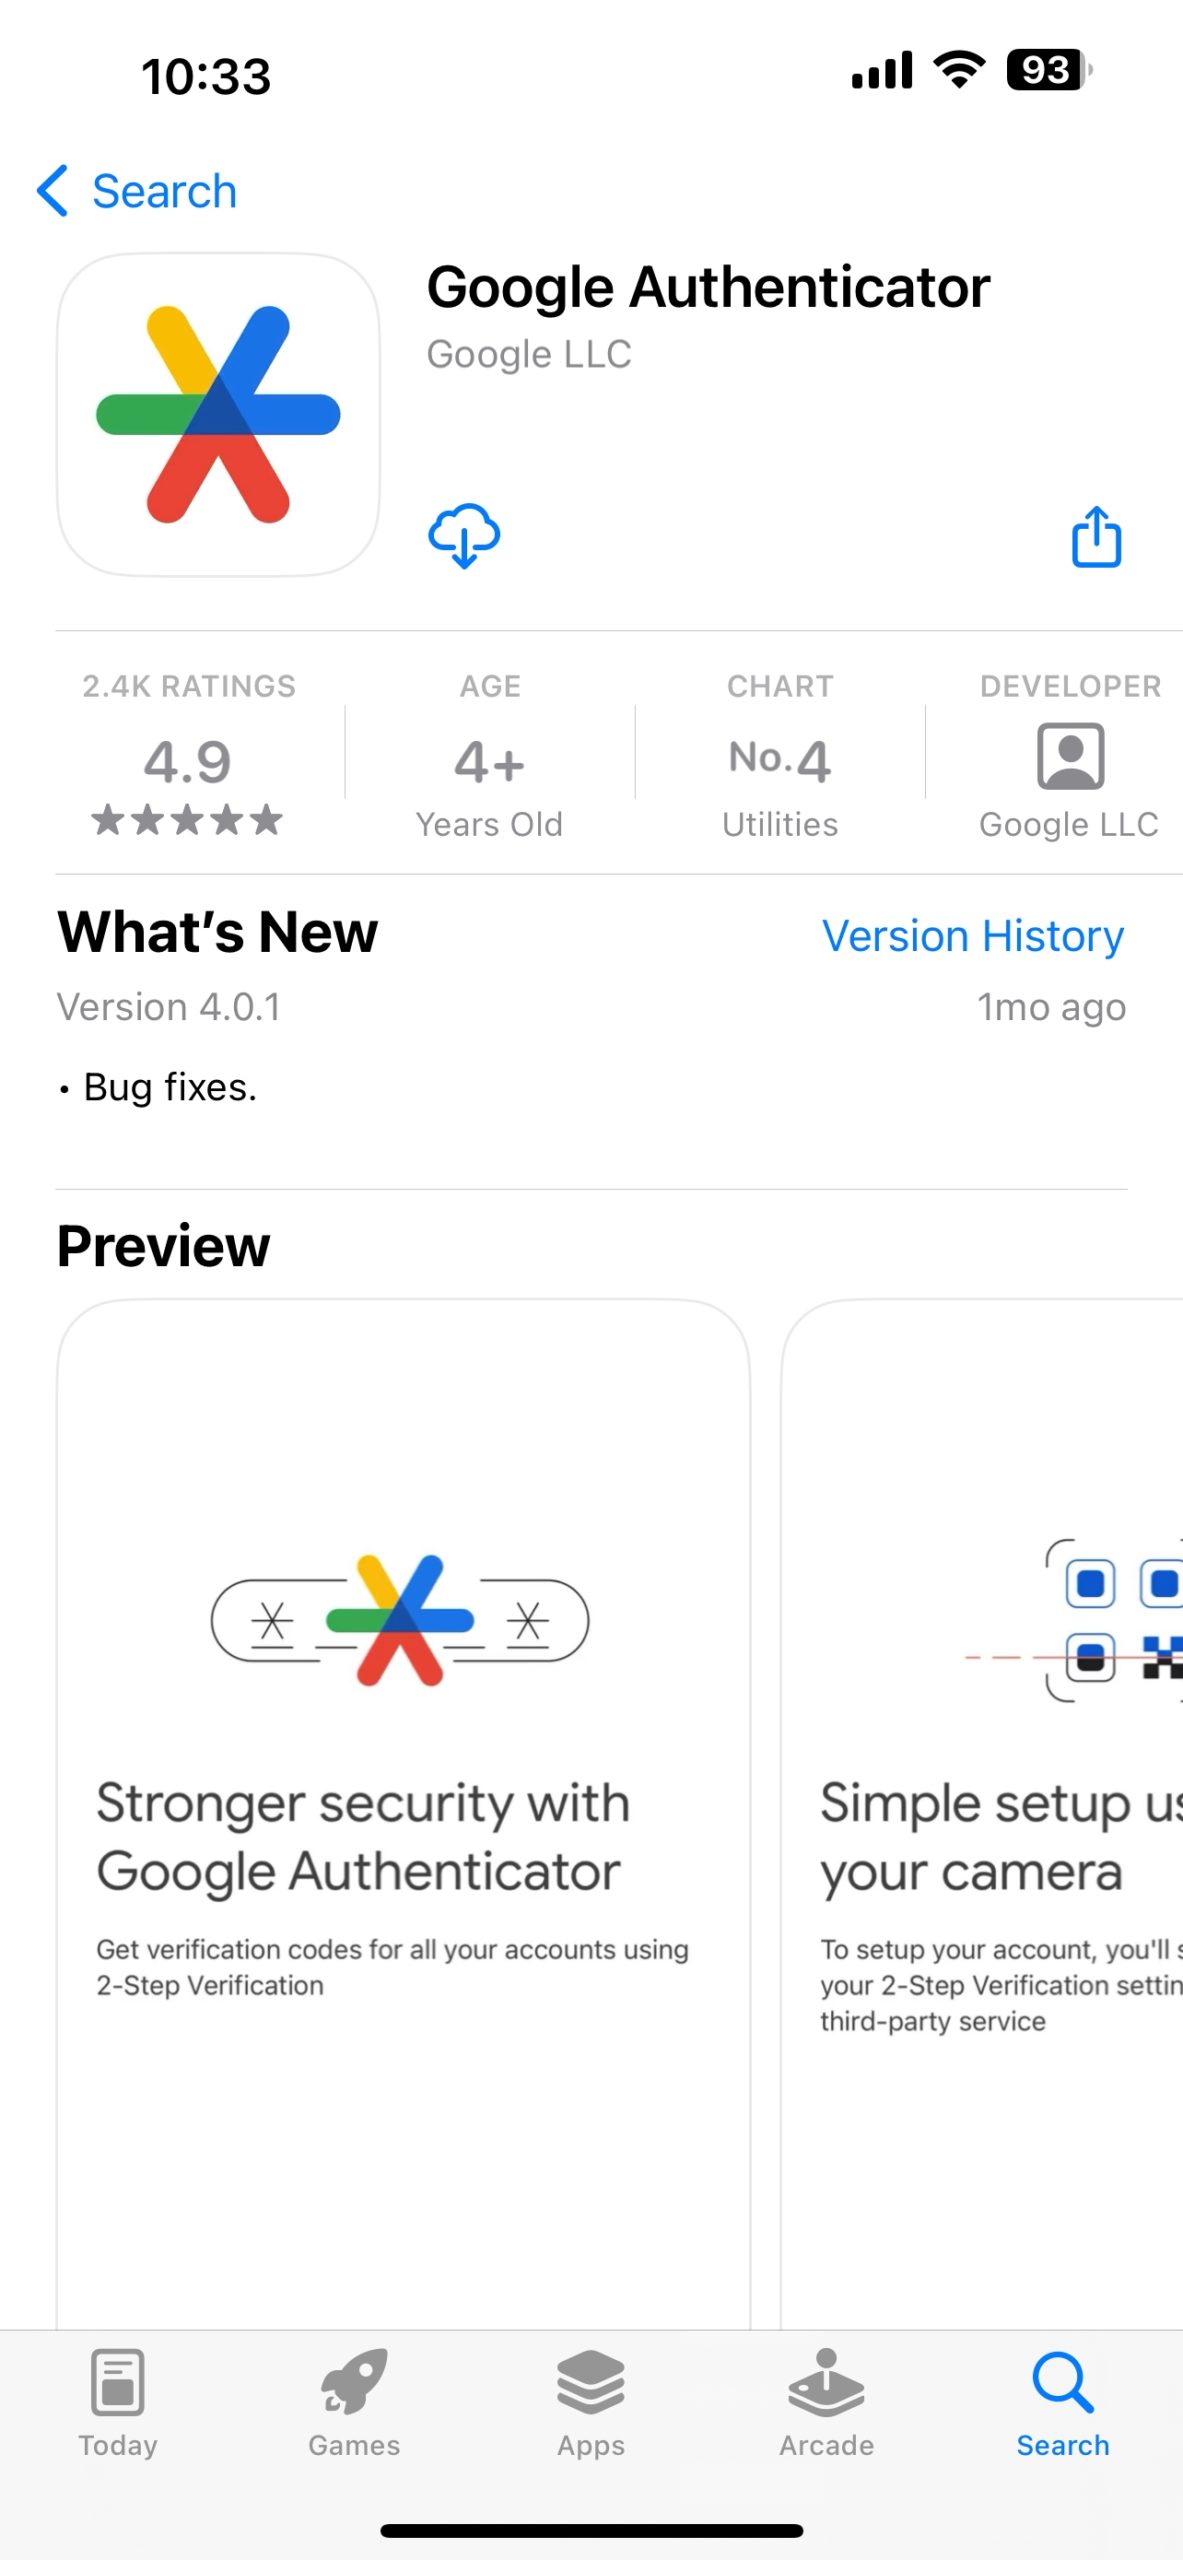
Set up 2FA authentication in 3 steps:
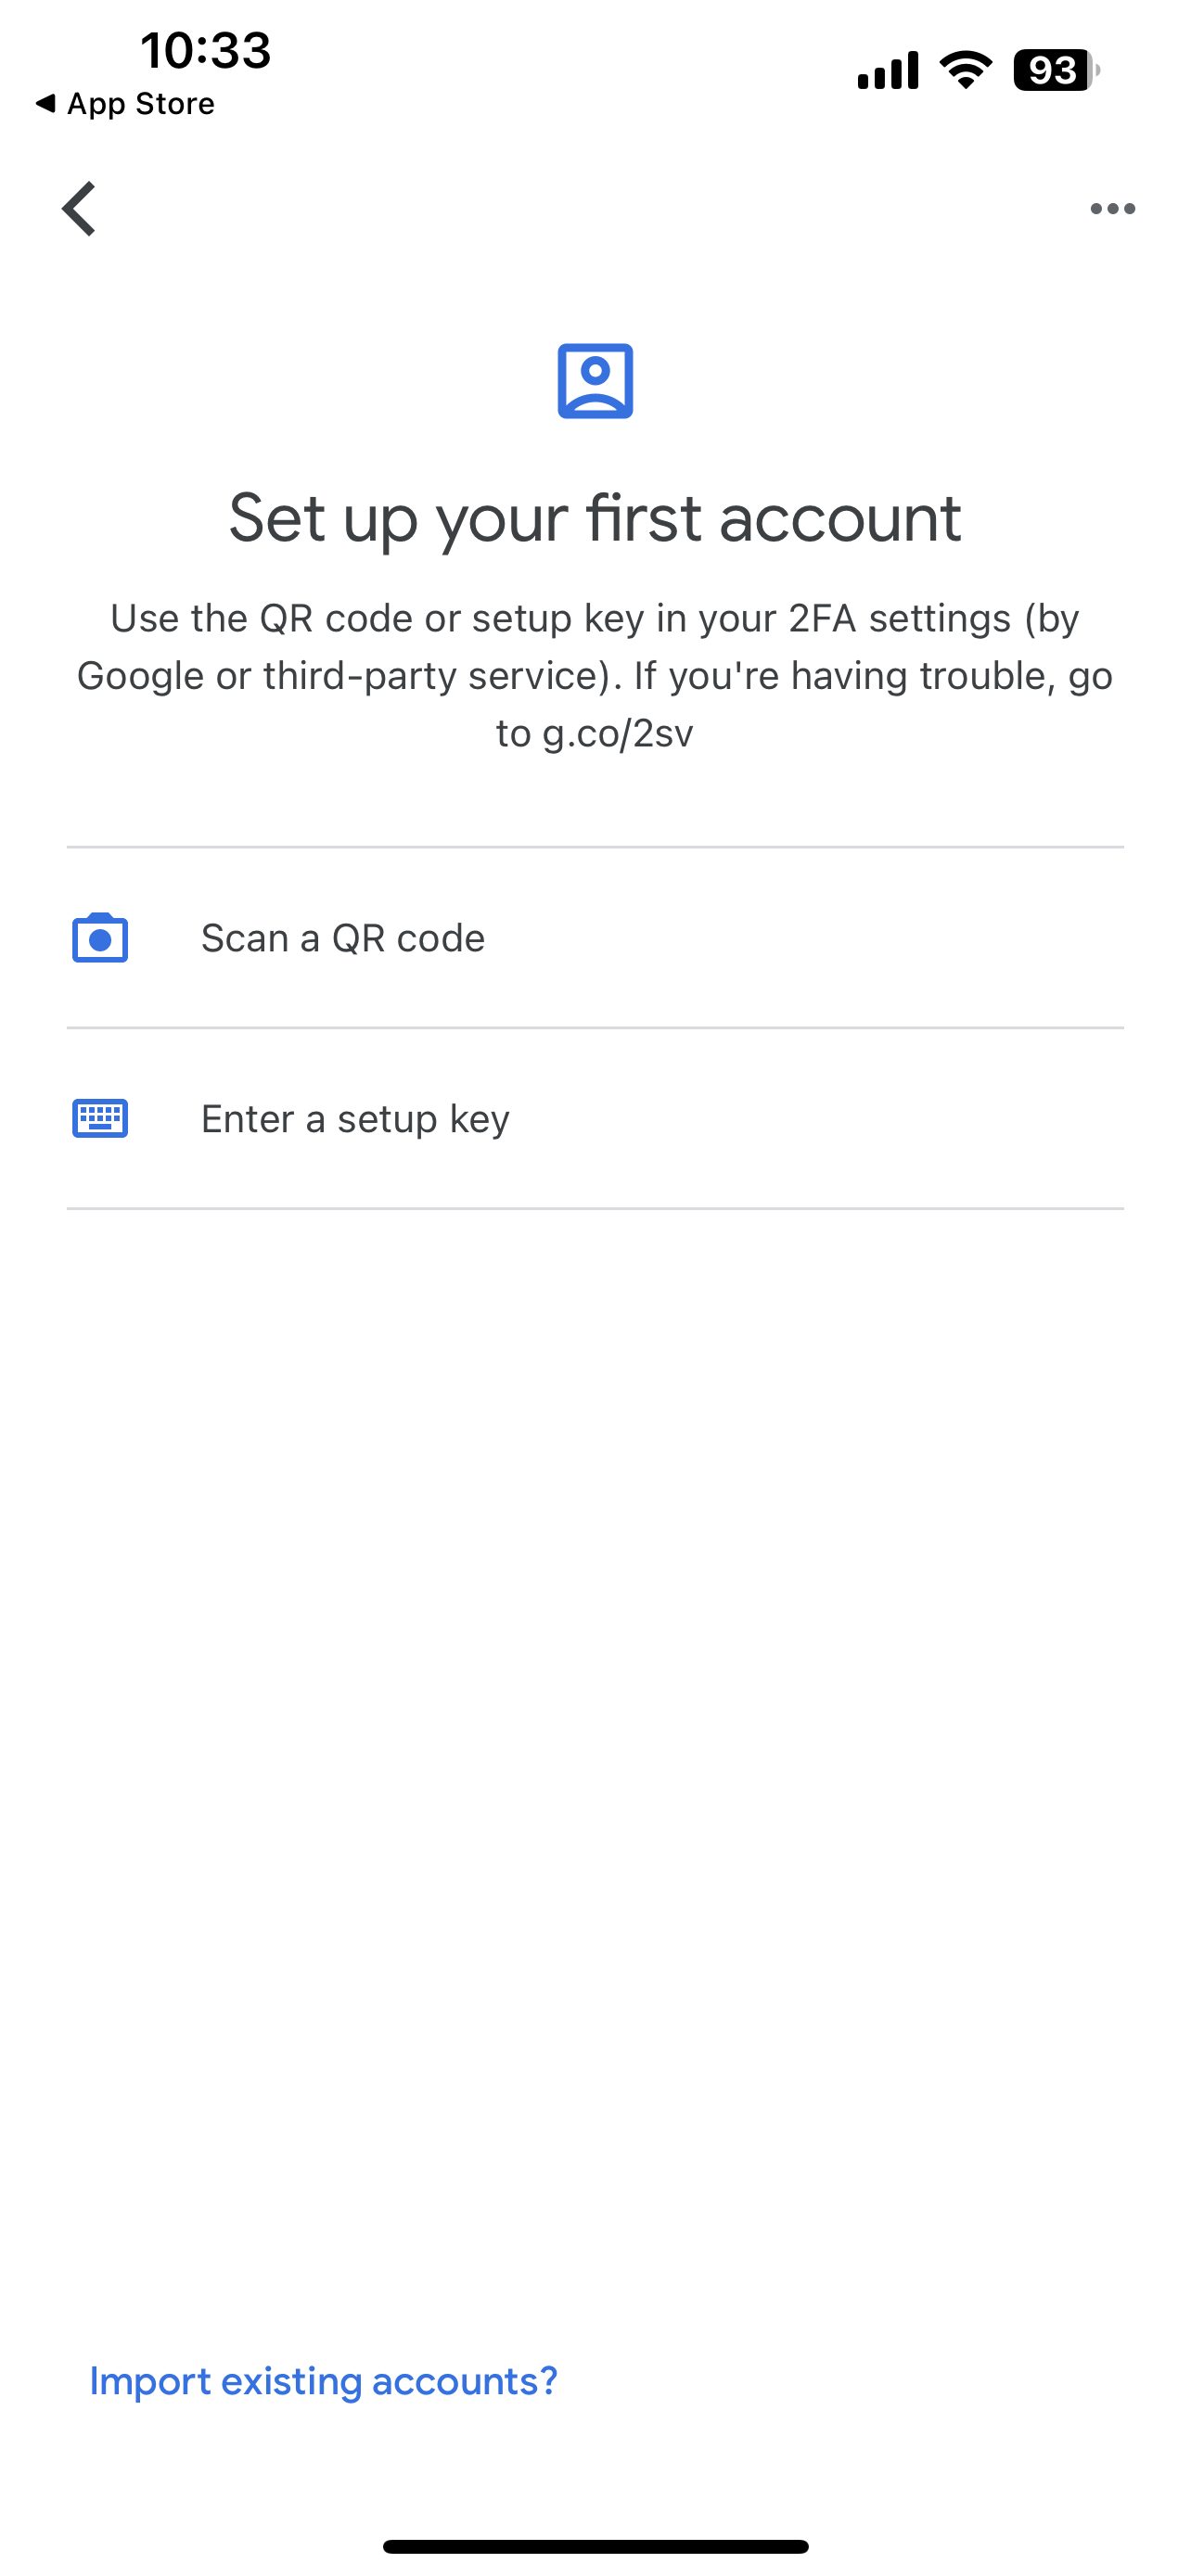
Download and install the free Google Authenticator iPhone or Android app on your smartphone.
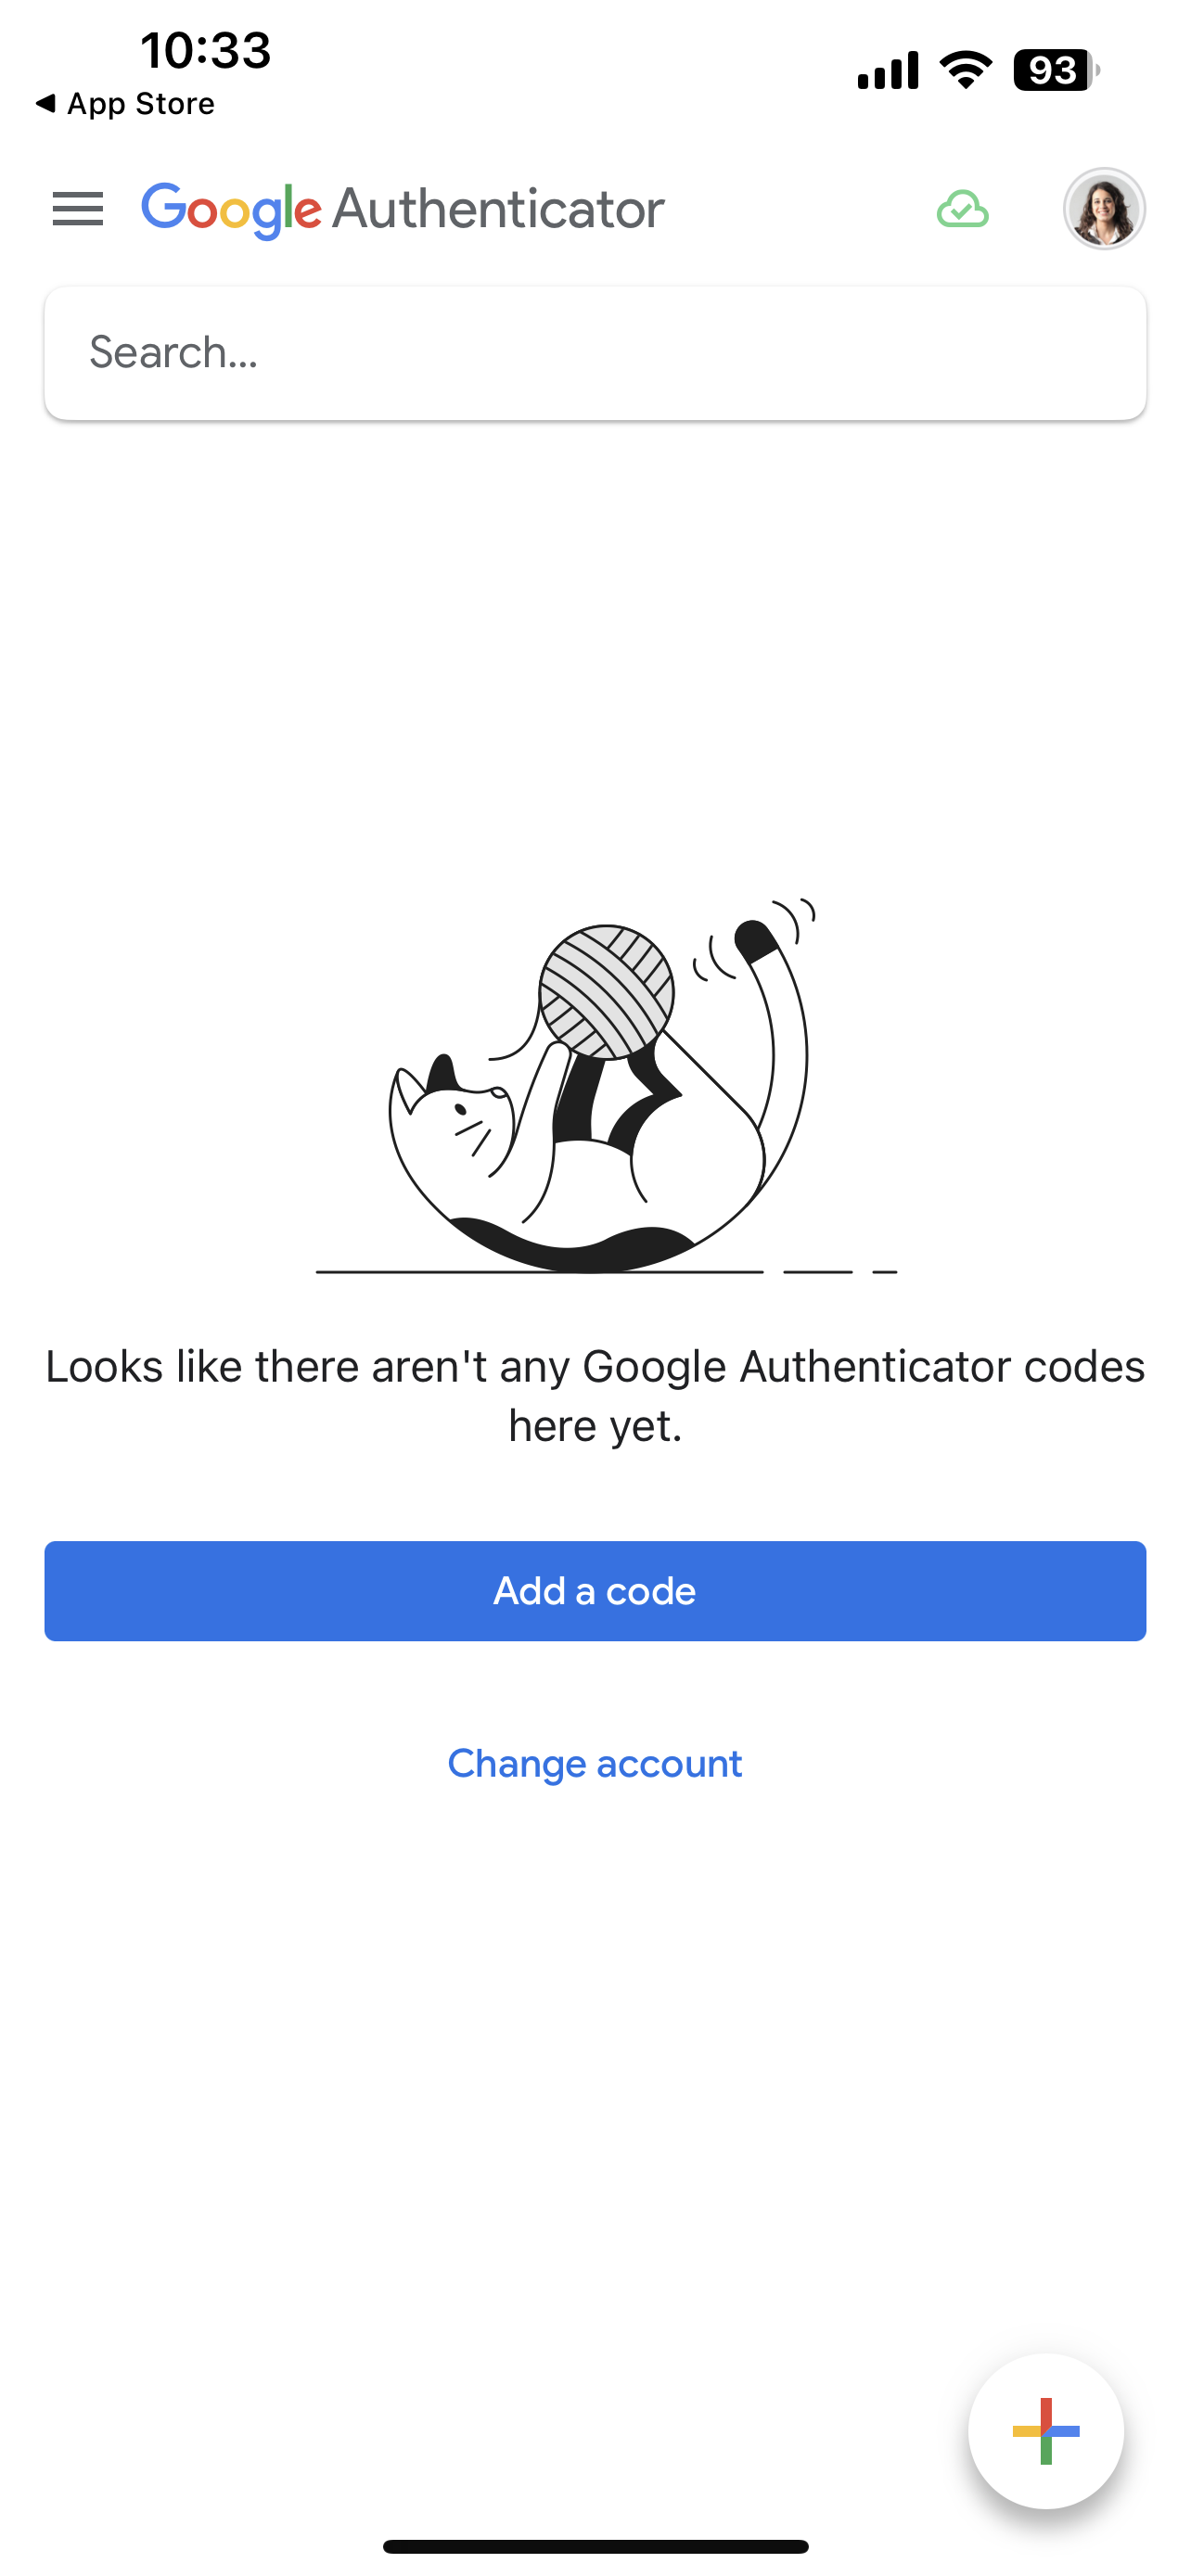
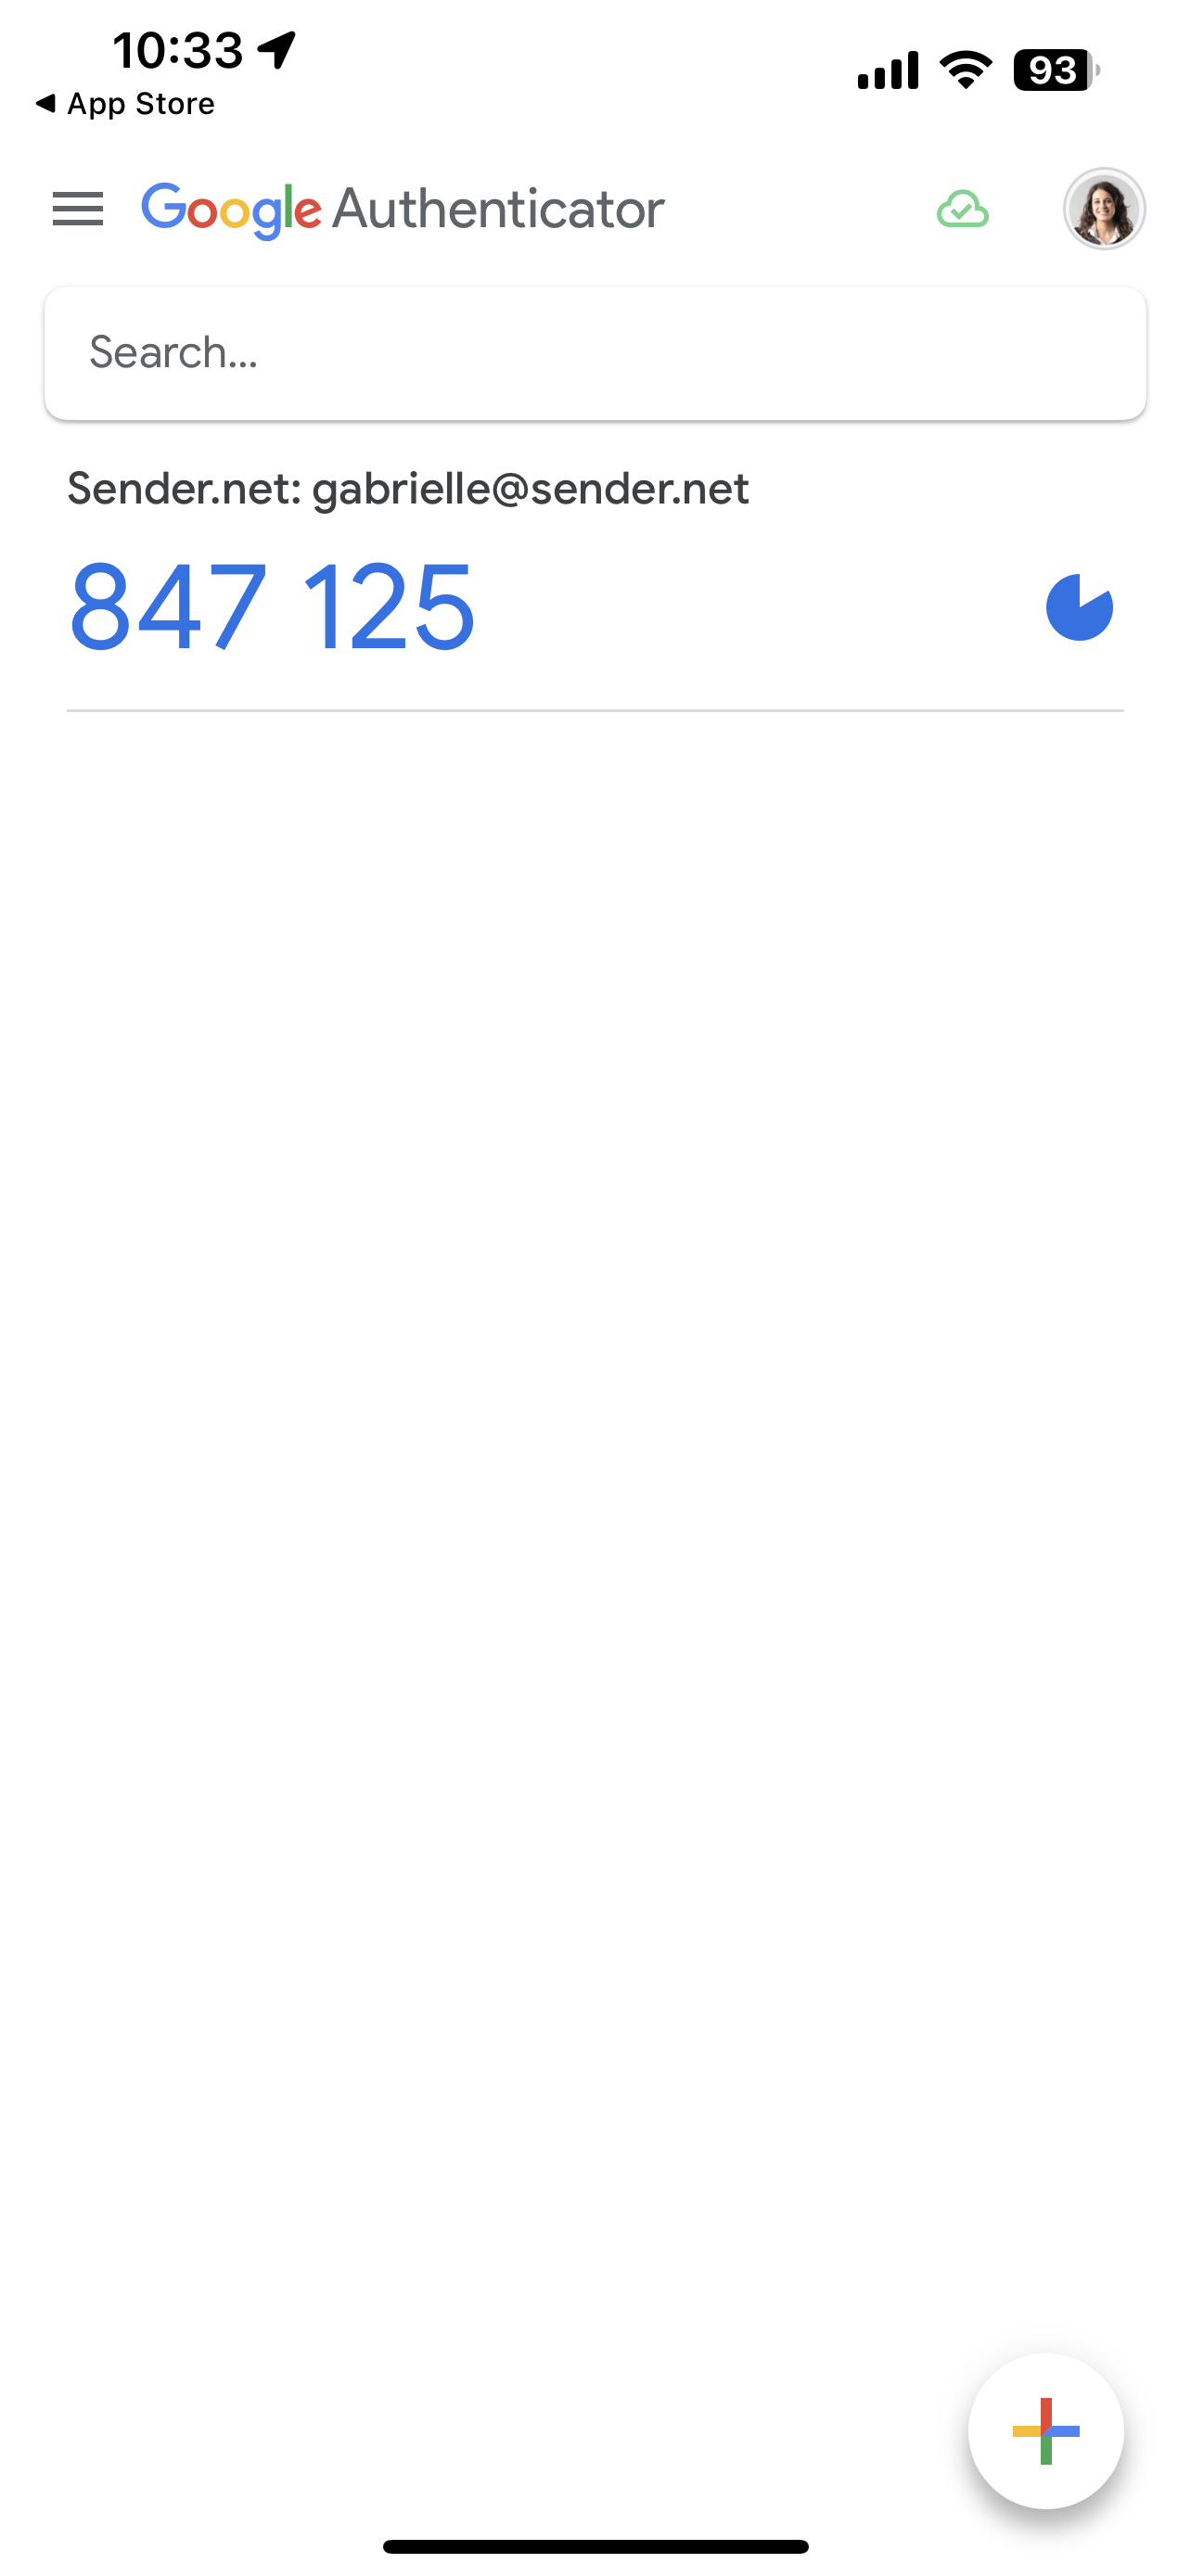
Open the app, click “Add a code”, choose “Scan a QR code” and then scan the QR code provided.
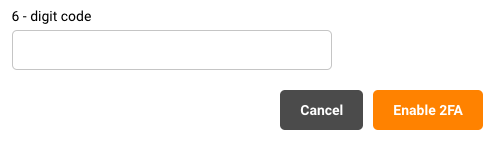
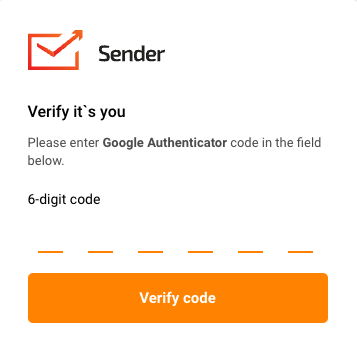
3. Enter the numbers from the app in the field below.
Once the code is entered, the 2FA gets enabled.
Upon your next log in, you will be required to enter a 6 digit code. To do that, simply open the “Google Authenticator” application on your mobile device and enter the given code.
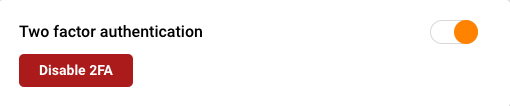
To disable the 2FA for your user, go to Settings -> Users, click “Edit” next to the user you want to make changes to.
Then either click the “Disable 2FA” button or switch the “Two factor authentication” toggle.
That’s it!
If you got stuck on a specific task or can’t find a way to execute a particular job, contact our support team via LiveChat or [email protected] – we’re here to help 24/7.
Use Sender’s step-by-step automation builder feature to build a welcome series automation in minutes.
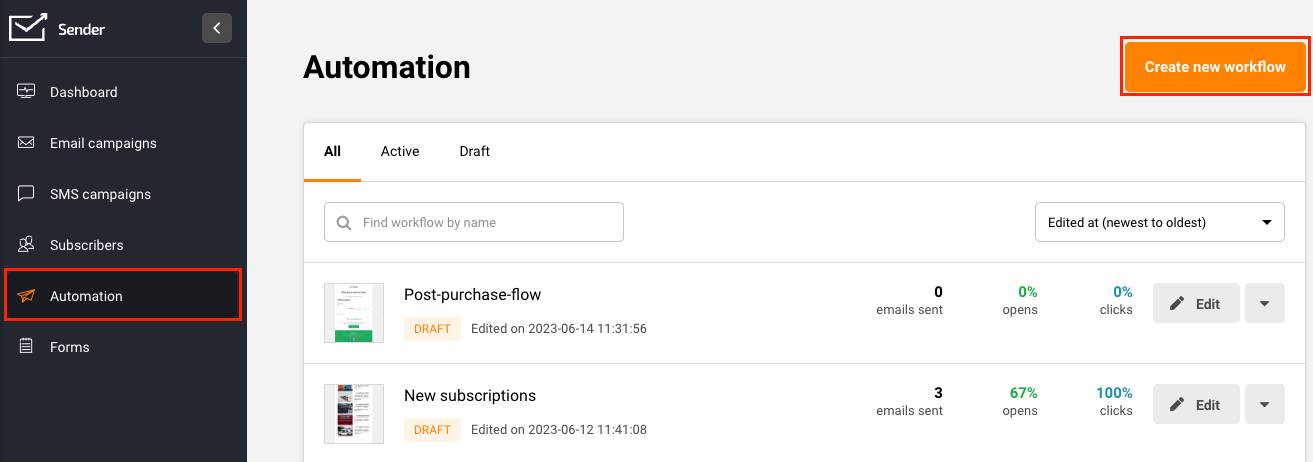
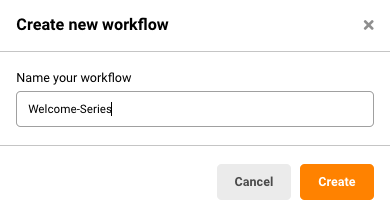
Click on “Automation” -> “Create New Workflow” to enter the automation flow builder.
Give your welcome sequence a name that is easy to place.
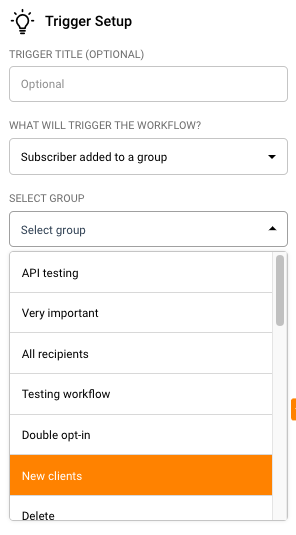
Choose the trigger. Your trigger is the event or action that will cause the automation to fire. In this case, let’s choose “Subscriber added to a group”.
Select your trigger and choose the name of the group on the right hand side. This group name will be the one that your subscribers filling up your signup form are getting added to.
You can verify the group name from the main dashboard -> “Forms” -> Edit your form -> “Settings” tab -> “Group”.
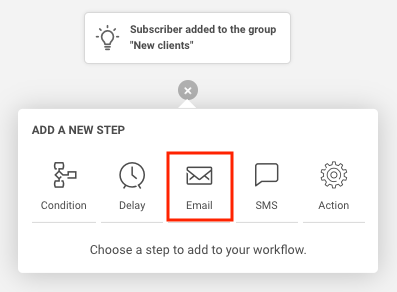
Click the “+” sign at the bottom of the trigger you just created and choose the “Email” step.
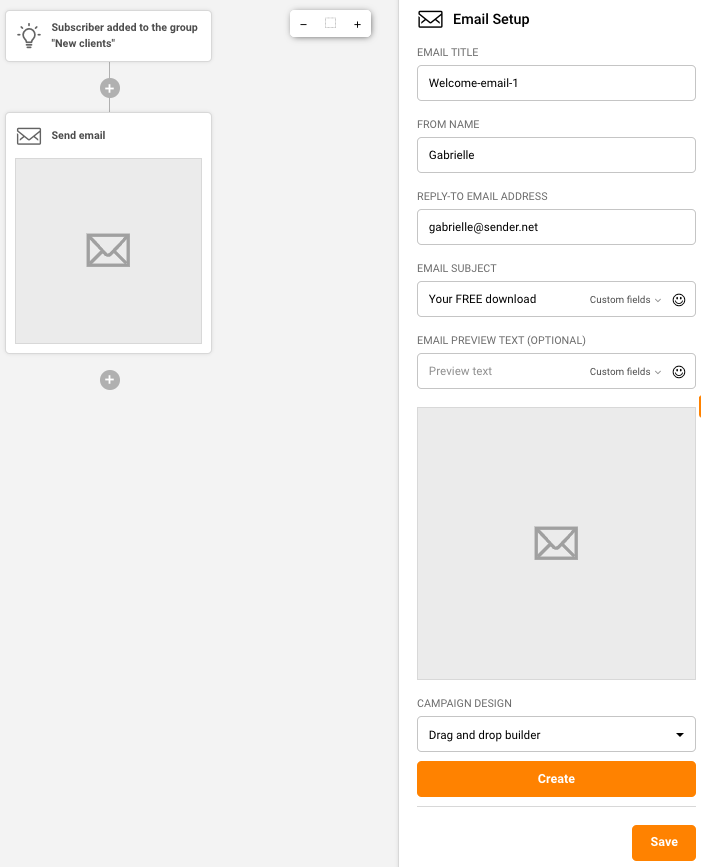
Next, configure your email settings to the right hand side.
You can personalize the subject line and preview text with subscriber details such as their first name, custom field data you might have collected using forms etc.
Hitting “Save” will save all the changes you just made.
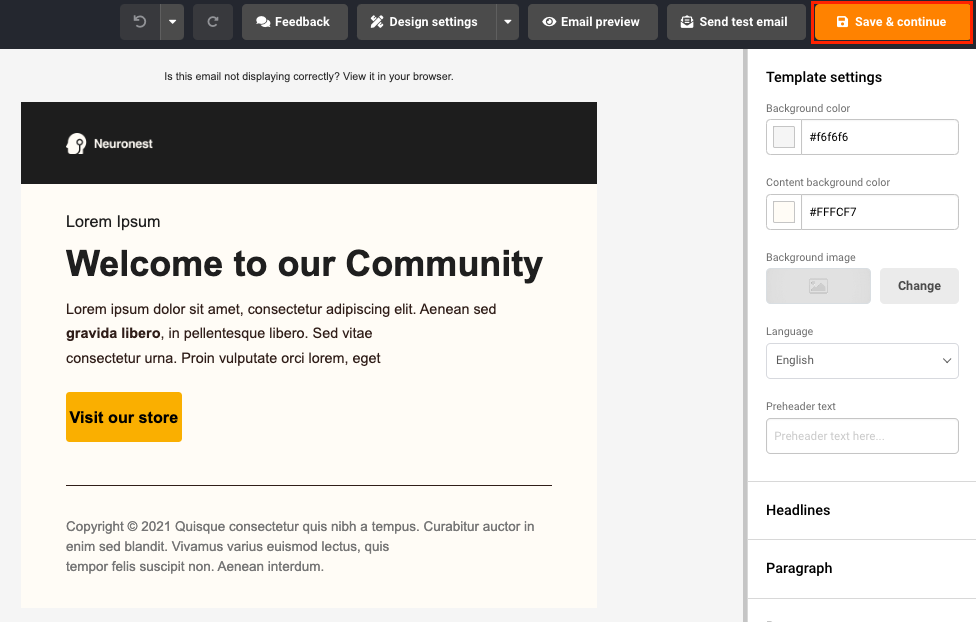
Clicking on “Create” will take you to the email editor screen to help you compose the first email of your welcome series.
Clicking the “Save & continue” button will save your email design and bring you back to the automation map screen.
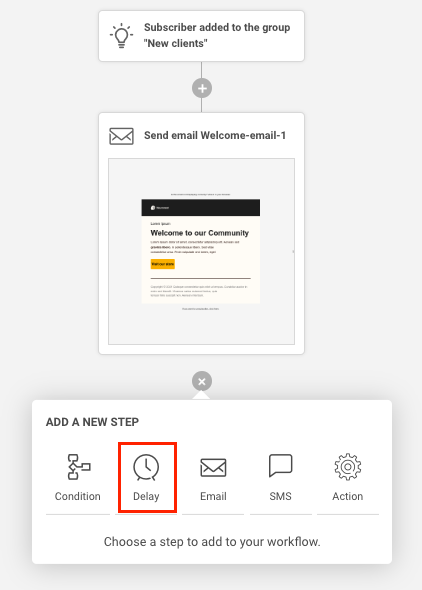
Under the email step you just added, click the “+” sign and select “Delay”.
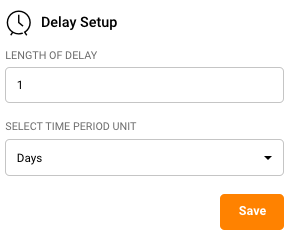
Let’s add a delay of 1 day to wait for the subscriber to open the email.
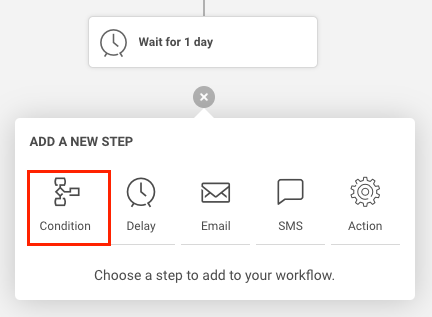
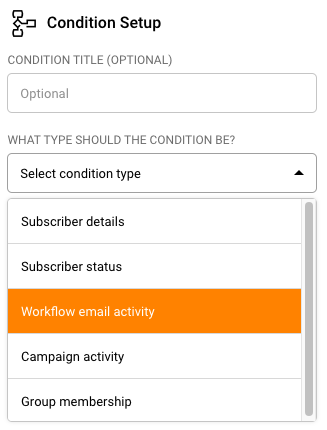
Next, let’s check to see if the subscriber has opened this email using the “Condition” step.
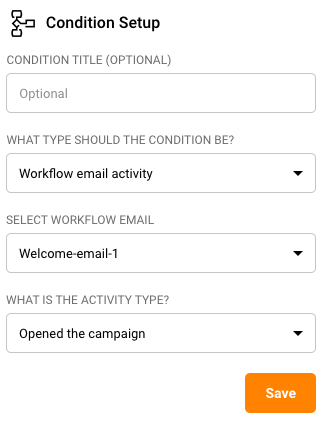
Give your condition a name and choose the condition type as “Workflow email activity”.
Under “Select Workflow Email” choose the welcome email you just created.
Set the “Activity Type” to “Opened the campaign” since we want to check whether the said email was opened or not.
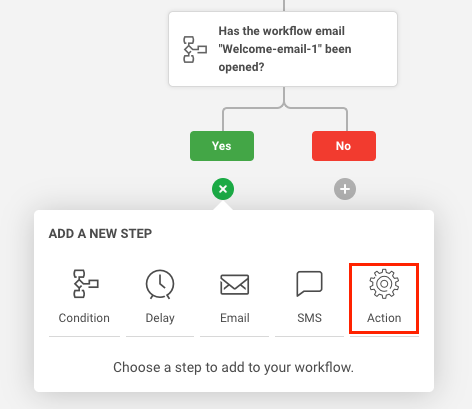
Click “Save” to come back to the automation map which now shows two branches under the condition step you just added: Yes and No.
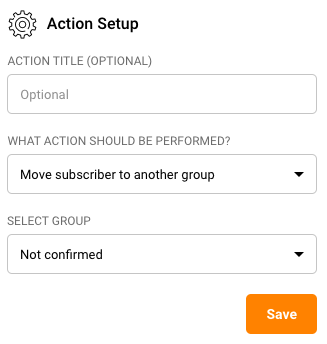
Click the “+” sign below the “Yes” conditional branch and add an “Action” step.
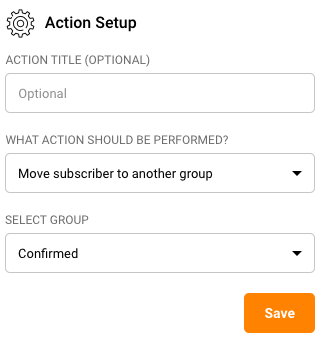
Configure the action step as under:
We are moving those subscribers who’ve opened their welcome email into a separate group called “Confirmed”.
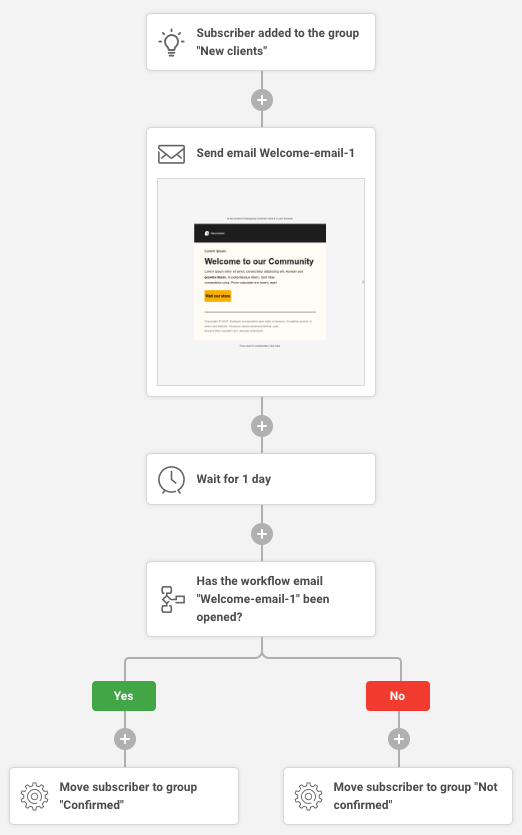
Next click the “+” sign under the No conditional branch and add an “Action” step there too, to move subscribers who have not opened this same email, to a group called “Not Confirmed”.
This is how your automation map will look now.
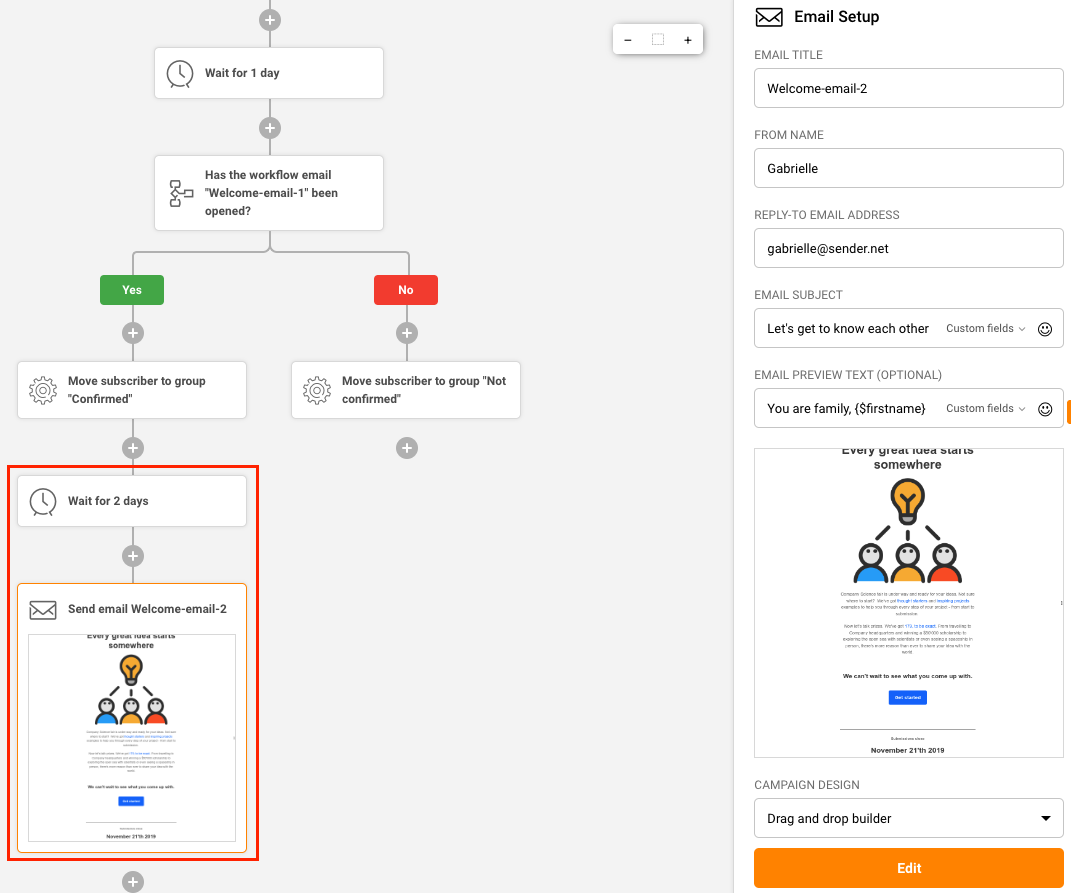
You could add another email to this welcome sequence. Maybe you want to send this email only to those subscribers who opened the first email and let’s assume you would like to do this after a delay of 2 days.
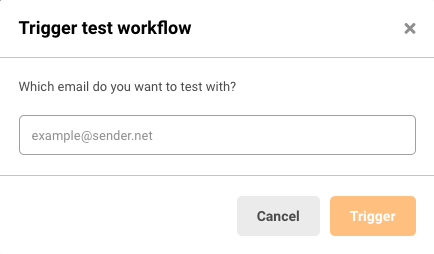
Your automation flows will forever be in “draft” mode until and unless you manually click “Activate” on the top right hand corner.
Once activated, you can test the workflow on a particular email address by clicking the “Test workflow” button and entering the email address you would like to run it on.
You can add as many email steps as you would like, interspaced with reasonable delays.
We have not highlighted the use of SMS steps since it is a very personal medium and we do not recommend sending out SMSes to new subscribers at the beginning of their journey with you.
Prefer a quick video to walk you through the exact same steps above? You can find it here.
If you got stuck on a specific task or can’t find a way to execute a particular job, contact our support team via LiveChat or [email protected] we’re here to help 24/7.
Sender’s automation builder feature helps you build a highly conversion-optimized abandoned cart automation sequence easily as shown below.
NOTE: Below automation sequence will work only when you have correctly integrated your Sender account with your online store.
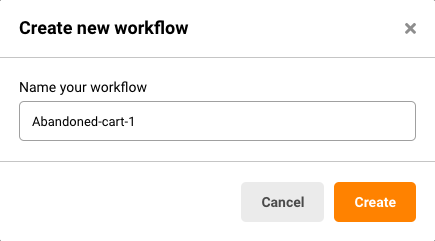
1. Click on “Automation” -> “Create New Workflow” to enter the automation flow builder.
2. Give your abandoned cart sequence a name that is easy to place.
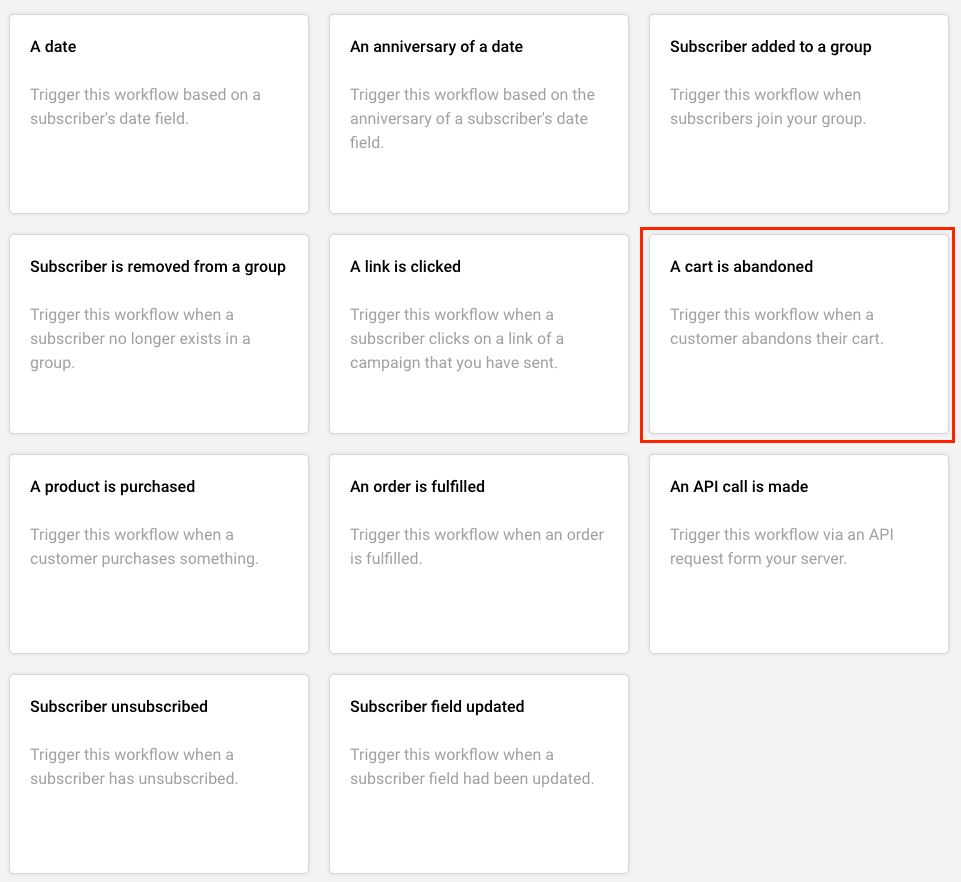
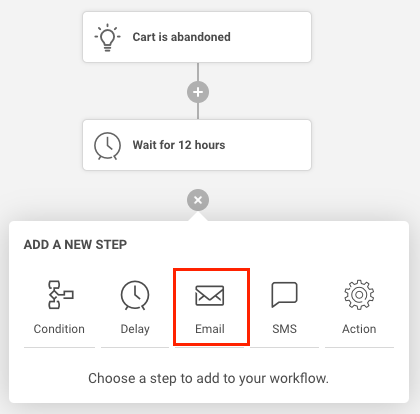
3. Choose your trigger as “A cart is abandoned”.
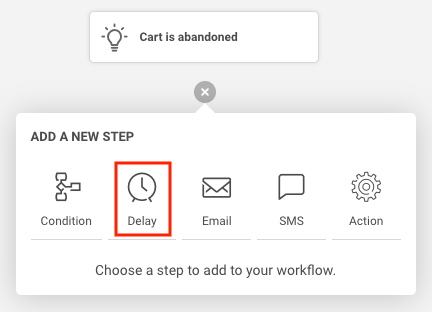
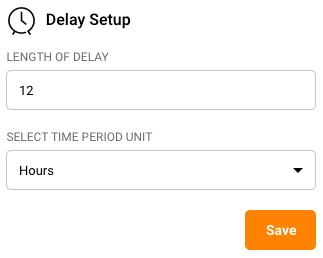
4. Next, add a delay step of 12 hours. Say because we would like to wait for 12 hours from the time the cart is abandoned, before sending the first email or SMS.
5. Choose an email step to go next. This will be your first cart abandonment email reminder.
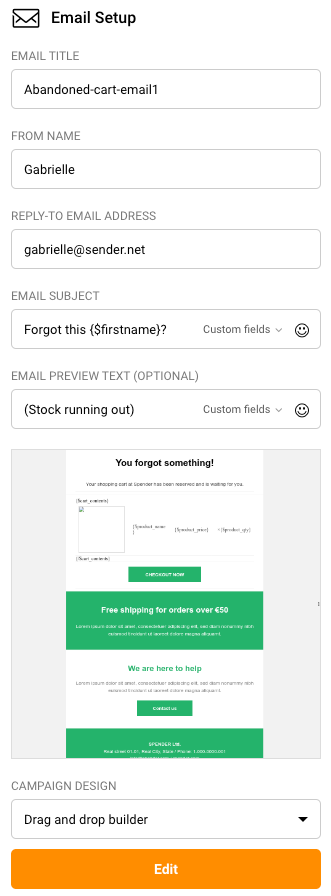
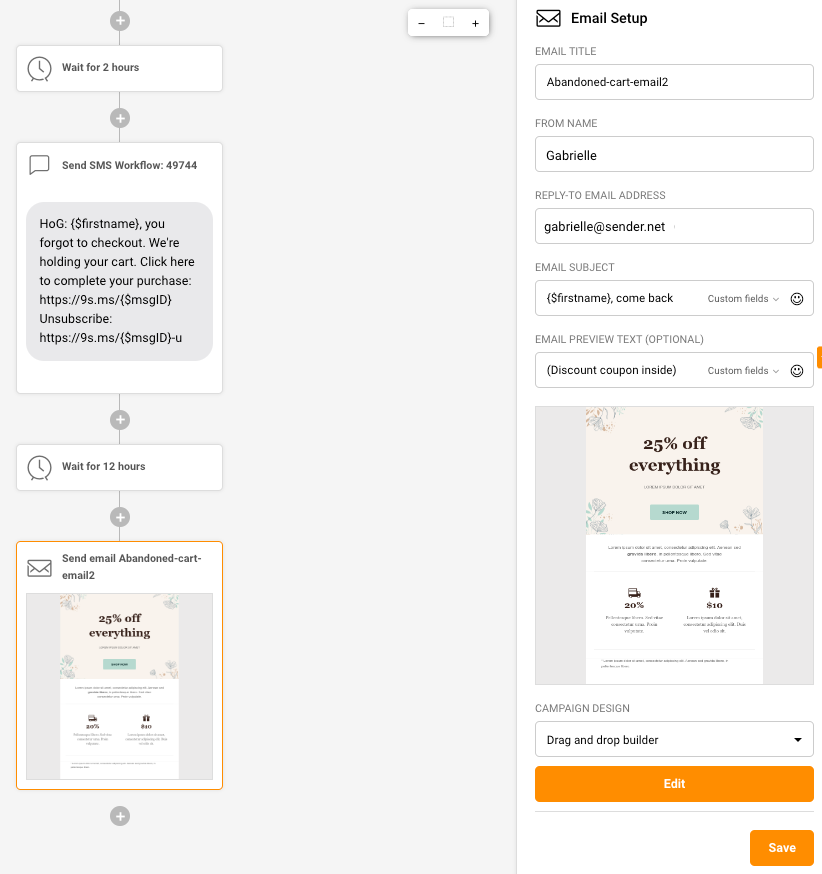
6. Configure the email settings as shown below.
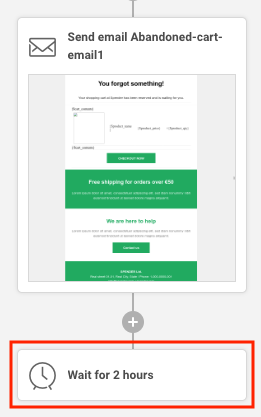
7. Click “Create” and use the email editor to create an abandoned email if you don’t already have one.
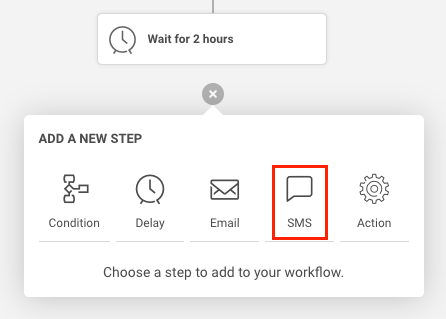
8. Add a delay of 2 hours.
9. After a delay of 2 hrs from the 1st reminder email, let’s now send the subscriber an SMS reminder.
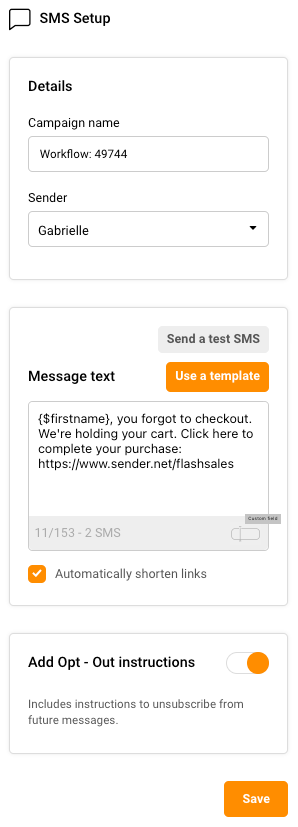
10. Compose your SMS using the dashboard on the right hand side.
11. After the SMS step, add a 12hr delay step, again to be followed by your email reminder number 2.
When done, below is how your automation map will look like.
Remember that you can fully customize any aspect of the above abandoned cart sequence.
For example, you could send your first abandonment message in as little as 6hrs and following this up with another email every 6 hrs, for the next 2 days, with no SMS involved.
Just ensure that your emails are well-personalized and include irresistible incentives and discounts, or dire scarcity or urgency.
Fancy a quick little video that walks you through the above steps? Find it here.
That’s it!
If you got stuck on a specific task or can’t find a way to execute a particular job, contact our support team via LiveChat or [email protected] we’re here to help 24/7.
NOTE: This automation, like the abandoned cart sequence, needs your online store to be integrated with your Sender account; the latter would not know when a purchase has been made.
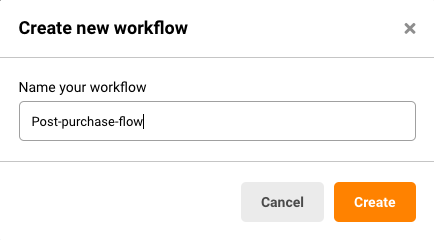
1. Click on “Automation” -> “Create New Workflow” and name your new workflow.
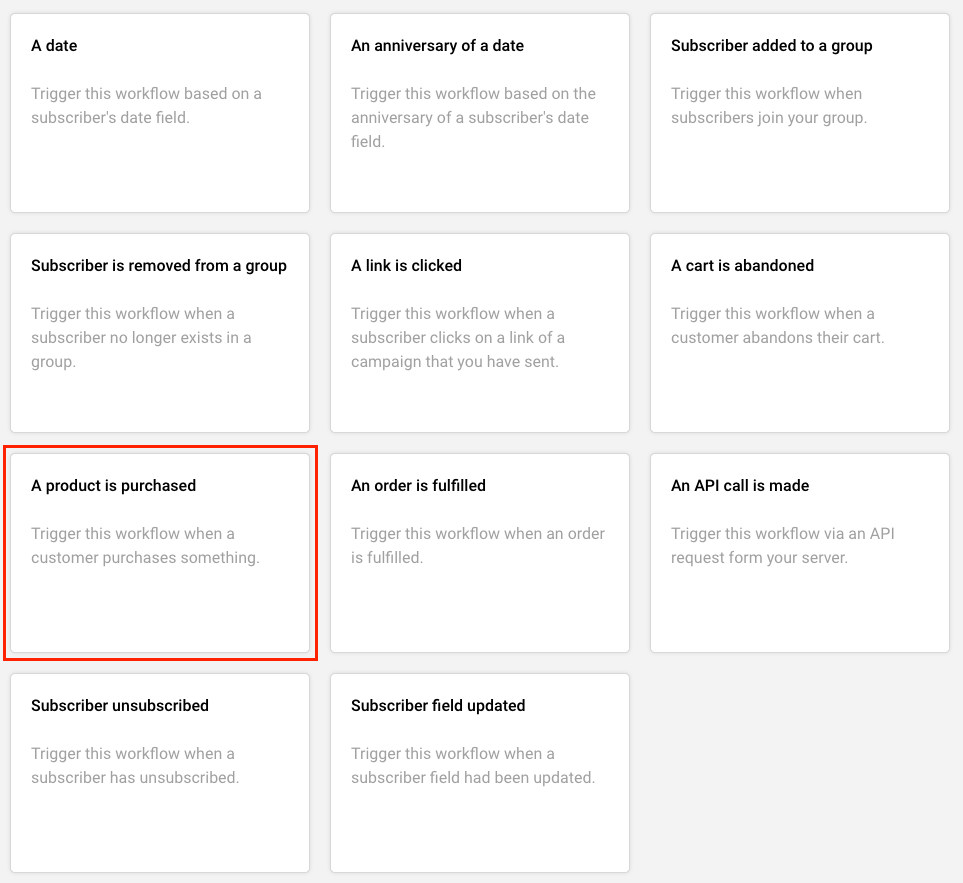
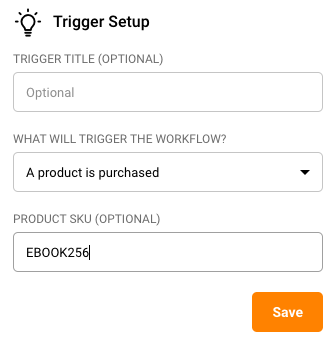
2. Choose the trigger as “A product is purchased”.
3. Click on the trigger to configure it with your product’s unique code (also called “SKU”) in case you are selling multiple products.
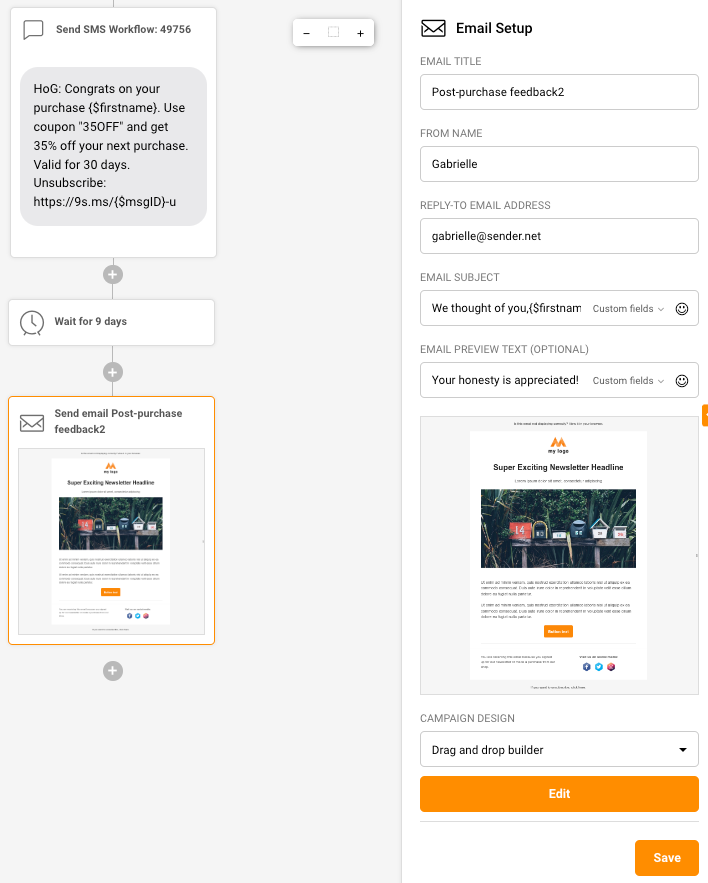
4. Add an email step to send out a thank you email immediately post purchase of the product.
5. Let us also set up an SMS to go out along with this email, with a special discount code that they can use for their next purchase with you.
6. Now, lets add a delay of 9 days (for the purchased product to be delivered and for them to start using it). After the delay, you could send out a product feedback email to understand their pleasures and frustrations with their purchase.
7. Post the product feedback email, you can add a delay of a few days and then send them an upsell or cross-sell opportunity at an irresistible price.
Since they’ve already bought from you once, they know and trust you. So, it will be relatively easy for you to sell them more of what they just bought or products complementary to their most recent purchase.
Let the sky be the limit when it comes to designing your automations.
If you got stuck on a specific task or can’t find a way to execute a particular job, contact our support team via LiveChat or [email protected] we’re here to help 24/7.