Author: admin

  • Automation performance reports

    This guide explains how to access and read performance reports for your automation workflows and transactional emails in Sender. Use these reports to evaluate workflow effectiveness, identify underperforming steps, and monitor transactional delivery health.

    Where to find this report

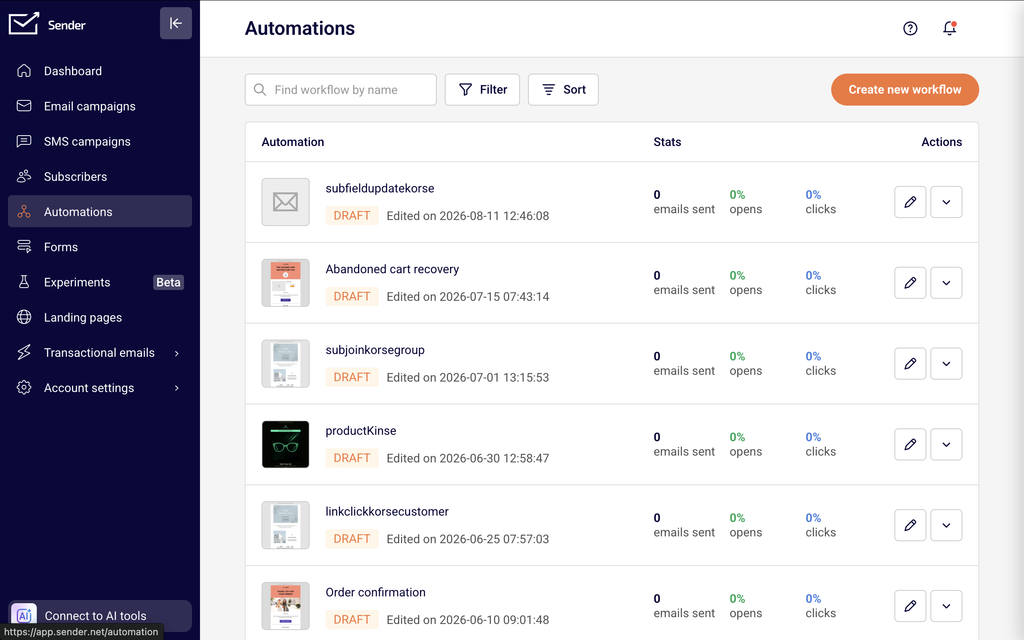
    Automation reports are accessible from two locations. On the Automations list page, each workflow row displays summary Stats — emails sent, opens, and clicks — giving you a quick performance snapshot without opening the workflow. To see detailed data, click the edit icon to open the workflow builder, where the right-side panel displays either the Workflow report or an individual Email report depending on what you select on the canvas.
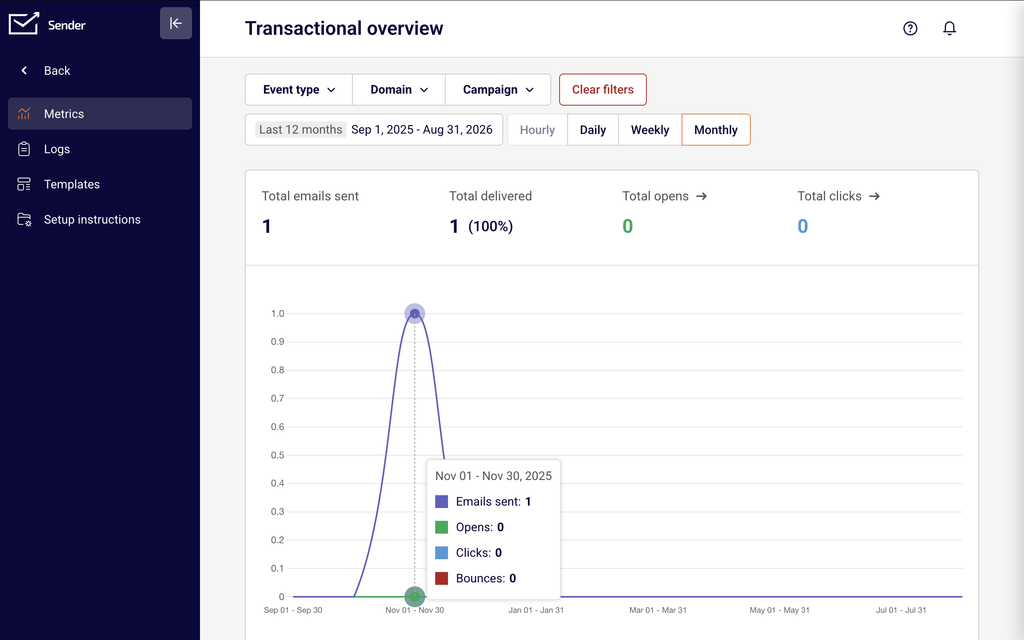
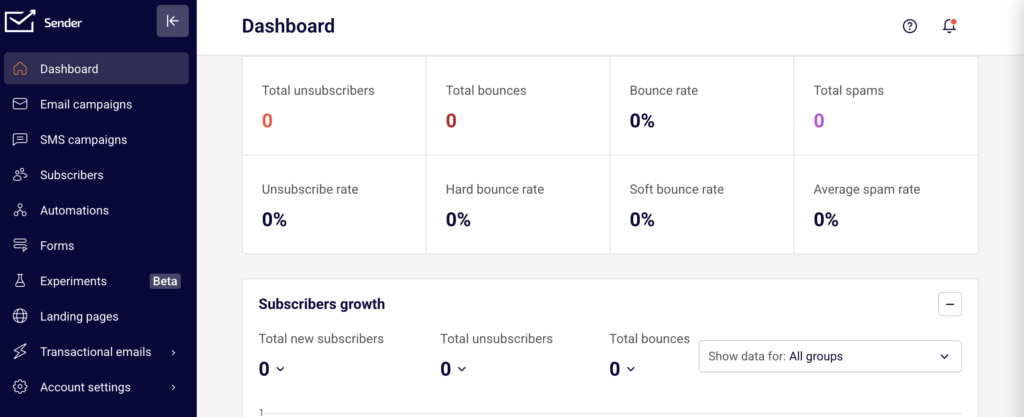
    Transactional email reports live under Transactional emails → Metrics, which opens the Transactional overview page. The Logs page in the same sidebar provides individual event-level data.

    Steps to access automation and transactional reports

    Step 1 — Review workflow-level performance on the Automations list

    Go to Automations from the main sidebar. Each workflow row shows aggregated Stats: total emails sent, opens percentage, and clicks percentage. Use the Filter dropdown to switch between All, Active, and Draft workflows. Use the Sort button or the Find workflow by name search bar to locate a specific automation. This view lets you compare performance across all workflows at a glance.

    Step 2 — Open the Workflow report in the builder

    Click the edit icon on any active workflow to open the workflow builder. Click an empty area of the canvas background to display the Workflow report panel on the right side. This panel shows aggregated metrics for the entire automation, including Completed automation, Subscribers in automation, and Total emails sent. Use these figures to understand overall throughput and how many contacts have finished the sequence.
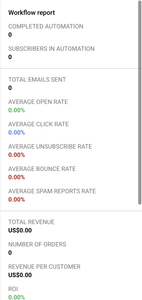
    Step 3 — View step-level Email reports

    Click any email step on the canvas to open its Email report panel on the right side. This panel displays per-step performance: Emails sent, Open rate, Click rate, Unsubscribe rate, and Bounce rate. The Subscribers currently at this step counter shows how many contacts are waiting at that point in the workflow. Click Full report for a detailed breakdown of that step's data.
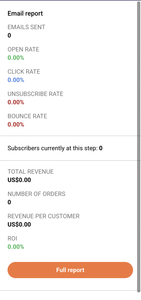
    Step 4 — Access the Transactional overview page

    Navigate to Transactional emails → Metrics to open the Transactional overview page. The top row of summary cards displays Total emails sent, Total delivered, Total opens, and Total clicks. Below the chart, a second row shows Unsubscribes, Hard bounces, Soft bounces, and Spam reports. Use the Event type, Domain, and Campaign filters to narrow the data. Switch between Hourly, Daily, Weekly, and Monthly frequency views, and set a custom date range using the date picker.

    Step 5 — Review individual events on the Logs page

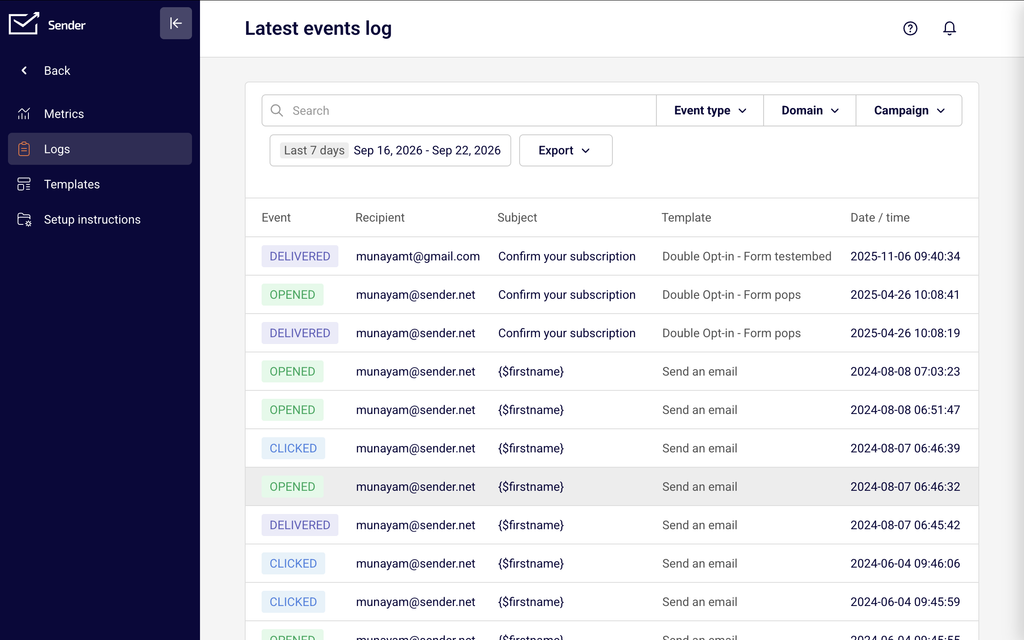
    Click Logs in the transactional sidebar to open the Latest events log page. Each row shows the Event type, Recipient, Subject, Template, and Date / time. Use the Event type filter to isolate specific events such as Bounces or Spam reports. Apply the Domain and Campaign filters or the Search bar to find specific recipients or subjects. Adjust the date range to control the time window displayed.
    Available metrics

    Emails sent (automation list) — The total number of emails sent across all steps in the workflow. Displayed in the Stats column on the Automations list page.

    Opens (automation list) — The open rate percentage for the entire workflow. Displayed in the Stats column on the Automations list page next to emails sent.

    Clicks (automation list) — The click rate percentage for the entire workflow. Displayed in the Stats column on the Automations list page.

    Completed automation — The number of subscribers who have finished all steps in the workflow. Displayed in the Workflow report panel when you click the canvas background.

    Subscribers in automation — The number of contacts currently active inside the workflow. Displayed in the Workflow report panel.

    Total emails sent (workflow) — The cumulative count of all emails sent by the automation across every step. Displayed in the Workflow report panel.

    Emails sent (step-level) — The number of emails sent by a specific email step. Displayed in the Email report panel when you click an email step.

    Open rate (step-level) — The percentage of recipients who opened the email at that step. Displayed in the Email report panel.

    Click rate (step-level) — The percentage of recipients who clicked a link in the email at that step. Displayed in the Email report panel.

    Unsubscribe rate (step-level) — The percentage of recipients who unsubscribed after receiving the email at that step. Displayed in the Email report panel.

    Bounce rate (step-level) — The percentage of emails that bounced at that step. Displayed in the Email report panel.

    Subscribers currently at this step — The number of contacts waiting at a specific step in the workflow. Displayed in the Email report panel for each email step.

    Total emails sent (transactional) — The total number of transactional emails sent in the selected period. Displayed as a summary card on the Transactional overview page.

    Total delivered (transactional) — The number of transactional emails successfully delivered. Displayed as a summary card on the Transactional overview page.

    Total opens (transactional) — The number of transactional emails opened. Displayed as a summary card on the Transactional overview page.

    Total clicks (transactional) — The number of link clicks in transactional emails. Displayed as a summary card on the Transactional overview page.

    Hard bounces — The count of transactional emails that permanently failed delivery. Displayed in the secondary metric row on the Transactional overview page.

    Soft bounces — The count of transactional emails that temporarily failed delivery. Displayed in the secondary metric row on the Transactional overview page.

    Unsubscribes (transactional) — The number of recipients who unsubscribed from transactional emails. Displayed in the secondary metric row on the Transactional overview page.

    Spam reports — The number of recipients who marked transactional emails as spam. Displayed in the secondary metric row on the Transactional overview page.

    How to identify performance issues

    Step-level drop-off — Compare the Subscribers currently at this step count across consecutive email steps. A large gap between one step and the next indicates contacts are leaving the workflow at that point, potentially due to a long delay, an unsubscribe, or a condition filtering them out.

    Declining open rates across steps — If later email steps show progressively lower Open rate values compared to earlier steps, your subject lines may be losing relevance or recipients may be disengaging over time. Review subject lines and timing for steps with the steepest drops.

    High bounce rate on a specific step — A step with a noticeably higher Bounce rate than other steps may indicate a list quality issue with the segment entering the automation, or a deliverability problem with that particular email. Check subscriber sources feeding into the trigger.

    Rising transactional hard bounces — On the Transactional overview page, a sustained increase in Hard bounces over time signals that your recipient lists may contain invalid addresses. Switch to Daily or Weekly frequency to spot upward trends and investigate the source of new addresses.

    Spam report spikes — A sudden increase in Spam reports on the Transactional overview page suggests recipients are not expecting the emails. Use the Campaign filter to isolate which template is generating reports, and review its content and sending frequency.

    Low click rate with normal open rate — If a step shows a healthy Open rate but a low Click rate, the email content or call-to-action may not be compelling enough. This pattern points to a content optimization opportunity rather than a deliverability problem.

    Report tips

    Filter the automation list by status — Use the Filter dropdown on the Automations page to show only Active workflows. This removes draft clutter and lets you focus on workflows that are generating live data.

    Use the Compare toggle for transactional trends — In the date range picker on the Transactional overview page, enable the Compare toggle to compare the current period against a previous one. This makes it easier to spot changes in delivery or engagement patterns.

    Check step-level metrics sequentially — Click each email step in order from top to bottom in the workflow builder to review how performance changes across the sequence. This step-by-step review is the most reliable way to find the exact point where engagement drops.

    Switch frequency views for different insights — On the Transactional overview page, use Hourly to investigate a specific day's sending pattern, Daily or Weekly for short-term trends, and Monthly for long-term performance tracking.

    Use the Campaign filter to isolate templates — On both the Transactional overview and Latest events log pages, select a specific template from the Campaign dropdown to see metrics for that template only. This is essential when you have multiple transactional email types and need to evaluate each one separately.

    Common issues

    Automation stats show 0 emails sent → The workflow is in Draft status and has not been activated. Click Activate on the workflow to begin sending. Stats populate only after the automation starts processing subscribers.

    Workflow report panel not visible → You may have an email step or trigger selected. Click an empty area of the canvas background to deselect all steps and display the Workflow report panel on the right side.

    Transactional metrics show no data → No transactional emails have been sent in the selected date range. Adjust the date range using the date picker, or confirm that your transactional sending is configured under Setup instructions in the transactional sidebar.

    Event type filter not narrowing results → On the Transactional overview page, the Event type filter uses checkboxes. Make sure you have unchecked the event types you want to exclude. All event types are selected by default.

    Logs page shows "No data found" → The selected date range or filters may be too narrow. Expand the date range or remove filters from Event type, Domain, and Campaign to see all logged events.

    FAQs

    Can I see performance for a single email step in an automation?

    Yes. Open the automation in the workflow builder and click any email step. The Email report panel displays Emails sent, Open rate, Click rate, Unsubscribe rate, and Bounce rate for that specific step. Click Full report for detailed data.

    How do I find drop-off points in my automation?

    Compare the Subscribers currently at this step count across consecutive steps. A large gap between one step and the next suggests contacts are dropping off — possibly due to a long delay, an unsubscribe, or a condition filtering them out.

    Can I filter transactional metrics by a specific template?

    Yes. On the Transactional overview page, use the Campaign dropdown and select the template name. The chart and summary cards update to show metrics for that template only.

    How often are automation and transactional report metrics updated?

    Metrics update in near real-time. Refresh the page to see the latest data. For transactional logs, individual events appear shortly after the email is sent or an event occurs.

    What is the difference between the automation Workflow report and individual step reports?

    The Workflow report shows aggregated metrics for the entire automation — Completed automation, Subscribers in automation, and Total emails sent. Individual step reports show per-email performance (sends, opens, clicks, bounces, unsubscribes) for each specific email in the sequence.

    Can I compare transactional performance across two time periods?

    Yes. Click the date range selector on the Transactional overview page and enable the Compare toggle. Set the two date ranges you want to compare and click Apply. The chart and summary cards display both periods for side-by-side analysis.

    How do I filter transactional logs to show only bounces?

    On the Latest events log page, click the Event type dropdown and select Bounces. The table updates to show only bounce events, with the Recipient, Subject, Template, and Date / time for each.
  • Open rate vs click rate

    This guide explains how open rate and click rate are defined, calculated, and interpreted in Sender, and how these two metrics relate to each other when evaluating email performance.

    What these metrics measure

    Open rate measures the percentage of delivered emails that registered an open. It is the first engagement signal in a campaign report — it tells you whether your subject line, sender name, preview text, and send timing were enough to make someone look at the message.

    The metric describes attention, not success. An open indicates the email reached the inbox and got noticed; it says nothing about whether the content did its job.

    Sender records an open using a tracking pixel: a transparent 1×1 image embedded in every email you send. When the recipient’s email client loads that image from our server, the open is attributed to that campaign and that subscriber. Every strength and weakness of the metric follows from this one mechanism — if the image never loads, a real open goes uncounted, and if something loads the image automatically, an open is counted that nobody made.

    Metric definitions

    Open rate — Calculated as the number of unique opens divided by the number of delivered emails, expressed as a percentage. This metric appears as opened in the Statistics section of the Campaign overview page, displayed as a percentage with the unique open count in parentheses. It is also shown as opens (percentage) in the Automations list and as Total opens (count) on the Dashboard under Traffic and reach report.

    Opens — The record of open activity for the campaign, found under Subscriber actions in the campaign report or through the View subscriber actions button in the Statistics section. Every open is logged separately with its own timestamp, so a subscriber who returns to the email three times appears three times, each with the time of that view. The list is therefore longer than the open count shown in Statistics, which tracks how many recipients opened rather than how many opens occurred.

    Click rate — Calculated as the number of unique clicks divided by the number of delivered emails, expressed as a percentage. This metric appears as unique clicks in the Statistics section of the Campaign overview page, displayed as a percentage with the unique click count in parentheses. It is also shown as clicks (percentage) in the Automations list and as Total clicks (count) on the Dashboard under Traffic and reach report.

    Click-to-open rate (CTOR) — Calculated as the number of unique clicks divided by the number of unique opens, expressed as a percentage. While Sender does not display CTOR as a standalone metric card, you can derive it from the opened and unique clicks values shown in the Statistics section of any Campaign overview page. CTOR isolates content engagement among recipients who already opened the email.

    Unopens — The list of subscribers who received the campaign but registered no open, also found under Subscriber actions; see non-openers list walks through opening it. This is the group most distorted by the tracking limits described below, since a recipient who read the email with images blocked is recorded here rather than under Opens.

    How to interpret the data

    Open rate between 15–25% — Generally considered a healthy range for marketing emails, though benchmarks vary significantly by industry, list size, and audience type. Rates in this range suggest that your subject lines and sender reputation are performing adequately.

    Open rate below 10% — May indicate subject line issues, poor sender reputation, list fatigue, or deliverability problems where emails are landing in spam folders rather than the inbox. Investigate whether your hard bounced or soft bounced rates in the Statistics section are elevated, as delivery failures reduce the denominator and can mask the underlying engagement problem.

    Open rate above 40% — Unusually high open rates may reflect a highly engaged niche audience, or they may be inflated by Apple Mail Privacy Protection pre-loading tracking pixels. Cross-reference with unique clicks to determine whether the high open rate corresponds to genuine engagement.

    Click rate between 2–5% — Generally considered a healthy range for marketing emails. This indicates that a meaningful portion of your delivered audience is interacting with your content and links.

    Click rate below 1% — Suggests that email content, link placement, or calls to action are not resonating with recipients. If your opened rate is healthy but unique clicks are low, the issue is likely with content relevance or email design rather than deliverability or subject lines.

    Click rate above 5% — Indicates strong content engagement. Compare this metric across campaigns in the Email campaigns list using the clicks column to identify which content types or offers generate the highest interaction.

    CTOR between 10–20% — Considered a typical range. A CTOR in this range means that among recipients who opened, a reasonable proportion found the content compelling enough to click. Benchmarks vary by industry and email type.

    CTOR below 5% — Indicates that while recipients are opening the email, the content is not driving clicks. This points to a disconnect between what the subject line promises and what the email delivers, or to weak calls to action.

    How metrics relate to each other

    Open rate as a prerequisite for click rate — A recipient must open an email before they can click a link within it, so click rate is always equal to or lower than open rate. If open rate is low, click rate will be constrained regardless of content quality. Improving open rate by refining subject lines and send timing creates a larger pool of recipients who can then engage with your content.

    Click rate vs CTOR for diagnosing issues — If click rate is low but CTOR is healthy, the problem lies in getting more people to open the email rather than in the email content itself. If both click rate and CTOR are low, the content or calls to action need improvement. Comparing the opened and unique clicks values in the Statistics section helps you isolate whether the bottleneck is at the open stage or the click stage.

    Open rate and deliverability — Open rate is calculated against delivered emails, not sent emails. If your total emails delivered count in the Statistics section is significantly lower than total emails sent, a high bounce rate is reducing your delivered volume. A seemingly healthy open rate may mask the fact that many intended recipients never received the email at all.

    Click rate and unsubscribe rate — Campaigns with consistently low unique clicks and rising unsubscribed values (both visible in the Statistics section) may indicate that your audience is disengaged and beginning to opt out. Monitoring both metrics together helps identify list fatigue before it escalates.

    Opens and clicks over time — The Opens and clicks by day and Opens and clicks by hour charts on the Campaign overview page show how engagement is distributed after sending. A concentrated spike in opens followed by minimal clicks may indicate that the email captured initial attention but failed to sustain interest through the content.

    Open rate and segmentation — Segments built on opens inherit every inaccuracy in the metric, so an “engaged” segment can quietly fill up with recipients whose devices opened on their behalf. Building segments on clicks gives you a more dependable definition of engagement — see identify engaged subscribers.

    Why open rates are less reliable than they used to be

    Open rate was treated as a dependable measure for most of email marketing’s history. Two developments changed that: email clients stopped loading images by default, and privacy features started loading them on the recipient’s behalf. The result is a metric that can undercount and overcount within the same campaign.

    Image blocking — Many email clients block remote images until the reader chooses to load them. A recipient can read your entire email without the tracking pixel ever loading, and that open is never recorded, so the reported rate sits below actual readership. Mobile clients block images particularly often to protect privacy, conserve data, and render messages faster.

    Preview panes — Some clients render a message in a preview pane without the recipient properly opening it. The pixel loads, an open is counted, and your report gains a false positive from someone who only glanced at a list view.

    Privacy protection from mailbox providers — Providers and privacy tools increasingly block tracking pixels or route them through intermediaries to prevent senders from learning when and where a message was read. Where that happens, opens are either lost or attributed to the intermediary instead of the person.

    Apple Mail Privacy Protection — Apple devices running iOS 15 and later fetch email content in advance through proxy servers for Apple Mail users, whether or not the recipient ever opens the message. Every recipient in that group registers as an open, which inflates the reported rate.

    These distortions do not cancel each other out. An audience weighted toward Apple Mail inflates opens, an audience on image-blocking clients suppresses them, and most lists contain both in proportions you cannot see from the report. Read open rate as a trend line across comparable campaigns rather than as a precise count.

    Tracking limitations

    Pixel-based open tracking — Sender tracks opens by embedding an invisible tracking pixel in each email. The open is registered when the recipient’s email client loads this pixel. If a recipient reads the email with images disabled or in a plain-text client, the open is not recorded. This means open rate may undercount actual readership.

    Apple Mail Privacy Protection — Apple Mail Privacy Protection pre-loads tracking pixels through proxy servers for Apple Mail users, regardless of whether the recipient actively views the email. This inflates opened values in the Statistics section. If a significant portion of your audience uses Apple Mail, treat open rate as directional and rely more heavily on unique clicks and CTOR for accurate engagement measurement.

    Link-based click tracking — Sender tracks clicks by wrapping links in your email with tracking redirects. A click is registered when a recipient follows a tracked link. Links that are copied and pasted directly, or that are accessed through email clients that strip tracking parameters, may not be recorded. Click rate may therefore undercount actual link engagement.

    Bot clicks and security scanners — Some corporate email security systems and spam filters automatically follow links in emails to check for malicious content. These automated clicks can inflate unique clicks and Total clicks values, particularly for audiences with high concentrations of corporate or enterprise email addresses.

    Cached and pre-fetched opens — Beyond Apple Mail Privacy Protection, some email clients and proxy services cache or pre-fetch email content including tracking pixels. This can register opens that do not reflect genuine recipient engagement, contributing to inflated open rate figures.

    What to measure alongside open rate

    Clicks as your primary engagement signal — clicks require a deliberate action, so they are far harder to trigger accidentally than an open. Where the two disagree, trust the clicks.

    Conversions and revenue — Tie campaigns to what happened after the click by tagging links with UTM parameters or by giving each campaign a unique discount code. The campaign analytics report shows where these figures live for each send.

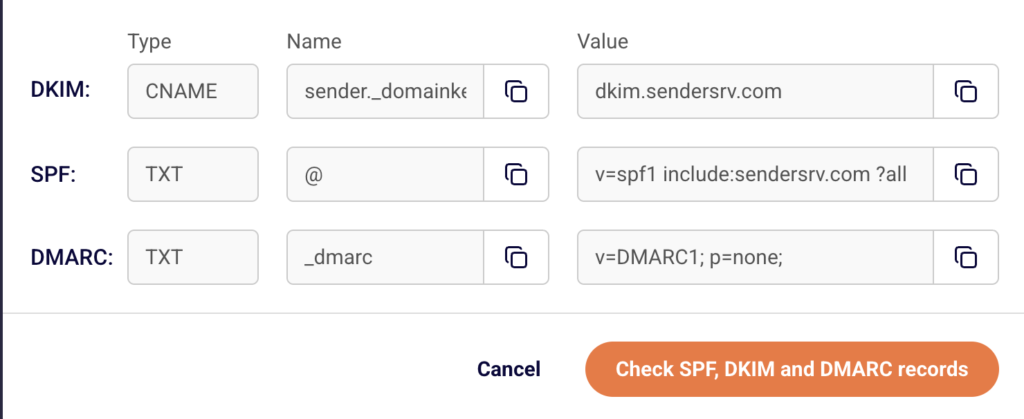
    Deliverability signals — An open rate only means something if the email arrived. Properly authenticating your domain with SPF, DKIM, and DMARC keeps messages out of spam folders and supports your sender reputation, which lifts engagement across every metric on the page.

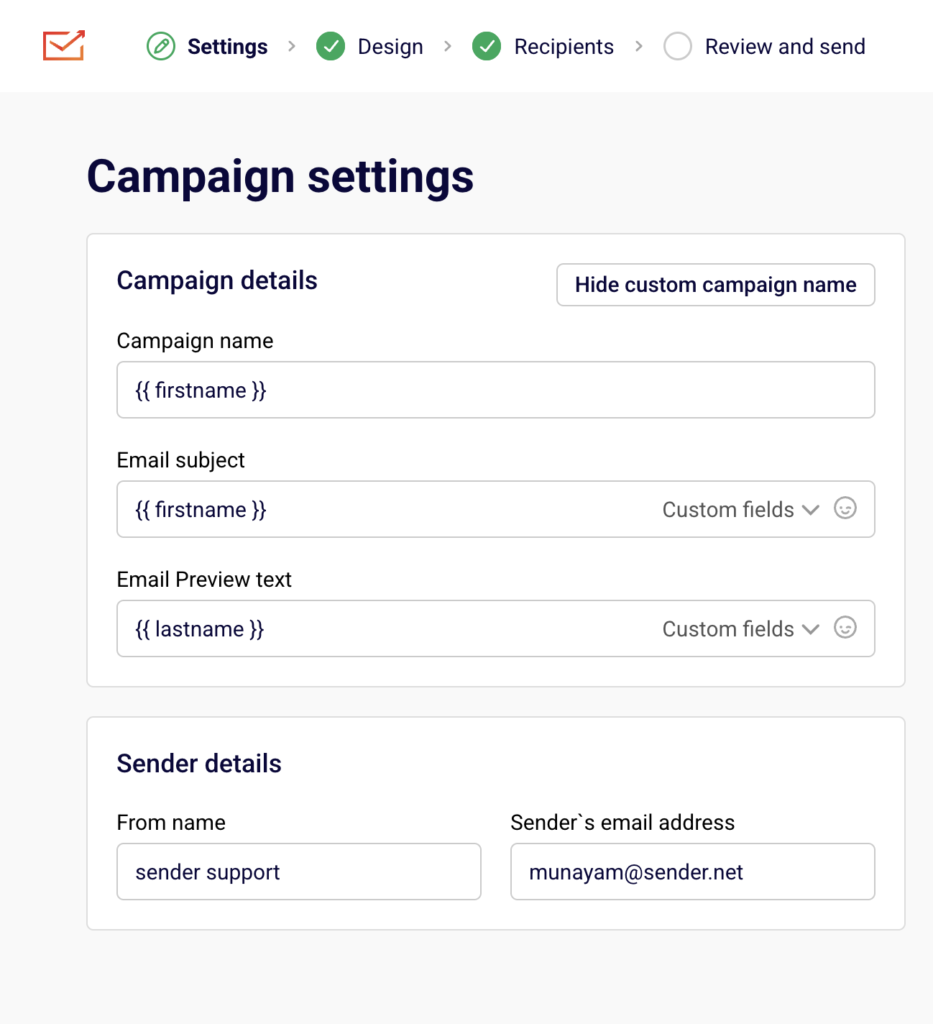
    Tests that isolate a single variable — Subject lines and preview text are the levers with the most direct effect on opens. Write them deliberately using subject and preview text, then confirm what works with A/B test experiments rather than comparing two campaigns that differed in several ways at once.

    Behavior you can verify — Personalization and segmentation raise engagement, but only when the segments are built on data you trust: purchases, clicks, form submissions, and site activity. Opens alone are a weak foundation for a workflow.

    A second channel — SMS is commonly quoted at around a 98% open rate, and its reporting rests on delivery receipts and clicks rather than on a tracking pixel. For time-sensitive messages, it sidesteps the measurement problem entirely.

    Common issues

    Open rate appears inflated compared to click rate → Apple Mail Privacy Protection is likely pre-loading tracking pixels for a portion of your audience. Use unique clicks and CTOR as supplementary engagement indicators, and review the Opens and clicks by day chart on the Campaign overview page to check whether the open pattern aligns with realistic human behavior.

    Click rate is zero despite a healthy open rate → Your email may not contain tracked links, or all links may be unsubscribe or preference links that recipients are not engaging with. Verify that your email contains at least one call-to-action link and review the Clicks report tab on the Campaign overview page to confirm that links are being tracked.

    Open rate drops suddenly across campaigns → A sudden decline in opened values in the Email campaigns list may indicate a deliverability issue, such as emails being routed to spam. Check the hard bounced and spam reports metrics in the Statistics section for the affected campaigns, and verify that your sending domain authentication is intact.

    Click rate varies significantly between campaigns → Content relevance, offer strength, and call-to-action design differ across sends. Compare the clicks column in the Email campaigns list to identify patterns in which campaign types generate higher engagement, and use the Clicks report tab to see which specific links received the most interaction.

    CTOR is high but click rate is low → The content is engaging for those who open, but too few recipients are opening the email. Focus on improving subject lines, preview text, and send timing to increase opened rates, which will expand the audience that can interact with your content.

    FAQs

    What is a good open rate?

    Open rates vary by industry, list size, and audience. As a general reference, 15–25% is considered a healthy range for marketing emails. However, Apple Mail Privacy Protection and image-blocking email clients can inflate or deflate reported open rates, so treat this metric as directional rather than exact.

    What is the difference between click rate and click-to-open rate?

    Click rate is calculated as unique clicks divided by total delivered emails — it measures engagement across your entire send. Click-to-open rate (CTOR) is calculated as unique clicks divided by unique opens — it measures how engaging your content was specifically among recipients who opened the email.

    Why is my open rate higher than expected?

    Apple Mail Privacy Protection pre-loads tracking pixels for Apple Mail users, which registers an open even if the recipient did not actively view the email. This can inflate open rate figures. Consider using click rate or CTOR as a supplementary engagement indicator.

    Does Sender track unique opens or total opens?

    Sender tracks both. Unique opens count each recipient once regardless of how many times they open the email. Total opens count every open event including repeat opens by the same recipient. The opened metric in the Statistics section of the Campaign overview page displays the unique open percentage and count by default.

    Why might my click rate be higher than expected?

    Corporate email security systems and spam filters sometimes automatically follow links in emails to scan for threats. These bot clicks inflate unique clicks values. If you notice unusually high click rates from specific domains or immediate clicks within seconds of delivery, automated scanning is a likely cause.

    Can I compare open rate and click rate across campaigns?

    Yes. The Email campaigns list displays opened and clicks columns for each sent campaign, allowing you to compare performance side by side. For automations, the Automations list shows opens and clicks percentages for each workflow.


    If you got stuck on a specific task or can’t find a way to execute a particular job, contact our support team via LiveChat or [email protected] – we’re here to help 24/7.

  • Common API errors

    This guide helps you diagnose and resolve the most frequently encountered HTTP error responses when using Sender’s REST API.

    Symptoms

    Your API request returns a 4xx or 5xx HTTP status code instead of the expected 200 or 201 response.

    The response body contains a “success”: false value or a “message” field describing the failure.

    The errors object in the response body lists one or more fields that failed validation.

    Your application receives no response or a timeout when calling https://api.sender.net/v2/ endpoints.

    Possible Causes

    Missing or invalid API token — The Authorization: Bearer {token} header is absent, malformed, or contains a revoked token, resulting in a 401 Unauthorized response.

    Malformed request body or invalid parameters — Required fields are missing or contain incorrect data types, causing a 400 Bad Request or 422 Bad request parameters response with details in the message or errors field.

    Rate limit exceeded — Too many requests were sent in a short period, triggering a 429 Too Many Requests response with rate limit details in the X-RateLimit-Limit, X-RateLimit-Remaining, and Retry-After headers.

    Incorrect endpoint or resource ID — The request targets a nonexistent URL or references a resource ID that does not exist, returning a 404 Not Found response.

    Server-side issue — A 5xx response indicates a temporary problem on Sender’s servers, not an issue with your request.

    Steps to Resolve

    Step 1 — Fix authentication errors (401 Unauthorized)

    If the API returns 401, verify that your request includes the Authorization header in the format Authorization: Bearer {token}. Confirm that the token has not been revoked by navigating to Account settings → API access tokens in your Sender dashboard. If the token is missing from the list, generate a new one and update the header in your application. Also verify that the request is sent over HTTPS — plain HTTP requests will fail.

    Step 2 — Resolve validation errors (400 and 422)

    For a 400 response, inspect the message field in the response body to identify the issue. For a 422 response, inspect the errors object — each key corresponds to a field name, and its value describes what is invalid. For example, “email”: [“Required value, email”] means the email field was missing or not a valid email address. Correct the flagged fields in your request body and ensure required parameters like email for POST /v2/subscribers or title for POST /v2/groups are included.

    Step 3 — Handle rate limiting (429 Too Many Requests)

    When you receive a 429 response, read the Retry-After header to determine how many seconds to wait before retrying. Check X-RateLimit-Limit for your maximum requests per minute and X-RateLimit-Remaining for how many you have left. Implement exponential backoff in your code so that consecutive rate limit hits progressively increase the delay between retries. Avoid sending bulk requests in tight loops.

    Step 4 — Correct endpoint and resource errors (404 Not Found)

    A 404 response means the requested resource does not exist. Verify that the endpoint URL matches the documented paths — for example, https://api.sender.net/v2/subscribers not https://api.sender.net/v2/subscriber. If the endpoint includes a resource ID such as POST /v2/campaigns/{id}/send, confirm the {id} value corresponds to an existing resource in your account. Check for typos and ensure you are using the v2 base URL.

    Step 5 — Address server errors (5xx)

    A 5xx response indicates a server-side issue on Sender’s end. Wait 30–60 seconds and retry the same request. If the error persists across multiple retries, contact Sender support at [email protected] with the full request details, response body, and timestamps. Do not modify your request — the issue is not caused by your input.

    Error Response Reference

    400 — Bad Request — The request structure is valid but contains a logical error. The response body includes “success”: false and a “message” field explaining the issue, such as “You must activate workflow first”. Review the message value and correct the precondition or parameter it references.

    401 — Unauthorized — Authentication failed. The Authorization: Bearer {token} header is missing, malformed, or contains an invalid token. Verify the token exists in Account settings → API access tokens and that the header format is correct.

    404 — Not Found — The requested resource or endpoint does not exist. Verify the URL path and any resource IDs included in the request. Ensure you are using the https://api.sender.net/v2/ base URL.

    422 — Bad Request Parameters — One or more parameters failed validation. The response body contains “message”: “The given data was invalid.” and an errors object where each key is a field name and each value is an array of validation messages. Fix the fields listed in the errors object and resend.

    429 — Too Many Requests — The rate limit has been exceeded. The response includes X-RateLimit-Limit, X-RateLimit-Remaining, X-RateLimit-Reset, and Retry-After headers. Wait the number of seconds specified in Retry-After before sending another request.

    5xx — Server Error — A server-side error occurred on Sender’s infrastructure. Retry the request after a short delay. If 5xx errors persist, contact Sender support with the request method, endpoint, and response timestamps.

    How to Verify the Fix

    After applying the fix, resend the original request and confirm you receive a 200 or 201 status code. Inspect the response body for “success”: true and the expected data object. If the request created or updated a resource (such as a subscriber or group), navigate to the corresponding section in your Sender dashboard to confirm the change is reflected. If the error persists after following the resolution steps, contact Sender support with the request details and full response body.

    Debugging Tips

    Log full responses — Always log the HTTP status code, response headers, and the complete response body for every API call. This captures the message and errors fields needed for diagnosis.

    Validate headers before sending — Confirm every request includes Authorization: Bearer {token}, Content-Type: application/json, and Accept: application/json. Missing any of these headers is a common source of 401 and 400 errors.

    Test with cURL first — Reproduce the failing request using curl on the command line. This isolates whether the issue is in your application code or the request itself.

    Monitor rate limit headers — Track X-RateLimit-Remaining in successful responses to anticipate 429 errors before they occur. Throttle your requests when the remaining count approaches zero.

    Use HTTPS exclusively — All requests to https://api.sender.net/v2/ must use HTTPS. Requests sent over plain HTTP will fail silently or return unexpected errors.

    Related Issues

    Subscriber creation returns 422 with field-specific errors → The email field is either missing or not a valid email address. Inspect the errors object in the response to identify which parameter failed and correct its value.

    Campaign send returns 400 with a precondition message → The campaign may not be fully configured. Check the message field for details such as “You must activate workflow first” and complete the required setup before retrying the POST /v2/campaigns/{id}/send request.

    Pagination requests return empty data arrays → The requested page may exceed the total number of available pages. Check the meta.last_page value in previous responses and ensure your ?page parameter does not exceed it.

    FAQs

    How do I find the specific field that caused a 422 error?

    Inspect the errors object in the response body. Each key in the object corresponds to a field name, and the value is an array describing what is invalid. For example, “email”: [“Required value, email”] means the email field was missing or malformed.

    My API token was working yesterday but now returns 401. What happened?

    The token may have been revoked or deleted. Go to Account settings → API access tokens and verify the token still exists. If not, create a new one and update your application’s Authorization header.

    How long should I wait after a 429 rate limit error?

    Check the Retry-After header in the response. It specifies the number of seconds to wait before retrying. Implement exponential backoff in your code so that consecutive rate limit hits increase the wait time progressively.

    The API returns 200 but the data in Sender does not update. Why?

    A 200 response confirms the request was accepted, but the data may take a moment to propagate. Refresh the relevant page in your Sender dashboard. If the data still does not appear, verify that the request body contained the correct field values and that you targeted the right resource ID.

    I keep getting 500 Internal Server Error. Is it my fault?

    A 500 error typically indicates a server-side issue on Sender’s end, not a problem with your request. Retry the request after a short wait. If 500 errors persist across multiple requests, contact Sender support with the request details and timestamps.

  • Webhooks explained

    This guide explains how to configure webhooks in Sender so you can receive real-time HTTP notifications when subscriber, group, campaign, and bounce events occur in your account.

    Prerequisites

    • An active Sender account
    • A publicly accessible HTTPS endpoint that can receive POST requests
    • Access to Account settings → Webhooks in the Sender dashboard
    • Server-side code capable of parsing JSON payloads and validating signatures

    Where to Find This Setting

    In the Sender dashboard, go to: Account settings → Webhooks

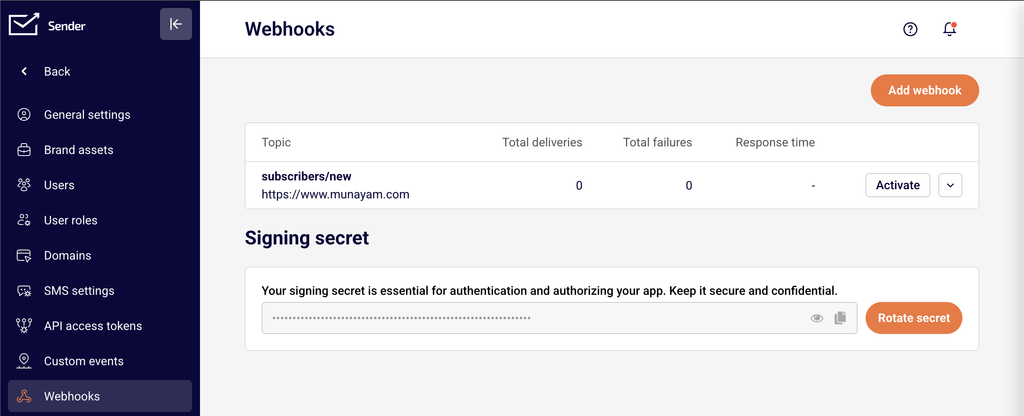
    On this page you will see a table listing all existing webhooks with the columns Topic, Total deliveries, Total failures, and Response time. An Add webhook button is located in the top-right corner. Below the webhook table, the Signing secret section displays your masked secret with options to reveal, copy, or rotate it.

    Steps to Configure a Webhook

    Step 1 — Open the Webhooks page

    In the left sidebar, click Account settings to expand the submenu, then click Webhooks. You will see the webhooks table and the Signing secret section. If you have no webhooks yet, the table will be empty.

    Step 2 — Add a new webhook

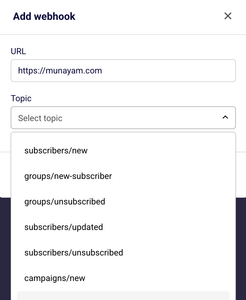
    Click the Add webhook button in the top-right corner. A dialog titled Add webhook will appear with two fields: URL and Topic.

    Step 3 — Enter your endpoint URL

    In the URL field, enter the full HTTPS address of your receiving endpoint — for example, https://yourdomain.com/webhooks/sender. This is the address Sender will send POST requests to when the selected event occurs.

    Step 4 — Select a topic

    Click the Topic dropdown and choose the event type you want to subscribe to. Available topics include subscribers/new, groups/new-subscriber, groups/unsubscribed, subscribers/updated, subscribers/unsubscribed, campaigns/new, groups/new, and bounces/new. Each webhook supports one topic, so create additional webhooks if you need to track multiple event types.

    Step 5 — Save the webhook

    Click Add to create the webhook. The dialog will close and the new webhook will appear in the table. Confirm the correct Topic and endpoint URL are displayed in the row.

    Step 6 — Copy your signing secret

    In the Signing secret section below the webhook table, click the copy icon next to the masked secret to copy it to your clipboard. Store this value securely in your server configuration — you will use it to verify that incoming payloads originate from Sender.

    Step 7 — Verify delivery on your endpoint

    Trigger the event you subscribed to — for example, add a new subscriber if you chose subscribers/new. Check your endpoint's incoming request log to confirm a POST request arrived from Sender. The Total deliveries counter in the webhooks table should increment, and Total failures should remain at 0.

    Event Types and Payload Reference

    subscribers/new — Fires when a new subscriber is added to your account. The payload includes subscriber details such as email address and the timestamp of creation.

    subscribers/updated — Fires when an existing subscriber's data is modified. The payload includes the updated subscriber fields and the timestamp of the change.

    subscribers/unsubscribed — Fires when a subscriber opts out globally. The payload includes the subscriber's email address and the unsubscribe timestamp.

    groups/new — Fires when a new subscriber group is created in your account. The payload includes the group name and creation timestamp.

    groups/new-subscriber — Fires when a subscriber is added to a specific group. The payload includes the subscriber's email address, the group identifier, and the timestamp.

    groups/unsubscribed — Fires when a subscriber is removed or unsubscribes from a specific group. The payload includes the subscriber's email, the group identifier, and the timestamp.

    campaigns/new — Fires when a new email campaign is created. The payload includes campaign details such as the campaign name and creation timestamp.

    bounces/new — Fires when a bounce event is recorded for a sent email. The payload includes the recipient email address, the bounce type, and the timestamp.

    Security and Verification

    Signing secret — Sender provides a unique Signing secret on the Webhooks page. Use this secret on your server to compute an HMAC hash of each incoming payload body and compare it against the signature included in the webhook request headers. If the values match, the payload is authentic.

    Rotate secret — If your signing secret is compromised, click Rotate secret on the Webhooks page to generate a new one. Update your server configuration with the new secret immediately, as the old secret will stop working once rotated.

    HTTPS only — Always use an HTTPS endpoint URL to ensure payloads are encrypted in transit. Sender's URL field accepts HTTPS addresses, and using plain HTTP exposes event data to interception.

    Webhook Tips

    One topic per webhook — Each webhook is bound to a single topic. To receive multiple event types at the same endpoint, create a separate webhook for each topic pointing to that URL.

    Return a 200 response promptly — Your endpoint should respond with a 2xx status code as quickly as possible. Perform heavy processing asynchronously after acknowledging receipt to avoid timeouts.

    Monitor the webhooks table — Check the Total failures and Response time columns on the Webhooks page regularly. A rising failure count indicates your endpoint is not responding correctly.

    Use View error logs for debugging — Click the dropdown arrow next to Pause on any webhook row and select View error logs to open the Webhook logs page. This page lists failed deliveries with the Date / time and Error code for each failure.

    Pause webhooks during maintenance — Click Pause on a webhook row to temporarily stop deliveries while your server is undergoing maintenance. This prevents failures from accumulating.

    Common Issues

    Webhook not appearing in the table → You may have closed the Add webhook dialog without clicking Add. Reopen the dialog, fill in the URL and Topic fields, and click Add.

    Total failures incrementing → Your endpoint is not returning a 2xx status code. Verify that your server is reachable, the URL is correct, and your endpoint returns 200 after processing the request. Open View error logs from the webhook row dropdown to check the specific Error code.

    Signing secret mismatch → The secret stored on your server does not match the current secret in Sender. Copy the Signing secret from the Webhooks page again and update your server. If you recently clicked Rotate secret, make sure the new value is deployed.

    Endpoint receives no requests → Confirm the webhook is not paused — the row should display a Pause button, not a Resume button. Also verify that the event you expect has actually occurred in your Sender account.

    Duplicate payloads received → If your endpoint takes too long to respond, Sender may retry the delivery. Ensure your server responds with 200 within a few seconds, and implement idempotency checks using the event timestamp or a unique identifier in the payload.

    FAQs

    What webhook topics are available in Sender? Sender supports eight topics: subscribers/new, subscribers/updated, subscribers/unsubscribed, groups/new, groups/new-subscriber, groups/unsubscribed, campaigns/new, and bounces/new. All topics are listed in the Topic dropdown inside the Add webhook dialog.

    Can I send the same event to multiple endpoints? Yes. Create a separate webhook for each endpoint and select the same Topic in each. Every webhook operates independently.

    How do I verify that a webhook payload came from Sender? Use the Signing secret displayed on the Webhooks page. Compute an HMAC hash of the incoming payload body using that secret and compare it to the signature value in the request header. A match confirms the payload originated from Sender.

    What happens if my endpoint is down when Sender sends a webhook? If your endpoint does not respond with a 2xx status code, the delivery is recorded as a failure. Check the Total failures column and open View error logs to review the Error code and Date / time of each failed attempt.

    Can I edit an existing webhook? Yes. Click the dropdown arrow next to Pause on the webhook row and select Edit. The Edit webhook dialog lets you update the URL and Topic. Click Add to save your changes.

    Can I temporarily disable a webhook without deleting it? Yes. Click the Pause button on the webhook row. The webhook remains in the table but stops receiving deliveries until you resume it.

    How do I delete a webhook? Click the dropdown arrow next to Pause on the webhook row and select Delete. The webhook is permanently removed from the table.

    Can I test a webhook without triggering a real event? Trigger a real event in your account — for example, add a test subscriber — and monitor your endpoint for the incoming payload. Alternatively, use a service like webhook.site or RequestBin as your endpoint URL to inspect payloads without building a server.

  • API Rate Limits

    This guide explains how to monitor, manage, and handle API rate limits when using Sender's REST API.

    Prerequisites

    • An active Sender account
    • An API access token generated from Account settings → API access tokens
    • A tool or environment for making HTTP requests (e.g., cURL, Postman, or application code)
    • Familiarity with reading HTTP response headers

    Authentication

    All Sender API v2 requests use the base URL https://api.sender.net/v2/. Include the Authorization: Bearer header and content-type headers with every request. The API is served only over HTTPS — unencrypted HTTP requests will fail.

    bash

    curl -X GET \

      "https://api.sender.net/v2/subscribers" \

      -H "Authorization: Bearer YOUR_API_TOKEN" \

      -H "Content-Type: application/json" \

      -H "Accept: application/json"

    “`

    ## Steps to Monitor and Handle API Rate Limits

    ### Step 1 — Check rate limit headers in API responses

    Every API response from Sender includes rate limit headers. After making any request, inspect the response headers for `X-RateLimit-Limit`, `X-RateLimit-Remaining`, and `X-RateLimit-Reset`. The `X-RateLimit-Limit` header shows the maximum number of requests you can make per minute. The `X-RateLimit-Remaining` header shows how many requests you have left in the current window. Use these values to track your consumption before you hit the limit.

    “`

    X-RateLimit-Limit: 60

    X-RateLimit-Remaining: 45

    X-RateLimit-Reset: 2026-03-18T13:02:00Z

    “`

    ### Step 2 — Detect a rate limit response

    When you exceed the allowed number of requests per minute, the API returns a `429 Too Many Requests` status code. The response includes a `Retry-After` header that specifies the number of seconds to wait before sending a new request. Stop making requests immediately when you receive a `429` response to avoid further rejections.

    “`

    HTTP/1.1 429 Too Many Requests

    Retry-After: 30

    X-RateLimit-Limit: 60

    X-RateLimit-Remaining: 0

    X-RateLimit-Reset: 2026-03-18T13:02:00Z

    Step 3 — Implement exponential backoff retry logic

    When a 429 response is returned, read the Retry-After header value and wait at least that many seconds before retrying. If the Retry-After header is not present, use exponential backoff — start with a 1-second delay, then double it on each consecutive 429 response (1s, 2s, 4s, 8s, and so on). Cap the maximum delay at a reasonable ceiling such as 60 seconds. Resume normal request intervals once a successful 2xx response is received.

    python

    import time

    import requests

    def make_request_with_backoff(url, headers, max_retries=5):

        delay = 1

        for attempt in range(max_retries):

            response = requests.get(url, headers=headers)

            if response.status_code == 429:

                wait = int(response.headers.get("Retry-After", delay))

                time.sleep(wait)

                delay = min(delay * 2, 60)

            else:

                return response

        return response

    Step 4 — Throttle requests proactively using remaining count

    Instead of waiting for a 429 response, monitor the X-RateLimit-Remaining header after each request. When the remaining count drops below a threshold (for example, fewer than 5 requests remaining), introduce a delay before the next call. Check the X-RateLimit-Reset header to determine when the window resets, and pause until that time. This approach prevents rate limit errors and keeps your integration running smoothly.

    python

    remaining = int(response.headers.get("X-RateLimit-Remaining", 1))

    if remaining < 5:

        reset_time = response.headers.get("X-RateLimit-Reset")

        # Parse reset_time and sleep until the window resets

        time.sleep(10)

    Step 5 — Verify rate limit handling is working

    Send a GET request to any endpoint, such as GET https://api.sender.net/v2/subscribers, and confirm the response includes the X-RateLimit-Limit and X-RateLimit-Remaining headers. Verify that X-RateLimit-Remaining decrements with each request. If your backoff logic is in place, simulate rapid requests in a test environment and confirm your code pauses and retries correctly when a 429 status is returned.

    Endpoint Reference

    GET /v2/subscribers — Returns all subscribers in your account. Supports pagination with ?page, ?limit, ?order, and ?direction query parameters. Use this endpoint to verify rate limit headers are returned in the response.

    GET /v2/campaigns — Returns all campaigns in your account. Paginated. Rate limit headers are included in every response, making any list endpoint suitable for testing your rate limit handling.

    GET /v2/groups — Returns all subscriber groups. Paginated. Like all Sender API endpoints, responses include X-RateLimit-Limit, X-RateLimit-Remaining, and X-RateLimit-Reset headers.

    Error Handling

    429 — Too Many Requests — You have exceeded the allowed number of API requests per minute. Read the Retry-After header for the number of seconds to wait before retrying. Implement exponential backoff in your retry logic.

    401 — Unauthorized — Your API token is missing, invalid, or expired. Go to Account settings → API access tokens to verify or regenerate your token. Include the Authorization: Bearer YOUR_API_TOKEN header in every request.

    400 — Bad Request — The request was malformed or contained invalid data. The response body includes a message field with details about the error. Review the message value and correct the request before retrying.

    422 — Bad Request Parameters — One or more required parameters are missing or invalid. The response includes an errors object with per-field details. Check each field listed in the errors object and provide valid values.

    5xx — Server Error — An unexpected error occurred on Sender's servers. Do not retry immediately — wait a few seconds and try again. If the error persists, contact [email protected].

    API Tips

    Read headers on every response — Check X-RateLimit-Remaining after every API call, not just when errors occur. This lets you proactively throttle requests before hitting the limit.

    Use the Retry-After header — Always prefer the Retry-After value over a hardcoded delay when handling 429 responses. This gives you the exact wait time the server requires.

    Batch your operations — Reduce the total number of API calls by using list endpoints with the ?limit parameter to fetch more records per request, rather than making many small requests.

    Log rate limit data — Record the X-RateLimit-Limit, X-RateLimit-Remaining, and X-RateLimit-Reset values from each response. This helps you identify usage patterns and adjust your request frequency over time.

    Cap your retry attempts — Set a maximum number of retries (e.g., 5) in your backoff logic. If the limit is still exceeded after the maximum retries, log the failure and alert your team rather than retrying indefinitely.

    Common Issues

    Requests fail with 429 despite low traffic → Multiple API tokens or parallel processes may be sharing the same rate limit window. Coordinate request timing across all services that use your Sender API credentials.

    X-RateLimit-Remaining shows 0 but no 429 returned → The remaining counter may reset between your check and the next request. Always handle a 429 response in your code, even if the remaining count appeared positive on the prior call.

    Retry logic causes duplicate operations → Non-idempotent requests (such as POST to create subscribers) can result in duplicate records if retried after a 429. Check whether the resource already exists before retrying create operations.

    Rate limit headers are missing from the response → Ensure you are sending requests to https://api.sender.net/v2/ over HTTPS with a valid Authorization: Bearer header. Unauthenticated or malformed requests may not return rate limit headers.

    Backoff delay grows too large → If you do not cap your exponential backoff, delays can become unreasonably long. Set a maximum wait time (e.g., 60 seconds) and fall back to that ceiling once the calculated delay exceeds it.

    FAQs

    Where do I find my API access token?

    Go to Account settings → API access tokens in the Sender dashboard. Click Create API token to generate a new one. Copy the token immediately — it may not be displayed again after you navigate away.

    What is the rate limit for Sender's API?

    Sender enforces a per-minute rate limit on API requests. The exact limit for your account is returned in the X-RateLimit-Limit response header with every API call. Monitor this header to know your current allowance.

    What happens if I exceed the API rate limit?

    The API returns a 429 Too Many Requests response with a Retry-After header. Wait for the number of seconds specified in Retry-After before retrying. Implement exponential backoff in your code to handle rate limits gracefully.

    Are rate limit headers included in every API response?

    Yes. Every successful and error response from the Sender API includes the X-RateLimit-Limit, X-RateLimit-Remaining, and X-RateLimit-Reset headers. Use these to track your usage in real time.

    Does the rate limit apply per API token or per account?

    The rate limit is tracked per account. If you use multiple API tokens, all tokens share the same rate limit window. Coordinate request timing across all tokens and services to stay within the limit.

  • REST API authentication

    This guide explains how to generate an API access token and authenticate requests to Sender's REST API.

    Prerequisites

    • An active Sender account
    • An API access token generated from Account settings → API access tokens
    • A tool or environment for making HTTP requests (e.g., cURL, Postman, or application code)

    Authentication

    All Sender API v2 requests use the base URL https://api.sender.net/v2/. The API is served only over HTTPS — calls made over plain HTTP will fail.

    Include three headers with every request:

    ``Authorization: Bearer YOUR_API_TOKEN

    Content-Type: application/json

    Accept: application/json

    Here is a minimal authenticated request using cURL:

    bash

    ``curl -X GET \

      "https://api.sender.net/v2/subscribers" \

      -H "Authorization: Bearer YOUR_API_TOKEN" \

      -H "Content-Type: application/json" \

      -H "Accept: application/json"

    A successful response returns a 200 status code with the requested resource data in the response body. If the token is missing or invalid, the API returns a 401 Unauthorized response.

    Steps to authenticate with the API

    Step 1 — Generate an API access token

    Go to Account settings → API access tokens in the Sender dashboard. Click Create API token. In the Select token validity time dialog, choose how long the token should remain valid — the options are Forever, 30 days, 7 days, or 1 day. Click Create. Copy the token immediately and store it securely. The token may not be displayed again after you navigate away from the page.

    Step 2 — Add the token to your API requests

    Include the Authorization: Bearer YOUR_API_TOKEN header in every request you send to https://api.sender.net/v2/. Also include Content-Type: application/json and Accept: application/json as headers. Here is an example using JavaScript:

    javascript

    ``const url = "https://api.sender.net/v2/campaigns/";

    let headers = {

        "Authorization": "Bearer YOUR_API_TOKEN",

        "Content-Type": "application/json",

        "Accept": "application/json",

    };

    fetch(url, {

        method: "GET",

        headers,

    }).then(response => response.json());

    Step 3 — Verify that authentication works

    Send a GET request to https://api.sender.net/v2/subscribers with your token in the Authorization header. A successful response returns a 200 status code with a JSON body containing a data array of subscriber objects, along with links and meta pagination objects. If you receive a 401 Unauthorized response, your token is invalid or missing — regenerate it from Account settings → API access tokens.

    Step 4 — Handle token expiration

    If you selected a limited validity period (e.g., 30 days, 7 days, or 1 day) when creating your token, the token expires after that duration. Expired tokens return a 401 Unauthorized response. To resolve this, go to Account settings → API access tokens, create a new token, and update the Authorization header in your application code with the new value.

    Endpoint reference

    GET /v2/subscribers — Returns a paginated list of all subscribers in your account. No required body parameters. Supports page, limit, order, and direction query parameters for pagination and sorting.

    GET /v2/subscribers/{email}or{phone}or{ID} — Returns a single subscriber profile. Replace the path parameter with the subscriber's email address, phone number, or subscriber ID. No request body required.

    GET /v2/campaigns — Returns a paginated list of all campaigns. Supports optional limit and status query parameters. Accepted status values are SCHEDULED, SENDING, SENT, or DRAFT.

    Error handling

    401 — Unauthorized — The API could not authenticate your request. This means the Authorization header is missing, the token value is incorrect, or the token has expired. Regenerate a token from Account settings → API access tokens and update your request header.

    400 — Bad request — The request was malformed or contained invalid data. The response body includes a "success": false field and a "message" field with details about what went wrong.

    404 — Not found — The requested resource does not exist. Verify that the endpoint path and any resource IDs in the URL are correct.

    422 — Bad request parameters — One or more request parameters failed validation. The response body includes a "message" field and an "errors" object where each key is the invalid field name and the value is an array of validation messages.

    429 — Too many requests — You exceeded the API rate limit. The response includes X-RateLimit-Limit, X-RateLimit-Remaining, X-RateLimit-Reset, and Retry-After headers. Wait for the number of seconds specified in Retry-After before retrying.

    API tips

    Store your token securely — Save your API token in an environment variable or secrets manager. Never hardcode it in client-side code or commit it to public repositories.

    Use the shortest valid token lifetime — If your integration runs a one-time migration, choose 1 day or 7 days instead of Forever to limit exposure if the token is compromised.

    Always set both content headers — Include Content-Type: application/json and Accept: application/json on every request, even for GET requests, to ensure consistent response formatting.

    Implement exponential backoff for rate limits — When you receive a 429 response, read the Retry-After header and wait before retrying. Increase the delay on consecutive 429 responses to avoid further throttling.

    Verify responses programmatically — Check the HTTP status code before processing the response body. Only parse data from responses with a 200 or 201 status code.

    Common issues

    Requests return 401 immediately after token creation → The token was not copied correctly or includes extra whitespace. Go to Account settings → API access tokens, create a new token, and copy the full value without leading or trailing spaces.

    Requests fail with a connection error → You are using http:// instead of https:// in the base URL. The API only accepts HTTPS connections. Change your base URL to https://api.sender.net/v2/.

    422 errors on POST or PATCH requests → Required fields are missing or contain invalid values. Check the "errors" object in the response body to identify which fields failed validation, then correct the request body and retry.

    Rate limiting triggered during bulk operations → Sending too many requests per minute causes 429 responses. Reduce your request frequency, batch operations where possible, and check the X-RateLimit-Remaining header before sending the next request.

    Token stops working after a period → The token was created with a limited validity time (1 day, 7 days, or 30 days) and has expired. Generate a new token from Account settings → API access tokens and update your application configuration.

    FAQs

    Where do I find my API access token?

    Go to Account settings → API access tokens in the Sender dashboard. Click Create API token to generate a new one. Copy the token immediately — it may not be displayed again after you navigate away.

    What is the base URL for all API requests?

    All Sender API v2 requests use the base URL https://api.sender.net/v2/. Append the specific endpoint path after this base URL.

    What token validity options are available?

    When creating a token, you can choose Forever, 30 days, 7 days, or 1 day. Select the validity period that matches your use case — shorter durations are more secure for temporary integrations.

    What happens if I exceed the API rate limit?

    The API returns a 429 Too Many Requests response with a Retry-After header. Wait for the specified number of seconds before retrying. Implement exponential backoff in your code to handle rate limits gracefully.

    Can I have multiple active API tokens?

    Yes. You can create multiple tokens from Account settings → API access tokens. Each token authenticates independently. Use separate tokens for different applications or environments so you can revoke one without affecting others.

    How do I paginate through large lists of subscribers?

    List endpoints return paginated results. Use the page and limit query parameters to control which page of results is returned. Check the meta object in the response for current_page, last_page, and total values to iterate through all records.

  • Testing API Calls

    This guide explains how to test your API calls to Sender's REST API, verify authentication, validate request and response patterns, and confirm that your integration works correctly before deploying to production.

    Prerequisites

    • An active Sender account
    • An API access token generated from Account settings → API access tokens
    • A tool or environment for making HTTP requests (e.g., cURL, Postman, or application code)
    • Familiarity with reading JSON response bodies and HTTP status codes

    Authentication

    All requests to the Sender API require a Bearer token passed in the Authorization header. The base URL for all API v2 endpoints is https://api.sender.net/v2/. Every request must also include Content-Type: application/json and Accept: application/json headers.

    A minimal authenticated request looks like this:

    bash

    curl -X GET \

      "https://api.sender.net/v2/subscribers" \

      -H "Authorization: Bearer YOUR_API_TOKEN" \

      -H "Content-Type: application/json" \

      -H "Accept: application/json"

    Replace YOUR_API_TOKEN with the token you generated from Account settings → API access tokens. If the token is valid, you receive a 200 response with data. If it is invalid or missing, you receive a 401 response.

    Steps to Test API Calls

    Step 1 — Verify your authentication with a read-only request

    Start by sending a GET request to https://api.sender.net/v2/subscribers to confirm your API token works. This is a safe, read-only call that returns your subscriber list without modifying any data.

    bash

    curl -X GET \

      "https://api.sender.net/v2/subscribers" \

      -H "Authorization: Bearer YOUR_API_TOKEN" \

      -H "Content-Type: application/json" \

      -H "Accept: application/json"

    A successful 200 response returns a JSON body with data, links, and meta objects. If you receive a 401 status code, your token is invalid — generate a new one from Account settings → API access tokens.

    Step 2 — Test a GET request with query parameters

    Send a GET request to https://api.sender.net/v2/groups to retrieve your subscriber groups. Add pagination parameters to test parameterized requests. Append ?page=1&limit=5 to the URL to return only the first five results.

    bash

    curl -X GET \

      "https://api.sender.net/v2/groups?page=1&limit=5" \

      -H "Authorization: Bearer YOUR_API_TOKEN" \

      -H "Content-Type: application/json" \

      -H "Accept: application/json"

    The 200 response includes a data array of group objects and a meta object showing current_page, per_page, total, and last_page values. Verify these pagination fields reflect your parameters.

    Step 3 — Test a POST request with a request body

    Send a POST request to https://api.sender.net/v2/subscribers to test creating a resource. Include a JSON request body with at least the required email field. Set trigger_automation to false to prevent triggering any automations during testing.

    bash

    curl -X POST \

      "https://api.sender.net/v2/subscribers" \

      -H "Authorization: Bearer YOUR_API_TOKEN" \

      -H "Content-Type: application/json" \

      -H "Accept: application/json" \

      -d '{

        "email": "[email protected]",

        "firstname": "Test",

        "lastname": "User",

        "trigger_automation": false

      }'

    A successful response returns a 200 status with "success": true and the full subscriber object in the data field. If the email field is missing or invalid, the API returns a 422 status with an errors object detailing the validation failure.

    Step 4 — Test error handling by sending an invalid request

    Intentionally send a malformed request to verify your code handles errors correctly. Send a POST request to https://api.sender.net/v2/subscribers with an invalid email value or omit the required email field entirely.

    bash

    curl -X POST \

      "https://api.sender.net/v2/subscribers" \

      -H "Authorization: Bearer YOUR_API_TOKEN" \

      -H "Content-Type: application/json" \

      -H "Accept: application/json" \

      -d '{"email": "not-a-valid-email"}'

    The API returns a 422 status code with a response body containing a message field and an errors object. Each key in errors is a field name, and its value is an array of validation messages. Confirm your code parses this structure correctly.

    Step 5 — Verify the result in the Sender dashboard

    After a successful POST test, confirm the data persists by retrieving it with a GET request. Send a GET request to https://api.sender.net/v2/subscribers/{email} replacing {email} with the email address you used in Step 3.

    bash

    curl -X GET \

      "https://api.sender.net/v2/subscribers/[email protected]" \

      -H "Authorization: Bearer YOUR_API_TOKEN" \

      -H "Content-Type: application/json" \

      -H "Accept: application/json"

    The 200 response returns the subscriber's full profile in the data object, including id, email, firstname, lastname, status, and subscriber_tags. You can also log in to the Sender dashboard, navigate to Subscribers, and confirm the test subscriber appears there.

    Endpoint Reference

    GET /v2/subscribers — Returns a paginated list of all subscribers in your account. Supports page, limit, order, and direction query parameters. No request body required.

    GET /v2/subscribers/{email}or{phone}or{ID} — Returns a single subscriber's full profile. Replace the path parameter with the subscriber's email address, phone number, or subscriber ID. No request body required.

    POST /v2/subscribers — Creates a new subscriber. The email field is required in the request body. Optional fields include firstname, lastname, groups, fields, phone, and trigger_automation.

    GET /v2/groups — Returns a paginated list of all subscriber groups. Supports page, limit, order, and direction query parameters. No request body required.

    Error Handling

    401 — Unauthorized — The API could not authenticate your request. Verify that your Authorization header uses the format Bearer YOUR_API_TOKEN and that the token is active in Account settings → API access tokens.

    400 — Bad request — The request is malformed or references an invalid action. The response body includes a message field with details. Check that your request URL and HTTP method are correct.

    404 — Not found — The requested resource does not exist. Verify the endpoint path and any resource IDs or email addresses in the URL are correct.

    422 — Bad request parameters — One or more fields failed validation. The response includes a message field and an errors object where each key is a field name mapped to an array of error messages. Fix the invalid fields and retry.

    429 — Too many requests — You have exceeded the API rate limit. The response includes X-RateLimit-Limit, X-RateLimit-Remaining, X-RateLimit-Reset, and Retry-After headers. Wait for the number of seconds specified in Retry-After before sending another request.

    5xx — Server error — An internal error occurred on Sender's servers. Retry the request after a short delay. If the issue persists, contact [email protected].

    API Tips

    Use read-only endpoints first — Start testing with GET requests like GET /v2/subscribers or GET /v2/groups to verify authentication and connectivity without modifying any data.

    Disable automations during testing — When creating subscribers via the API during testing, set "trigger_automation": false in the request body to prevent unintended automation triggers.

    Check response headers for rate limits — Every API response includes X-RateLimit-Remaining and X-RateLimit-Limit headers. Monitor these during testing to understand your usage and implement backoff strategies before hitting limits.

    Test pagination with small limits — Use ?page=1&limit=2 to return minimal data while verifying that your pagination logic correctly reads the meta object fields like current_page, last_page, and total.

    Log full responses during development — Capture the complete HTTP status code, response headers, and body during testing. This gives you full visibility into errors, rate limit state, and response structure before writing production error handling.

    Common Issues

    401 on every request → The API token may be expired, revoked, or incorrectly formatted. Ensure the Authorization header value is exactly Bearer YOUR_API_TOKEN with a single space after Bearer. Regenerate the token from Account settings → API access tokens if needed.

    422 when creating a subscriber → The email field is either missing or contains an invalid value. Verify the request body is valid JSON with "email" set to a properly formatted email address.

    Empty data array in response → The account has no resources of the requested type, or the pagination parameters point beyond the available results. Check the meta.total value and adjust your page parameter.

    Connection refused or timeout → The API only accepts HTTPS connections at https://api.sender.net/v2/. Ensure you are not using http:// and that your network allows outbound HTTPS traffic on port 443.

    Response body is not JSON → The Accept: application/json header may be missing from your request. Include both Content-Type: application/json and Accept: application/json in every request.

    FAQs

    Where do I find my API access token? Go to Account settings → API access tokens in the Sender dashboard. Click Create API token to generate a new one. Copy the token immediately — it may not be displayed again after you navigate away.

    What is the base URL for all API requests? All Sender API v2 requests use the base URL https://api.sender.net/v2/. Append the specific endpoint path after this base URL. The API is served only over HTTPS.

    What tools can I use to test API calls? You can use cURL from the command line, Postman as a graphical client, or write test scripts in any language that supports HTTP requests (JavaScript, Python, PHP, etc.). The Sender API docs provide code examples in JavaScript, PHP, Python, and Bash.

    How do I know if my API call was successful? Successful responses return a 200 or 201 status code with the resource data in the response body. Error responses return 4xx or 5xx status codes with a message field and, for validation errors, an errors object describing each invalid field.

    What happens if I exceed the API rate limit? The API returns a 429 Too Many Requests response with a Retry-After header. Wait for the specified number of seconds before retrying. Implement exponential backoff in your code to handle rate limits gracefully.

    Can I test write operations without affecting my live data? Use the trigger_automation parameter set to false when creating subscribers to prevent automations from firing. You can delete test subscribers after testing. There is no sandbox environment, so all API calls operate on your live account data.

  • Connecting with your store

    This guide explains how to connect your ecommerce store to Sender so you can sync customer data, track cart activity, trigger automations, and send targeted campaigns based on purchase behavior.

    Prerequisites

    • An active Sender account
    • An active ecommerce store on a supported platform (Shopify, WooCommerce, PrestaShop, Jumpseller, or Drupal)
    • Admin access to your ecommerce platform’s dashboard or admin panel
    • An API access token from Sender (required for WooCommerce, PrestaShop, and plugin-based integrations)

    Where to Find This Setting

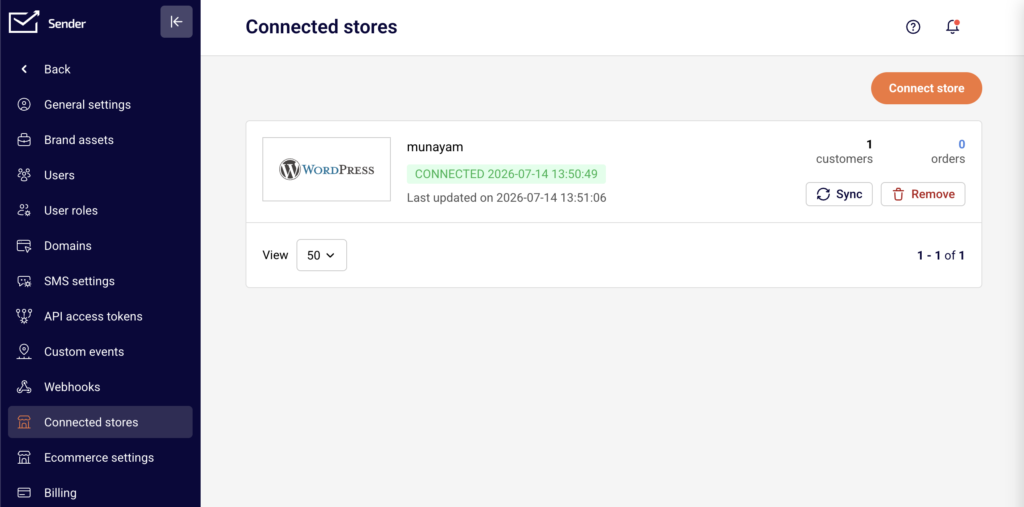
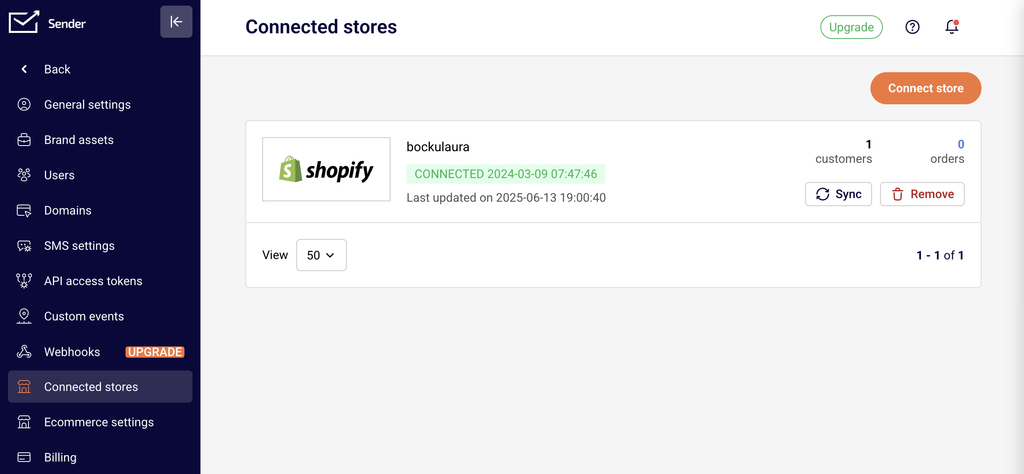
    In the Sender dashboard, go to Account settings → Connected stores. This page displays all currently connected stores and provides the Connect store button to add a new connection.

    account-settings-connected-stores

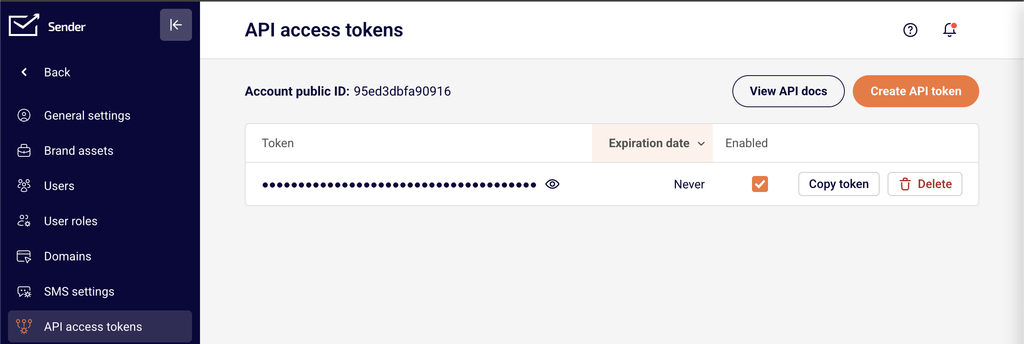
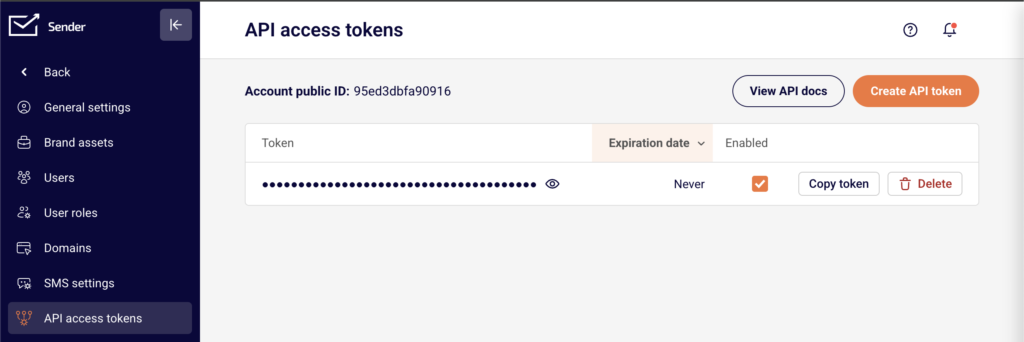
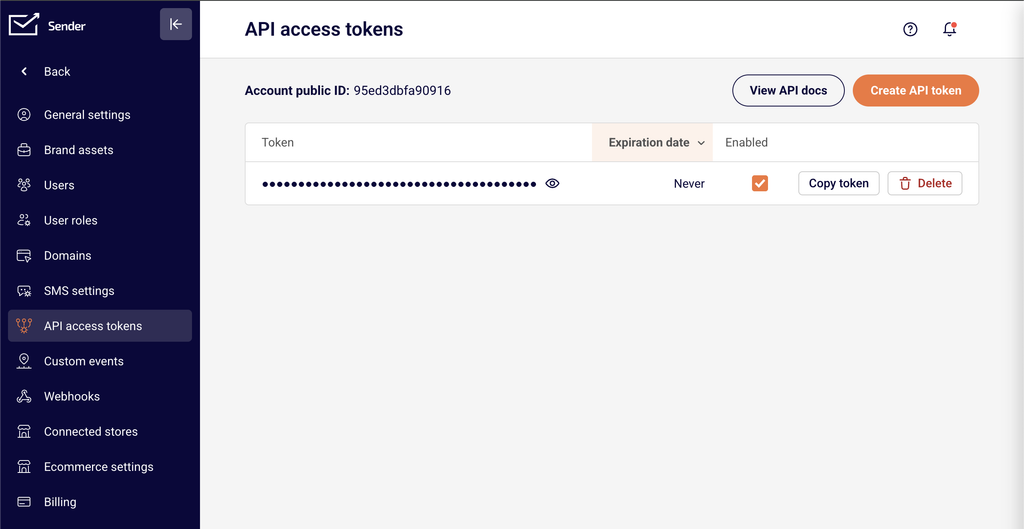
    For plugin-based integrations (such as WooCommerce or PrestaShop), you also need an API access token. Go to Account settings → API access tokens to generate one.

    account-settings-api-token

    The connection process differs depending on your ecommerce platform. Shopify connects directly through the Shopify App Store. WooCommerce, WordPress, and PrestaShop require installing a plugin and authenticating with your Sender API token. Jumpseller connects through an interactive setup flow.

    Note: Third-party platform interfaces may change over time. The steps below reflect the current process but may vary slightly depending on your platform version.

    Steps to Connect Your Store

    Step 1 — Generate an API access token in Sender

    Go to Account settings → API access tokens in the Sender dashboard. Click Create API token. In the dialog that appears, select a validity period — options include Forever, 30 days, 7 days, or 1 day. Click Create. Copy the generated token and store it securely. You will need this token to authenticate plugin-based integrations such as WooCommerce and PrestaShop.

    Step 2 — Install and authenticate the integration on your ecommerce platform

    The installation process depends on your platform:

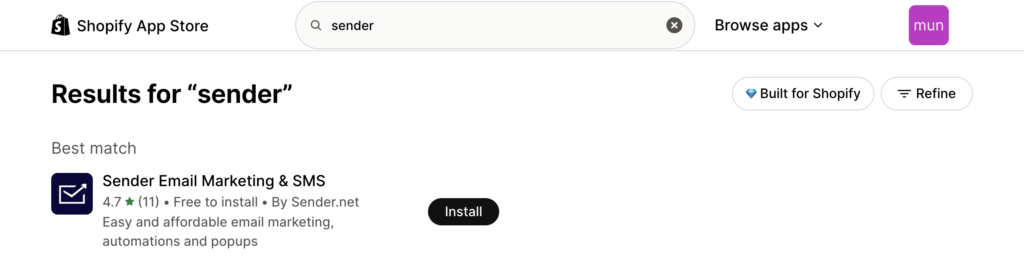
    Shopify — Log into your Shopify admin. Click Add apps, then go to the Shopify App Store. Search for Sender Email Marketing & SMS. Click Add app and then Install app. You will be redirected to the Sender app inside Shopify to complete the connection.

    shopify-app-store

    WooCommerce — Download the Sender.net plugin from the WordPress plugin store. Install and activate the plugin in your WordPress admin. Enter your API access token from Sender to authenticate. The Sender.net section will appear in your WordPress sidebar.

    sender-wordpress-plugin

    PrestaShop — Download the Sender.net module from the Sender website. In your PrestaShop admin panel, go to Modules and Services → Add a new module. Upload the downloaded file and install it. Navigate to the Emailing & SMS section, find the Sender.net module, and click Install. Enter your API access token to authenticate.

    Jumpseller — Follow the interactive tutorial provided by Sender to connect your Jumpseller store directly to your account.

    Step 3 — Configure tracking and sync settings

    Once connected, configure your integration settings within the plugin or app on your ecommerce platform.

    sender-woocommerce-cart-tracking

    For WooCommerce and PrestaShop, enable the Enable tracking option to activate cart tracking and customer data sync. Select which subscriber group new customers and guest visitors should be added to.

    sender-shopify-app-integration

    For Shopify, cart tracking is enabled automatically after you connect. Your connected store will now appear on the Connected stores page in Sender.

    How to Verify the Integration

    Go to Account settings → Connected stores in Sender and confirm your store is listed with an active status.

    sender-shopify-connected-store

    Place a test order or add items to a cart on your store, then check the Subscribers section in Sender to verify that customer data has synced. Navigate to Automations and confirm that ecommerce triggers such as A cart is abandoned and A product is purchased are available for use.

    What Syncs Between Platforms

    Customer email addresses → Sender — When a customer makes a purchase, creates an account, or is captured as a guest visitor, their email address is automatically added to the designated subscriber group in Sender. This happens in real time as events occur on your store.

    Cart activity → Sender — Abandoned cart data and product purchase events are tracked and sent to Sender in real time. This data powers the A cart is abandoned and A product is purchased automation triggers.

    Subscriber group assignment → Sender — New customers and guest visitors are assigned to the subscriber groups you configure in the plugin settings. You can set different groups for purchasers, new registrations, and guest cart captures.

    Customer fields → Sender — Depending on the platform and your plugin configuration, additional customer data such as name, gender, and date of birth can be synced to custom fields in Sender. This is configurable in platforms like PrestaShop through the Customer data settings in the plugin.

    Integration Tips

    Use a long-lived API token for stable connections — When generating an API access token for a plugin integration, select Forever as the validity period to avoid unexpected disconnections caused by token expiration.

    Assign separate subscriber groups for different customer types — Configure your plugin to save purchasers, new registrations, and guest visitors into distinct subscriber groups. This makes it easier to create targeted segments and campaigns in Sender.

    Enable tracking before setting up automations — Make sure the Enable tracking option is active in your plugin settings before creating abandoned cart or post-purchase automation workflows. Without tracking enabled, the automation triggers will not receive cart or purchase data.

    Test the connection with a sample transaction — After connecting your store, complete a test purchase or add-to-cart action to confirm data is flowing into Sender before launching live campaigns.

    Common Issues

    Store does not appear on the Connected stores page → The plugin or app installation may not have completed successfully. Revisit your ecommerce platform’s plugin settings and confirm that the API access token is entered correctly and the plugin is activated.

    Subscribers are not syncing to Sender → The Enable tracking option may be disabled in your plugin settings. Go to the Sender.net plugin settings in your ecommerce admin and verify that tracking is turned on and a subscriber group is selected.

    API token authentication fails → The token may have expired or been deleted. Go to Account settings → API access tokens in Sender, generate a new token, and re-enter it in your plugin’s authentication field.

    Abandoned cart automation is not triggering → Cart tracking must be active and the automation workflow must be set to Active status. Verify both in your plugin settings and in Sender under Automations.

    Pop-up forms are not appearing on the store website → Ensure the form is activated in Sender under Forms. Pop-up forms display automatically on connected stores once they are toggled to active — no additional script installation is needed.

    FAQs

    Where do I find my Sender API access token?

    Go to Account settings → API access tokens in the Sender dashboard. Click Create API token if you do not have one yet. Select a validity period, click Create, then copy the token and paste it into your plugin’s authentication field.

    Which ecommerce platforms does Sender support for direct store connections?

    Sender offers direct integrations with Shopify, WooCommerce, PrestaShop, Jumpseller, and Drupal. Each platform has its own connection method — either through an app store, a downloadable plugin, or an interactive setup flow.

    Does connecting my store sync existing customers or only new ones?

    This depends on the platform. Some integrations, such as PrestaShop, offer an Export customers option that lets you sync your full customer list to a subscriber group in Sender. Others sync only new activity going forward. Check your plugin’s settings for export or sync options.

    Can I connect multiple stores to the same Sender account?

    Yes. You can connect multiple stores across different platforms. Each connected store will appear separately on the Connected stores page under Account settings.

    What happens if I disconnect a store from Sender?

    Disconnecting stops future data sync between the store and Sender. Subscribers and data already synced to your Sender account remain intact and are not deleted. You can reconnect the store at any time by repeating the setup process.

    Do I need a paid Sender plan to use store integrations?

    Store integrations are available on all plans. However, certain features such as Revenue tracking require a Pro plan. Check the Billing section in Sender for details on your current plan’s capabilities.

  • Zapier Integration

    This guide explains how to connect Sender to Zapier so you can automate workflows between Sender and thousands of other apps — such as syncing new subscribers, triggering actions when campaigns are created, or adding contacts from external tools.

    Prerequisites

    • An active Sender account
    • A Zapier account (free or paid plan)
    • An API access token from Sender (generated in Account settings → API access tokens)
    • A Zap idea in mind — knowing which trigger and action you want to automate

    Where to Find This Setting

    The Sender side of the connection is managed through your API access token. To find it, go to Account settings → API access tokens in your Sender dashboard. Click Create API token if you don't have one yet, then copy the token value.

    The Zapier side of the connection is managed entirely within Zapier. You configure the integration when creating or editing a Zap in the Zap editor at https://zapier.com. You can also manage existing connections from the Apps page under My Apps in your Zapier dashboard.

    Note: The Zapier interface may change over time. Steps and menu labels described below reflect the current layout but may vary slightly.

    Steps to Connect Sender to Zapier

    Step 1 — Generate an API Access Token in Sender

    In your Sender dashboard, navigate to Account settings → API access tokens. Click Create API token. Give your token a descriptive name (e.g., Zapier integration) so you can identify it later. Once the token is created, copy it and store it securely. You will paste this token into Zapier during the authentication step.

    Step 2 — Create a Zap and Authenticate Sender

    Log in to your Zapier account and click Create → Zaps (or + Create depending on your interface). In the Zap editor, choose whether Sender will serve as the trigger app or the action app. Search for and select Sender. When prompted to connect your Sender account, click Sign in and paste your API access token into the authentication field. Click Yes, Continue to confirm the connection.

    Step 3 — Configure the Trigger and Action

    Select the specific trigger event or action event you want to use. If Sender is your trigger, choose an event such as New Subscriber or New Campaign. If Sender is your action, choose an event such as Add / Update Subscriber or Add Subscriber to Group. Configure any required fields — such as selecting a subscriber group — then click Continue. Test the step to confirm data is flowing correctly, then publish your Zap by toggling it on.

    How to Verify the Integration

    After publishing your Zap, trigger the event manually to confirm data flows as expected. For example, if your trigger is New Subscriber, add a test subscriber in Sender and check that the action fires in the connected app. In Sender, go to Subscribers to verify that any new contacts pushed by a Zap action appear in the correct subscriber group. In Zapier, check the Zap History page to confirm the Zap ran successfully without errors.

    What Syncs Between Platforms

    Subscriber data (Sender → Zapier) — When a trigger event occurs in Sender (such as a new subscriber being added, updated, or unsubscribed), Zapier receives the subscriber's details in real time. All Sender triggers are instant, meaning data is sent to Zapier immediately when the event happens.

    Subscriber data (Zapier → Sender) — When a Zap action pushes data into Sender, it can create or update subscribers, add or remove subscribers from groups, or unsubscribe email addresses. Data is sent to Sender as soon as the Zap's trigger fires.

    Campaign data (bidirectional) — Sender can trigger a Zap when a new campaign is created. In the other direction, Zapier can create a draft campaign or send an existing draft campaign in Sender.

    Integration Tips

    Use descriptive token names — When creating your API access token in Sender, name it something identifiable like Zapier integration so you can easily manage or revoke it later without affecting other integrations.

    Test before publishing — Always use Zapier's built-in test feature for each step before turning on your Zap. This confirms that authentication works and data maps correctly between platforms.

    Use filters and formatting in Zapier — Add Zapier filter or formatter steps between your trigger and action to control which data flows into Sender. For example, filter out subscribers from a specific domain or format phone numbers before syncing.

    Monitor Zap History — Regularly check the Zap History page in Zapier to catch errors early. Failed Zap runs typically indicate expired tokens, missing required fields, or changed configurations.

    One token per integration — Consider creating a separate API access token for each third-party integration. This way, revoking one token does not break other connected services.

    Common Issues

    Sender account fails to authenticate in Zapier → The API access token may be incorrect or contain extra spaces. Go to Account settings → API access tokens in Sender, create a new token, and paste it carefully into Zapier without any leading or trailing spaces.

    Zap runs but no data appears in Sender → The action step may be misconfigured. Open the Zap in the Zap editor, verify that required fields (such as email address and subscriber group) are correctly mapped, and re-test the step.

    Trigger not firing for new events → All Sender triggers are instant and rely on webhooks. If triggers stop working, go to My Apps in Zapier, find the Sender connection, and click Reconnect to re-establish the webhook connection.

    Duplicate subscribers appearing in Sender → Use the Add / Update Subscriber action instead of creating a new subscriber each time. This action checks for an existing email address and updates the record rather than creating a duplicate.

    Zap turns off automatically → Zapier disables Zaps after repeated errors. Check the Zap History for error details, fix the underlying issue (expired token, deleted group, etc.), and turn the Zap back on.

    FAQs

    Where do I find my Sender API access token?

    Go to Account settings → API access tokens in the Sender dashboard. Click Create API token if you don't have one yet. Copy the token and paste it into the Zapier authentication field when connecting your Sender account.

    What triggers and actions does Sender support in Zapier?

    Sender supports seven instant triggers: New Campaign, New Subscriber, New Group, New Subscriber in Group, New Unsubscriber, New Unsubscriber From Group, and Updated Subscriber. It also supports seven actions: Add / Update Subscriber, Add Subscriber to Group, Remove Subscriber From Group, Create Campaign, Send Campaign, Send Transactional Campaign, and Unsubscribe Email.

    Does the integration sync existing subscribers or only new ones?

    Sender triggers in Zapier only fire for new events going forward — they do not sync historical data. To bring existing subscribers into a Zap workflow, use a Zapier action triggered by another app (such as a spreadsheet) to push contacts into Sender.

    Can I connect Sender to multiple apps through Zapier at the same time?

    Yes. Each Zap operates independently. You can create multiple Zaps that connect Sender to different apps simultaneously without conflicts.

    What happens if I revoke my API access token in Sender?

    Any Zapier Zaps authenticated with that token will stop working. You will need to create a new token in Account settings → API access tokens and reconnect your Sender account in Zapier using the new token.

    Are Sender triggers in Zapier instant or polling-based?

    All Sender triggers in Zapier are instant. They use webhooks to send data to Zapier the moment the event occurs in Sender, with no polling delay.

  • Gmail and Yahoo sender requirements

    This guide explains what Gmail and Yahoo require from bulk email senders and how to configure your Sender account to meet those requirements.

    Why This Matters

    Gmail and Yahoo enforce strict sender requirements that affect whether your emails reach subscriber inboxes or get rejected entirely. Senders who do not comply risk having their messages blocked, filtered to spam, or silently dropped. Non-compliance can also trigger domain reputation damage that affects all emails sent from your domain, not just those sent through Sender. Meeting these requirements is essential to maintaining deliverability and avoiding disruption to your email program.

    What Is Required

    Domain authentication — Gmail and Yahoo require that all bulk senders authenticate their sending domain using SPF, DKIM, and DMARC. Messages that fail authentication checks are more likely to be rejected or sent to spam. This applies to anyone sending marketing or bulk email to Gmail or Yahoo recipients.

    One-click unsubscribe (RFC 8058) — Bulk senders must support one-click unsubscribe by including a functioning List-Unsubscribe header in every marketing email. Gmail and Yahoo expect this header to allow recipients to unsubscribe without additional steps. Failure to include it can result in emails being blocked.

    Low spam complaint rate — Gmail requires senders to keep their spam complaint rate below 0.3%, with a recommended target below 0.10%. Yahoo applies similar thresholds. Exceeding these limits triggers filtering or blocking of your messages.

    Valid “From” address and matching domain — The domain in your “From” address must match the domain you have authenticated. Gmail and Yahoo check this alignment as part of DMARC validation. Sending from a free email address (e.g., gmail.com, yahoo.com) as your “From” address will cause authentication failures.

    Physical mailing address — CAN-SPAM and other regulations require a valid physical postal address in every commercial email. While not a Gmail- or Yahoo-specific rule, it is enforced by Sender and expected by mailbox providers as a trust signal.

    Proper DNS records (PTR/reverse DNS) — Sending IP addresses must have valid PTR records that resolve correctly. Sender manages this for emails sent through its infrastructure, but if you use a custom sending setup, you should verify this with your provider.

    Note: This article describes general compliance guidance. Consult a legal professional for jurisdiction-specific advice on email regulations.

    Steps to Meet Gmail and Yahoo Requirements

    Step 1 — Verify your sending domain authentication

    Go to Account settings → Domains. Locate your sending domain in the list and check the Authentication column.

    account-settings-domains

    Three green checkmarks should appear, confirming that SPF, DKIM, and DMARC are properly configured. If any are missing, click Recheck DNS records to refresh the status.

    account-settings-domains-dns

    If authentication is not yet set up, click Add domain and follow the setup instructions provided. All three protocols must be verified before sending to Gmail or Yahoo recipients.

    Step 2 — Use an authenticated “From” address

    When creating a campaign, go to the Settings step and review the Sender details section. Confirm that the Sender’s email address field uses a domain you have already authenticated in Account settings → Domains.

    campaign-settings-sender-details

    Do not use a free email provider address (e.g., gmail.com, yahoo.com) as your “From” address. The domain in your “From” address must match the authenticated domain for DMARC alignment to pass. If needed, update the From name field to reflect a recognizable sender identity.

    Step 3 — Confirm your physical address is set

    Go to Account settings → General settings. Under the Company info section, fill in the Address, City, State / Province / Region, Postal/ZIP code, and Country fields. This address is included in your email footer automatically when using Sender’s default templates.

    account-settings-company-info

    Click Save to apply changes. A valid mailing address is required by CAN-SPAM and is expected by Gmail and Yahoo as part of sender compliance.

    Step 4 — Ensure unsubscribe handling is configured

    Sender automatically includes a List-Unsubscribe header and a visible unsubscribe link in marketing emails sent through its templates. To adjust unsubscribe behavior, go to Account settings → General settings and locate the Ask for unsubscribe confirmation toggle under Other settings.

    account-settings-unsubscribe-confirmation

    When this toggle is off, recipients are unsubscribed immediately upon clicking the link, which aligns with Gmail and Yahoo’s one-click unsubscribe requirement. Confirm this setting matches your compliance needs.

    Step 5 — Monitor your spam complaint rate

    Return to your Dashboard and review the Average spam rate metric in the Traffic and reach report section. Gmail and Yahoo expect this rate to stay below 0.3%, with a recommended target below 0.10%. If your spam rate is climbing, review your subscriber list for non-consented contacts, reduce sending frequency, or improve content relevance.

    dashboard-traffic-reach

    Sustained high complaint rates can trigger filtering or blocking by Gmail and Yahoo, and may also result in a review from Sender.

    Sender’s Policies

    Authenticated domain required — Sender requires you to add and verify a sending domain in Account settings → Domains before you can send campaigns. Sending from unverified or free email domains is restricted and may result in delivery failures.

    Unsubscribe link required — Every marketing email sent through Sender must include a working unsubscribe link. Sender’s default templates include this automatically. Removing or hiding the unsubscribe link violates Sender’s sending policies and may lead to account suspension.

    Purchased lists prohibited — Sender’s acceptable use policy prohibits sending to purchased, rented, or scraped email lists. Sending to these lists leads to high bounce rates and spam complaints, which violate Gmail and Yahoo thresholds and may result in account suspension.

    Spam complaint monitoring — Sender monitors spam complaint rates across all accounts. If your complaint rate exceeds acceptable levels, your account may be flagged for review, restricted, or suspended. This enforcement aligns with Gmail and Yahoo’s requirement to maintain complaint rates below 0.3%.

    Physical address required — Sender requires a valid physical mailing address in Account settings → General settings. This address is automatically inserted into email footers. Leaving it blank or entering invalid information violates Sender’s policies and CAN-SPAM regulations.

    Compliance Tips

    Keep your “From” domain consistent — Always send from the same authenticated domain. Switching between multiple unauthenticated domains confuses mailbox providers and damages your sender reputation with Gmail and Yahoo.

    Disable unsubscribe confirmation for bulk sending — Gmail and Yahoo’s one-click unsubscribe requirement works best when subscribers are removed immediately. If the Ask for unsubscribe confirmation toggle is enabled, consider turning it off to ensure seamless compliance.

    Clean your list before sending — Remove inactive, bounced, and unengaged subscribers regularly. High bounce rates and low engagement signal poor list quality to Gmail and Yahoo, increasing the likelihood of filtering.

    Send only to opted-in subscribers — Every recipient on your list should have given explicit permission to receive your emails. Consent-based sending is the most effective way to maintain low complaint rates and comply with Gmail, Yahoo, and regulatory requirements.

    Test authentication before launching campaigns — After adding your domain in Account settings → Domains, click Recheck DNS records to confirm all three authentication checks (SPF, DKIM, DMARC) show green checkmarks before sending your first campaign.

    Common Issues

    Emails landing in Gmail spam despite authentication → This typically happens when your spam complaint rate exceeds Gmail’s threshold or your DMARC policy is not aligned with your “From” domain. Check Account settings → Domains to verify all three authentication checks are green, and review your Dashboard for rising spam rates.

    DMARC alignment failure → This occurs when the domain in your Sender’s email address field does not match the domain authenticated in Account settings → Domains. Update your “From” address to use the verified domain.

    Unsubscribe link missing from emails → If you are using a custom HTML template without Sender’s default footer blocks, the unsubscribe link may not be included. Add the unsubscribe merge tag manually to your template to ensure compliance with Gmail, Yahoo, and Sender requirements.

    Account flagged for high spam complaints → Sender monitors complaint rates and may restrict your account if rates are too high. Review your subscriber list for non-consented contacts, reduce frequency to unengaged segments, and ensure your content matches subscriber expectations.

    Physical address missing from email footer → Go to Account settings → General settings and complete all fields under Company info. If you are using a custom template, confirm that the address merge tag is included in the footer.

    FAQs

    Do Gmail and Yahoo requirements apply to all senders?

    The strictest requirements (domain authentication, one-click unsubscribe, low spam rates) apply specifically to bulk senders — generally those sending more than 5,000 messages per day to Gmail or Yahoo addresses. However, all senders benefit from following these requirements, and Sender enforces many of them regardless of volume.

    Can I send from a Gmail or Yahoo email address as my “From” address?

    No. Gmail and Yahoo’s DMARC policies reject emails sent from their domains through third-party platforms like Sender. You must use a custom domain that you own and have authenticated in Account settings → Domains.

    What happens if I don’t set up DMARC?

    Gmail and Yahoo may reject or filter your emails if DMARC is not configured. At minimum, you need a DMARC record published on your domain, even if it is set to a monitoring-only policy. Check the Authentication column in Account settings → Domains to confirm your DMARC status.

    How does Sender handle the one-click unsubscribe requirement?

    Sender automatically adds the List-Unsubscribe header to marketing emails, which satisfies Gmail and Yahoo’s one-click unsubscribe requirement. If you disable the Ask for unsubscribe confirmation toggle in Account settings → General settings, subscribers are removed immediately upon clicking, fully meeting the one-click standard.

    Will my emails be blocked if my spam rate exceeds 0.3%?

    Gmail may begin filtering or rejecting your messages if your spam complaint rate stays above 0.3%. Yahoo applies similar enforcement. If your rate is elevated, Sender may also flag your account for review. Reduce sending to unengaged contacts and review your list hygiene practices to bring the rate down.

    Where do I check my authentication status in Sender?

    Go to Account settings → Domains. Each domain in the list shows green checkmarks for SPF, DKIM, and DMARC under the Authentication column. If any checkmark is missing, your authentication is incomplete.