Blog

  • How to Import Subscriber Phone Numbers

    This guide walks you through how to import subscriber phone numbers into Sender for the first time, so your contacts are ready for SMS campaigns.

    Where to Find This Feature

    In the Sender dashboard, go to: Subscribers → Subscribers → Add subscribers

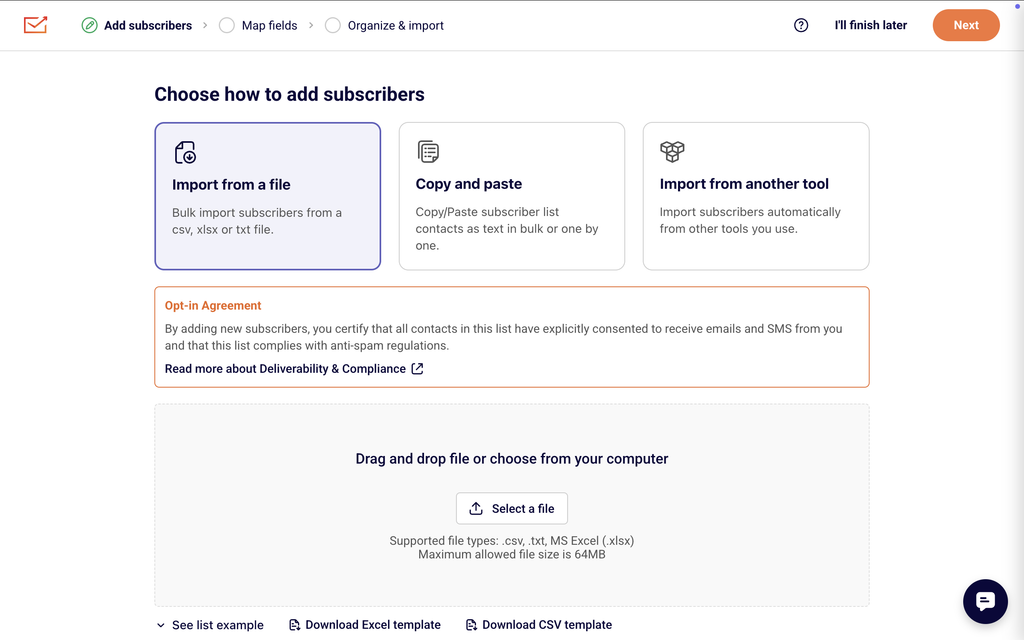
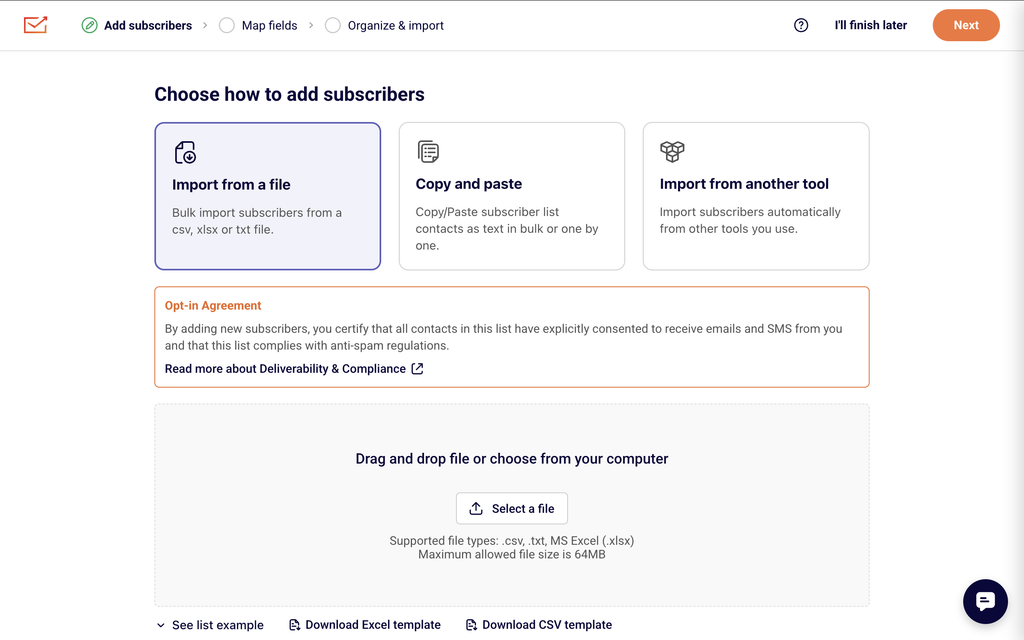
    This opens the Import subscribers page, where you can upload a file containing subscriber data including phone numbers. You will see four import methods at the top of the page: Import from a file, Copy/Paste subscriber list, Import from Mailchimp, and Import from GetResponse. Below the import method tabs, you will find a file upload area, a list format example, and template download options.

    Steps to Import Subscriber Phone Numbers

    Step 1 — Prepare Your File

    Before uploading, format your file so that each subscriber is on a separate row and each field (email, first name, last name, phone number) is in a separate column. Phone numbers must be in international format with the country code prefix (e.g., +1 for the United States, +44 for the United Kingdom). For example: +12345678901.

    Sender accepts .csv, .txt, and .xlsx (MS Excel) files up to 64 MB. You can click Download Excel template or Download CSV template on the import page to get a pre-formatted file to work with.

    Step 2 — Upload Your File

    On the Import subscribers page, make sure the Import from a file tab is selected. Drag and drop your file into the upload area, or click the Import file button to select a file from your computer. Sender will process the file and display a preview of your data in the next step.

    Step 3 — Map Columns to Subscriber Fields

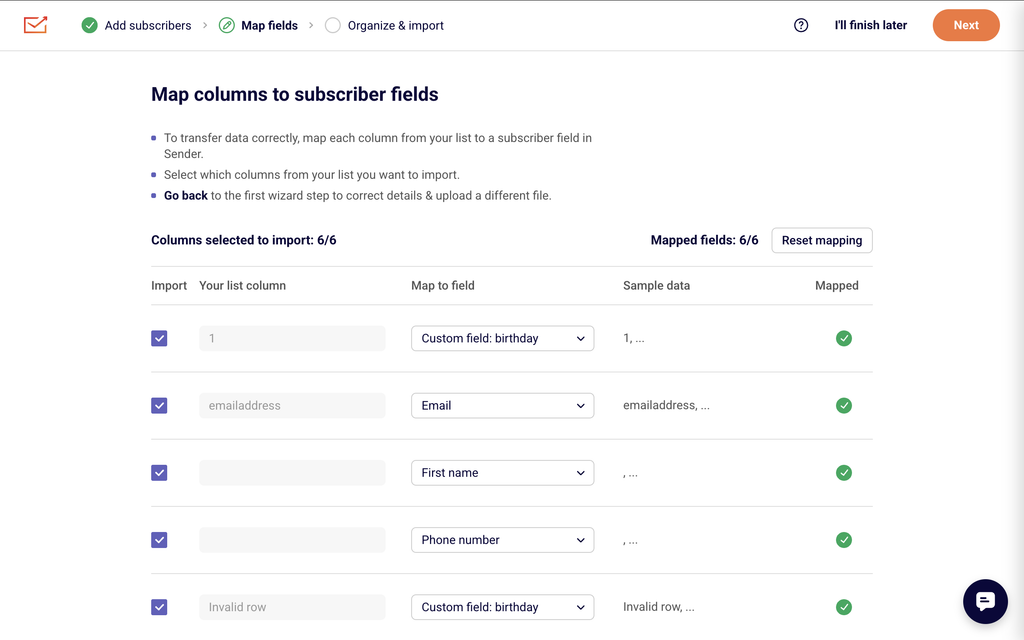
    After uploading, Sender displays the Match the columns section with a preview of your data. Each column has a dropdown at the top. Verify that Sender has correctly matched your columns to the right subscriber fields — particularly that your phone number column is mapped to Phone number.

    If a column is not matched correctly, click the dropdown and select the correct field. You can also search for a field by name, select Create a new field if you need a custom field, or choose Skip this column to exclude a column from the import. A count at the bottom shows how many subscribers will be imported.

    Step 4 — Assign to a Group and Start the Import

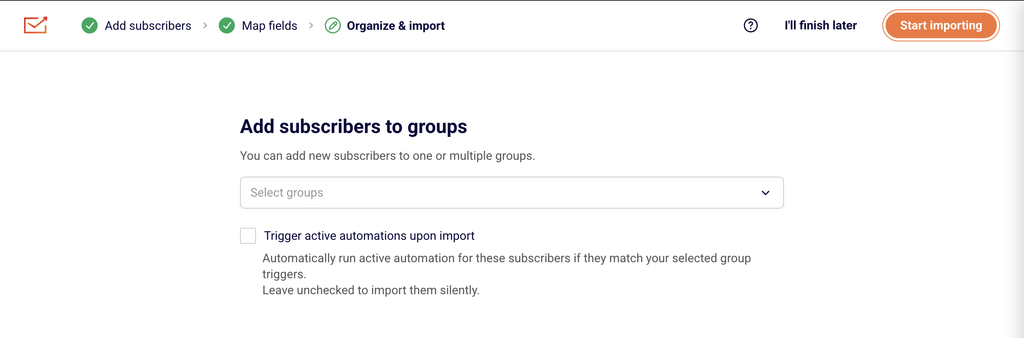
    Below the column mapping preview, you will see the Add subscribers to a group section. Click the Choose groups dropdown to assign imported subscribers to one or more existing groups, or select Create a new group to make a new one. Assigning subscribers to a group makes it easier to target them later in SMS campaigns.

    When everything looks correct, click the Start import button. Sender processes the import and returns you to the Subscribers list, where you can verify that the new subscribers and their phone numbers appear.

    SMS Compliance Requirements

    Consent (TCPA / GDPR) — Before importing phone numbers, you must have explicit opt-in consent from each subscriber to receive SMS marketing messages. In the United States, the Telephone Consumer Protection Act (TCPA) requires prior express written consent. In the European Union, the General Data Protection Regulation (GDPR) requires a clear legal basis for processing personal data, including phone numbers. Only import phone numbers for contacts who have given you verifiable permission.

    Phone number format — Sender requires phone numbers in international format, which includes the country code prefix followed by the subscriber's number (e.g., +14155551234). Numbers that do not include the country code may not be recognized correctly and will not be usable for SMS sending.

    Opt-out instructions — Most carrier regulations and Sender's own SMS policies require every marketing SMS to include opt-out instructions, such as "Reply STOP to unsubscribe." While this requirement applies when sending messages rather than during import, ensure your imported list only contains subscribers who have not previously opted out.

    Purchased or rented lists — Do not import phone numbers from purchased, rented, or scraped lists. Sending SMS messages to contacts who have not opted in violates carrier policies and SMS regulations, and may result in account suspension.

    Always consult a legal professional for guidance specific to your jurisdiction and business.

    What Happens Next

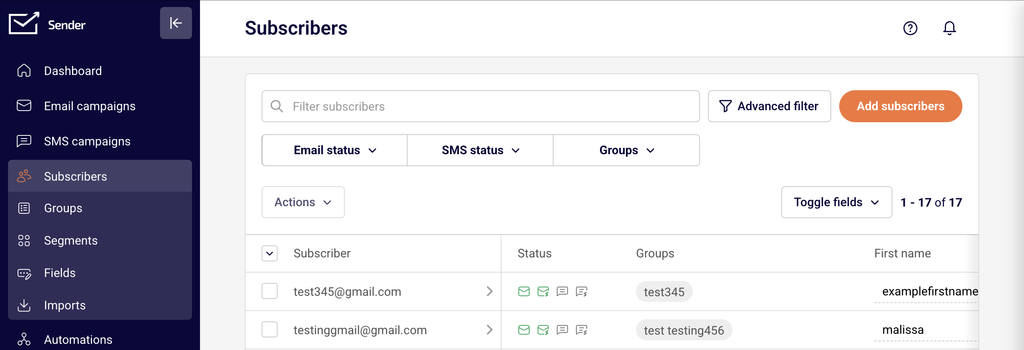
    After importing, go to Subscribers → Subscribers and click on any imported contact to view their profile. The subscriber profile displays an SMS campaign section showing the imported phone number with its status (e.g., ACTIVE). The Subscriber activity log on the right side of the profile confirms the import with entries such as "Phone set to [number] — Source: Import."

    Imported subscribers with valid phone numbers are immediately available for SMS campaigns. To verify your setup, you can send a test SMS to your own number by creating a new SMS campaign from SMS campaigns → New campaign.

    You can manage subscriber phone numbers, group assignments, and field mappings at any time from the Subscribers section of the dashboard.

    Common Issues

    Phone numbers not appearing after import → The phone number column was not mapped to the Phone number field during the column matching step. Re-import the file and make sure the dropdown above the phone number column is set to Phone number.

    Phone numbers in incorrect format → Numbers missing the country code prefix (e.g., 5551234567 instead of +15551234567) may not be recognized. Update your file so every phone number starts with + followed by the country code, then re-import.

    Subscribers not showing as SMS-active → If a subscriber's profile shows the SMS campaign section but the phone number is missing or the status is not ACTIVE, the phone number may have been formatted incorrectly or the column was skipped during import. Check the subscriber's profile and edit the phone number manually if needed.

    File upload fails → Sender supports .csv, .txt, and .xlsx files up to 64 MB. Make sure your file is in one of these formats and does not exceed the size limit. If the file is too large, split it into smaller batches.

    Duplicate subscribers → If a subscriber with the same email address already exists, Sender updates the existing record with the imported data, including the phone number. This does not create duplicate entries.

    FAQs

    What file formats does Sender accept for importing subscribers?

    Sender accepts .csv, .txt, and MS Excel (.xlsx) files. The maximum file size is 64 MB. You can download a pre-formatted template from the Import subscribers page by clicking Download Excel template or Download CSV template.

    What phone number format does Sender require?

    Phone numbers must be stored in international format with the country code prefix (e.g., +1 for the United States, +44 for the United Kingdom). The full number should start with + followed by the country code and subscriber number, such as +14155551234.

    Do I need consent to import subscriber phone numbers?

    Yes. SMS regulations like TCPA (US) and GDPR (EU) require explicit consent from recipients before sending marketing SMS. You should only import phone numbers for subscribers who have actively opted in to receive SMS messages from your business. Consult a legal professional for guidance specific to your jurisdiction.

    Can I import phone numbers without email addresses?

    Sender's import process uses email addresses as the primary subscriber identifier. Each row in your import file should include an email address along with the phone number to ensure the subscriber record is created or matched correctly.

    Can I assign imported subscribers to a group?

    Yes. During the import process, the Add subscribers to a group section lets you select one or more existing groups from the Choose groups dropdown, or create a new group by selecting Create a new group. This helps organize your SMS subscribers for targeted campaigns.

    What happens if I import a phone number for an existing subscriber?

    If the email address in your import file matches an existing subscriber, Sender updates that subscriber's record with the newly imported phone number. The existing subscriber data is not duplicated.

    How do I verify that the phone numbers were imported correctly?

    After importing, go to Subscribers → Subscribers and click on a recently imported contact. The subscriber profile will display the phone number under the SMS campaign section, along with its status. The Subscriber activity log will also show a "Phone set to [number] — Source: Import" entry confirming the import.

    Are there SMS sending restrictions by country?

    Yes. Some countries have specific carrier restrictions on sender IDs, content, or sending hours. Check Sender's SMS documentation or contact support for details about restrictions in your target countries.

  • SMS quiet hours and sending time restrictions

    This guide walks you through how to understand SMS quiet hours, comply with sending time restrictions, and use Sender's scheduling tools to send SMS campaigns at appropriate times.

    Where to Find This Feature

    In the Sender dashboard, go to: SMS campaigns

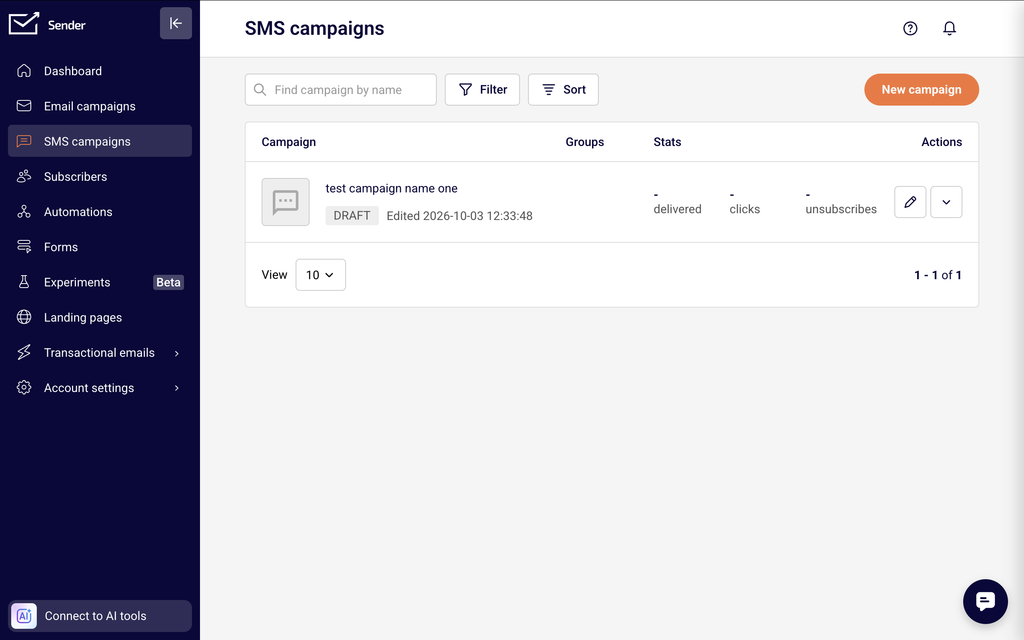
    You will see the SMS campaign library, which contains your drafted, scheduled, sending, and sent campaigns. The New campaign button at the top lets you create a new SMS campaign. Sending time settings are configured during the final step of campaign creation, called Review and schedule, where you choose when your campaign is sent.

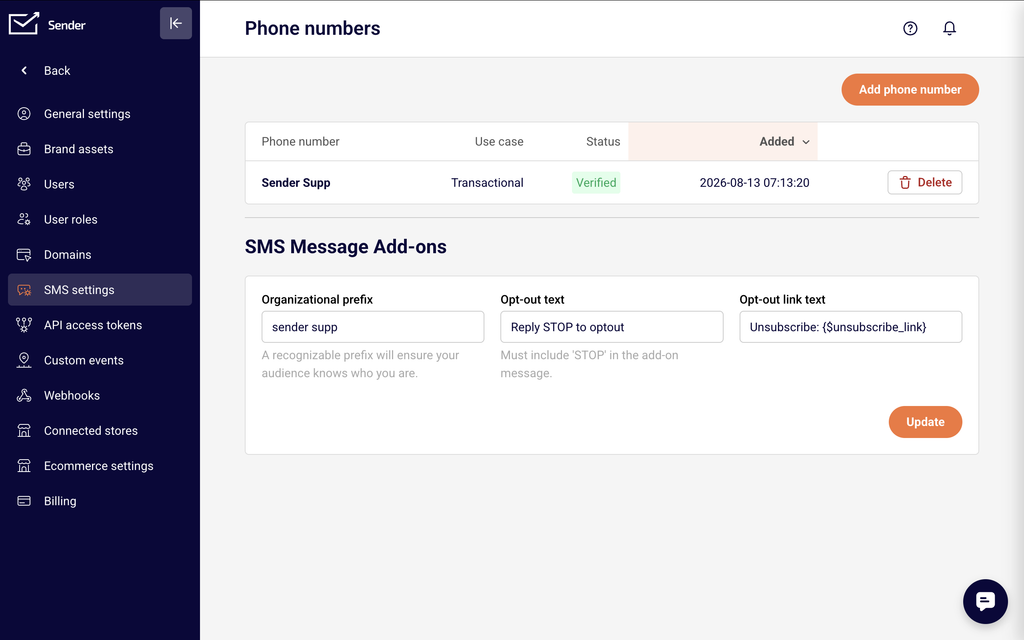
    To manage your sender phone numbers and SMS message add-ons, go to: Account settings → SMS settings

    Steps to Configure SMS Sending Times and Respect Quiet Hours

    Step 1 — Understand SMS Quiet Hours

    Quiet hours are time windows during which sending marketing SMS messages is restricted or prohibited. Under the TCPA (Telephone Consumer Protection Act, a US federal regulation governing telemarketing communications), businesses cannot text customers before 8:00 AM or after 9:00 PM in the recipient's local time zone. Similar restrictions may apply in other jurisdictions under regulations like the GDPR or local carrier rules. Scheduling your SMS campaigns outside of these restricted windows helps you stay compliant and reduces the risk of complaints, opt-outs, and potential fines.

    Step 2 — Create Your SMS Campaign Content

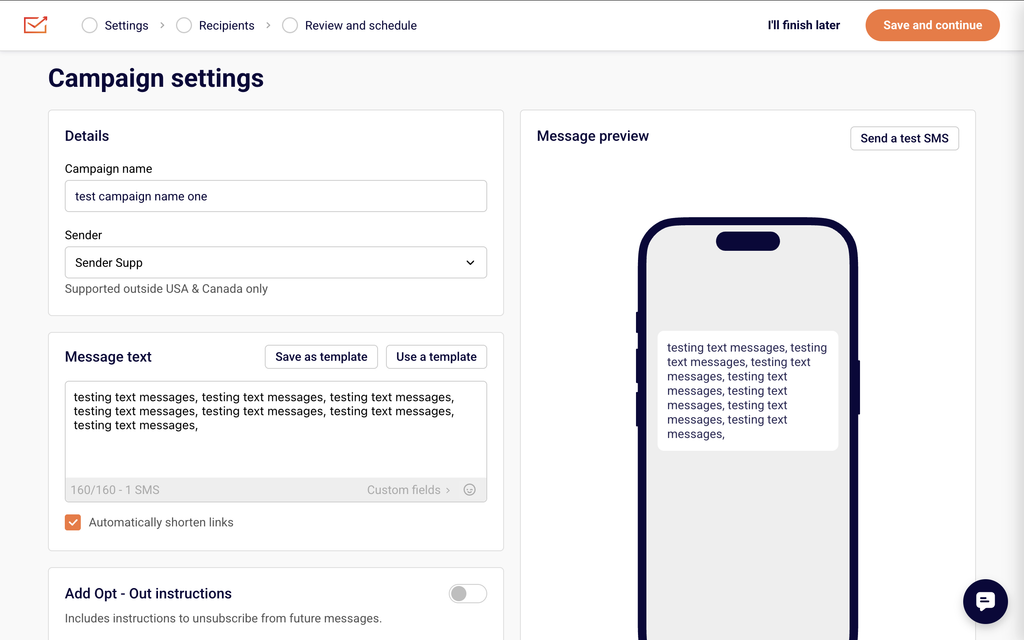
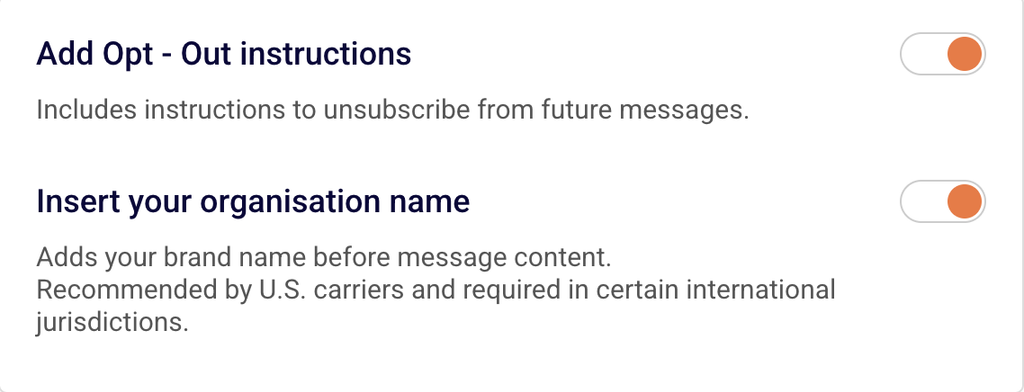
    In the Sender dashboard, click SMS campaigns in the left sidebar, then click New campaign. On the Campaign settings page, enter a Campaign name, select a verified phone number from the Sender dropdown, and write your message in the Message text field. Enable the Add Opt-Out instructions toggle to include unsubscribe instructions. Enable Insert your organisation name to prepend your brand name to the message, which is recommended by U.S. carriers. Click Save and continue to proceed to the Recipients step, select your subscriber groups or segments, and then click Save and continue again to reach the final step.

    Step 3 — Schedule Your Campaign for a Compliant Sending Time

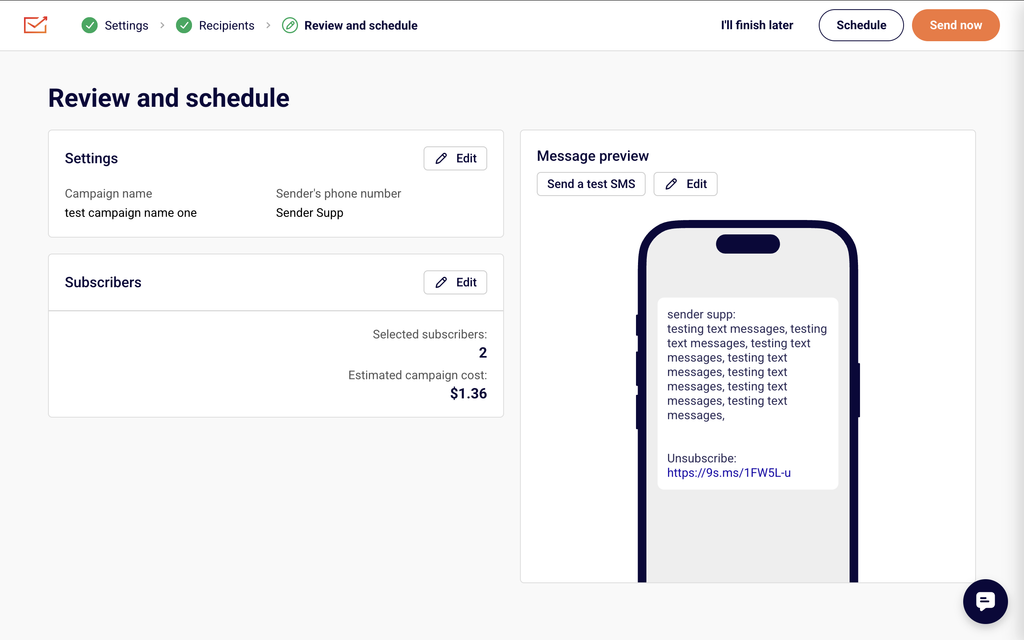
    On the Review and schedule step (labeled Confirm and send), you will see a summary of your campaign settings, subscriber count, estimated cost, and a message preview. To send at a specific time that respects quiet hours, click Schedule to send. A Schedule campaign dialog will appear with a calendar date picker and a Select time field. Choose a date and set the time to fall within the compliant sending window — between 8:00 AM and 9:00 PM in your recipients' local time zone. Click Schedule to confirm. Your scheduled campaign will appear in the SMS campaign list with the scheduled delivery date and time.

    Step 4 — Verify Your Scheduled Time Before Sending

    Before finalizing, review the scheduled date and time displayed in the campaign summary. Confirm that the sending time accounts for time zone differences if your subscribers are in multiple regions. If you need to send immediately and it is within the compliant window, you can click Send now instead. You can also click Send a test SMS from the message preview panel to verify the message content and delivery before launching the full campaign.

    SMS Compliance Requirements

    TCPA (Telephone Consumer Protection Act) — Applies to businesses sending SMS to recipients in the United States. The TCPA generally prohibits sending marketing text messages before 8:00 AM or after 9:00 PM in the recipient's local time zone. Sender's scheduling tools allow you to set a specific delivery time to help you stay within these windows.

    GDPR (General Data Protection Regulation) — Applies to businesses sending SMS to recipients in the European Union and European Economic Area. While the GDPR does not specify exact sending hours, it requires that marketing communications be sent only with explicit consent and in a manner that respects the recipient's rights. Some EU member states have additional rules restricting commercial messaging during certain hours or on certain days.

    Carrier-Level Restrictions — Mobile carriers in various countries may impose their own rules on when and how marketing SMS can be delivered. These can include restrictions on sending times, content filtering, and throughput limits. Violating carrier policies can result in message blocking or sender ID suspension. Check Sender's SMS documentation or contact support for details about restrictions in your target countries.

    Sender's SMS Policies — Sender requires that all SMS campaigns include opt-out instructions and recommends including your organization name in every message. Sender also requires a verified phone number or registered sender ID before you can send campaigns. These policies complement regulatory requirements and help protect your sending reputation.

    Always consult a legal professional for jurisdiction-specific advice on SMS sending time restrictions and compliance obligations.

    What Happens Next

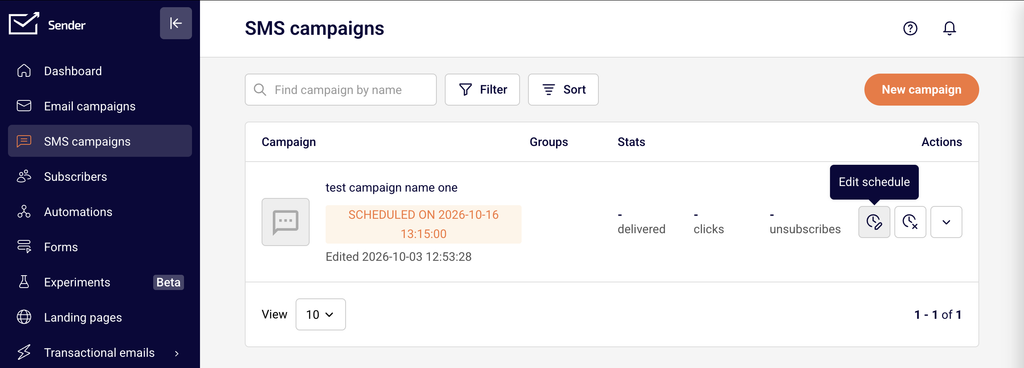
    After scheduling your campaign, it will appear in the SMS campaigns list with a Scheduled status and the delivery date and time displayed alongside it.

    You can return to SMS campaigns at any time to view, edit, or cancel scheduled campaigns before they are sent.

    To verify everything is working correctly, use the Send a test SMS option on the Review and schedule step to send a test message to your own phone number before launching the campaign.

    Your scheduled SMS campaigns will also be visible in campaign reports after delivery, where you can track delivery status, failed messages, and other performance metrics.

    Common Issues

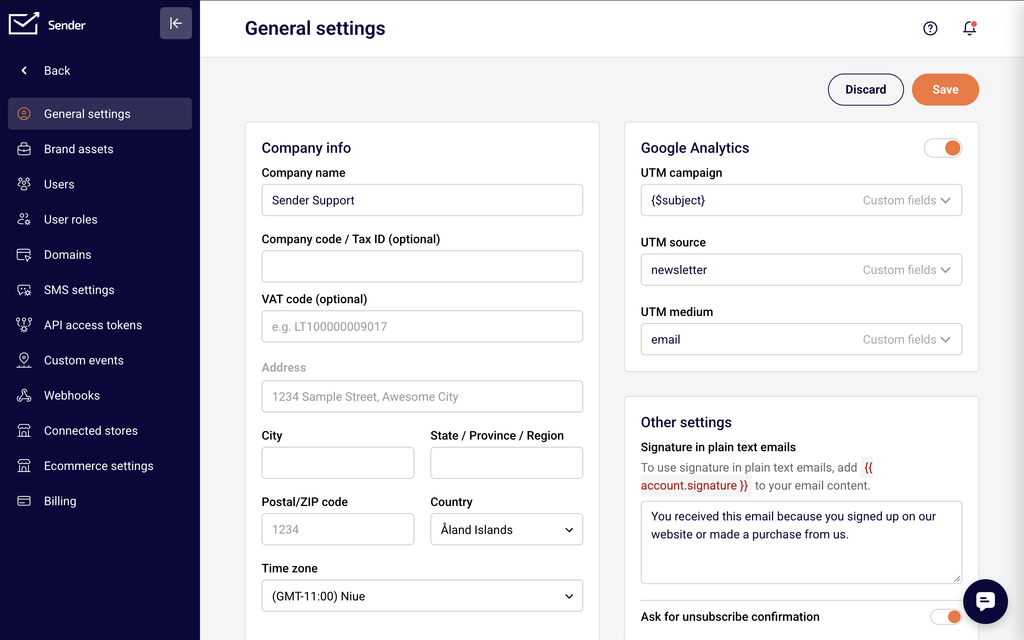
    SMS sent outside compliant hours → This happens when the scheduled time does not account for time zone differences between your account's time zone and your recipients' local time zones. Review your account time zone under Account settings → General settings → Time zone, and adjust your scheduled delivery time to ensure it falls within 8:00 AM–9:00 PM for all recipient regions.

    Campaign shows "No verified phone numbers have been found" → This occurs when no sender phone number has been verified or approved. Go to Account settings → SMS settings to check your phone number status. If your phone number shows In Progress, wait for verification to complete before creating a campaign.

    Scheduled campaign not sending at the expected time → This can happen if the time zone set in your Sender account does not match your intended delivery time zone. Confirm the time zone under Account settings → General settings and recalculate the schedule if your recipients are in a different region.

    Recipients report receiving messages at inconvenient times → This typically occurs when your subscriber list spans multiple time zones and you schedule a single send time. Consider segmenting your audience by region and scheduling separate campaigns for each time zone to ensure all messages arrive within compliant hours.

    FAQs

    What are SMS quiet hours? Quiet hours are time periods during which sending marketing SMS messages is restricted or prohibited by regulations. In the United States, the TCPA generally requires that marketing texts not be sent before 8:00 AM or after 9:00 PM in the recipient's local time zone. Other countries and carriers may have their own restrictions. Consult a legal professional for guidance specific to your jurisdiction.

    Does Sender automatically block SMS during quiet hours? Sender provides scheduling tools that let you control exactly when your campaign is sent. It is your responsibility to schedule campaigns at times that comply with applicable regulations. Use the Schedule to send feature on the Review and schedule step to set a delivery time within the compliant window for your audience.

    How do I schedule an SMS campaign in Sender? During campaign creation, complete the Settings and Recipients steps, then on the Review and schedule step, click Schedule to send. Select a date and time using the calendar and time picker in the Schedule campaign dialog, then click Schedule to confirm.

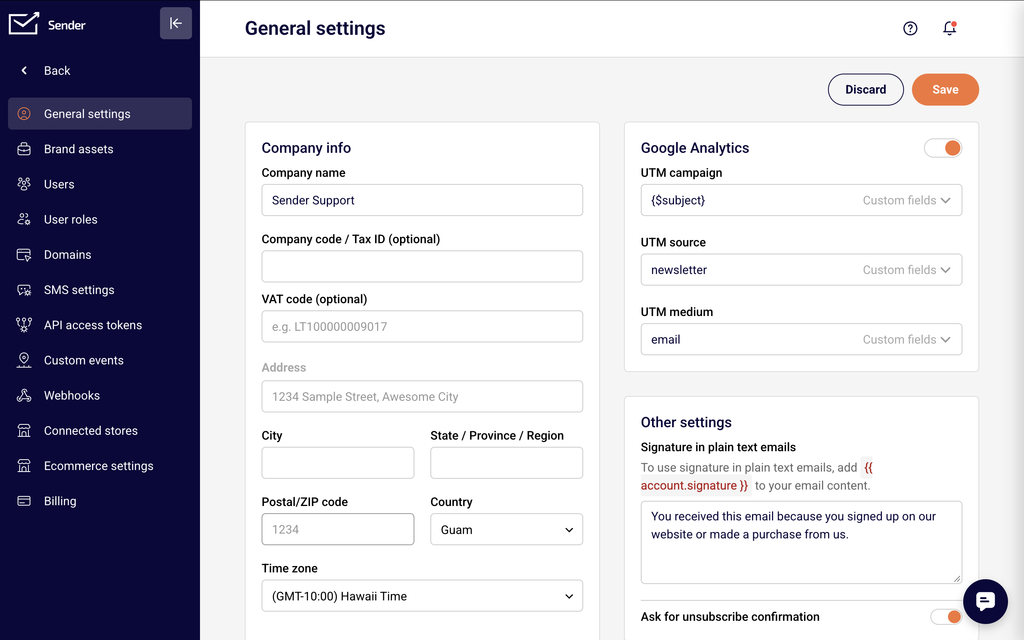
    What time zone does Sender use for scheduling? Sender uses the time zone configured in your account settings. You can check or update this under Account settings → General settings → Time zone. Make sure this setting aligns with the time zone you intend for your campaign delivery.

    What should I do if my subscribers are in multiple time zones? Segment your subscriber list by geographic region or time zone. Create separate campaigns for each segment and schedule each one to arrive within the compliant sending window for that region. This ensures all recipients receive your message during appropriate hours.

    Can I send an SMS campaign immediately instead of scheduling it? Yes. On the Review and schedule step, click Send now to deliver the campaign immediately. Before doing so, confirm that the current time falls within the compliant sending window for your recipients' time zones.

    Are there sending time restrictions outside the United States? Yes. Many countries have their own regulations governing when commercial SMS messages may be sent. Some EU member states, for example, restrict marketing messages during evenings, weekends, or public holidays. Carrier-level rules may also apply. Check Sender's SMS documentation or contact support for specific country restrictions, and consult a legal professional for compliance guidance.

  • SMS Limits by Plan

    This guide explains the SMS sending limits included with each Sender plan so you can choose the right plan and manage your SMS credits effectively.

    Where to Find This Feature

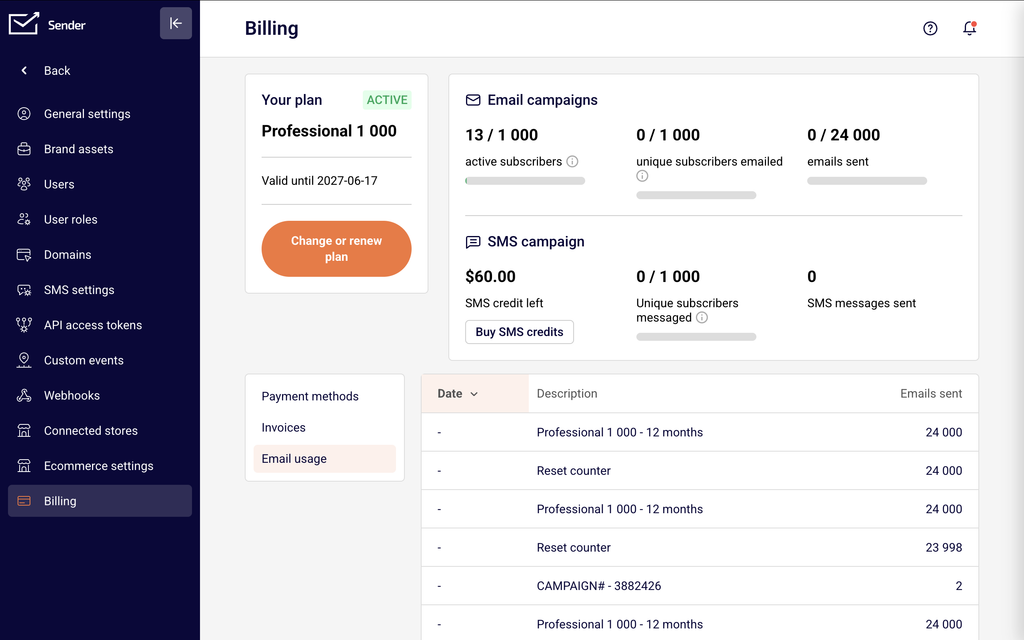
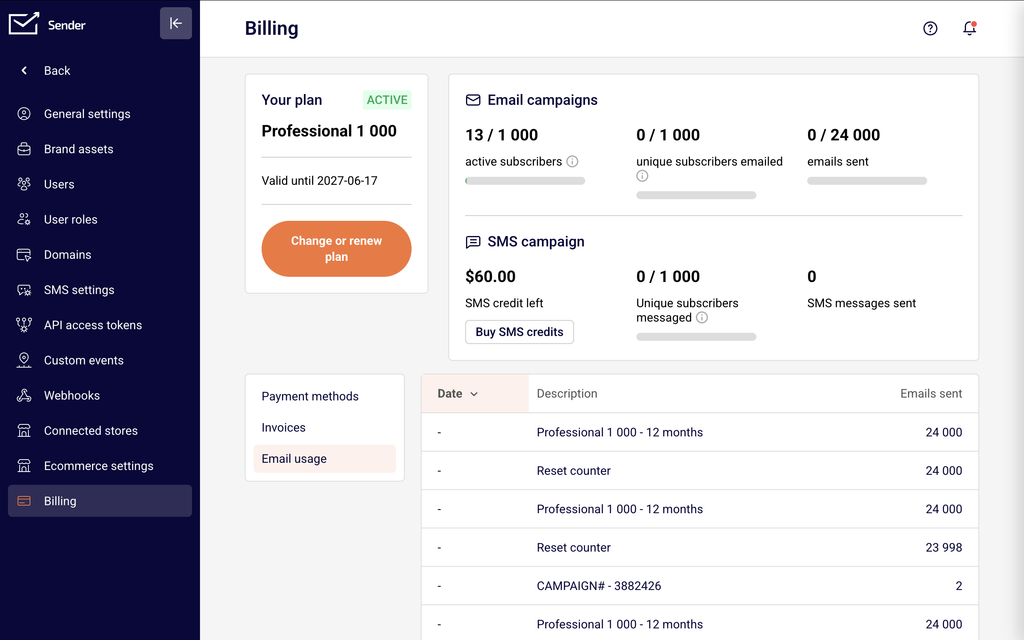
    In the Sender dashboard, go to: Account settings → Billing
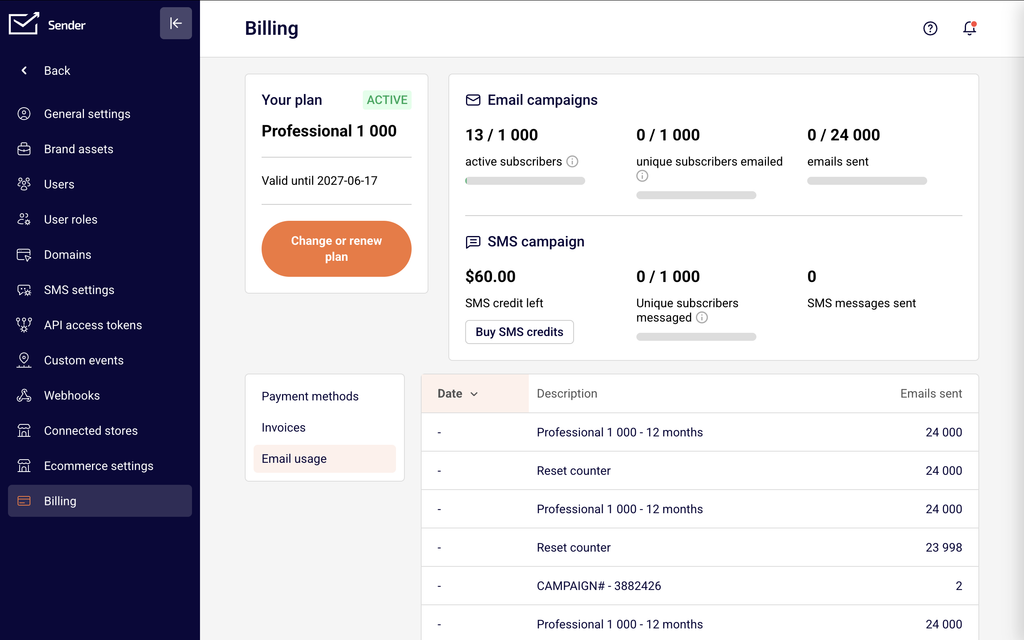
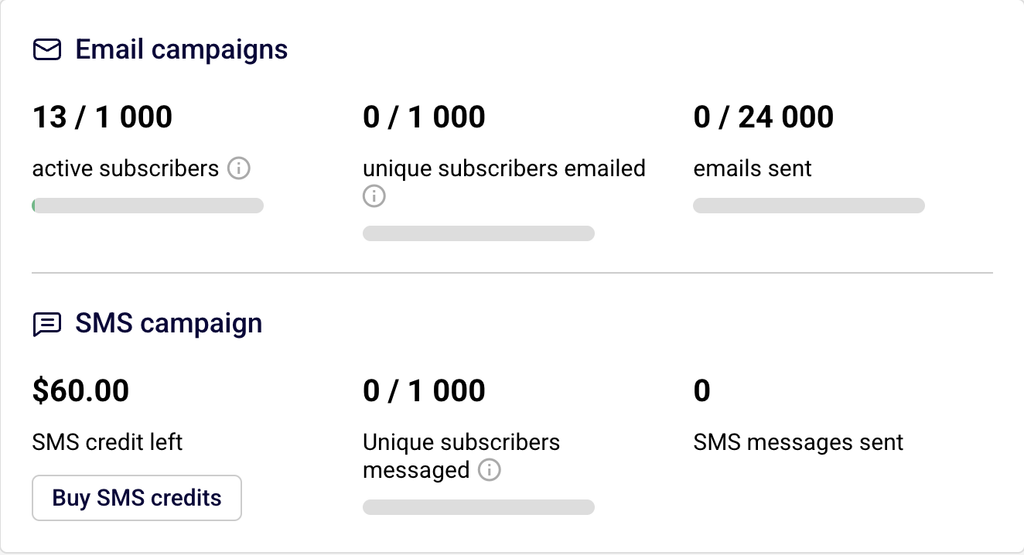
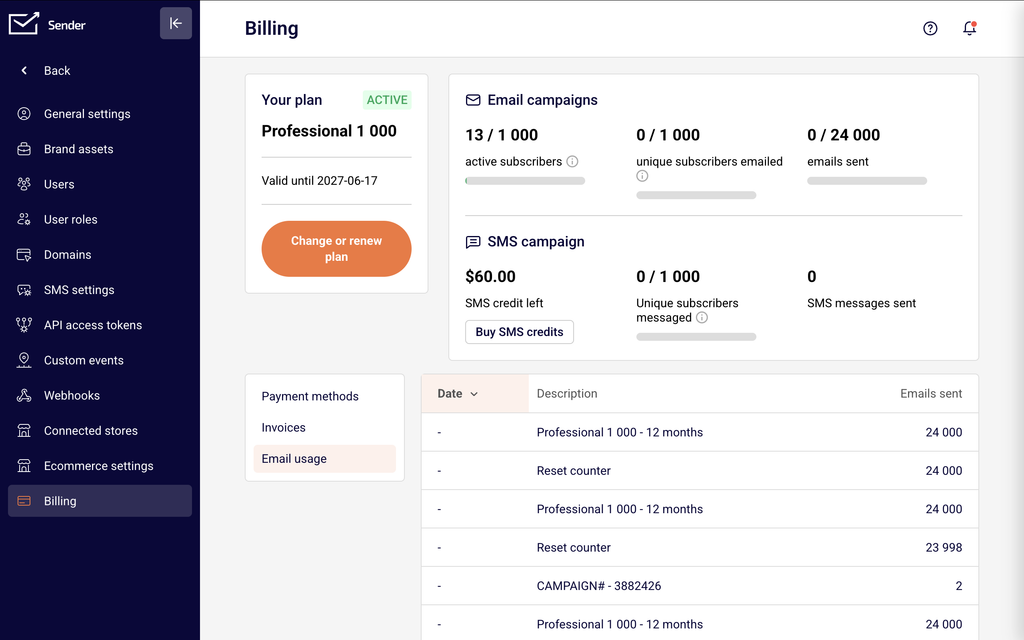
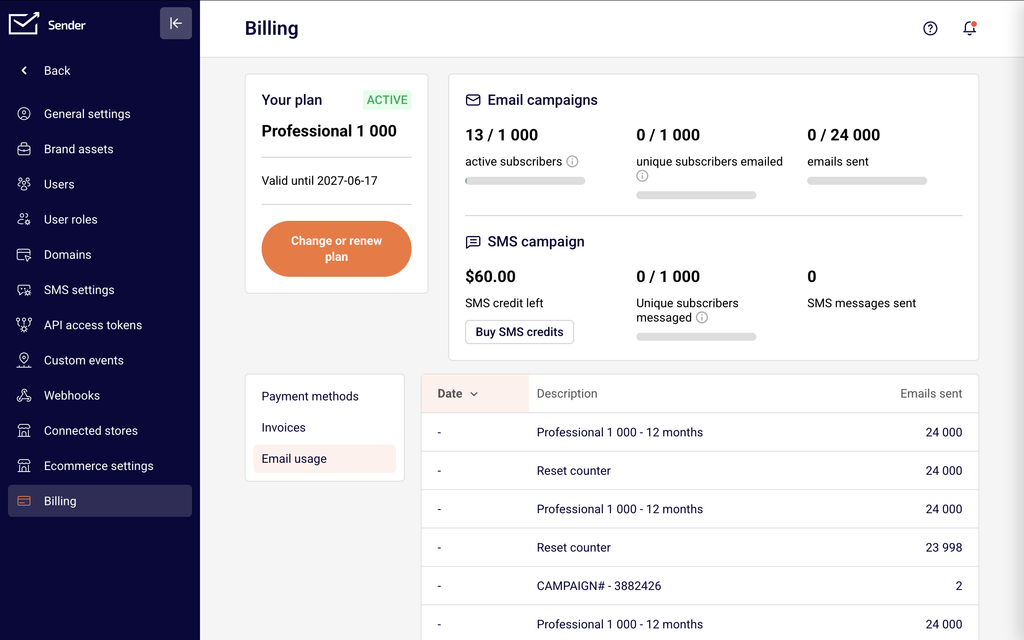
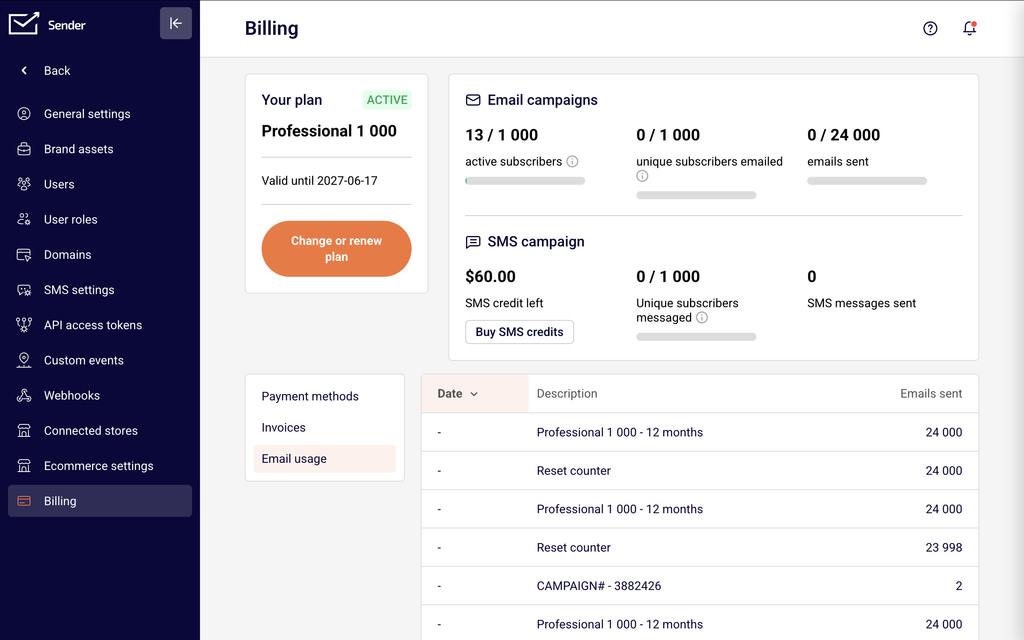
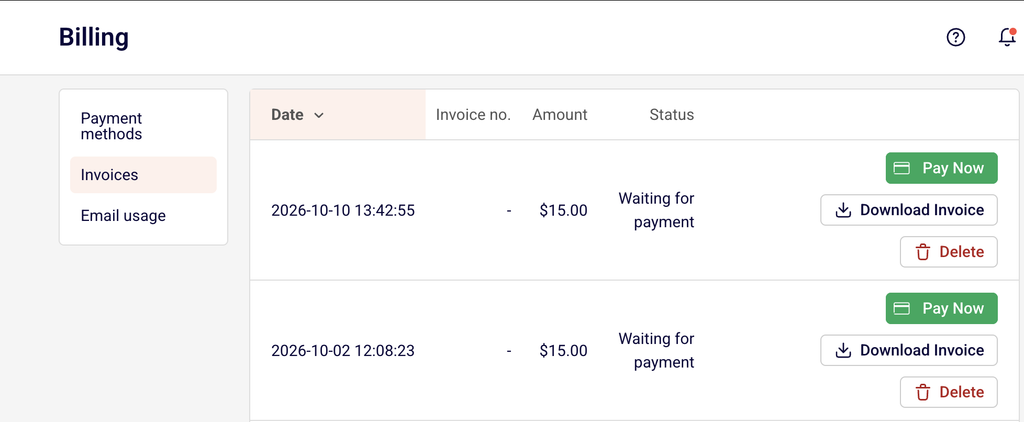
    On the Billing page, you will see an SMS campaign section that displays three key metrics: your current SMS credit left balance, the number of Unique subscribers messaged during the current billing period, and the total SMS messages sent. You can also click Buy SMS credits to purchase additional credits, or click Change or renew plan to upgrade your plan for higher SMS limits.

    Steps to Check and Manage Your SMS Limits

    Step 1 — Confirm Your Current Plan Supports SMS

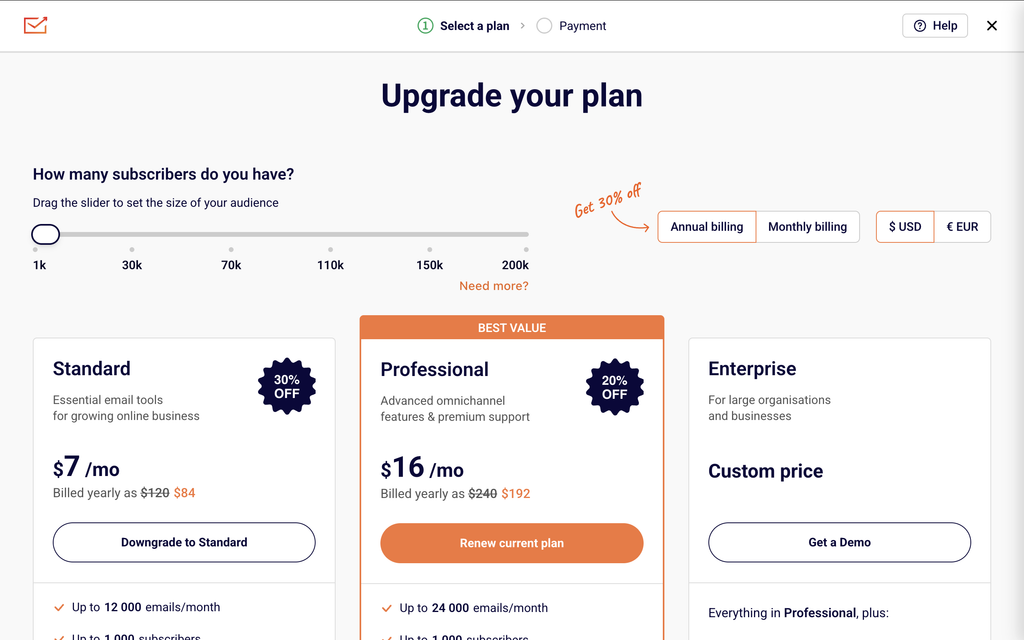
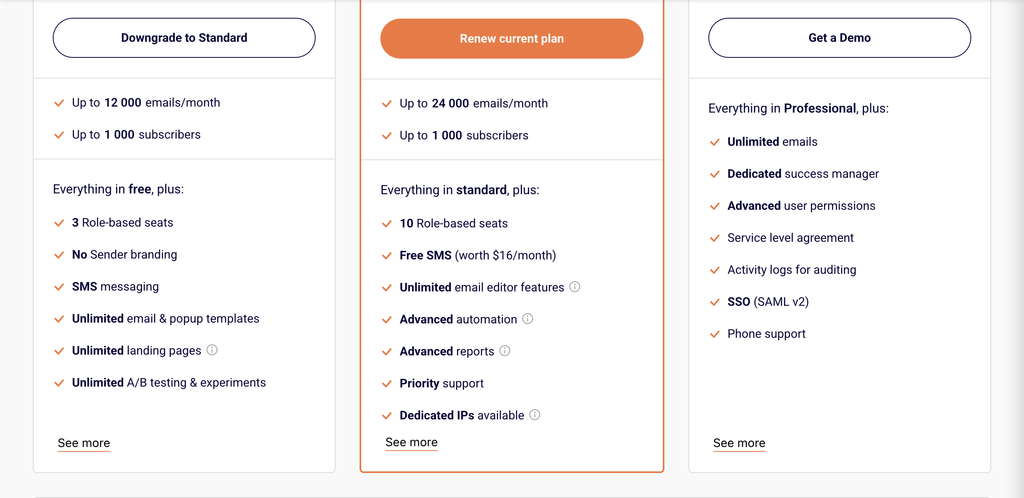
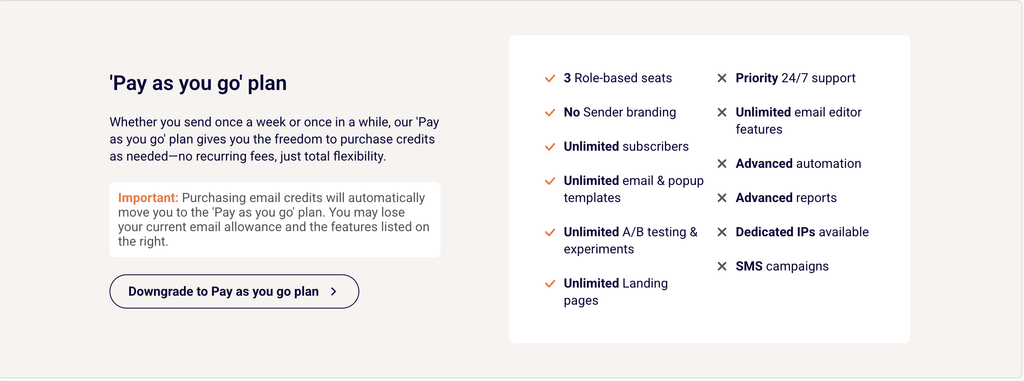
    Not all Sender plans include SMS. The Free Forever plan and the Pay as you go plan do not support SMS campaigns. To send SMS messages, you need a Standard, Professional, or Enterprise plan. To check your current plan, go to Account settings → Billing and look at the Your plan card in the top-left corner. If you are on a plan that does not support SMS, click Change or renew plan to upgrade.

    Step 2 — Review Your SMS Usage and Credit Balance

    On the Billing page, locate the SMS campaign section. This displays three values: your SMS credit left (the remaining monetary balance available for sending SMS), the Unique subscribers messaged count (distinct subscribers who received at least one SMS during this billing period, shown against your plan limit), and the SMS messages sent total. Monitor these values to avoid reaching your limits mid-campaign.

    Step 3 — Understand SMS Limits by Plan Tier

    SMS limits depend on which plan you are on and the subscriber tier you selected:

    Standard — Includes SMS messaging capability, but no free monthly SMS credits. You must purchase SMS credits separately by clicking Buy SMS credits on the Billing page. Your unique subscribers messaged limit matches your plan's subscriber tier (for example, 1,000 on a 1k-subscriber plan).

    Professional — Includes free monthly SMS credits that are automatically added to your account each billing period. The credit value scales with your subscriber tier (for example, $20/month on the 1k plan, $320/month on the 30k plan). Your unique subscribers messaged limit also matches your subscriber tier. Free SMS credits expire after one month and do not roll over.

    Enterprise — Includes everything in the Professional plan. Contact Sender's sales team for details on SMS credit allocations and custom limits.

    Step 4 — Purchase Additional SMS Credits if Needed

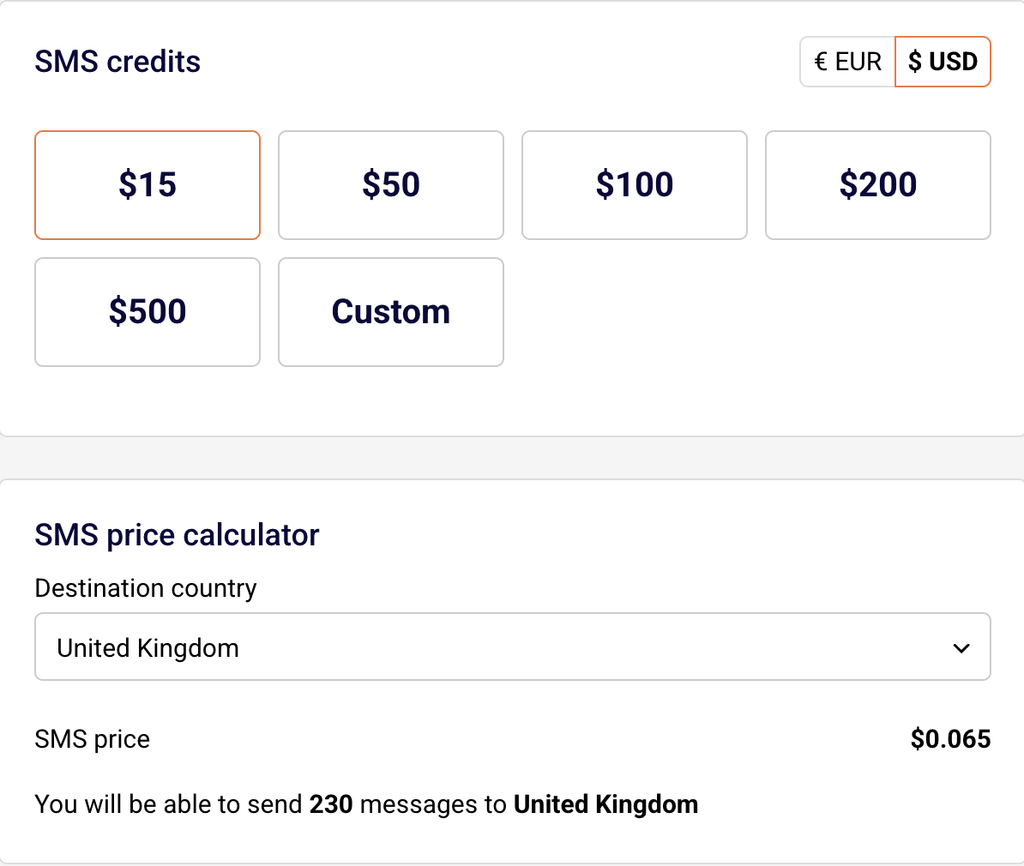
    If you run out of SMS credits or need more than your plan provides, go to Account settings → Billing and click Buy SMS credits. On the purchase page, select a credit package or enter a Custom amount. Use the SMS price calculator to check the cost per message for your destination country — SMS pricing is character-based and varies by country. Select your payment method and click Purchase to add credits to your account. Additional credits are available on both the Standard and Professional plans.

    SMS Compliance Requirements

    Character-based billing — Sender bills SMS messages based on character count. A standard SMS using GSM-7 encoding (the default character set for Latin-alphabet text messages) supports up to 160 characters per message segment. If your message exceeds 160 characters, it is billed as two or more SMS messages. Keep messages concise to control costs.

    Opt-out requirements — Every marketing SMS must include opt-out instructions such as "Reply STOP to unsubscribe." You can configure your default opt-out text in Account settings → SMS settings under SMS Message Add-ons. This is required by most carrier regulations and Sender's own SMS policies.

    TCPA (US) — The Telephone Consumer Protection Act requires prior express written consent before sending marketing text messages to US recipients. Collect consent through signup forms with a clear opt-in statement. Consult a legal professional for jurisdiction-specific guidance.

    GDPR (EU) — The General Data Protection Regulation requires a lawful basis (typically explicit consent) for processing personal data, including phone numbers, for marketing purposes. Ensure your SMS consent collection process meets GDPR requirements. Consult a legal professional for guidance specific to your situation.

    Carrier restrictions — Some countries and carriers impose restrictions on sender IDs, message content, or sending hours. SMS pricing also varies by destination country. Check the SMS price calculator on the Buy SMS credits page or contact Sender support for details about restrictions in your target countries.

    Always consult a legal professional for advice specific to your jurisdiction and use case.

    What Happens Next

    After confirming your plan supports SMS, check your SMS credit left balance on the Billing page to ensure you have enough credits before sending a campaign.

    If you are on the Professional plan, your free monthly SMS credits will appear automatically at the start of each billing period — remember that unused credits expire after one month.

    To verify your setup is working correctly, send a test SMS to your own phone number from the SMS campaigns section before launching a campaign to a larger audience.

    You can monitor your SMS usage at any time by returning to Account settings → Billing and reviewing the SMS campaign section.

    Common Issues

    SMS campaigns option is not available → Your account is on the Free Forever or Pay as you go plan, neither of which supports SMS. Upgrade to a Standard or Professional plan under Account settings → Billing → Change or renew plan.

    SMS credit balance is zero or too low → Your free monthly credits (Professional plan) may have expired, or you have used all purchased credits. Go to Account settings → Billing and click Buy SMS credits to add more. Professional plan credits expire after one month and do not carry over.

    Unique subscribers messaged limit reached → You have sent SMS messages to the maximum number of distinct subscribers allowed by your plan tier during this billing period. To increase this limit, upgrade to a higher subscriber tier under Account settings → Billing → Change or renew plan.

    Message billed as multiple SMS → Your message exceeded 160 characters (GSM-7 encoding), so it was split into multiple message segments. Each segment counts as a separate SMS. Shorten your message or account for the additional cost when budgeting credits.

    SMS price varies by country → SMS pricing depends on the destination country. Use the SMS price calculator on the Buy SMS credits page to check the per-message cost for your target country before purchasing credits.

    FAQs

    Which Sender plans include SMS? SMS campaigns are available on the Standard, Professional, and Enterprise plans. The Free Forever and Pay as you go plans do not include SMS.

    Does the Professional plan include free SMS credits? Yes. The Professional plan includes a monthly SMS credit allocation that scales with your subscriber tier. For example, the 1k-subscriber Professional plan includes $20/month in free SMS credits. These credits expire after one month and do not roll over to the next billing period.

    Does the Standard plan include free SMS credits? No. The Standard plan enables SMS messaging, but you must purchase SMS credits separately through Account settings → Billing → Buy SMS credits.

    What is the unique subscribers messaged limit? This is the maximum number of distinct subscribers you can send at least one SMS to during a single billing period. The limit matches your plan's subscriber tier (for example, 1,000 on a 1k-subscriber plan, 30,000 on a 30k-subscriber plan).

    How is SMS pricing calculated? SMS pricing is character-based and varies by destination country. A single SMS supports up to 160 characters using GSM-7 encoding. Messages longer than 160 characters are billed as multiple SMS. Use the SMS price calculator on the Buy SMS credits page to estimate costs for your target country.

    What SMS credit packages are available? Sender offers preset credit packages as well as a Custom amount option. You can purchase credits on the Buy SMS credits page under Account settings → Billing.

    Do unused SMS credits expire? Free monthly SMS credits included with the Professional plan expire after one month. Separately purchased SMS credits may have different expiration terms — check your Billing page for details on your current credit balance.

    How do I check my remaining SMS credits? Go to Account settings → Billing and look at the SMS campaign section. Your remaining balance is displayed under SMS credit left.