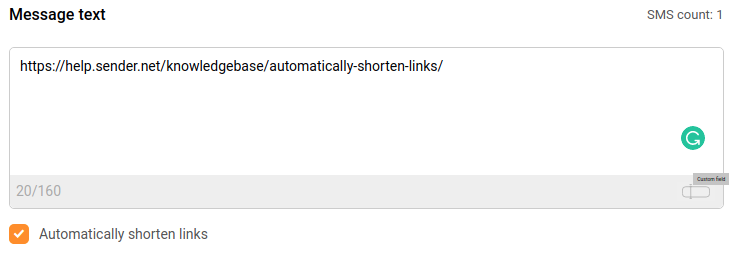
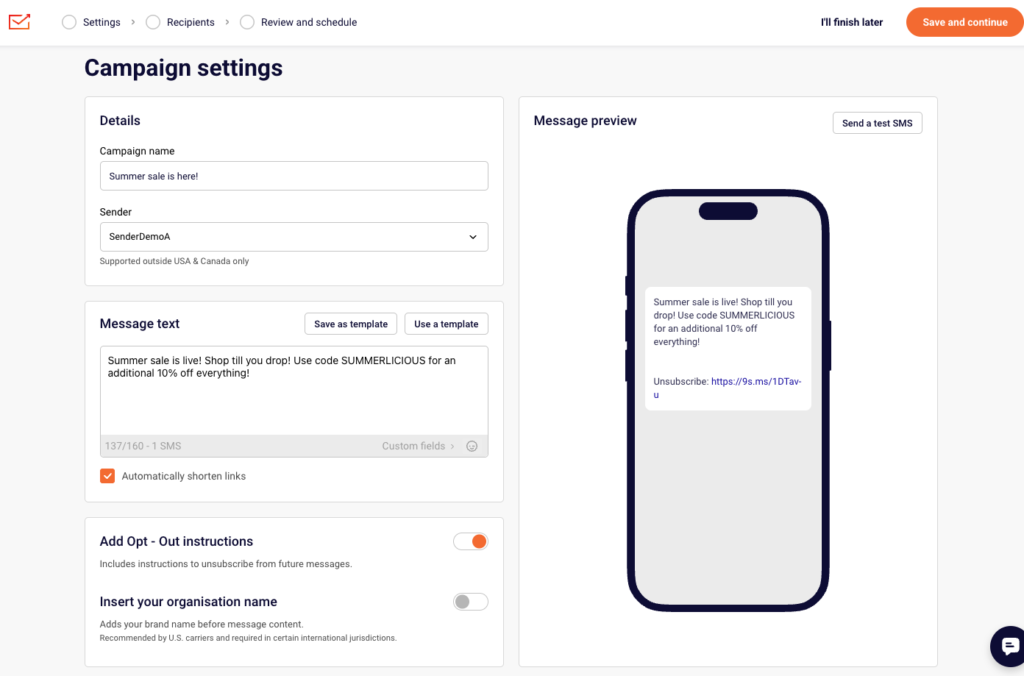
The “Automatically shorten links” option helps you to save on symbols count. For example, there is this link with a lot of characters:
When you enable the “Automatically shorten links,” the system automatically generates a link like this:
That’s it!
If you got stuck on a specific task or can’t find a way to execute a particular job, contact our support team via LiveChat or [email protected] – we’re here to help 24/7.
There are two ways to add sending numbers – Toll-free (available in USA and Canada) and Alphanumeric (not supported in USA and Canada).
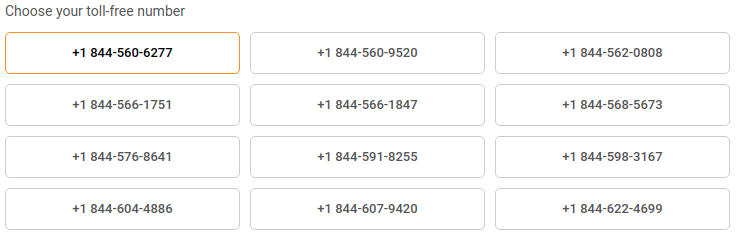
Toll-free numbers
They can be chosen from randomly generated numbers. If you need another number, refresh the page, and the system will generate new ones. There is no option to select a specific number because the system generates them automatically.
Please note that toll-free numbers must be verified. More on Toll-Free number verification here.
Alphanumeric
It is possible to add up to 11 symbols for Alphanumeric numbers. It should be associated with the company name. Once the Alphanumeric number is added, our QA team reviews it.
No multimedia support. Alphanumeric Sender IDs, as well as toll-free numbers are allowed for text only, no MMS or images can be sent.
No two-way or keywords. Recipients cannot respond to messages from this number type.
That’s it!
If you got stuck on a specific task or can’t find a way to execute a particular job, contact our support team via LiveChat or [email protected] – we’re here to help 24/7.
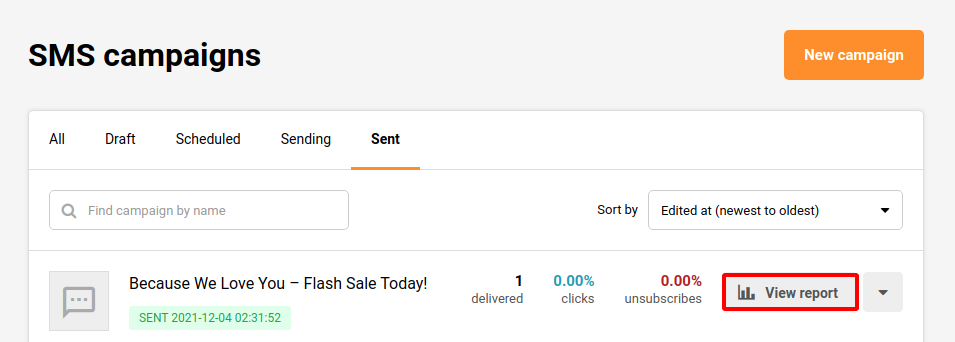
The SMS campaign report is located behind the “View report” button on the SMS campaign section:
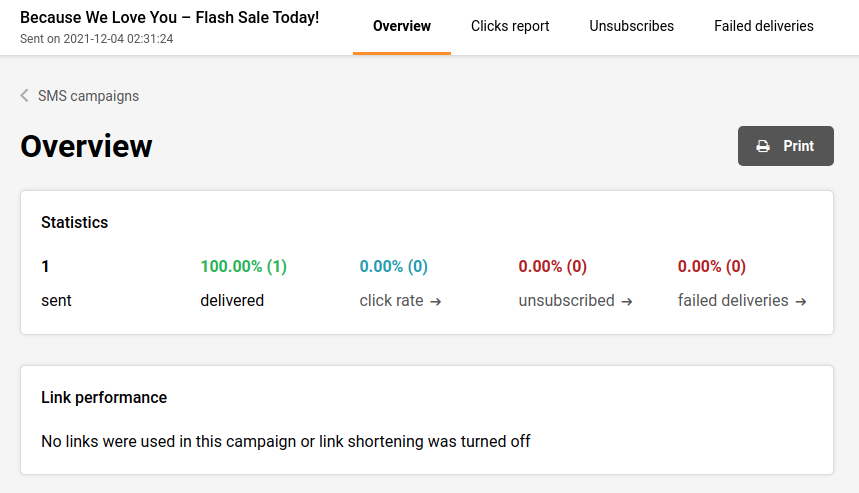
Overview:
Just below the Overview, you will find 5 different counters:
Sent (the amount of sent SMS campaigns)
Delivered (the amount of successfully delivered SMS campaigns)
Click rate (If the is a used link)
Unsubscribed
Failed deliveries
Click to view any of the individual reports:
You can Print and Export any of the specified reports.
If you got stuck on a specific task or can’t find a way to execute a particular job, contact our support team via LiveChat or [email protected] – we’re here to help 24/7.
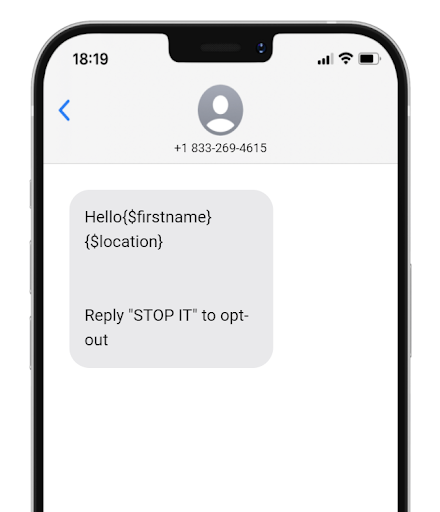
The dynamic text can be used with any custom field: first name, surname, order number, location, or any other information that has been collected about subscribers in the custom fields section.
Here is how the dynamic text looks like:
Here is a tutorial on how to insert the dynamic text:
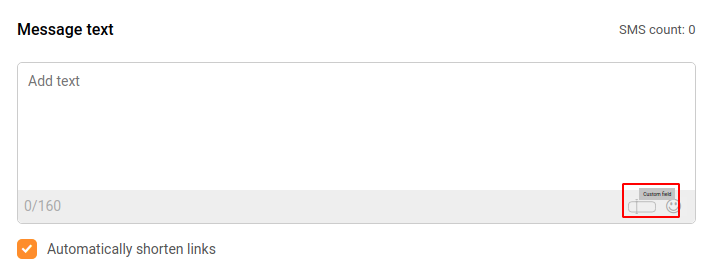
While creating a new SMS campaign, there is a tiny custom field icon in the bottom right corner of the “Message text” box. Once it is clicked, all custom fields appear. Then the desired custom field can be selected.
Here’s a short video guide on how it’s done:
That’s it!
If you got stuck on a specific task or can’t find a way to execute a particular job, contact our support team via LiveChat or [email protected] – we’re here to help 24/7.
The SMS campaign scheduling option appears at the last step of the campaign creation. Once everything with the SMS campaign is done, click on the “Save & Continue” button, select your desired subscriber list, click continue to get into the final step.
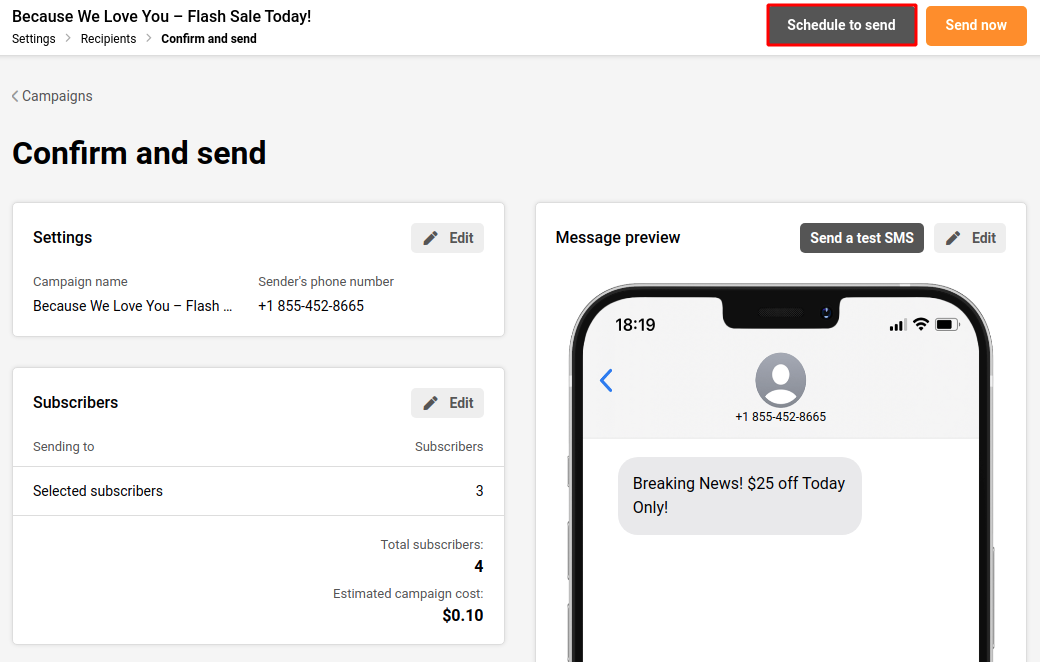
Click on “Schedule to send”
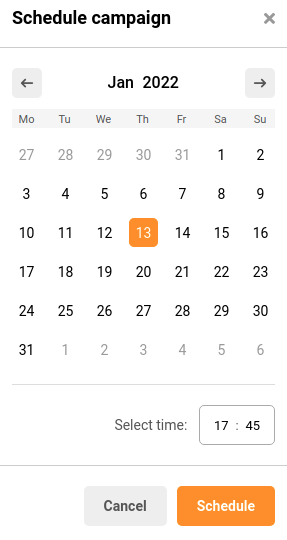
When the schedule button is clicked, a calendar appears, where a date and time can be picked for when the SMS should be delivered.
Scheduled SMS appears in the SMS campaign section together with the delivery date and time.
If you got stuck on a specific task or can’t find a way to execute a particular job, contact our support team via LiveChat or [email protected] – we’re here to help 24/7.
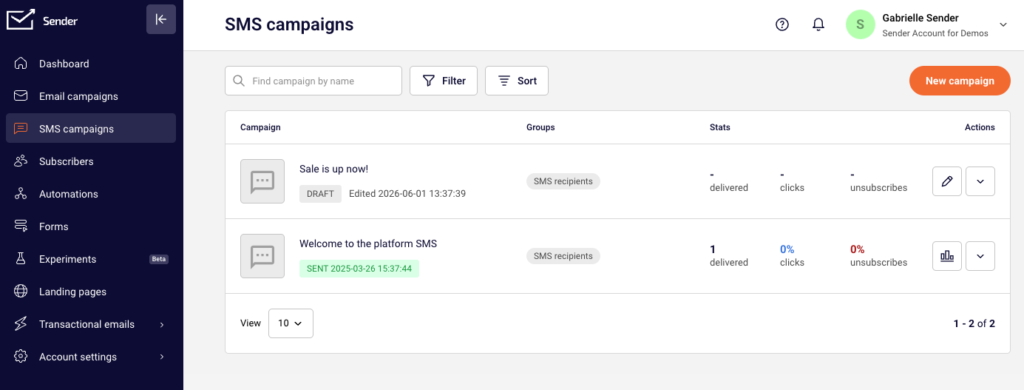
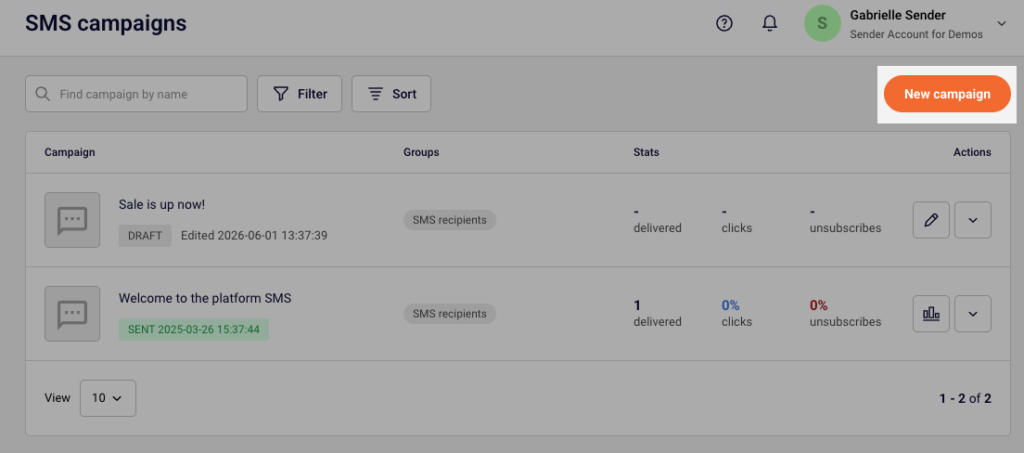
Once the SMS campaign section is opened, the campaign library can be accessed. It contains scheduled and sent campaigns as well as their drafts.
Click the “New campaign” button to start creating a new SMS campaign.
The first stage of creating an SMS campaign:
Moving from one stage to another will not cause any loss to the progress that has been made. Therefore, if the Campaign name needs to be changed, simply press on the “Settings” stage and go back to change it:
Settings is where the editing of the SMS campaign is done. This stage contains:
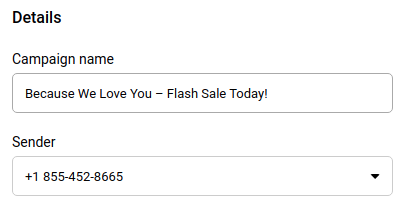
Details (example):
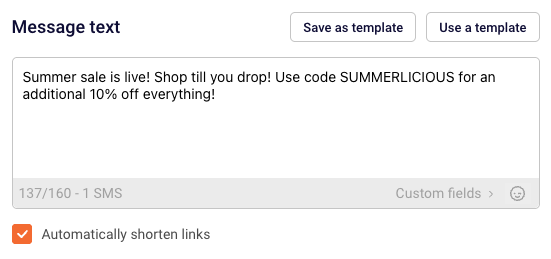
Message text (example):
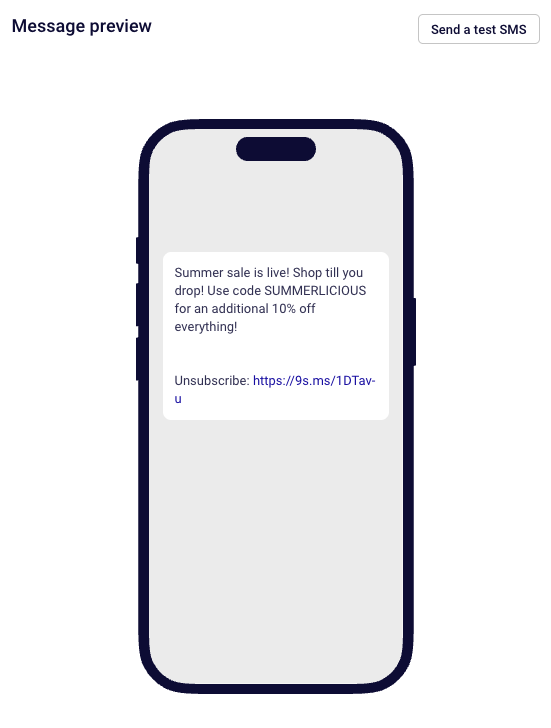
The preview of the SMS campaign and the option to Add Opt-Out instructions:
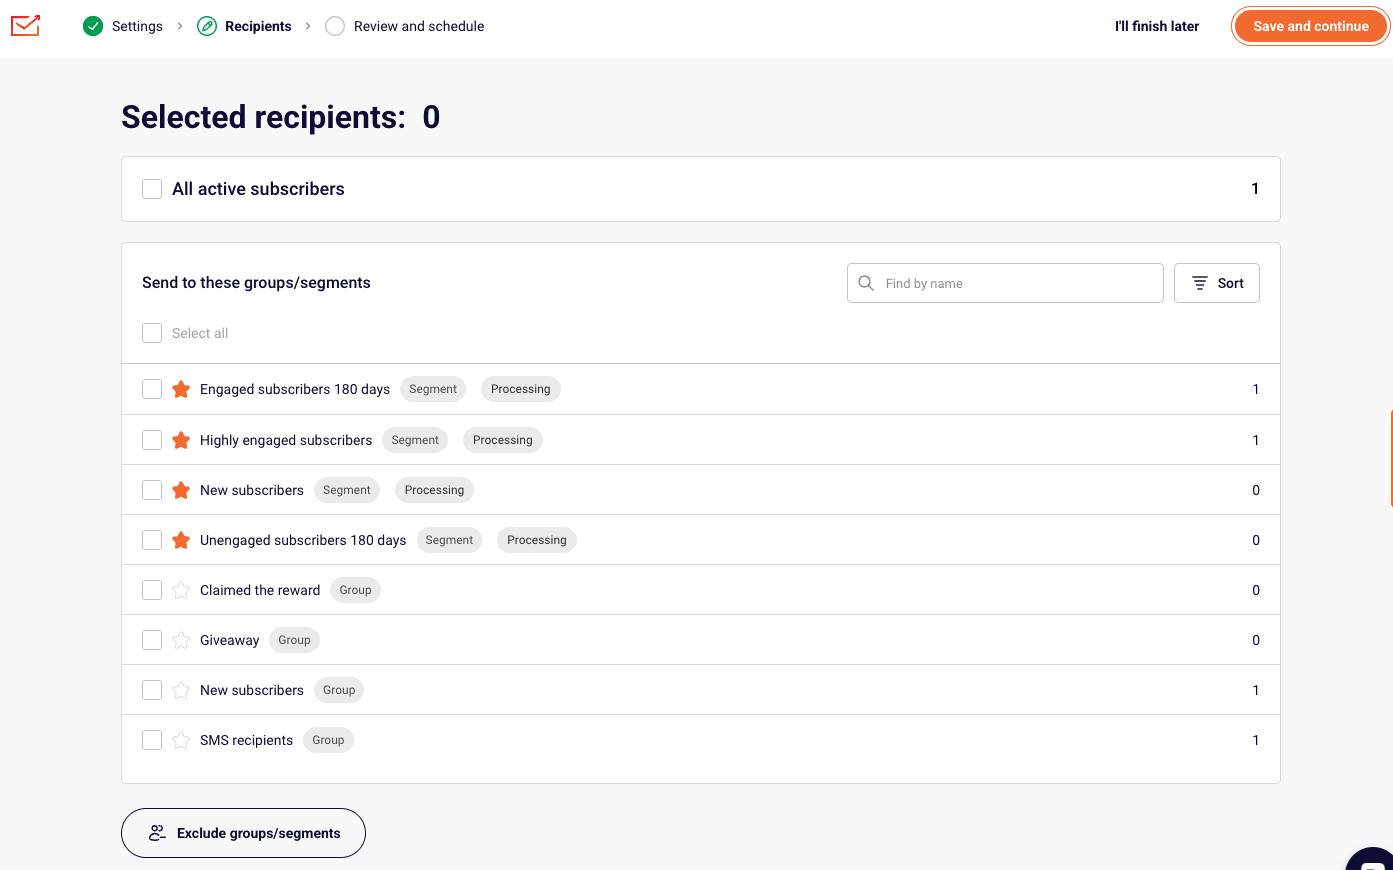
Once everything is completed in the Settings stage, the “Save and continue” button needs to be clicked to save the progress and move to the next stage – Recipients. Here recipients can be selected by choosing specific Groups or Segments that have been created:
After the recipients (subscribers) are selected, the last thing that is left is to “Confirm and send”. Here the estimated cost of the campaign is displayed together with the total number of subscribers that has been selected and the settings that have been set:
Please note: our SMS pricing is character-based. Once you exceed the 160-character limit, the message is billed as two SMS, if you exceed two SMS character limit, the SMS will be charged as two SMS and so on.
If you include custom fields into the SMS, final price might be more than the estimated one due to various length of customer data that will be included instead of the custom field code.
If you include non latin characters, it will drastically change the number of characters used in the SMS campaign.
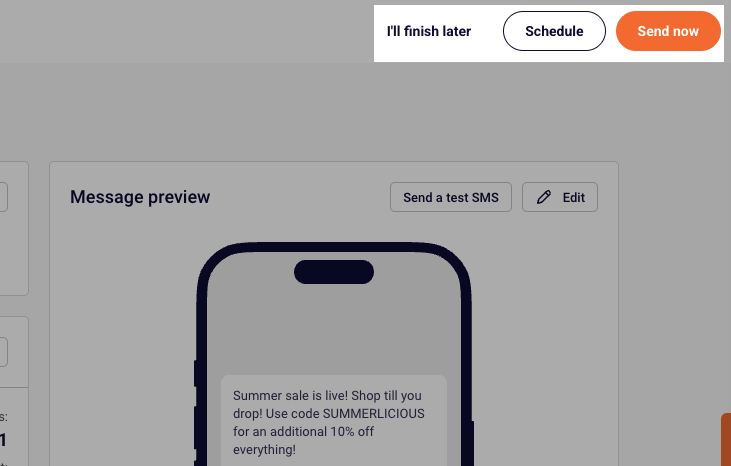
At the last stage, the SMS campaign can be sent as a test SMS, scheduled to be sent later or sent immediately. You can also click “I’ll finish later,” and all of your progress will be saved.
If you are stuck on a specific task or can’t find a way to execute a particular job, contact our support team via LiveChat or [email protected] – we’re here to help 24/7.
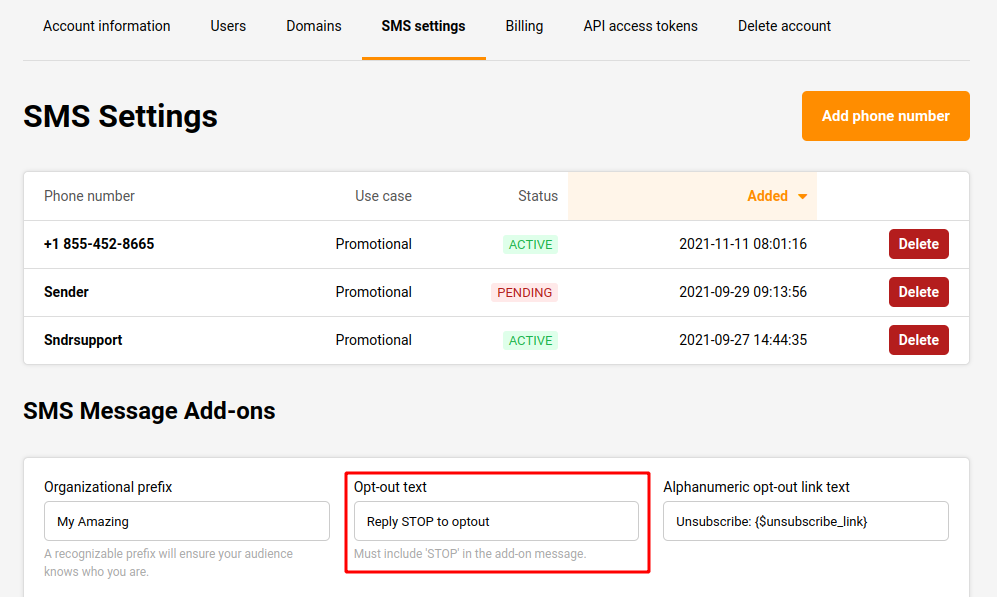
Yes. There is an “Opt-Out” feature in the SMS campaign with customizable Opt-Out text. This feature can be found under the “SMS Message Add-ons” section in the SMS settings.
Go to “Settings” on the left sidebar under the account, then select the “SMS settings” section. The “Opt-out text” box can be seen at the bottom of the page. From here the “Opt-Out” text can be customized.
That’s it!
If you got stuck on a specific task or can’t find a way to execute a particular job, contact our support team via LiveChat or [email protected] – we’re here to help 24/7.
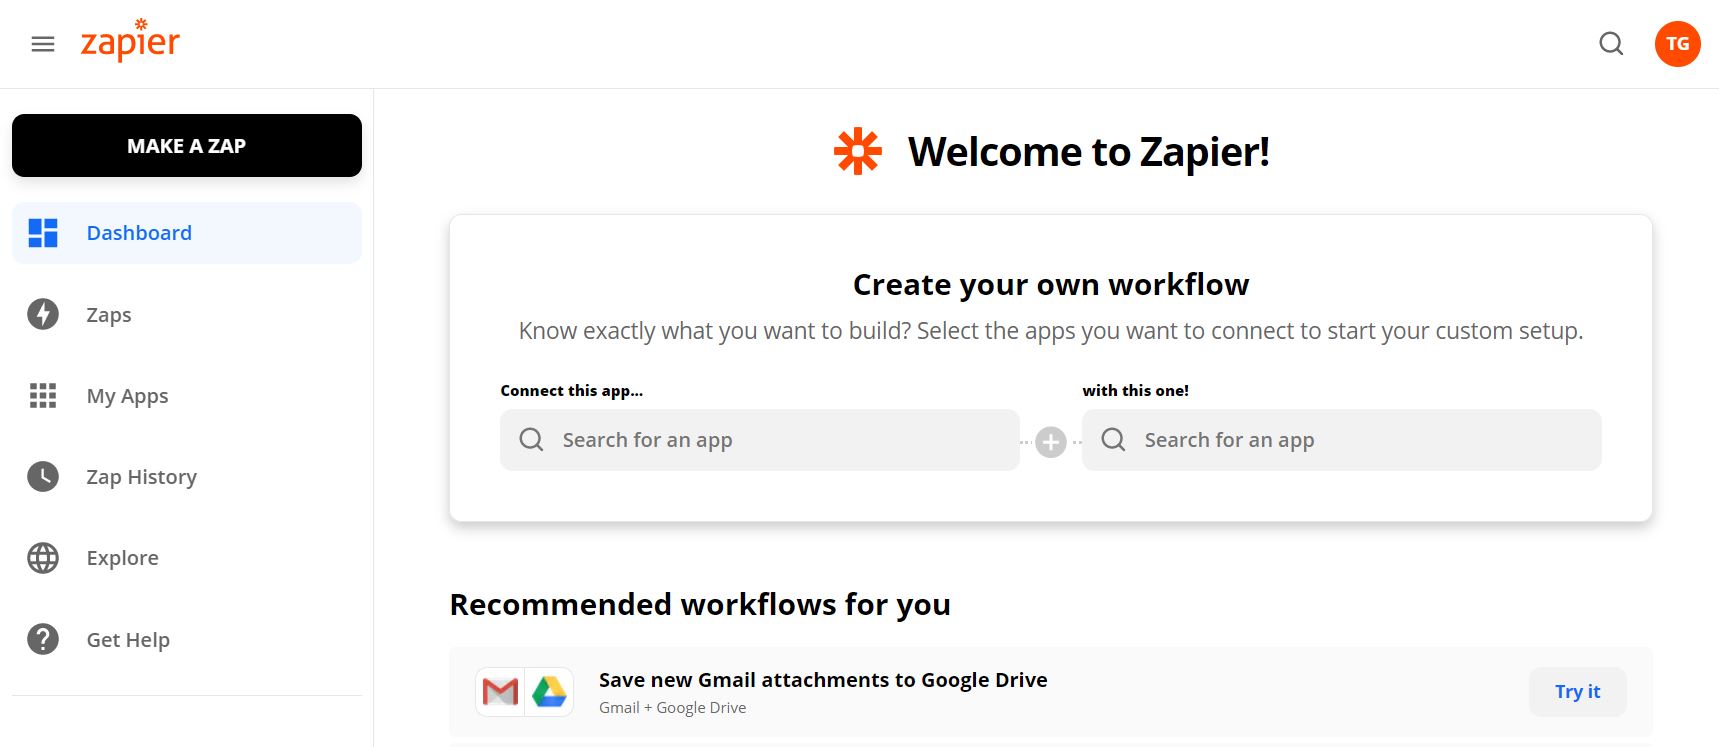
Zapier is an online automation tool that connects your favorite apps, such as Gmail, Slack, Shopify, Squarespace, and 3000+ others with Sender.net.
You can connect two or more apps to automate repetitive tasks. It’s easy enough that anyone can create workflows with just a few clicks.
Use cases
Due to the integration between Sender.net and Zapier, you can move new contacts straight to your Sender’s contact list and/or activate custom events based on particular triggers. Here are several different examples on automated workflows between Sender.net and Zapier:
Start automation workflow based on the custom event, e.g., send welcome emails each time clients fill in a survey.
New contacts from in the Google Form are automatically moved to your contacts list on Sender.net
Use Zapier to integrate with LinkedIn Lead Gen Forms and automatically move new subscribers to Sender.net
With Zapier, you can create custom and individual connections with your favorite apps. Each automation sequence is named “Zap” which includes a trigger and action steps.
Triggers
New campaign. Triggers when a new campaign is created.
New subscriber. Triggers when a new subscriber is added.
New unsubscriber. Trigger when a subscriber unsubscribes.
New group. Triggers when a new group is created.
New subscriber in the group. Triggers when the subscriber is added to the group.
New unsubscriber from the group. Triggers when a subscriber is removed from the group.
Updated subscriber. Triggers when subscriber is updated.
Actions
Add/Update Subscriber. Add a new subscriber or update subscriber’s data.
Create campaign. Creates a draft campaign.
Unsubscribes an email address.
Add subscriber to the group. Adds a subscriber to the group.
Remove a subscriber from a group.
Send campaign. Send a drafted campaign.
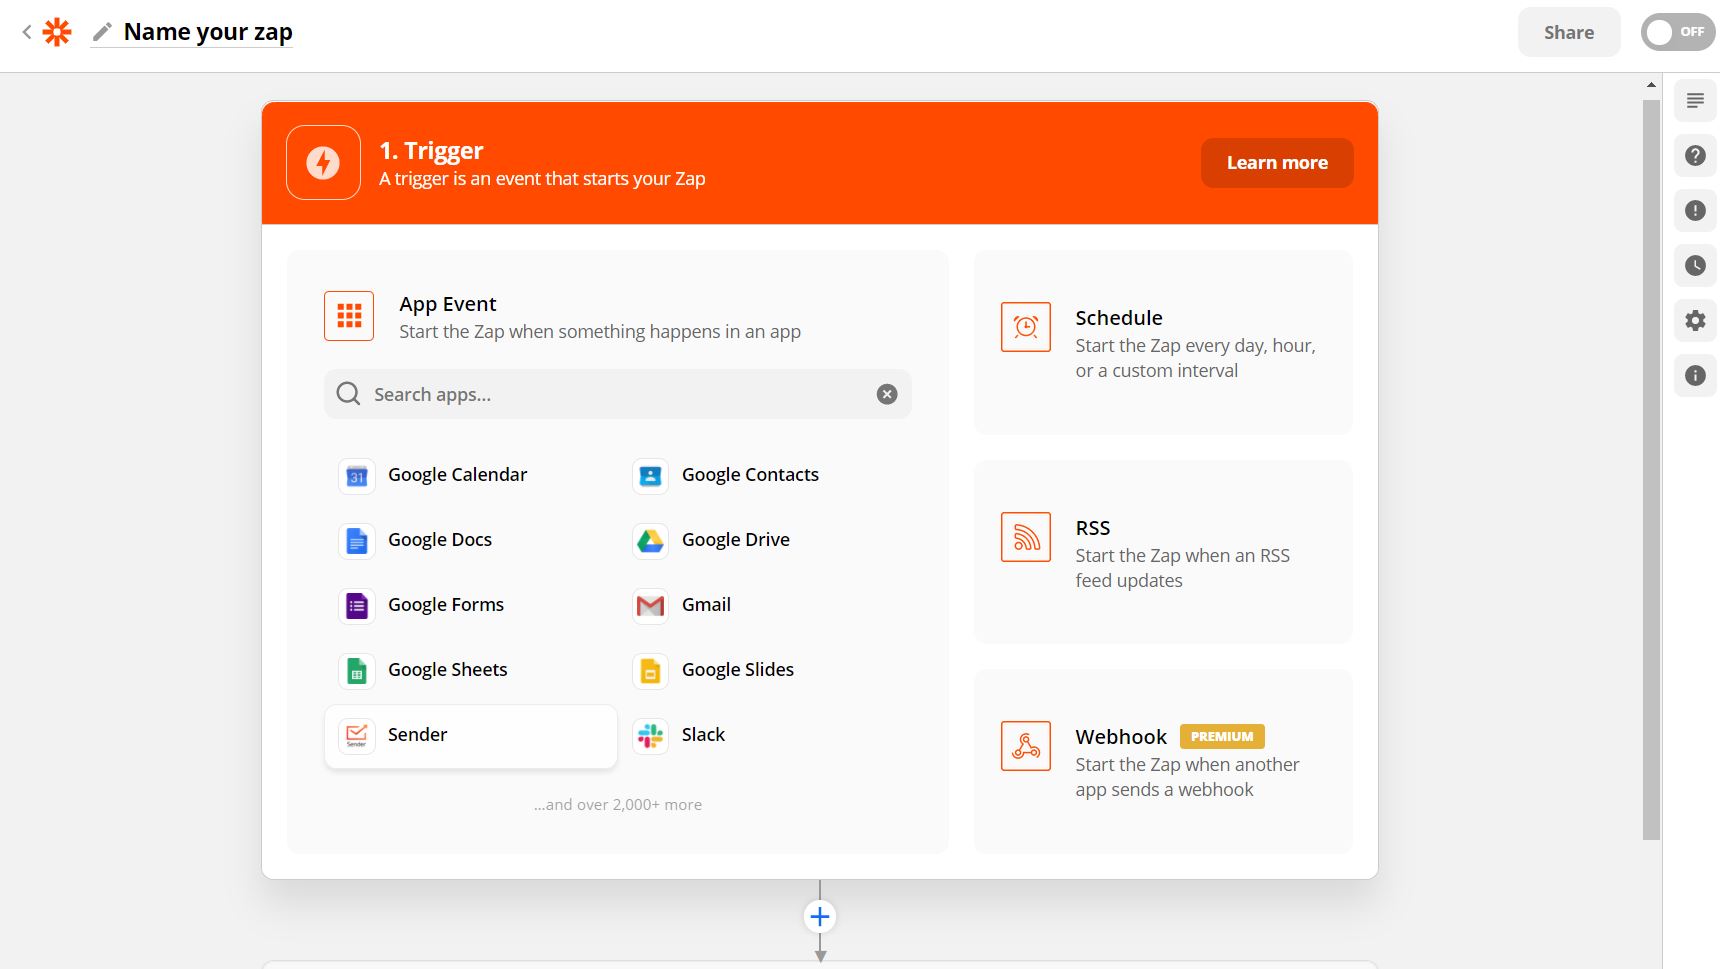
Next, choose the app that will begin the automated sequence and the action trigger. Continue by authenticating the application’s account on the appeared popup and continue building the sequence.
Proceed by selecting a different app and the action step that will be performed according to the workflow – the equivalent procedure applies.
Here’re the shortcuts to the ready-to-use Zapier templates – click on “Try It” to proceed with a Zap.
Add subscribers in Sender for new spreadsheet rows in Google Sheets
If you got stuck on a specific task or can’t find a way to execute a particular job, contact our support team via LiveChat or [email protected] – we’re here to help 24/7.
In order to provide users with the best possible email marketing experience and avoid email deliverability problems, we take mailing practices seriously.
We do this by ensuring that our email sending infrastructure, responsible for sending your emails, is maintained at the highest quality and excellent IP reputation.
To maintain email-sending infrastructure, we actively monitor all sendings across the platform. For new accounts, we also conduct a comprehensive account verification check that considers multiple factors.
For an account to be verified, there has to be a legitimate website added and verified. A campaign that reflects the verified website’s content also must be created.
The QA department reserves the right to request additional information about the account and the subscriber-gathering process.
If you are stuck on a specific task or can’t find a way to execute a particular job, contact our support team via LiveChat or [email protected] – we’re here to help 24/7.
Integrations with various platforms and gadgets considerably enhance the product’s overall experience due to continuous and smooth transitioning between systems. Here you’ll find a list of commonly used integrations with Sender.
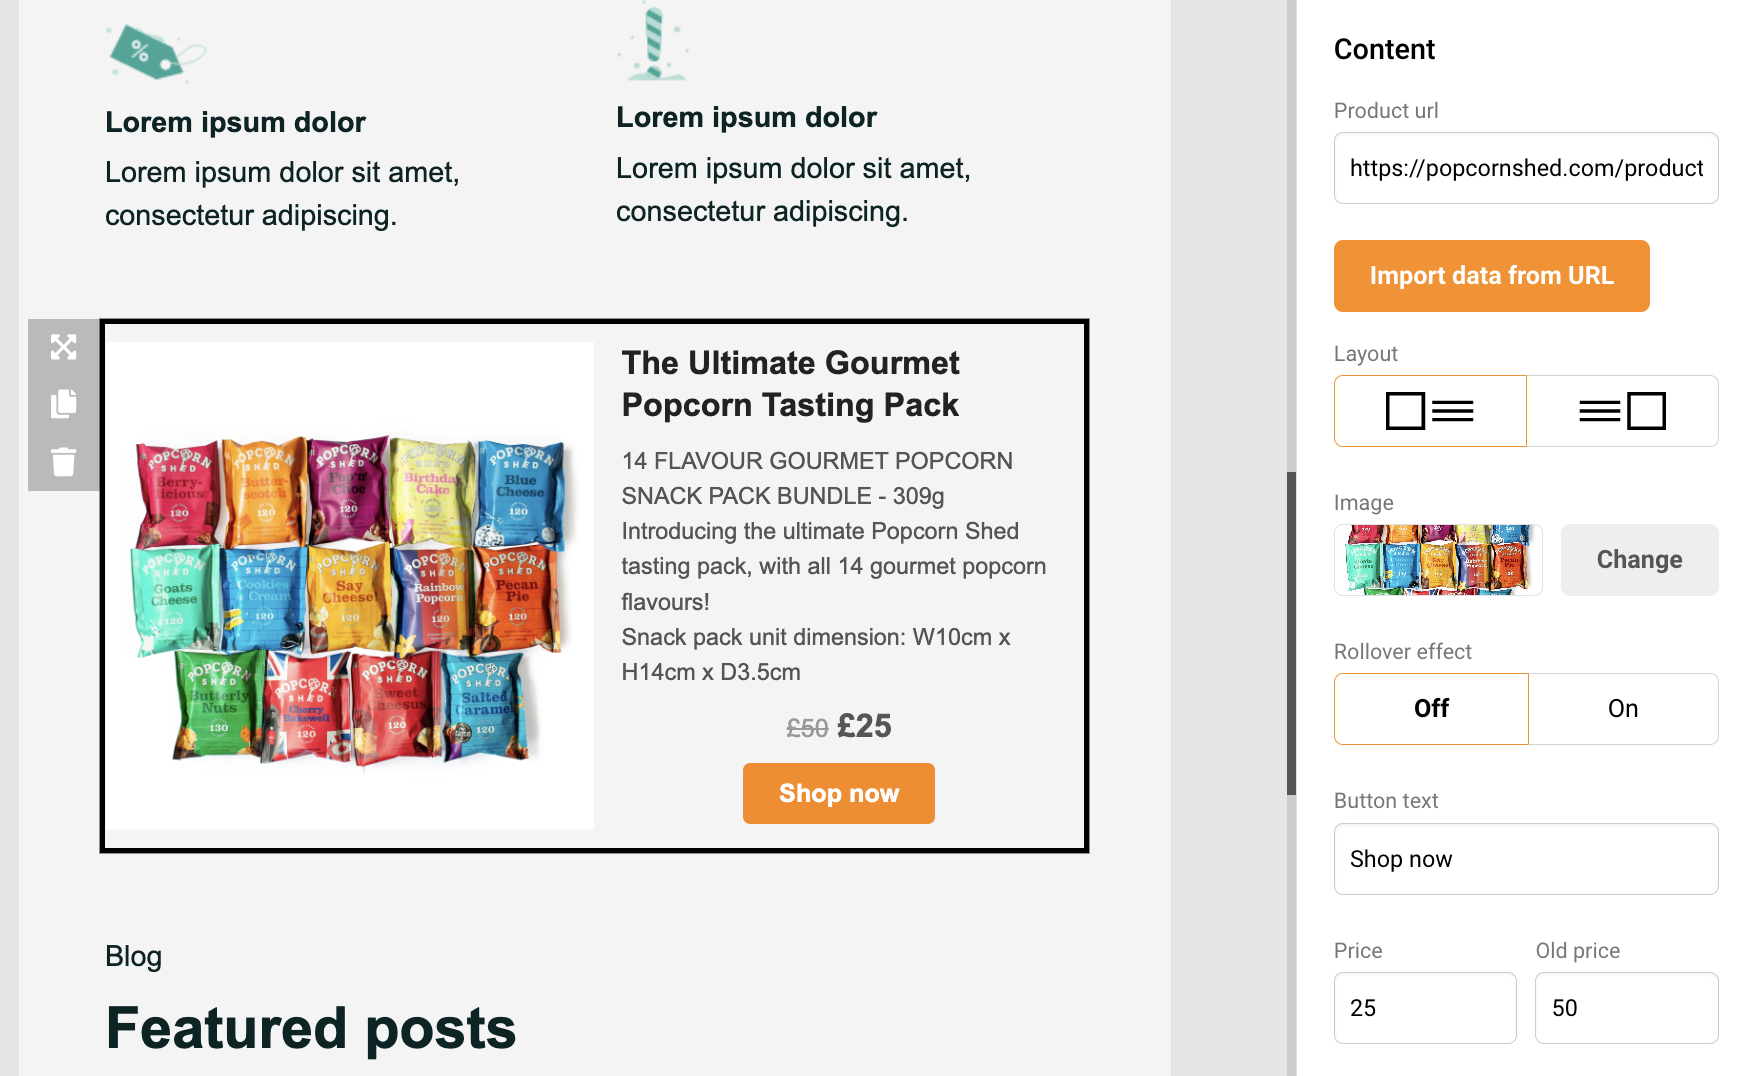
Product import
Product block is designed mainly for e-commerce clients but can be used by all users. With product block, you can easily import items from any online store. The most significant part about that – no integrations are needed.
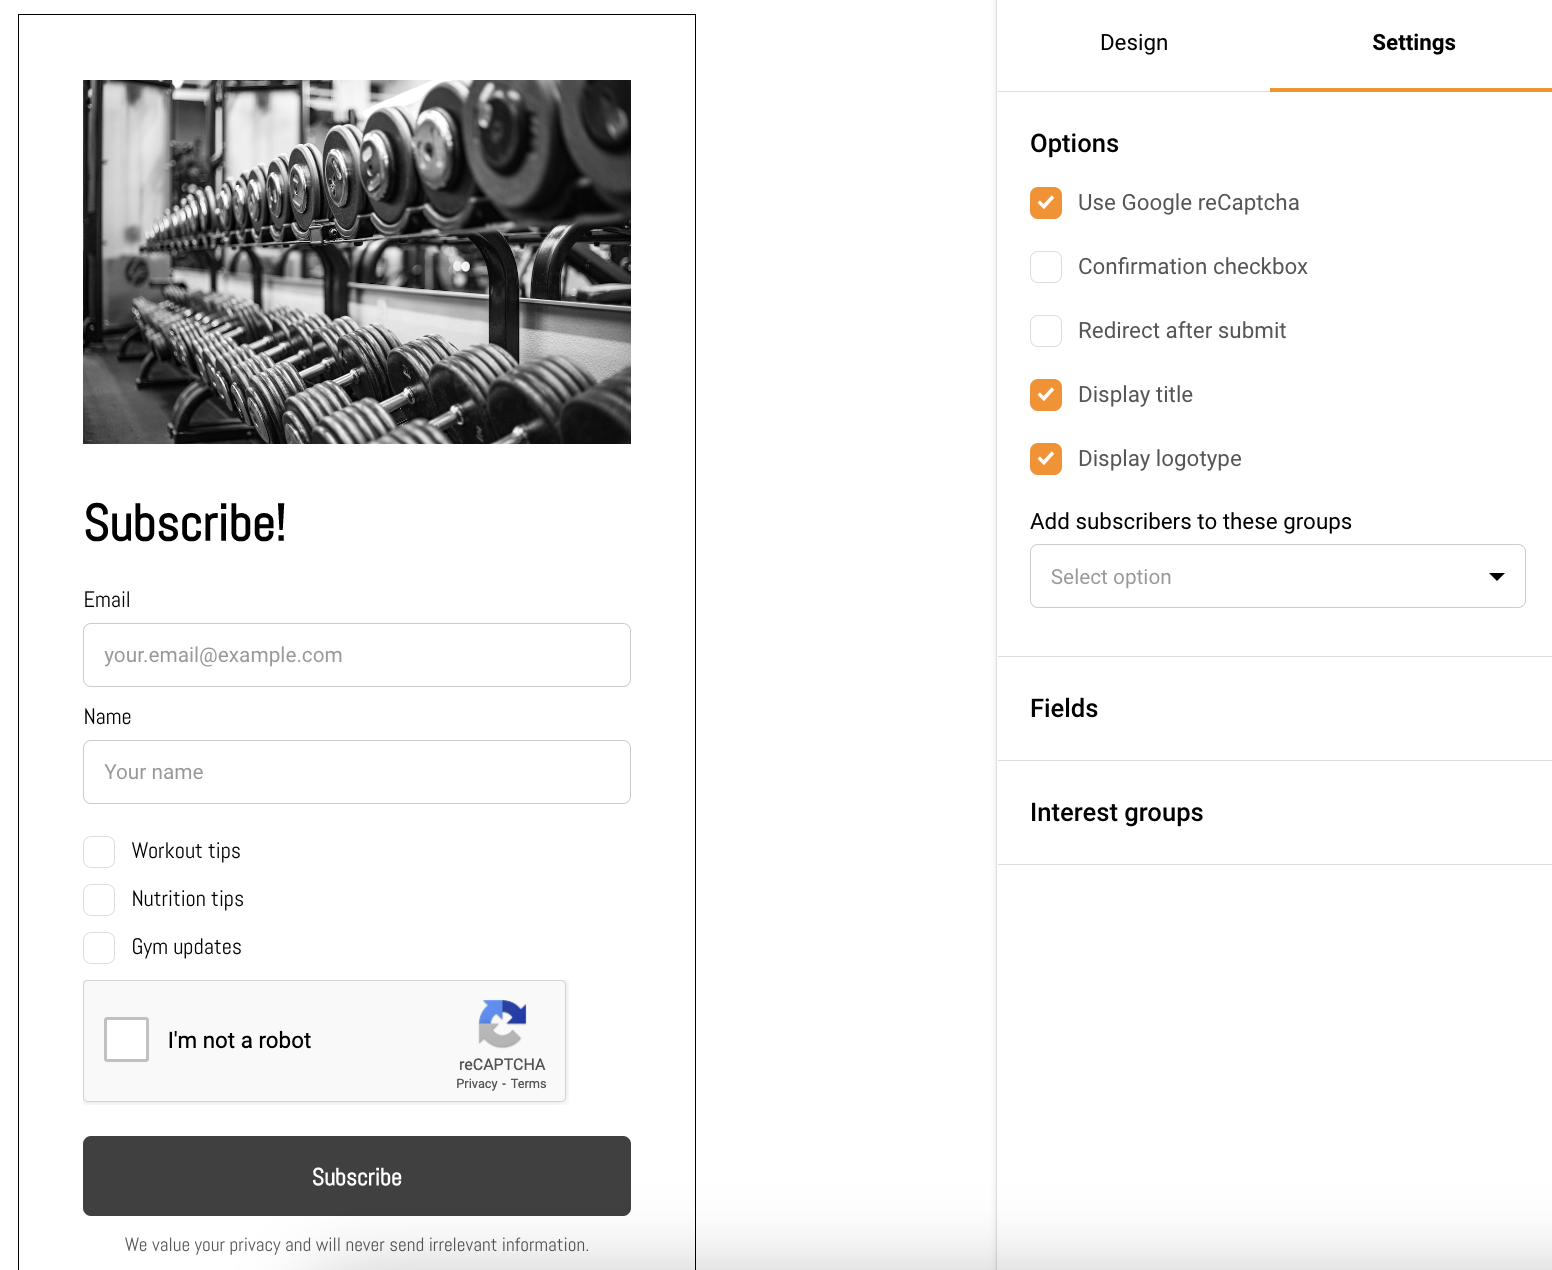
Gathering subscribers was never an easy task, though comprehensive subscription forms or functioning popups help with the matter. With Sender, you’re able to create customizable and easy-to-integrate opt-in forms with ease.
The best way to save time and increase your revenue is to automate your email marketing. Automation is an irreplaceable feature for creating automated abandoned cart or post-purchase email sequences and keeping profits growing.
Integrate with custom systems using advanced yet easy-to-use API.
If you are stuck on a specific task or can’t find a way to execute a particular job, contact our support team via LiveChat or [email protected] – we’re here to help 24/7.