The recipient’s carrier rejected the message, possibly due to the user opting out of receiving messages from the sender. Further communication may not be possible unless the user opts back in.
Blog
-
Stripo Integration
Stripo is an intuitive email design platform that lets you create professional, responsive email templates without needing to write any code.
Stripo offers a wide range of professionally designed templates and extensive customization options, allowing you to easily tailor every email to match your brand and message.
Why connect Stripo with Sender?
Build beautiful, custom emails in Stripo and move them to Sender in just a few clicks.
Take advantage of Stripo’s large library of professionally designed templates.
Use advanced design tools and interactive elements for more engaging email content.
Ensure your emails look great on all devices with built-in mobile responsiveness.
Reuse saved content blocks to keep your brand consistent and save time.
Preview how your email will appear in different inboxes before sending.
Makes collaboration between designers and marketers easier and more efficient.
How to integrate Stripo with Sender?
Log in to your Stripo account and head to “Email Messages”.
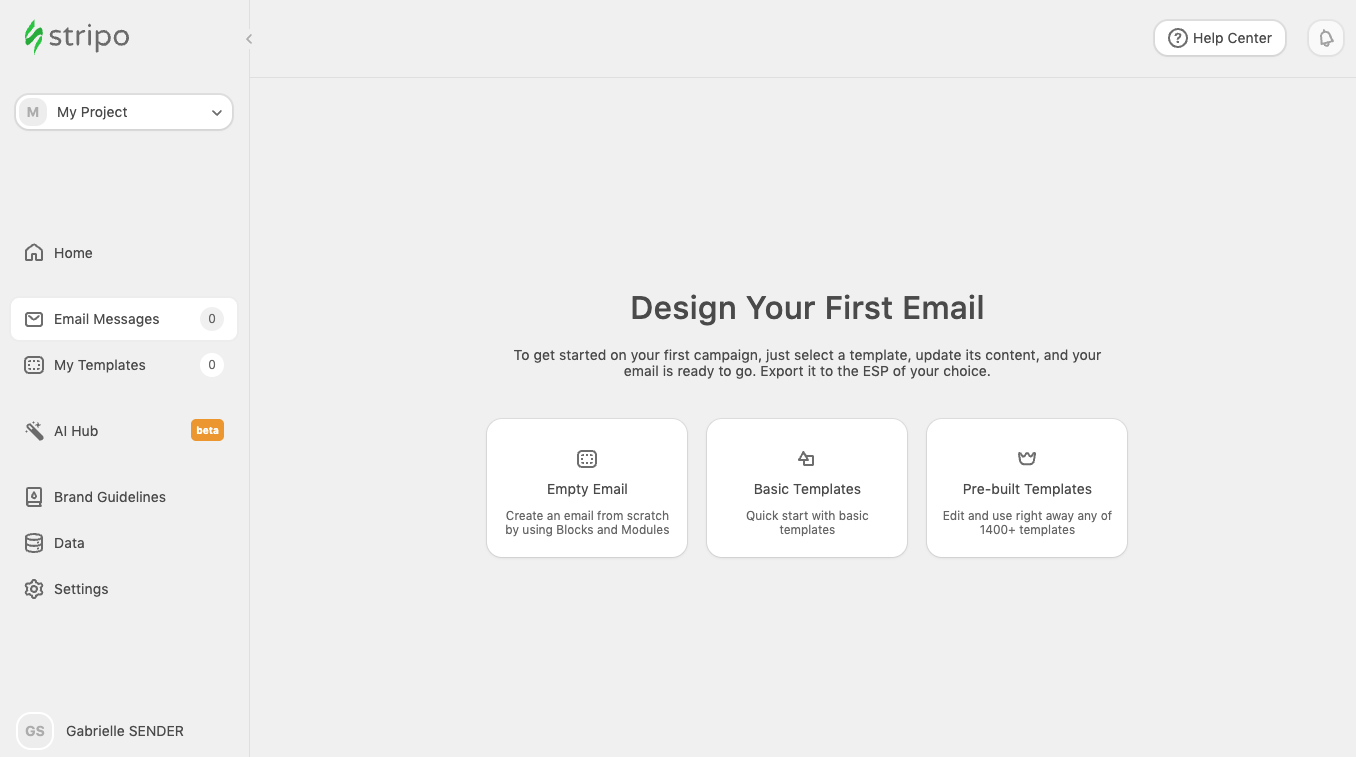
If you want to create a campaign template from scratch, choose “Empty Email”, in our case, we want to use a template that has been already created, therefore we will choose from “Pre-built Templates”.
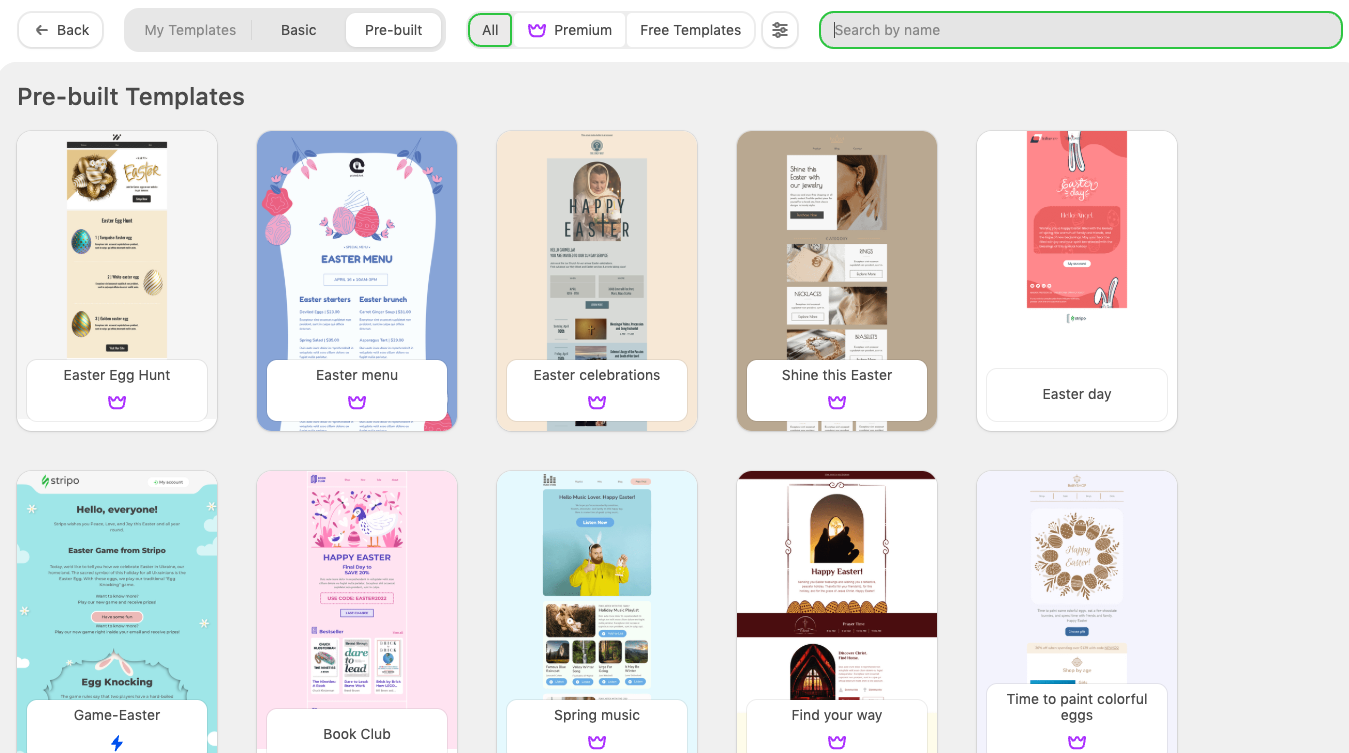
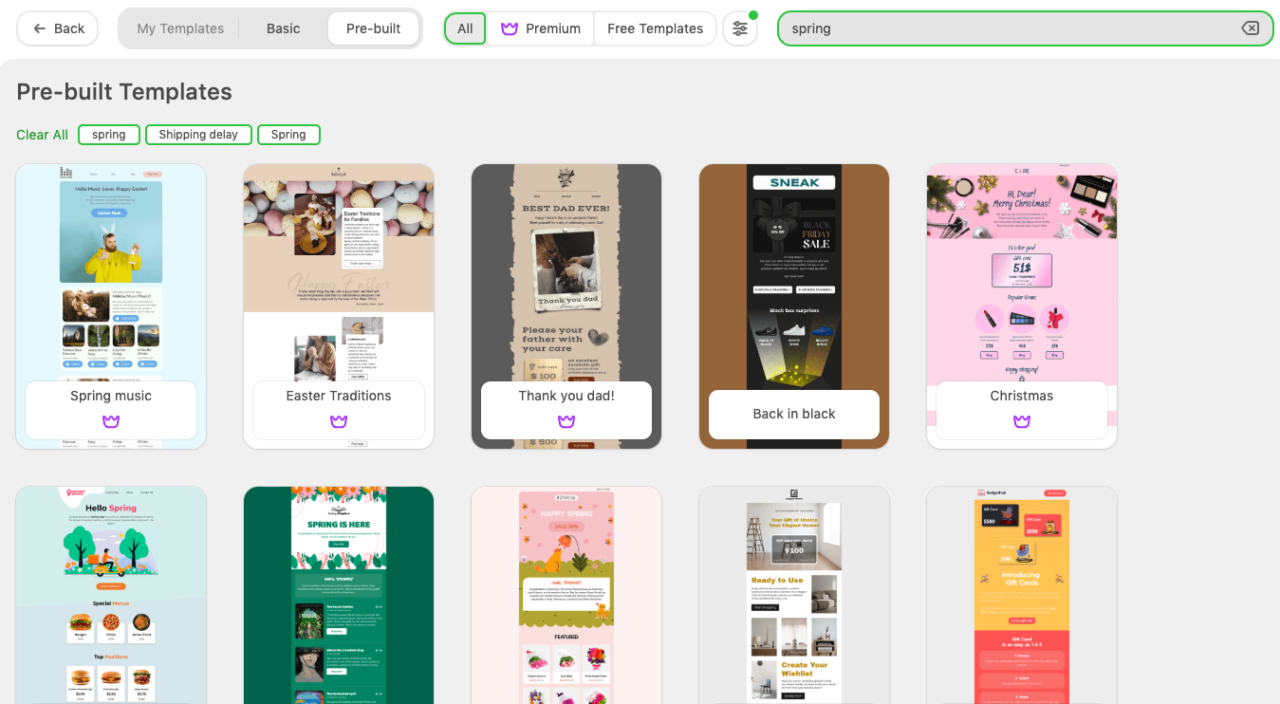
You can simply browse the suggested options or search for a particular themed one. In this case we will search for Spring templates and choose the most suitable one for our idea.
Once you choose the template, make sure to edit it to the fullest of your liking as the exported template will appear as the HTML type campaign on your Sender account and it may be harder to edit.
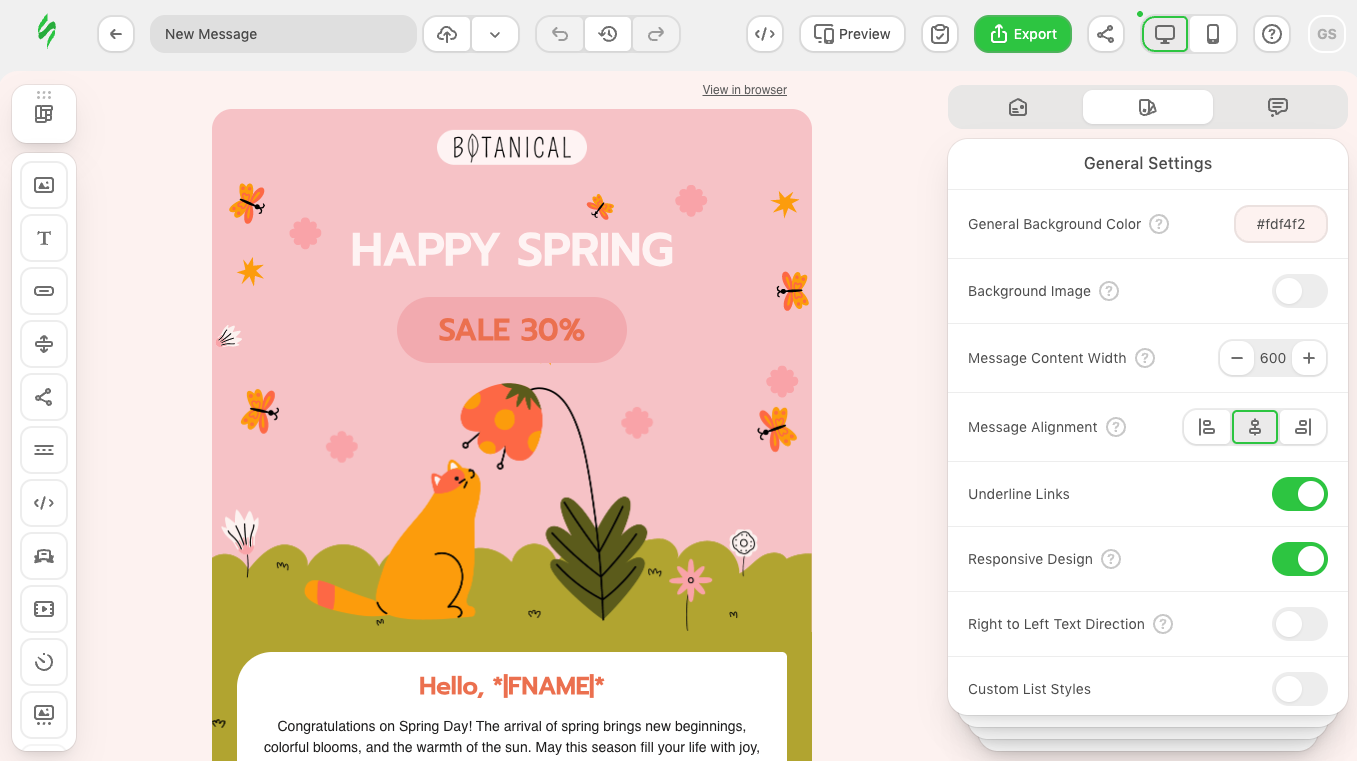
Once you are happy with how everything looks, click “Export” at the top of the page.

In the app menu, search for Sender and choose the application.
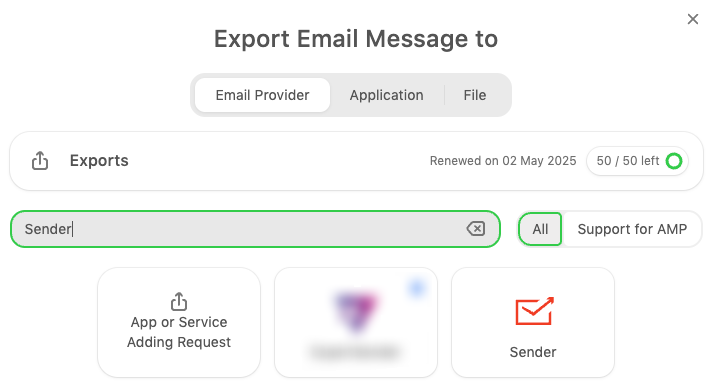
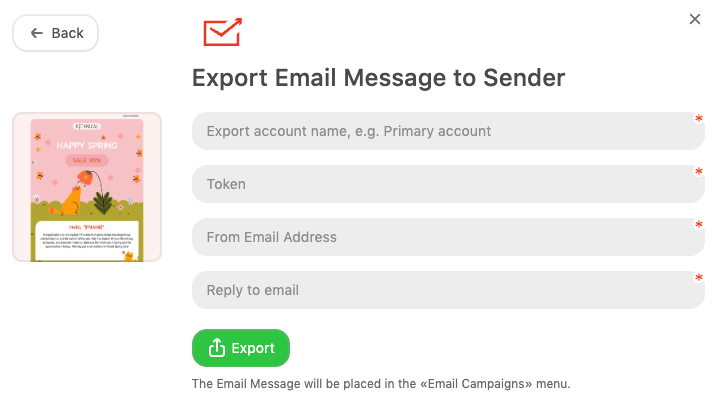
To finish the export, you will need to give the following details:
- Name the account
- Provide the API access token. Click here to learn how to obtain one from your Sender account.
- Provide the from email address
- Add a reply to email
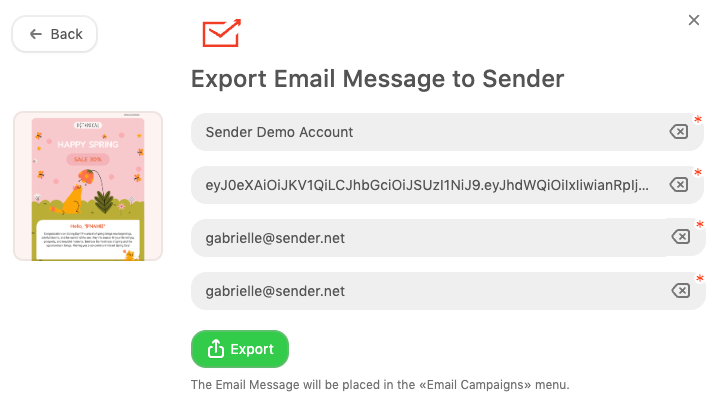
You will be able to edit the sender’s email address in your Sender account if needed.
After providing the details, click “Export”.
Once you receive the confirmation message, head to your Sender account.

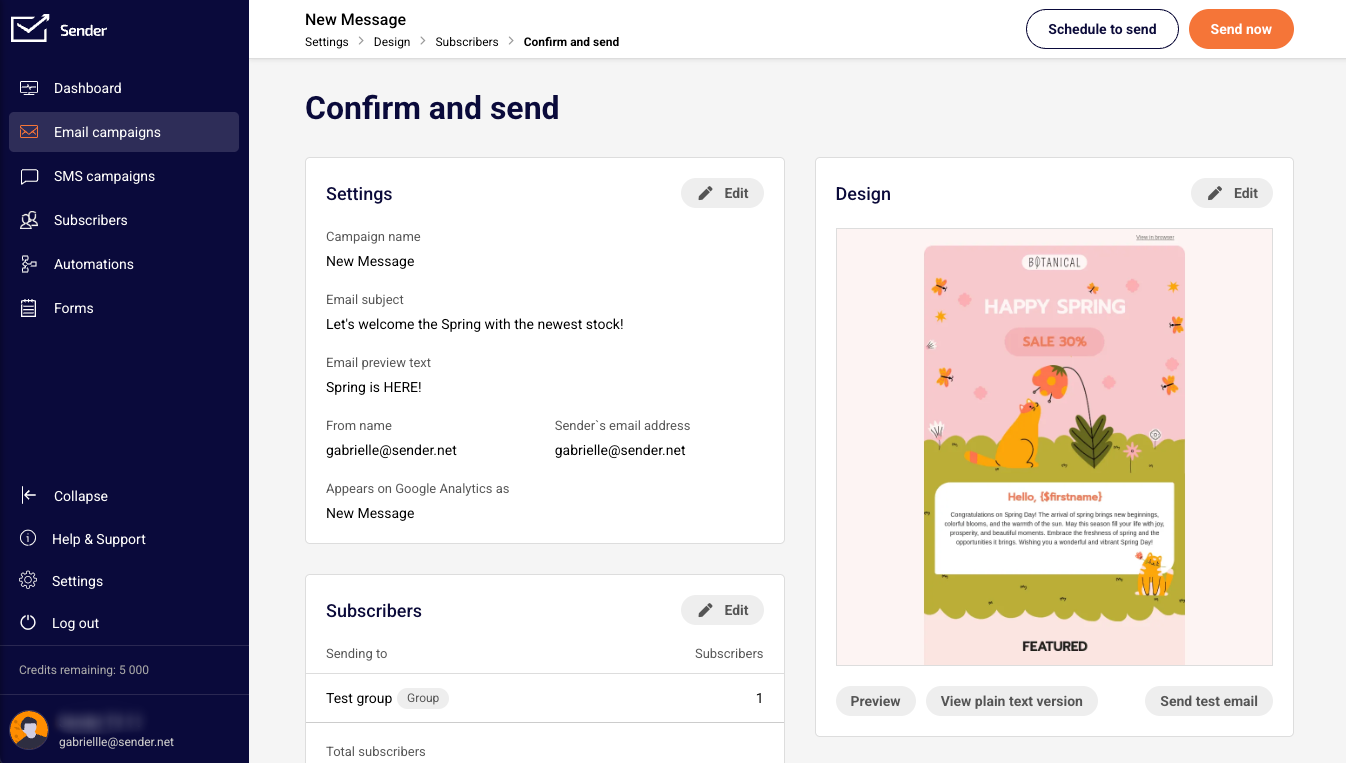
Head to “Email campaigns” section in your Sender account and you will find the email campaign imported from Stripo.
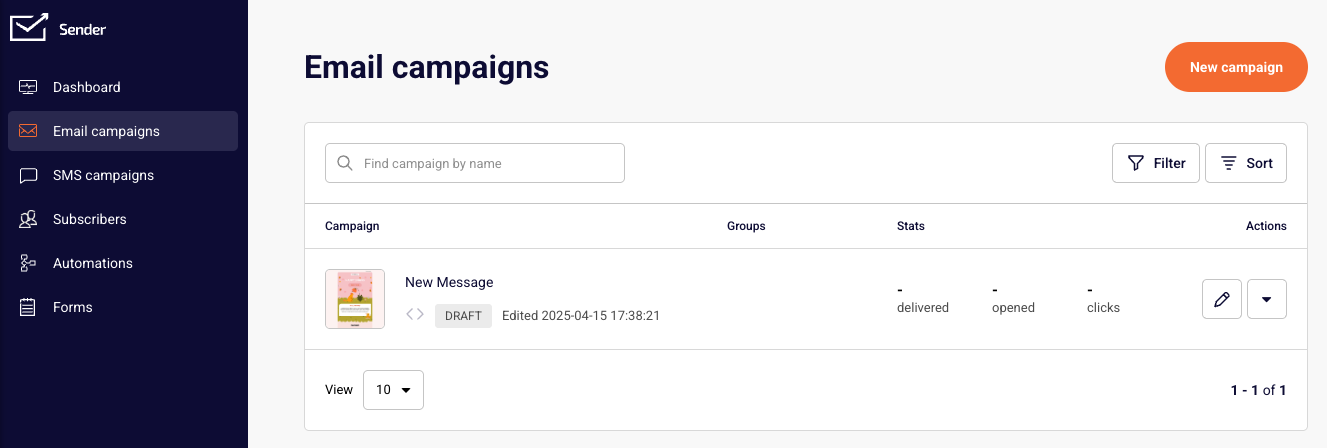
Continue as per usual by choosing the recipients in the Subscriber section and choose to send the campaign immediately or schedule it for a better time in the future.
That’s it!
If you got stuck on a specific task or can’t find a way to execute a particular job, contact our support team via LiveChat or [email protected] – we’re here to help 24/7.
-
Submit a Feature Request
We’re always looking for ways to improve our platform, and many of our features exist today because of user feedback.
If you have an idea for a new feature or an improvement, we’d love to hear from you!
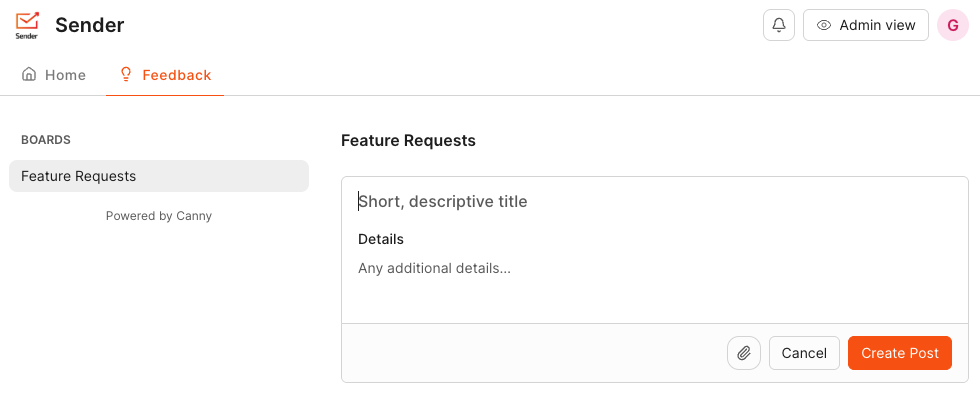
You can submit your feature requests on our Feature Request Board.
There, you’ll have the option to:
- describe your idea in detail,
- upload screenshots or images to better illustrate what you need,
- vote on suggestions from other users.
By sharing your feedback, you play a direct role in shaping features that expand our platform’s capabilities, giving you more tools, more efficiency, and more ways to succeed.
If you got stuck on a specific task or can’t find a way to execute a particular job, contact our support team via LiveChat or [email protected] we’re here to help 24/7.
-
Billing Overview
Understanding how our billing works helps you manage your email and SMS marketing efforts without unexpected interruptions.
In this comprehensive guide, the key differences between the free plan, subscriptions, and prepaid email credits will be outlined so you can better understand your options.
Additionally, we’ll explain the steps to take if you exceed your email credit or subscriber limits.
We’ll also provide guidance on how to upgrade or renew your plan effectively when your current plan no longer meets your needs, ensuring a smooth transition as your requirements grow.
Free Forever Plan
The Free Forever Plan is an excellent option for those just starting with email marketing or managing smaller subscriber lists.
It offers 15,000 email credits to be used when sending campaigns to up to 2,500 unique subscribers.
Our system keeps track of changes to your subscriber list. If you remove old subscribers and add new ones within the same billing period, it will prevent you from sending a campaign to more than 2,500 unique subscribers, ensuring you stay within the limit.
If you upgrade from the Free Plan to a paid plan, the Free Plan’s limits will not be added to the new plan; instead, your plan will switch from one to another.
Subscription Plans
For businesses or individuals looking for more advanced features and higher limits, we offer several Subscription Plans, such as the Standard, Professional, and Enterprise tiers. These plans are billed monthly or annually, with a higher cost for each tier.
Monthly vs. Annual Billing: You can choose to pay either monthly or annually. Annual billing always offers a discount over the monthly option, making it a more cost-effective choice for users who are committed to using the platform long-term.
Subscription plans provide a different allocation of email credits based on the tier you choose:
Standard plan offers 12 times the number of subscribers in email credits,
Professional plan provides 24 times the number of subscribers in email credits,
Enterprise plan offers unlimited email credits, giving you the flexibility to send as many emails as needed.
IMPORTANT NOTE: If you’re running out of email credits on your subscription plan, avoid purchasing Prepaid Email Credits, as they are a separate payment tier. Doing so will not result in email credits being added to your subscription plan but rather cause your account to switch from the subscription model to prepaid credits.
Prepaid Email Credits
For those who send infrequently and prefer not to commit to a subscription, we offer Prepaid Email Credits as an alternative. This option allows users to buy a block of email credits upfront without committing to a monthly or annual plan.
Flexibility: Prepaid Email Credits are a great choice for businesses with occasional email marketing needs. You can purchase credits as needed without worrying about recurring charges. Once you run out, simply buy more.
Expiration: Prepaid Email Credits do not have an expiration date, so you can use them at your own pace.
No subscriber limit: There’s also no limit to the number of subscribers you can have – 1 Prepaid Credit equals 1 email sent to 1 subscriber.
Exceeding Limits and What Happens Next
As your email marketing efforts grow, you may find that your current plan or credit allocation no longer meets your needs. Here’s how to manage this:
If you exceed either the email credits or subscriber limits allotted to your plan, the system will stop allowing you to send email campaigns until your limits are reset. In this case, you have three options:
- Purchase a higher plan – Upgrading to a plan with more email credits and a higher subscriber limit will immediately restore your ability to send email campaigns.
- Renew your current plan – renewing your current plan will reset your limits for the next billing cycle, allowing you to resume your marketing efforts.
- Wait for the next billing cycle – If you don’t need immediate access, you can simply wait for your next billing cycle to begin, at which point your limits will reset and you’ll be able to send emails once again.
IMPORTANT NOTE: If you’re on a subscription plan with auto-renewal enabled and you have more active subscribers than your current plan allows before the renewal date, the system will automatically upgrade you to a larger plan that can accommodate all of your active subscribers. This upgrade will also come with a higher cost, so make sure you’re comfortable with the change before the renewal date.
Upgrading from a Monthly to a Yearly Plan:
You can switch from a monthly plan to a yearly plan at any time.
- When you upgrade, your new plan’s expiration date will be set to one year from the date of purchase.
- The limits of your plan will renew monthly on the same day that you purchased the plan.
The Correct Way to Upgrade a Yearly Plan:
If you’re on a yearly plan and exceed your plan limits, the only proper way to upgrade is to purchase a larger yearly plan.
IMPORTANT NOTE: If you choose to buy a monthly plan instead of upgrading to a larger yearly plan, the remaining limits from your current yearly plan will cover most if not all of the cost of the monthly plan, but the unused value of your yearly plan will be lost and will not be refunded.
If you have a few months remaining on your yearly plan or have purchased a plan that’s too small, don’t worry. The system will automatically calculate the appropriate adjustment, ensuring you don’t lose any value.
For example, imagine you’re on the 6th month of your yearly plan and anticipate needing more subscribers than your current plan allows, you should go to Billing and choose a larger yearly plan and in the next step of the purchase you will:
- Receive a 2-month discount (as is standard with yearly plans).
- See a deduction for the remaining 6 months of your current yearly plan.
- Only be asked to pay the difference between the new plan and the prorated value of your existing plan.
Downgrading
Downgrading can be done for both plan tiers and subscription sizes. However, it’s recommended to downgrade just before the renewal date, especially if the plan prices are significantly different.
For example, if your current plan costs $100 and you haven’t used it yet, but you want to switch to a smaller plan that costs $45, you won’t need to pay anything to change your plan. However, the outstanding $55 will be lost—it will not be refunded, nor will it be added to your credits.
When downgrading, make sure you’re switching from a monthly plan to a smaller monthly or yearly plan, or from a yearly plan to a smaller yearly plan. This ensures that you make the most of your remaining plan value when downgrading.
If you choose to downgrade your plan from Standard to Professional, please note that the features, email credits, and subscriber limits of the new plan will take effect immediately. This may result in losing access to certain features or limits that were available on your previous plan.
Be sure to check your usage to ensure it aligns with the capabilities of the new plan before making the change.
Where to check the remaining plan value?
If you’re unsure how much value is left on your plan, you can always select a new plan in the Billing section and click “purchase.” On the next step, before you click “pay now,” you’ll be able to see a breakdown of the discount you’re receiving based on your remaining plan value. This breakdown will help you make an informed decision about which plan to choose or when to downgrade.
What happens once the plan expires?
If auto-renewal is disabled or you remove your saved billing method, cancel your subscription, once your plan expires your account will automatically be downgraded to the Free Forever plan.
You’ll still be able to use your account within the Free Forever plan’s limits until you make a new purchase.
If you got stuck on a specific task or can’t find a way to execute a particular job, contact our support team via LiveChat or [email protected] – we’re here to help 24/7.
-
Salesforce Integration via Zapier
Connect Salesforce with Sender through Zapier to automate lead and contact management. This integration ensures that whenever a new contact is added in Salesforce, their details are instantly synced with your Sender account. You can also update existing subscribers and trigger automations for a seamless email marketing experience.
Follow this guide to connect Salesforce and Sender:
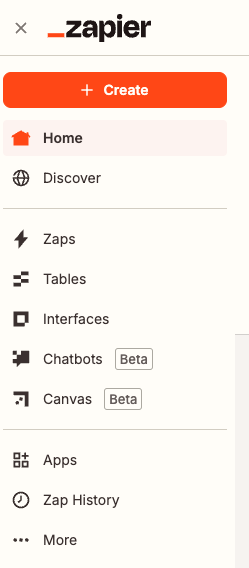
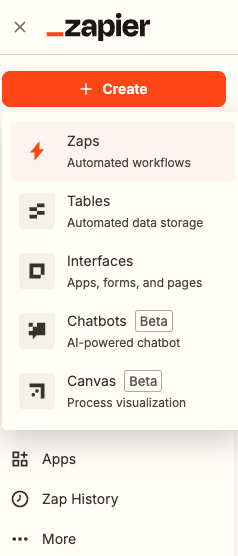
Head to Zapier, log in to your account and click “Create” to make a new Zap.
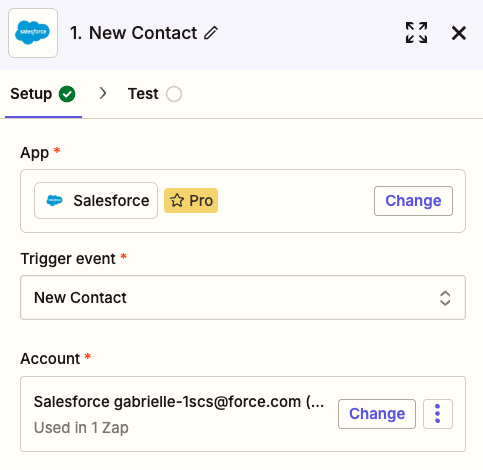
Name the Zap, for the trigger search for “Salesforce” and select it from the list.

After selecting the trigger app, choose the appropriate trigger event for your integration. In this case, we will pick “New Contact.”
Also, connect your Salesforce account to the trigger and test the connection.
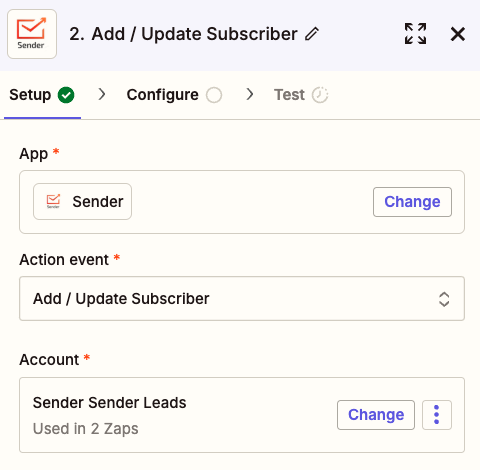
Once the test is done, setup the action step by firstly searching for Sender in apps.

For the action event choose “Add/Update Subscriber” and connect your Sender account.
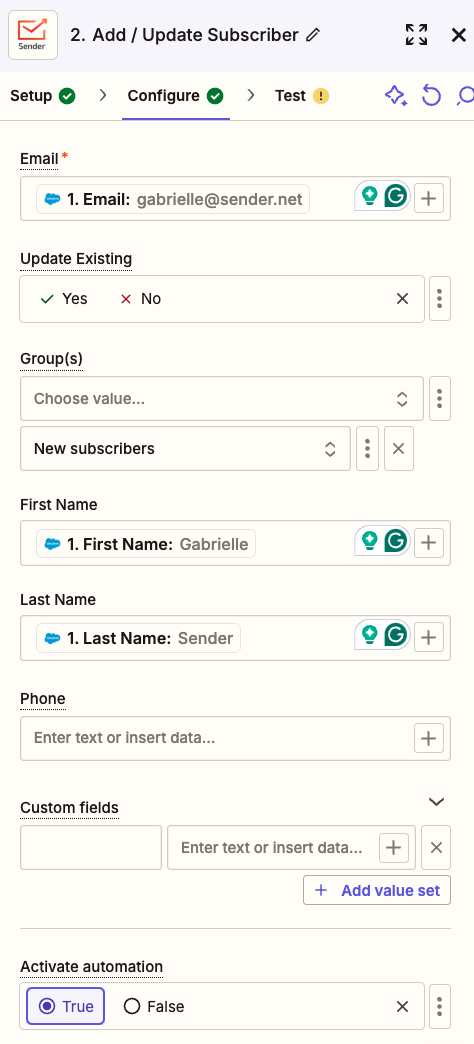
- In the “Configure” step, align Salesforce fields with the corresponding fields in Sender to ensure precise data transfer to your custom fields.
- Choose whether to update existing subscribers if they’re already in your list by selecting the appropriate setting.
- Assign new subscribers to the correct group for easier identification and tracking of their source once imported into Sender.
- To manage automation triggers, select “True” to enable or “False” to disable automation in the “Activate Automation” section at the bottom.
Test the connection to ensure everything is setup correctly.
Finally, publish your Zap to activate the integration and ensure a smooth data flow.
If you got stuck on a specific task or can’t find a way to execute a particular job, contact our support team via LiveChat or [email protected] – we’re here to help 24/7.
-
HubSpot Integration via Zapier
Connect your HubSpot CRM with Sender using Zapier to automate workflows and keep your email marketing in sync. With this integration, you can automatically transfer new contacts, update subscriber details, and trigger email campaigns based on HubSpot activities.
Follow this guide to connect Hubspot and Sender:
Head to Zapier, log in to your account and click “Create” to make a new Zap:
Name the Zap, for the trigger search for “Hubspot” and select it from the list.

After selecting the trigger app, choose the appropriate trigger event for your integration. In this case, we will pick “New Contact.”
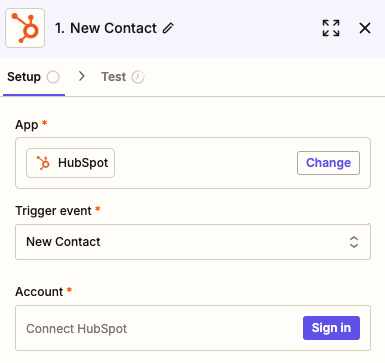
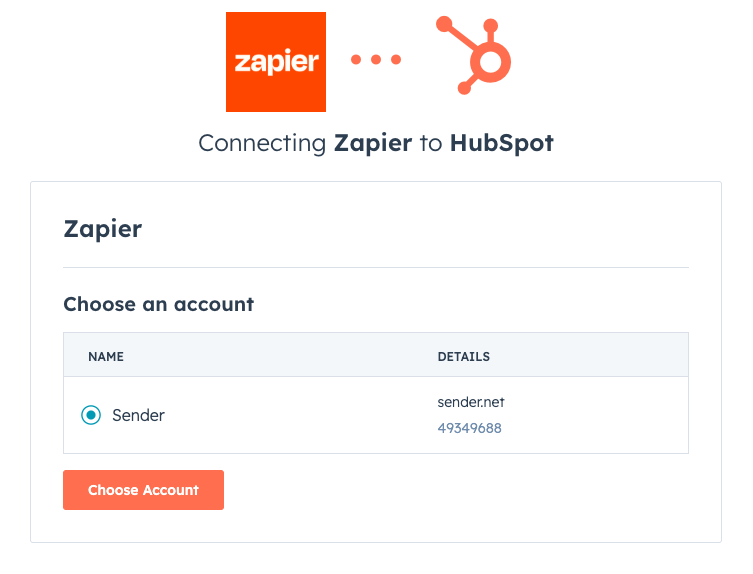
Connect your Hubspot account to Zapier by selecting it from the provided list.
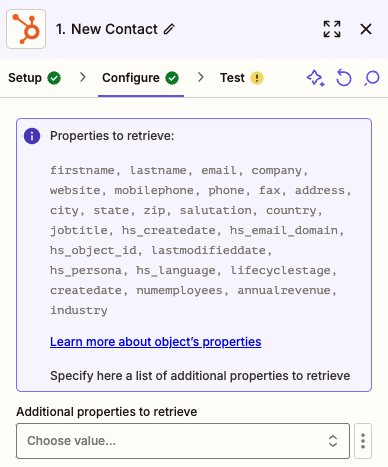
Once the account is connected, choose additional values (if needed) you want to send from Hubspot to Sender, apart from the ones listed in the purple bubble.
Test the trigger and move to the second step of the connection.
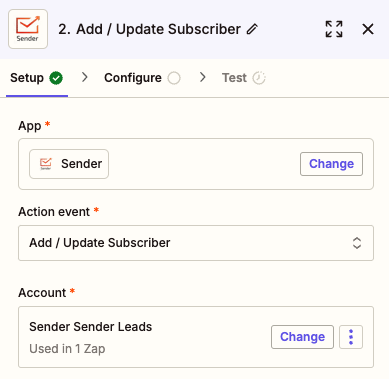
Search for Sender in the action step application list.

For the action event choose “Add/update subscriber” and connect your Sender account to Zapier.
-
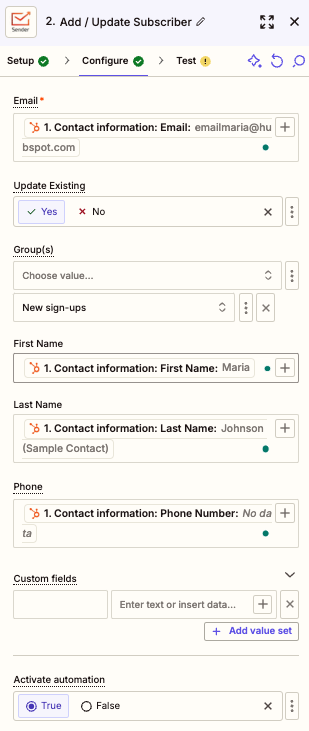
In the “Configure” step, match the fields from HubSpot with the corresponding fields in Sender to ensure accurate data transfer to your custom fields.
-
Decide whether to update existing subscribers if they are already in your list by selecting the appropriate option.
-
Select the appropriate group for new subscribers to easily identify them and track their source once they are imported into your Sender account.
-
To control whether the integration triggers an automation, choose “True” to enable it or “False” to prevent it in the “Activate Automation” section at the bottom.
Test the connection to ensure everything is setup correctly.
Finally, publish your Zap to activate the integration and ensure a smooth data flow.
That’s it!
If you got stuck on a specific task or can’t find a way to execute a particular job, contact our support team via LiveChat or [email protected] – we’re here to help 24/7.
-
-
Facebook Lead Ads Integration via Zapier
Integrating Facebook Lead Ads through Zapier allows you to seamlessly transfer new leads directly into your Sender account. This setup ensures that every lead captured through your Facebook Lead Ads is automatically added to your email list, saving you time and eliminating manual data entry.
Follow these steps to connect Facebook Lead Ads and Sender:
Head to your Zapier account and create a new Zap:
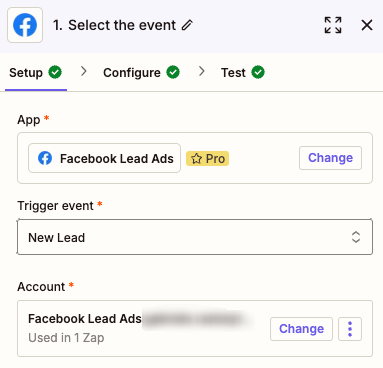
Name your Zap and for the trigger search for “Facebook Lead Ads” and select it from the list.

Once the trigger app is chosen, select the trigger event to be New Lead and connect your Facebook account.
Next, choose the page that you want to use to collect the leads for and choose the form that you have created for this page from the drop-down list.
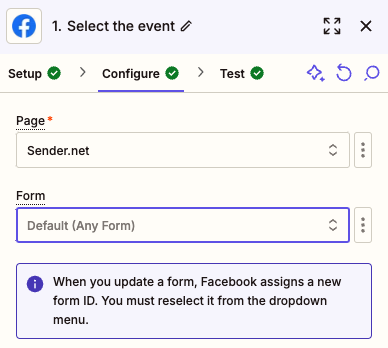
Once the form is selected, test the trigger step.
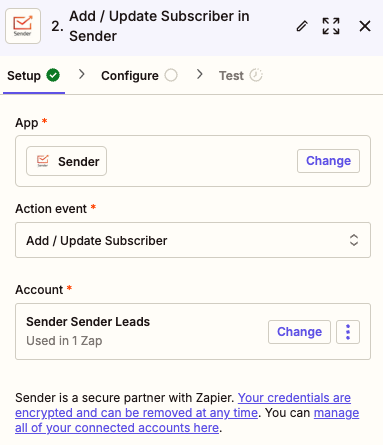
Continue to the action part of the integration setup. Search for Sender in action apps and select it from the list.

Set up the action event to be “Add/update subscriber” and connect your Sender account to Zapier.
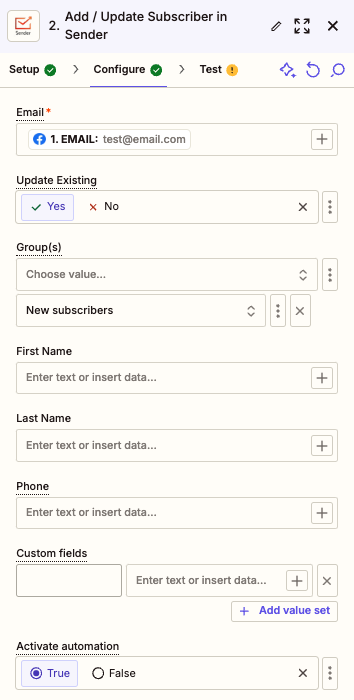
- Ensure you select the email field for the new lead to be added to your account successfully as a subscriber.
- Do the same for all the other fields of the form that you want to be imported to Sender.
- If the subscriber is already on your list, enable the “Update Existing” feature to ensure you have the most updated information about your subscribers.
- Select the group for the subscribers to be assigned upon upload to easily distinguish between different channels your subscribers sign up through.
- If you have an automation setup with Sender, make sure to allow for the connection to trigger it by selecting “True” for “Activate automation”.
Make sure to test the connection to ensure everything is running smoothly.
To finish off, don’t forget to publish your Zap!
That’s it!
If you got stuck on a specific task or can’t find a way to execute a particular job, contact our support team via LiveChat or [email protected] – we’re here to help 24/7.
-
Google Tag Manager Integration (Tracking Script)
Google Tag Manager (GTM) is a free tool that allows you to manage and deploy marketing and analytics tags on your website without modifying code.
By integrating GTM with Sender, you can track key events such as email sign-ups and conversions, helping you optimize your marketing efforts.
To add your Sender script to Google Tag Manager do the following:
Go to Forms.
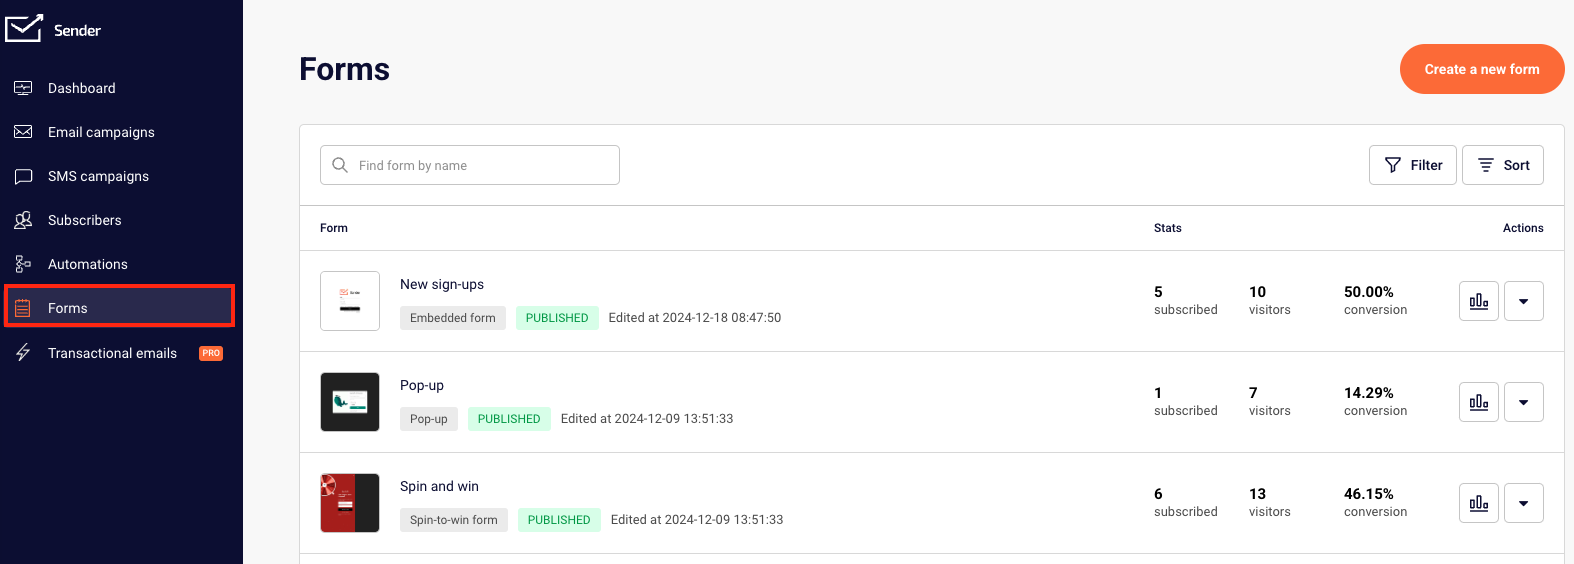
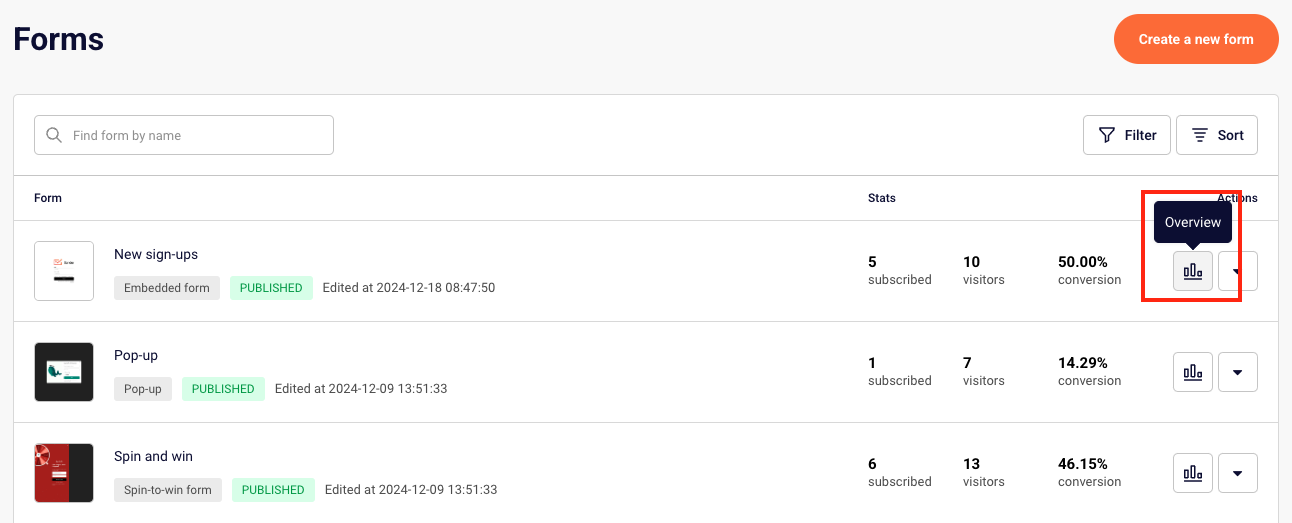
Choose a pop-up or embedded form and click Overview next to it.
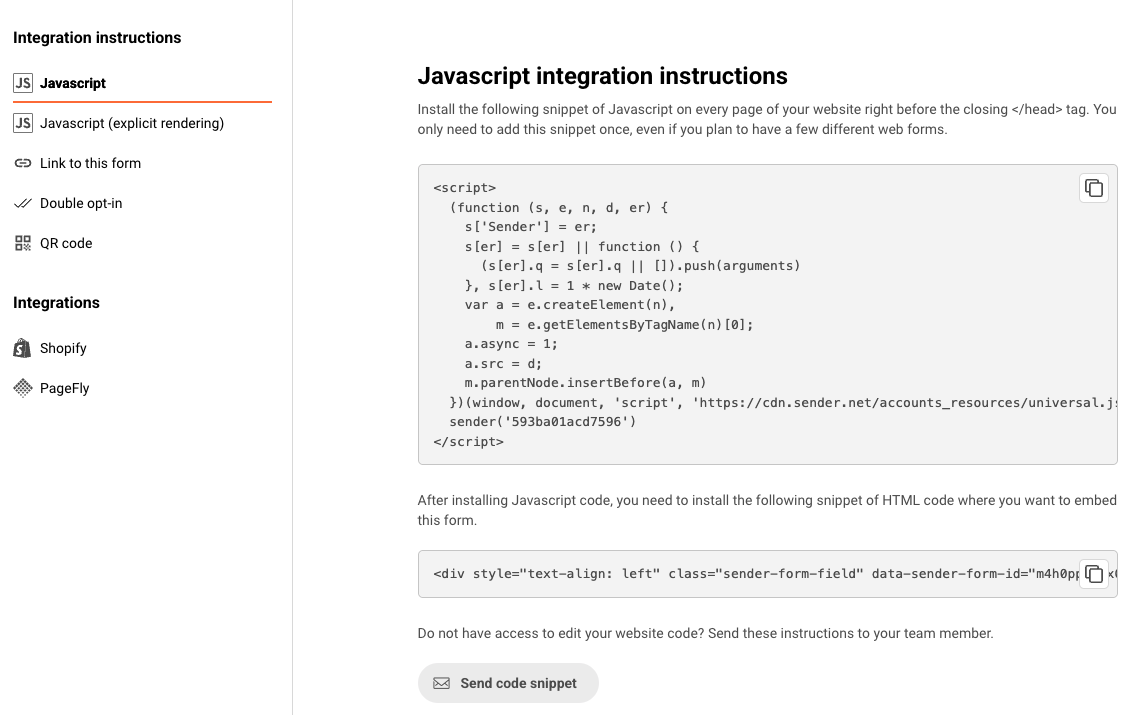
Scroll down to the Integration instructions and copy the Javascript code of the form.
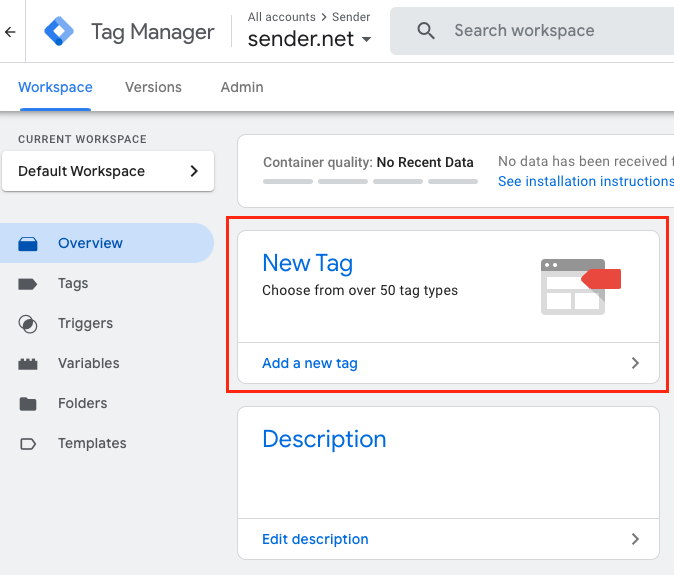
Now, head to Google Tag Manager and log in to your account.
Once you are in, select “Add a new tag”.
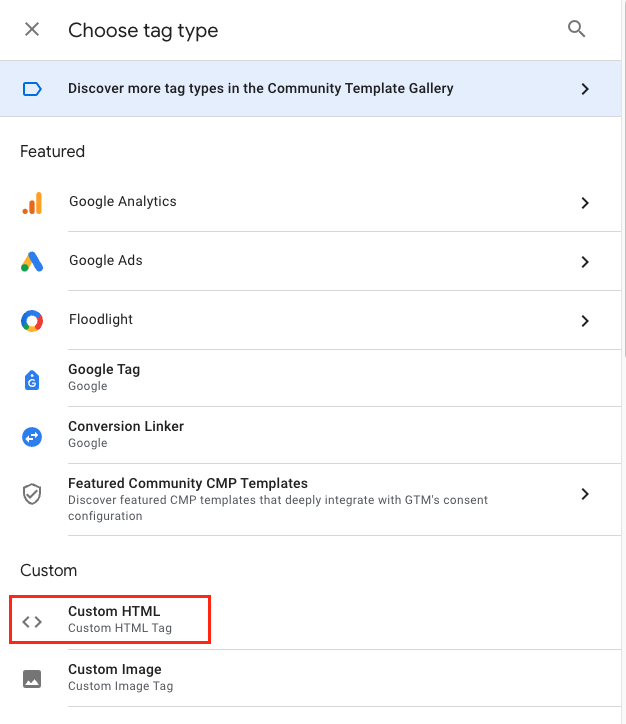
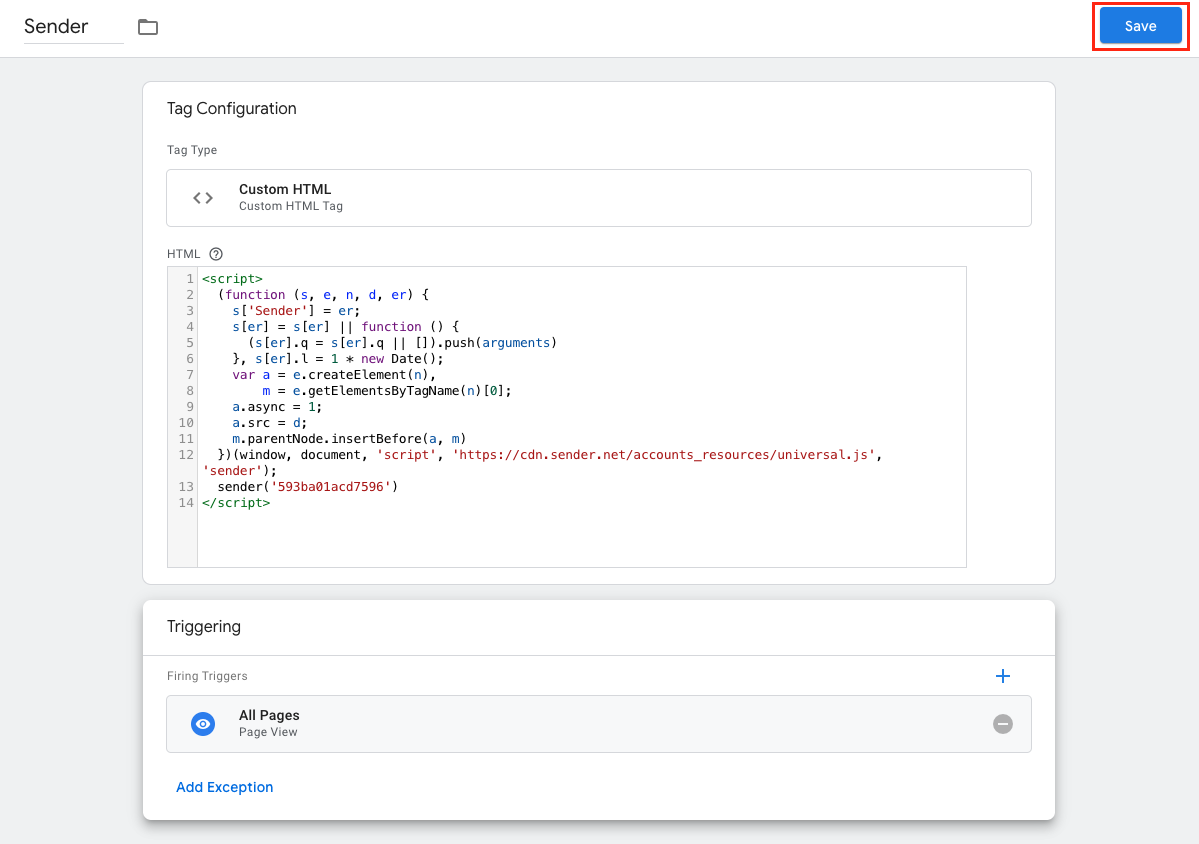
Name the tag and click “Tag Configuration” to choose the tag type.

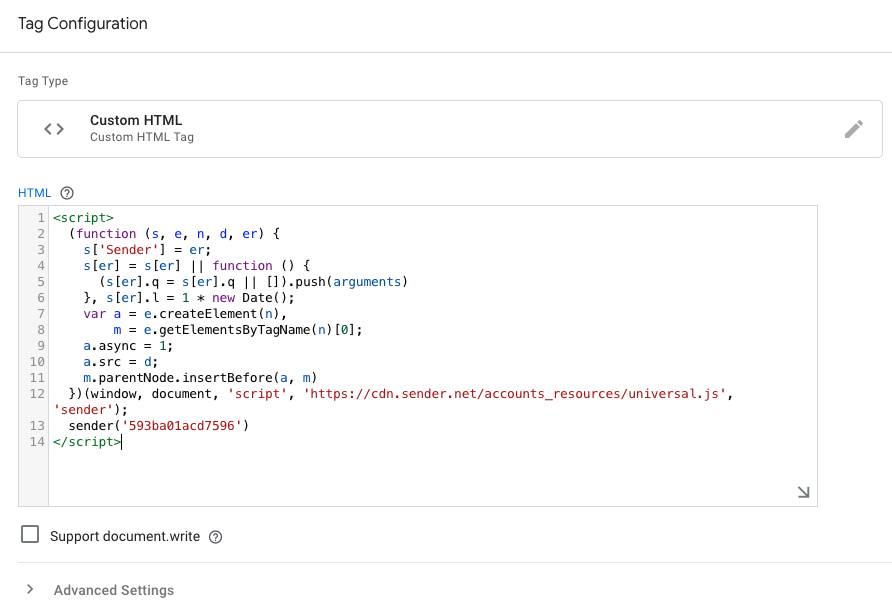
For the tag type choose “Custom HTML” from the list.
Paste the copied Javascript into the “HTML” section.
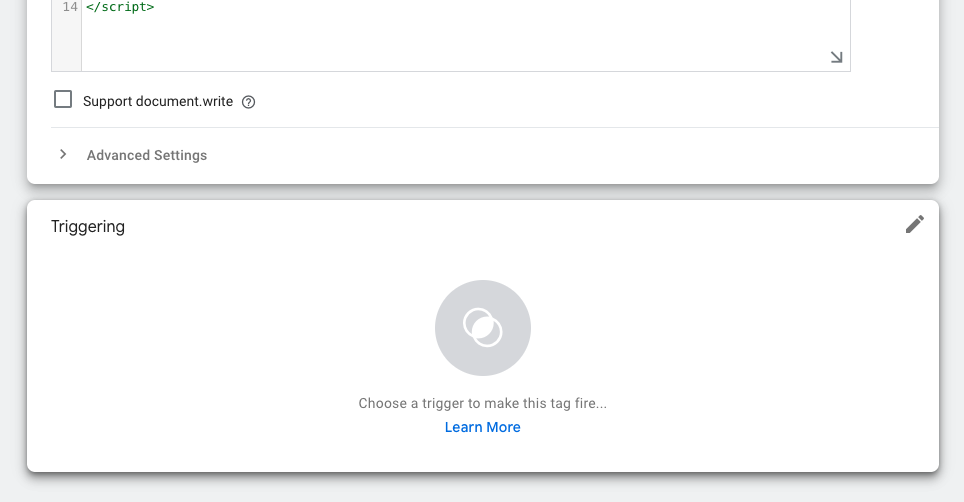
Continue by choosing a trigger.
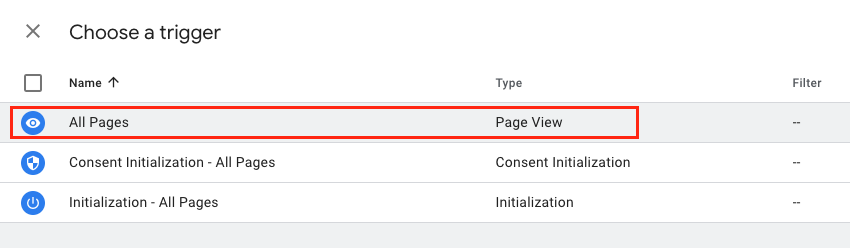
Choose “All Pages” from the trigger list.
Once all is setup, make sure to save the progress.
And submit the changes that you have made by clicking “Submit” button at the right-top corner.

Your Google Tag Manager integration with Sender is now successfully configured. With this setup, you can efficiently track user interactions, optimize your marketing efforts, and gain valuable insights into your audience’s behavior.
If you got stuck on a specific task or can’t find a way to execute a particular job, contact our support team via LiveChat or [email protected] – we’re here to help 24/7.
-
Pabbly Integration
Discover how the integration between Sender and Pabbly can streamline your email marketing and automation efforts. By connecting these two platforms, you can easily sync data, trigger workflows, and enhance your marketing campaigns with minimal effort.
This guide will walk you through the steps to set up the integration and make the most of its features for seamless communication and efficient management.
To set up the integration between Sender and Pabbly Connect, follow these steps:
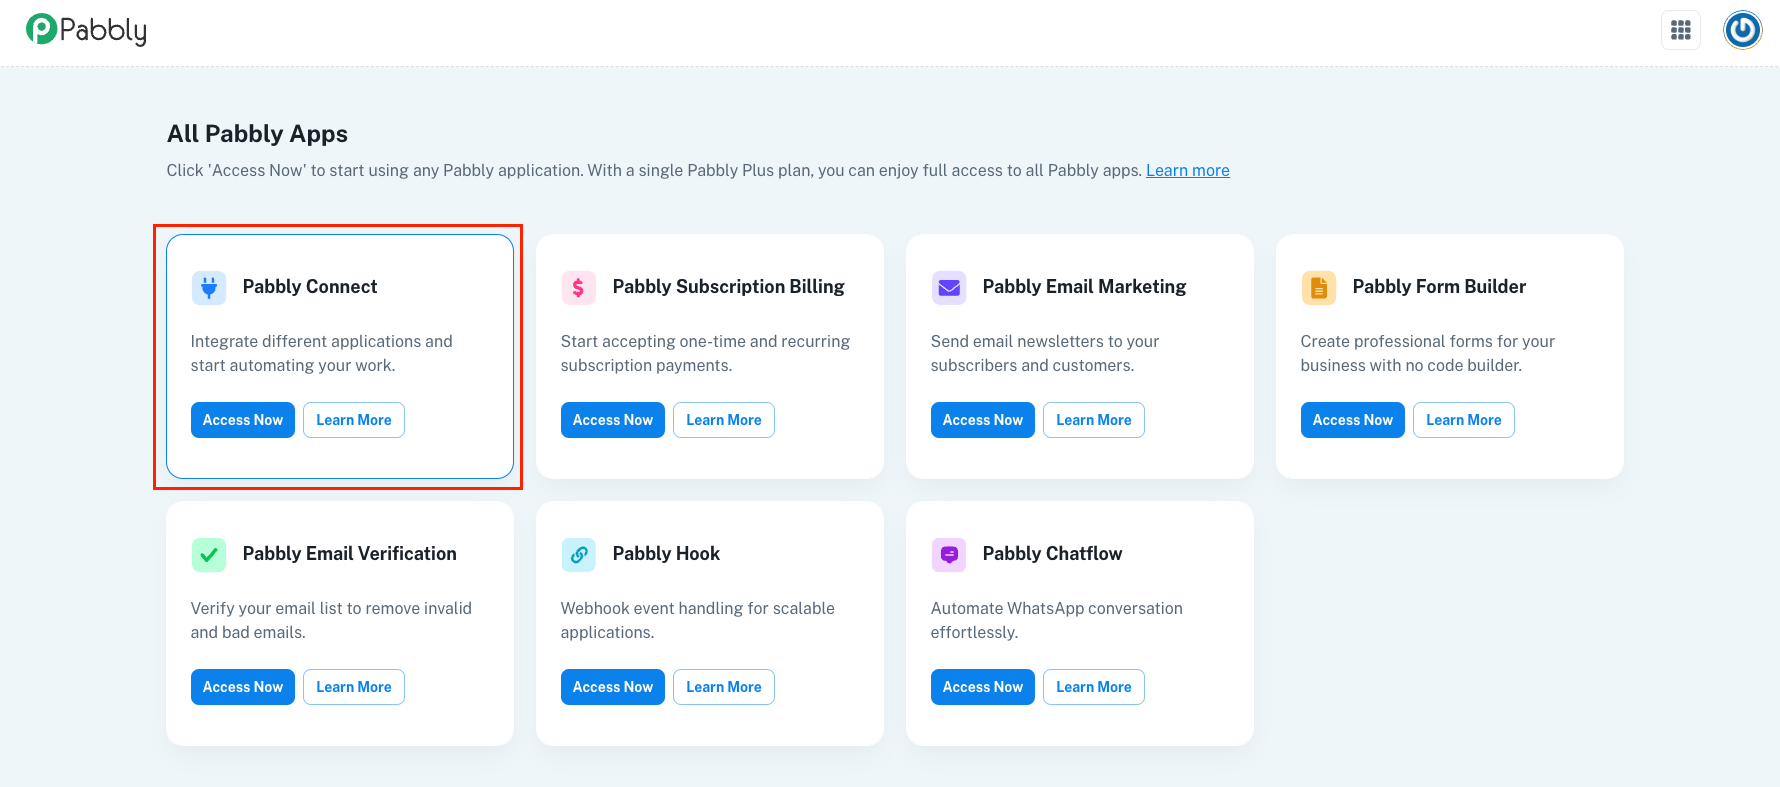
Firstly, log in to your Pabbly account, access Pabbly Connect.
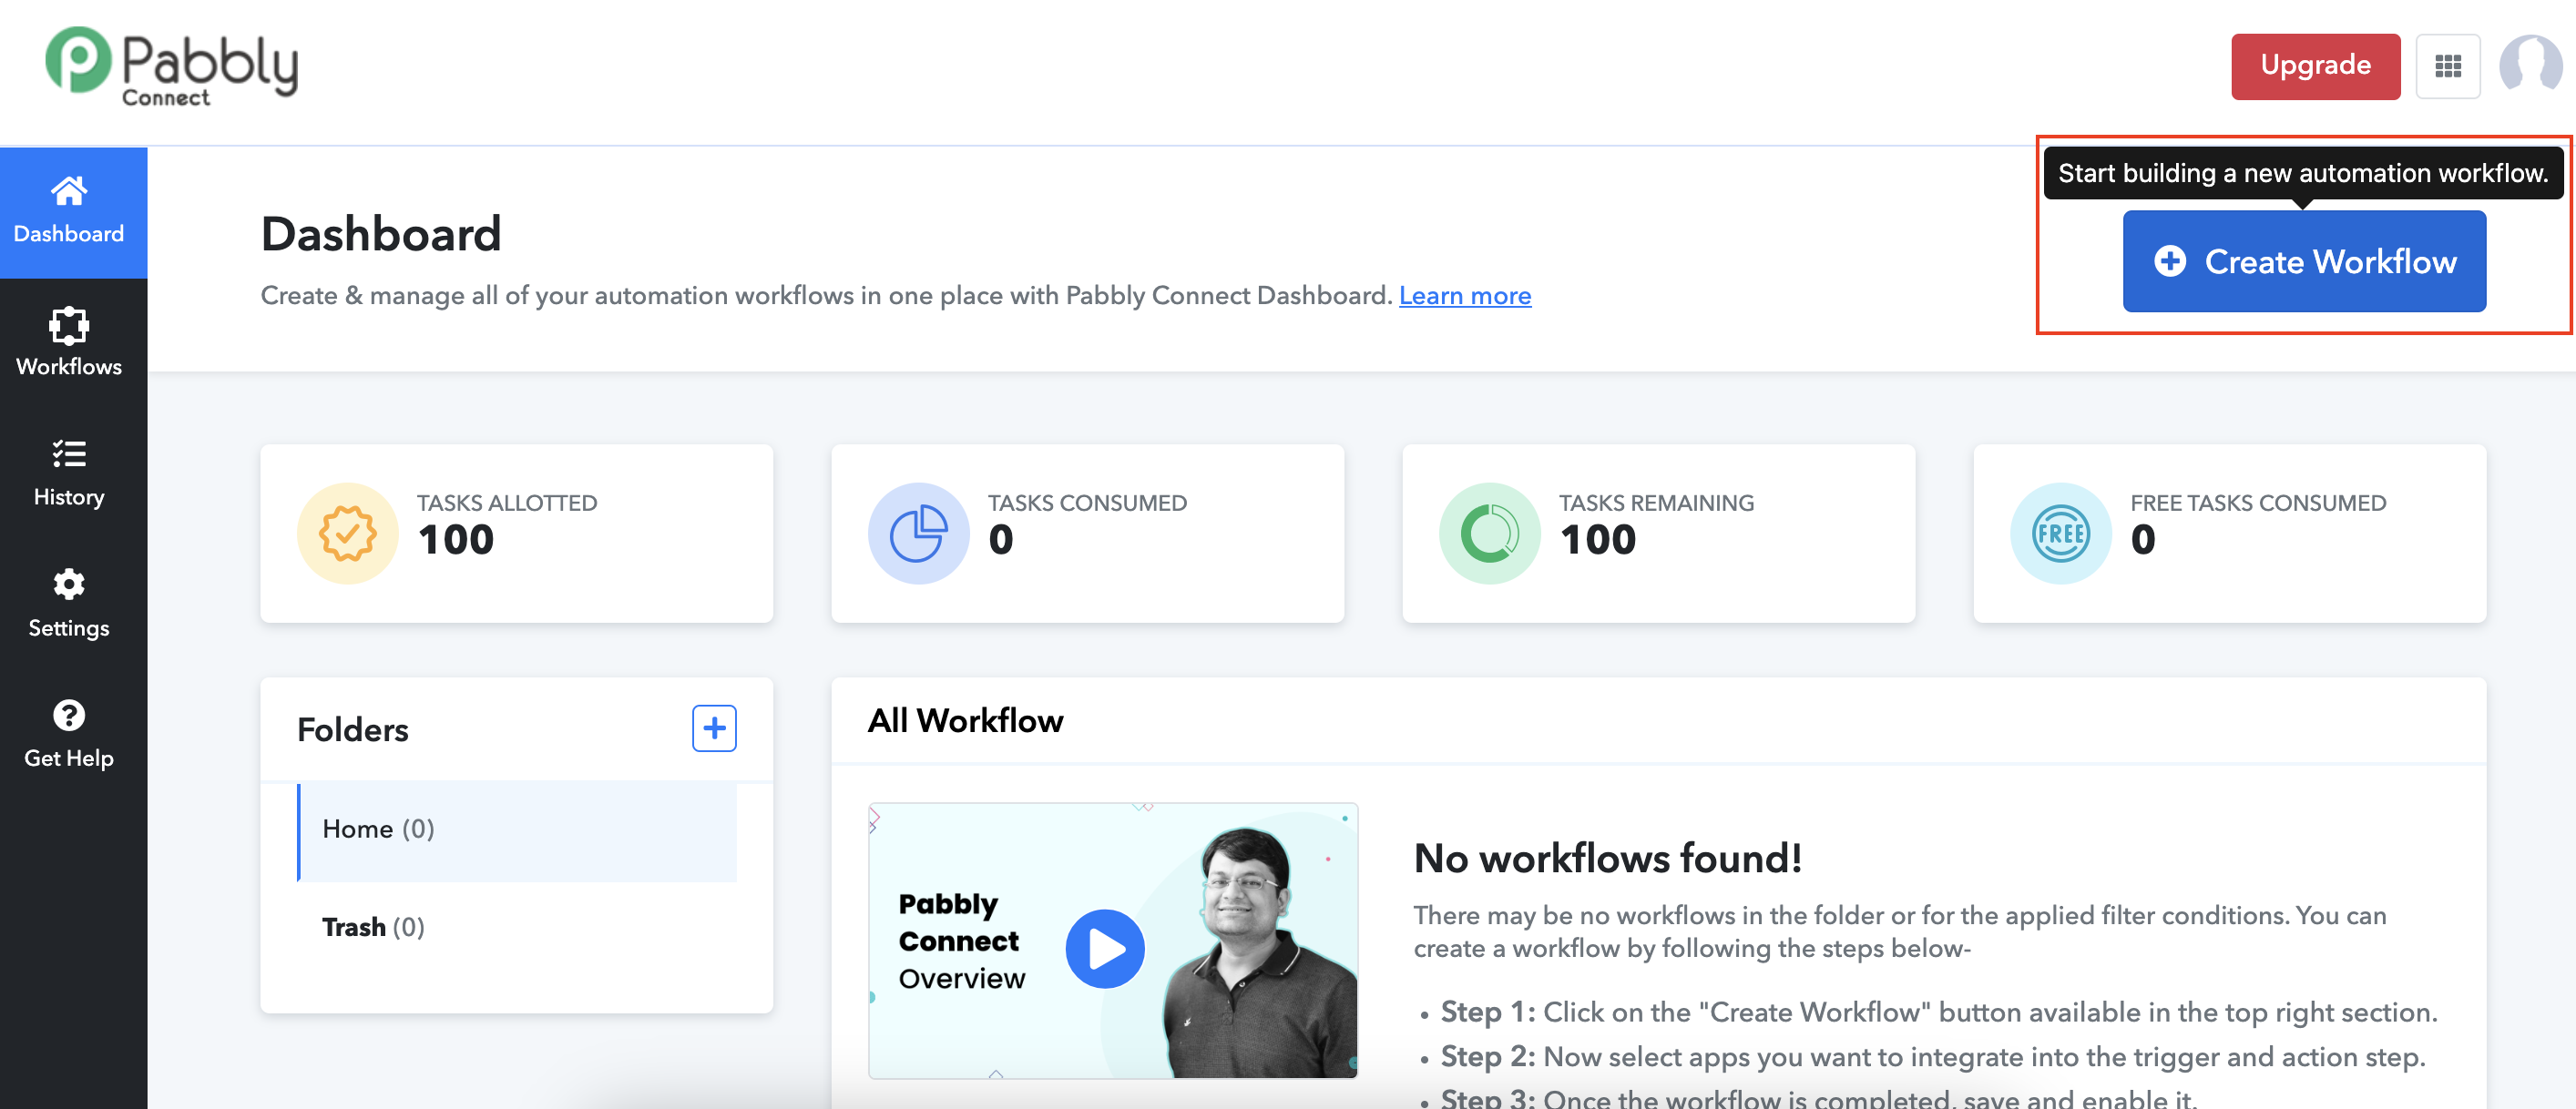
Click Create Workflow to start setting up your integration.
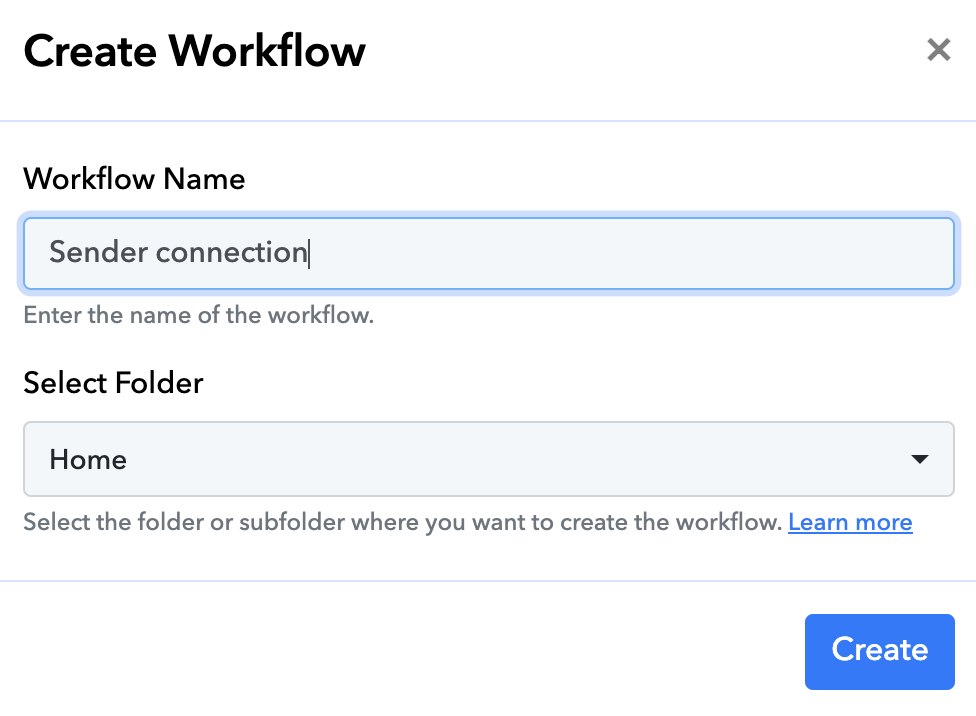
Name your workflow and select the folder where you want to create the workflow.
For the trigger, choose an application that you want to connect with Sender. In this case, we will select Google Sheets as our trigger.
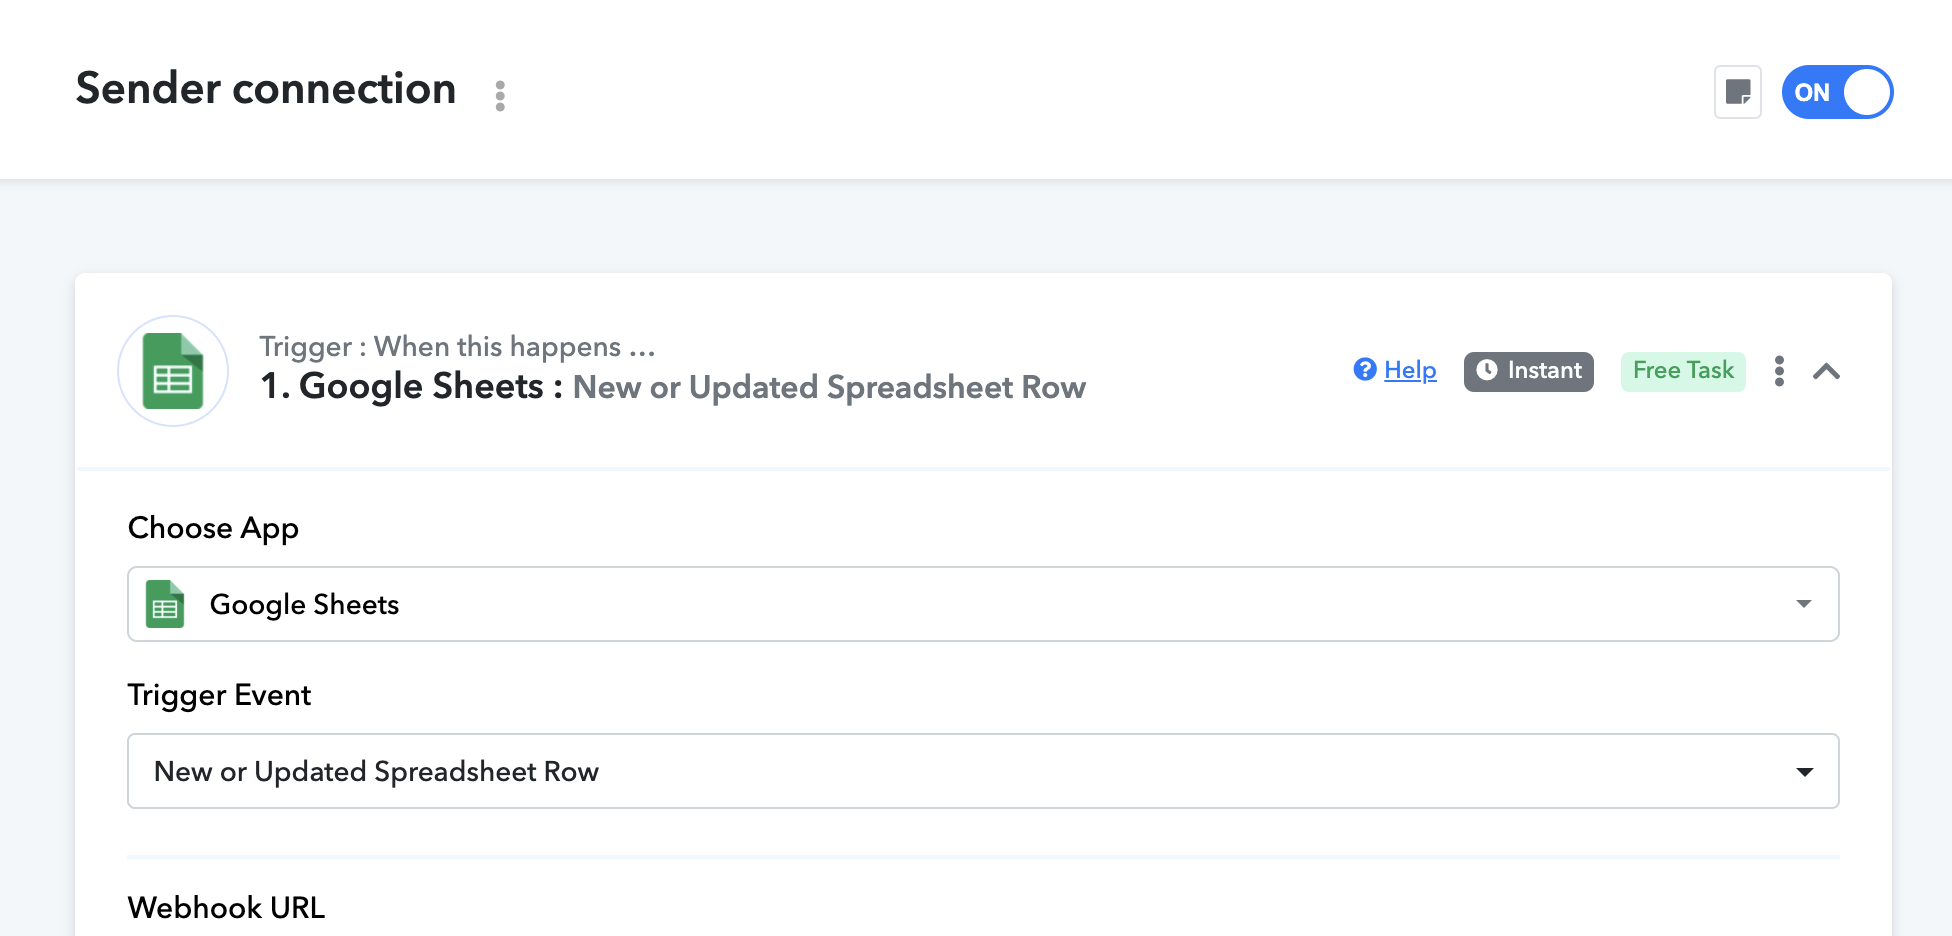
Follow the instructions to successfuly connect the trigger application.
For the action step, search and choose Sender application and for the action event select the one you need to be performed. In this case, we will choose “Create Subscriber”.
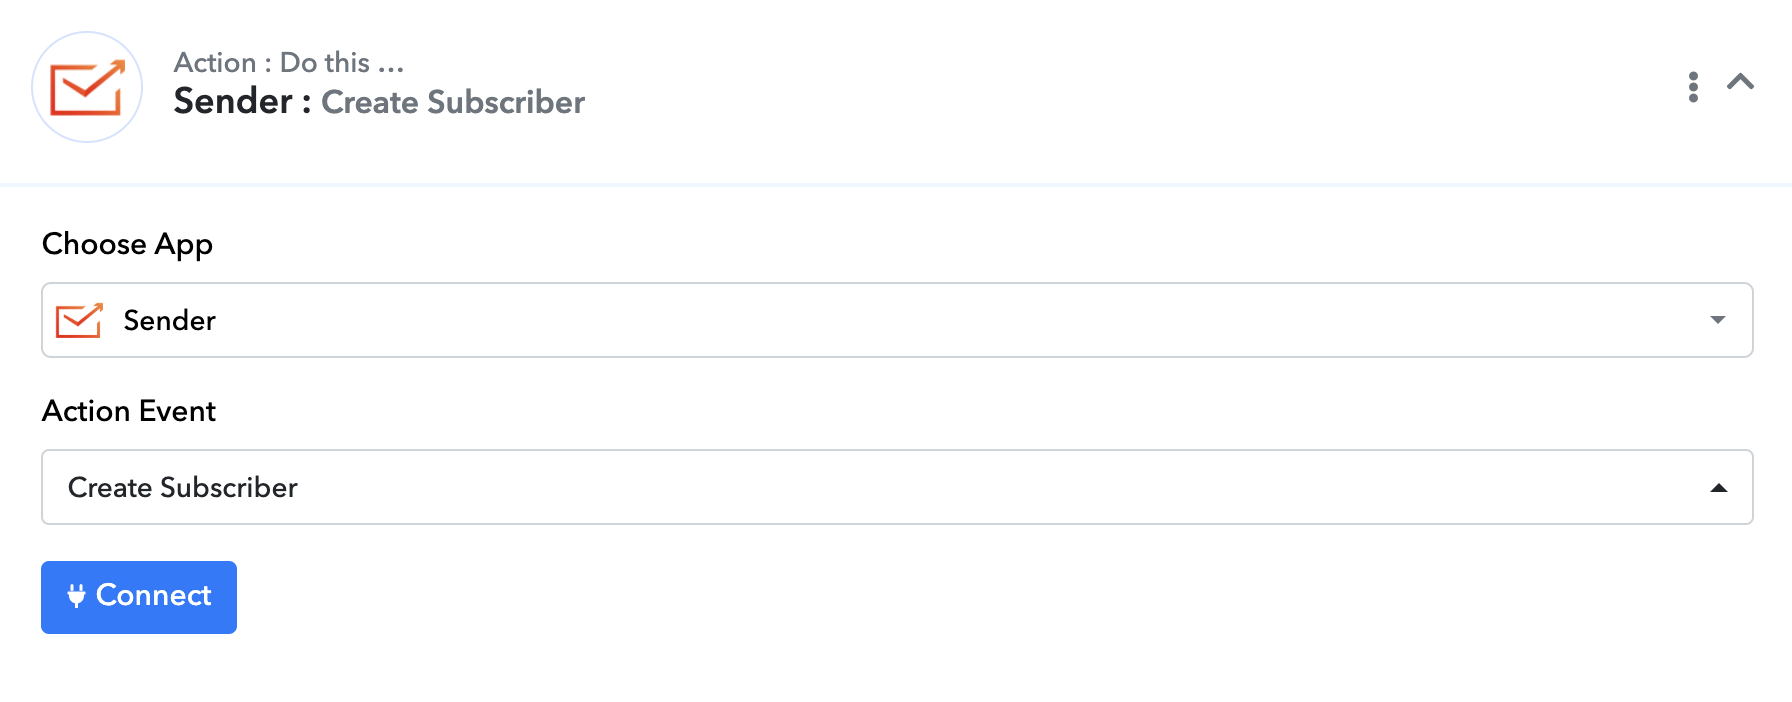
For this action, you will be asked to select a group that you want the subscriber to be allocated to and choose whether you want the automation to be triggered.
Once that is setup, test the flow and save the setup.
Make sure the workflow is enabled:
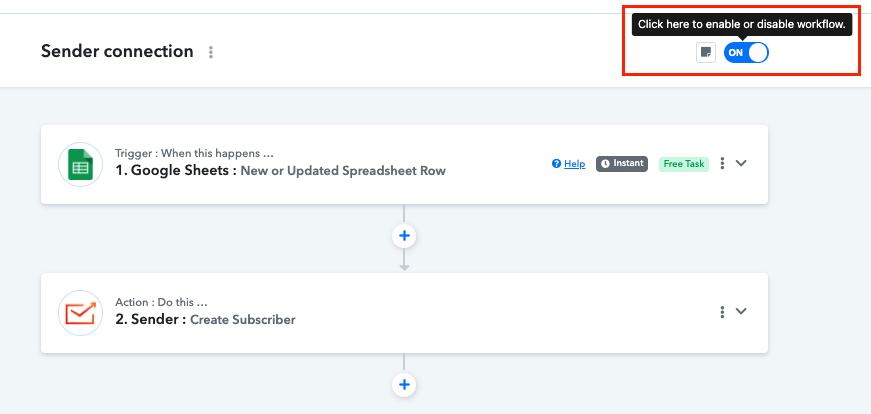
That’s it!
If you got stuck on a specific task or can’t find a way to execute a particular job, contact our support team via LiveChat or [email protected] – we’re here to help 24/7.
-
Default custom fields list
Default custom fields allow you to set a fallback value for specific fields in your campaigns, ensuring your messages always feel complete and personalized—even when data is missing.
For example, if you’re using a custom field like “Favorite Product” but don’t have that information for some subscribers, you can set a default value like “Our Bestsellers” to maintain a smooth and engaging message flow.
This feature helps you deliver consistent, polished communication effortlessly!
To set up these default values for your customer fields follow these steps:
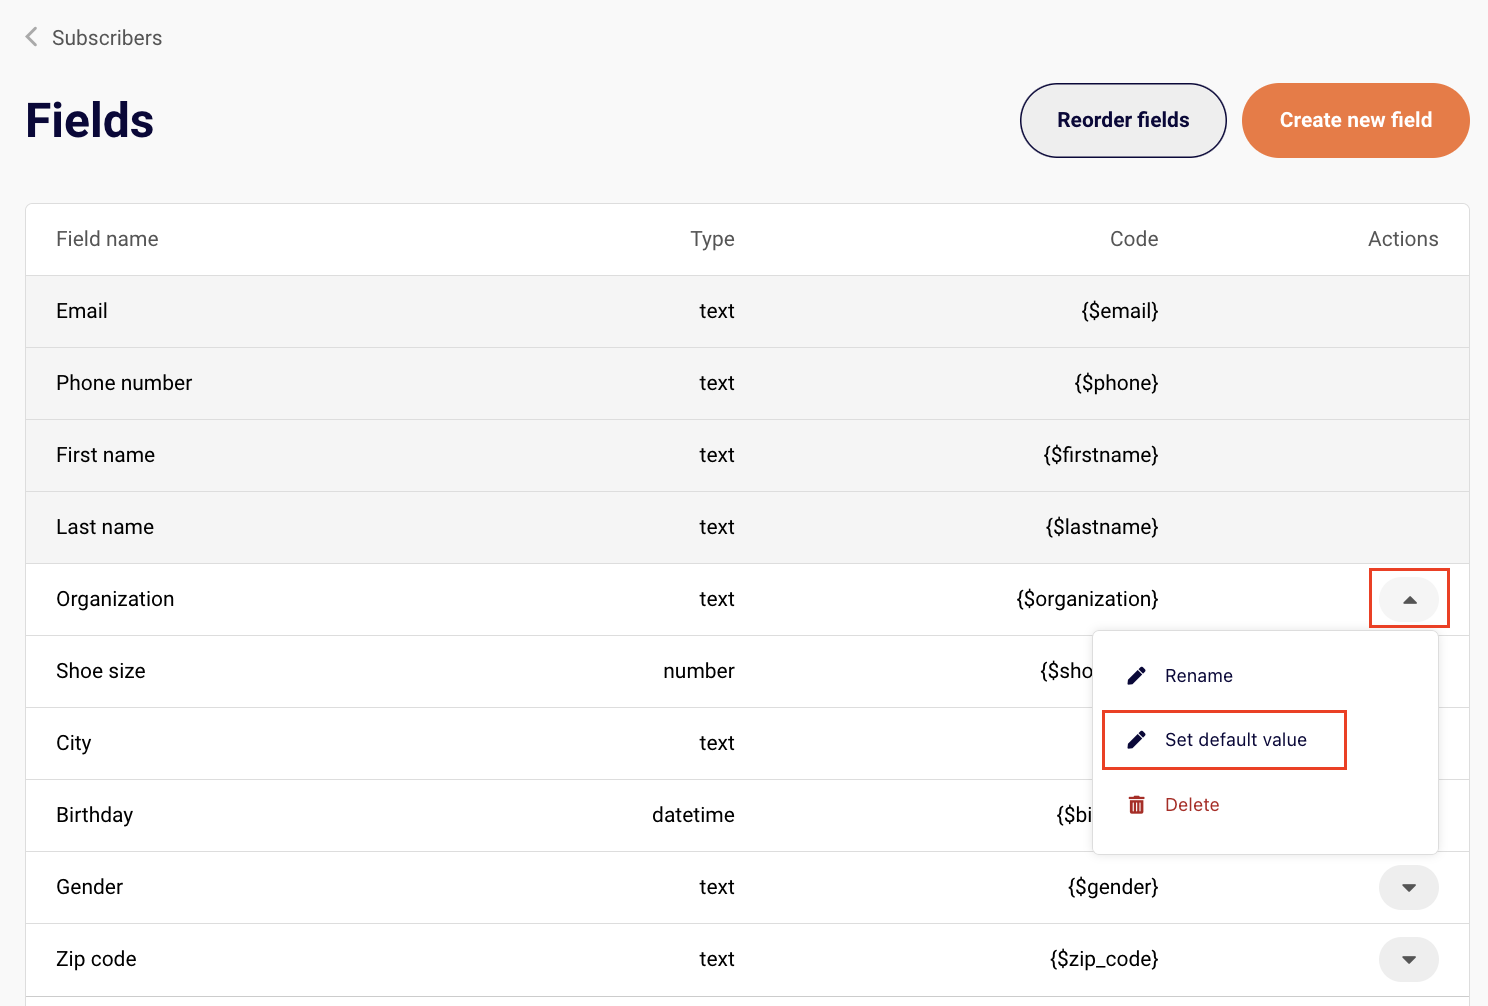
Head to “Subscribers” and select “Fields”.
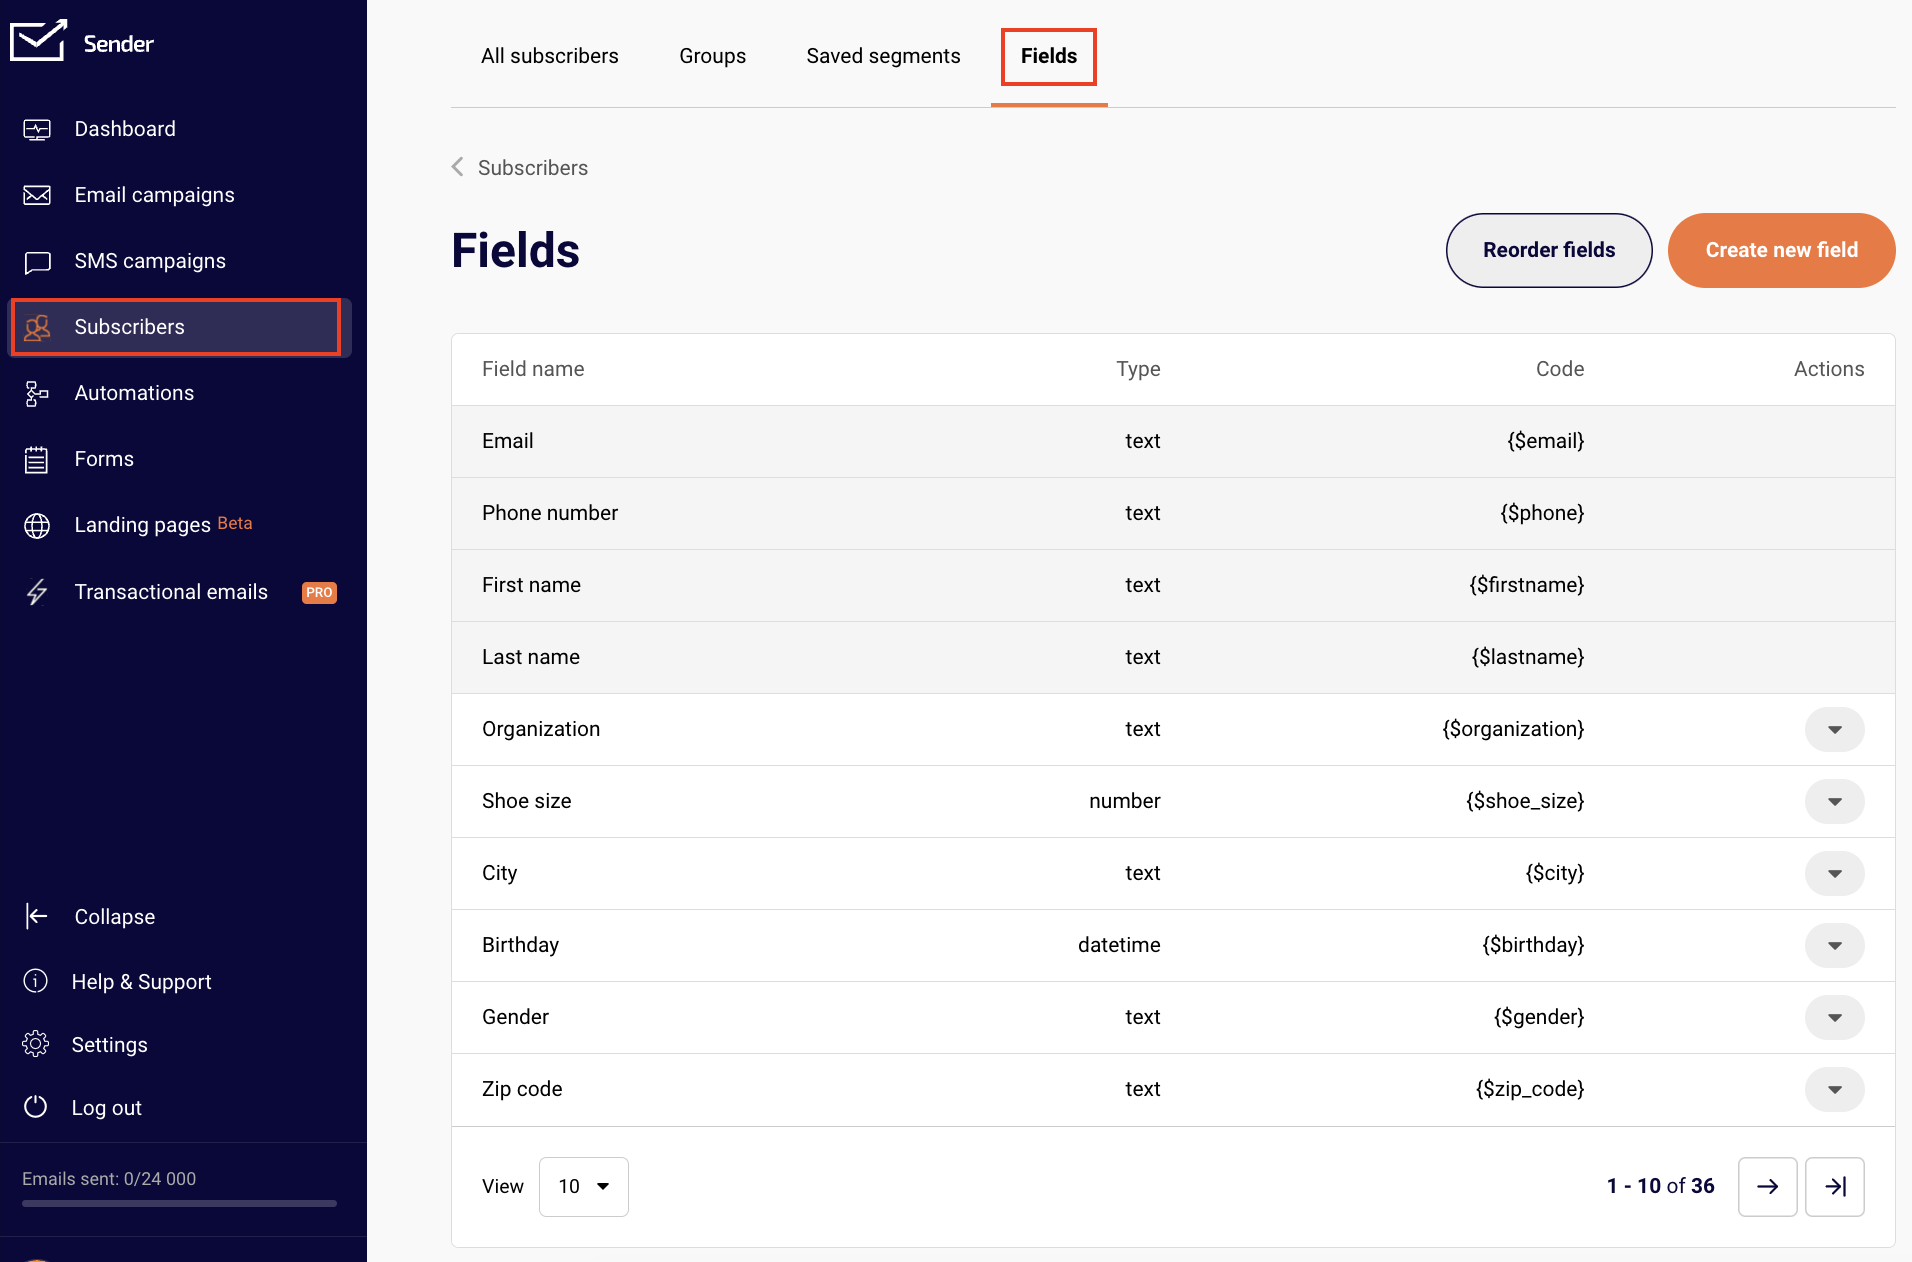
You will notice an arrow that opens a drop-down bar next to the custom fields. These are the custom fields that can have a default value.
To add the default custom field value, click on the arrow next to the intended field and select “Set default value”.
Type in the value you like and make sure to update the changes.
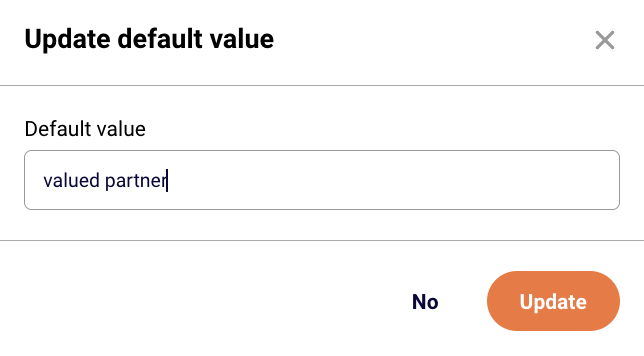
This value will now appear in the email or SMS campaign if the “Organization” custom field is included, but no information is available under a particular subscriber.
If you are unsure how to include a custom field in a campaign, click here to learn.
That’s it!
If you got stuck on a specific task or can’t find a way to execute a particular job, contact our support team via LiveChat or [email protected] – we’re here to help 24/7.