Blog

  • Edit image block

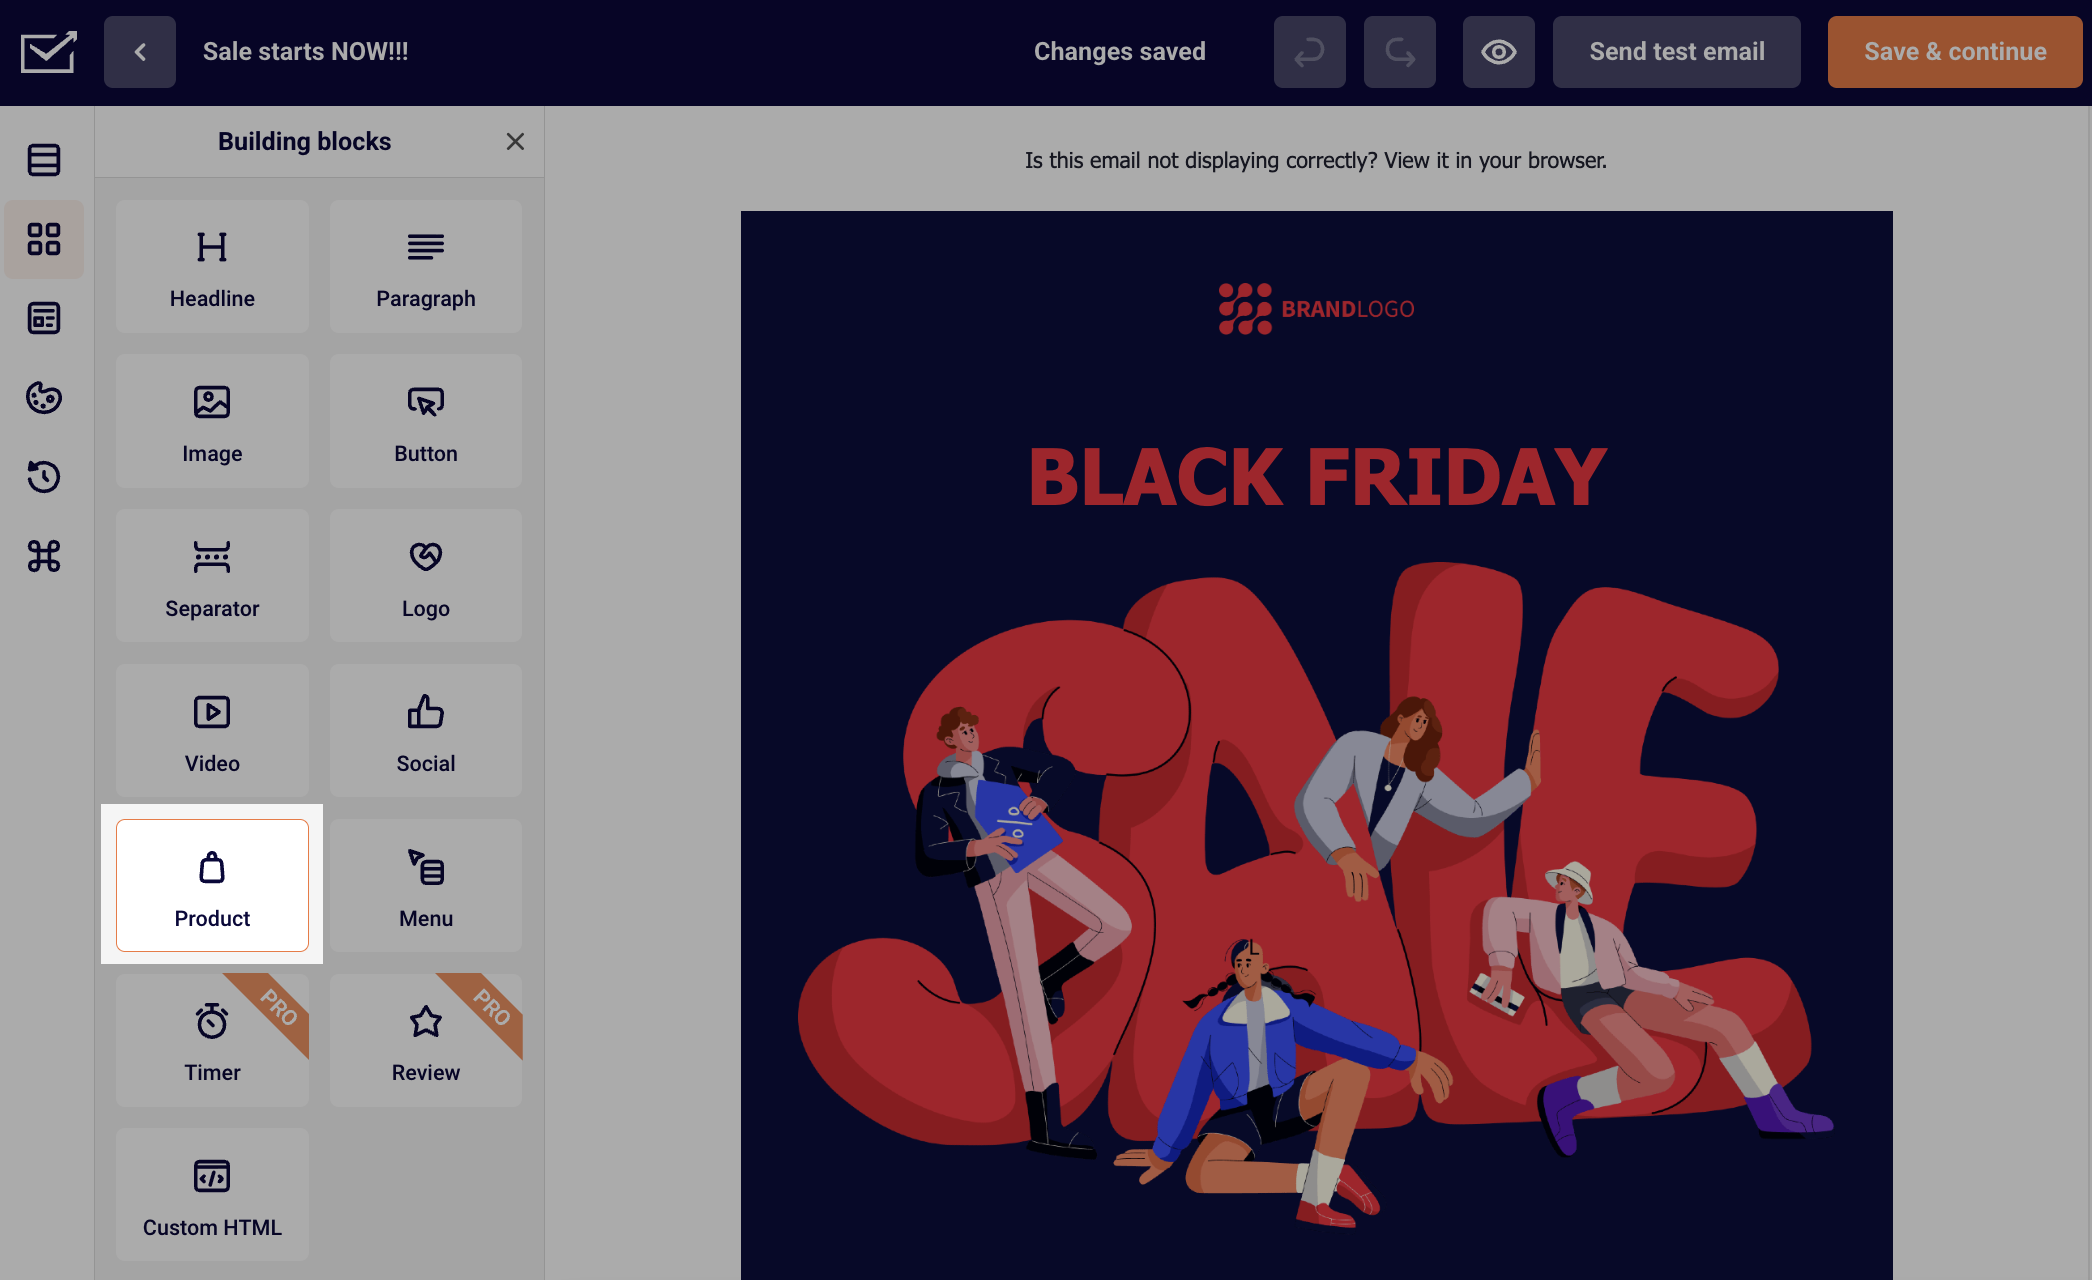
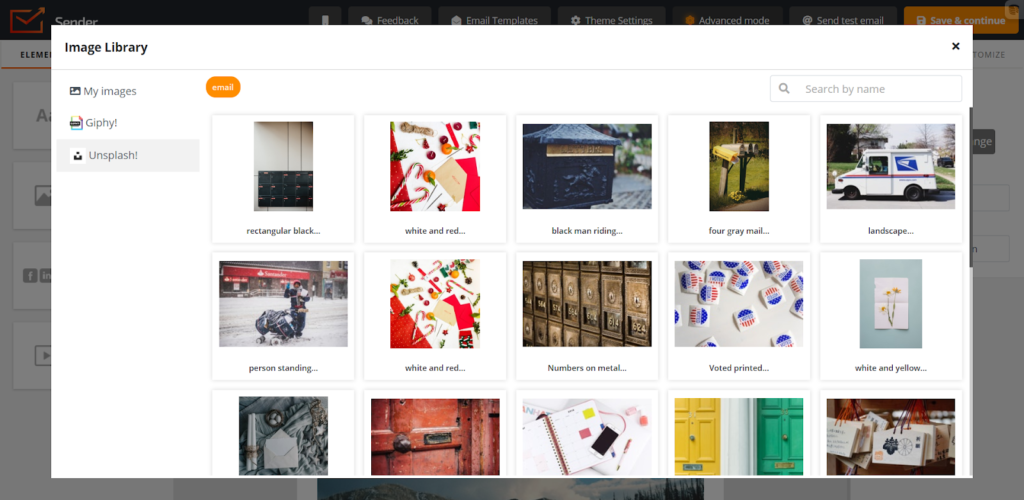
    Let’s start with uploading the Image. It’s pretty simple – after you drag the image element into the block, the image library will pop out.

    image import

    In order to import your own image, press ‘Browse’ on the left bottom corner or simply drop the image file to the upload section.

    By the way, the Image Library has integrations with ‘Giphy!’ and ‘Unsplash!’, you can also get images and GIF from them:

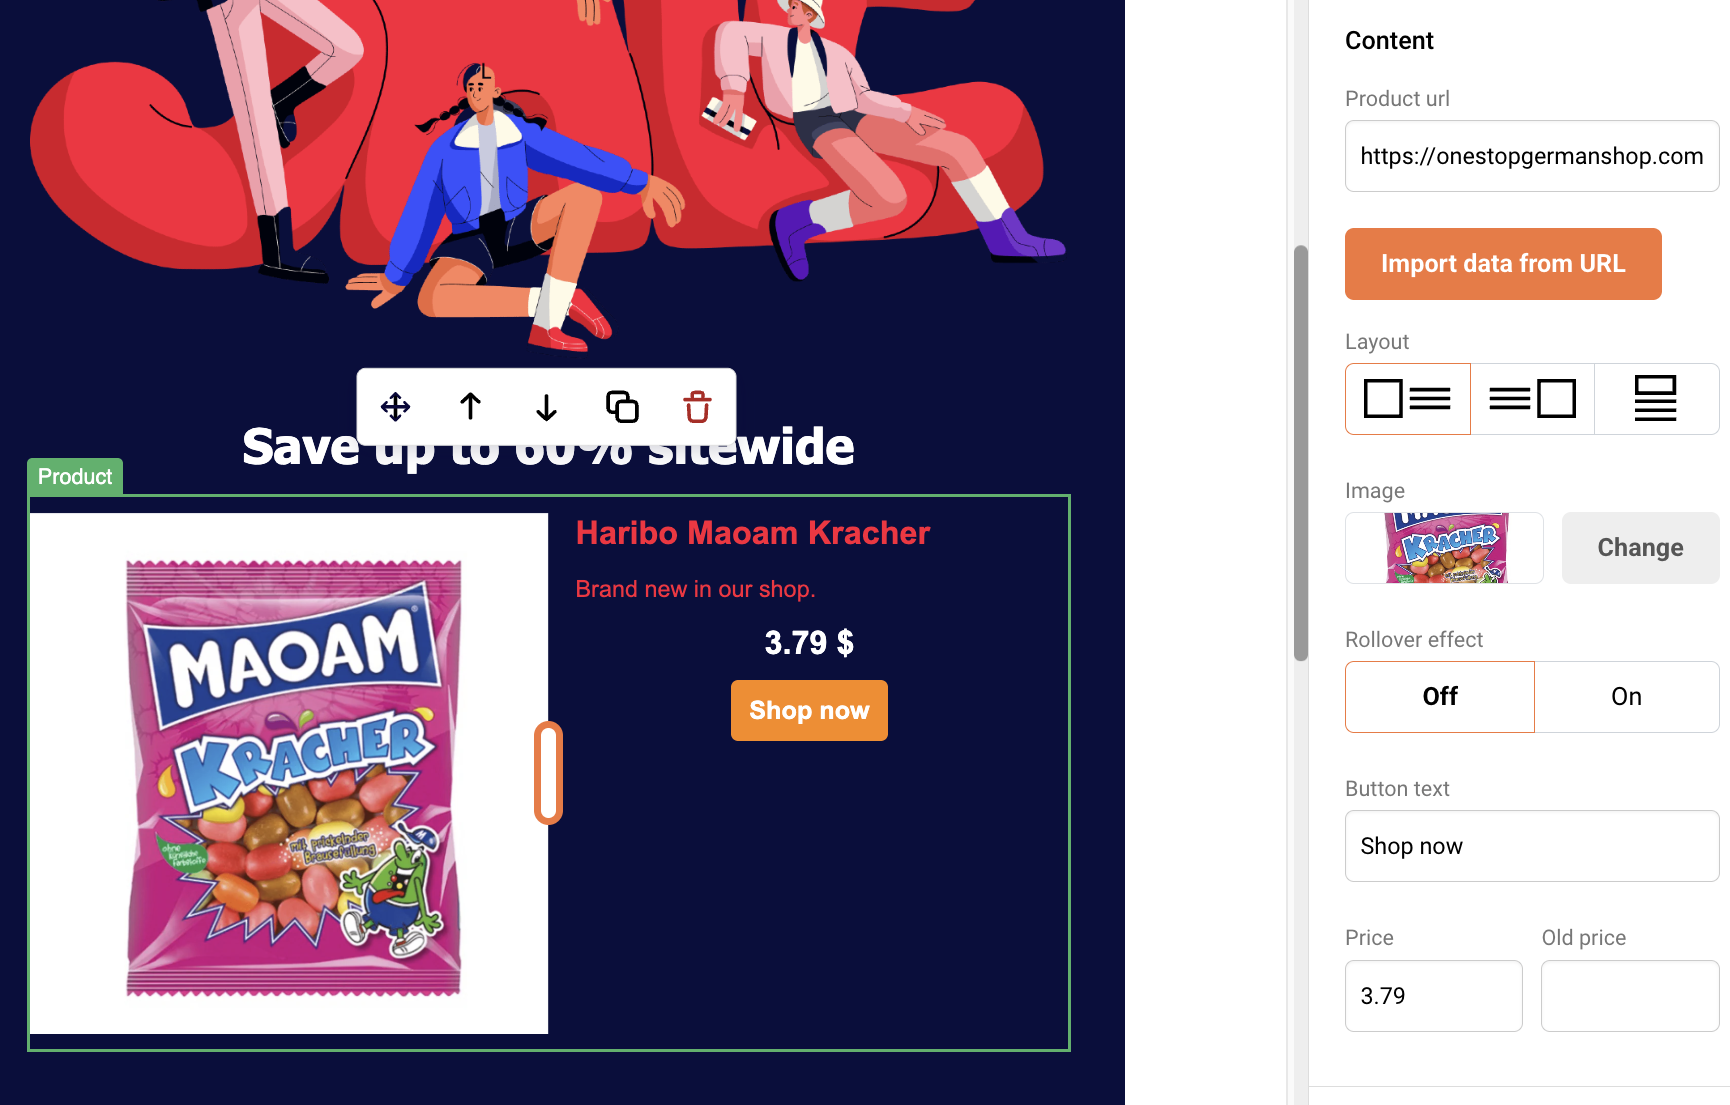
    After you’re done with uploading the image, there are two main ways to style it –  via the ‘Content’ and ‘Customize’ options.

    The content part consists of the ability to Replace the image itself, to change where it links to and to change the alternative text. The alternative text shows up when the mouse cursor is dragged on the image.

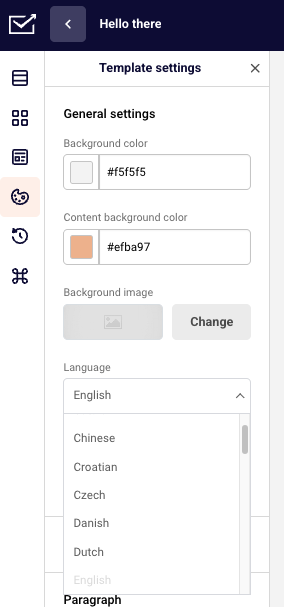
    The ‘Customize’ part has way more utility. You can adjust the image size, the corner type, and also the horizontal and vertical spacing in the block settings.

    image size

    If you got stuck on a specific task or can’t find a way to execute a particular job, contact our support team via LiveChat or [email protected] – we’re here to help 24/7.

  • Add “view in browser” link

    All the templates from our template library have the static block at the top that has the text ‘Is this email not displaying correctly? View it in your browser’. The content of the text in the templates cannot be changed but you are free to change the language and design. Click here to read more on how to do that.

    If you import your own HTML coded template and want to add a ‘View this email in your browser’ link. You can create a link in your HTML with the merge tag that is provided below:

    <a href=”[BROWSER_PREVIEW]”>
    ’Is this email not displaying correctly? View it in your browser
    </a>

    Keep in mind that the link ‘View this email in your browser can’t be tested in the HTML Builder, so simply send a test email to see if it works properly.

    That’s it!

    If you got stuck on a specific task or can’t find a way to execute a particular job, contact our support team via LiveChat or [email protected] – we’re here to help 24/7.

  • Add products with product block

    The product block is designed mainly for e-commerce clients but can be used by all. With product block, you can easily import items from any online store. The most significant part about that – no integrations are needed.

    Simply pick the product block and drag it to a particular section.

    When the block appears, copy the product’s URL from the online store and paste it into the “Product URL” field on the right side.

    When the URL link is the imported system will extract the following information:

    • Name
    • Image
    • Description
    • Price
    • Special price
    • Category
    • Currency
    • Quantity
    • Rating

    Each part of the product block can be modified individually in settings. Click on the block, and settings will appear on the right side. 

    In case of an error, please implement JSON snippets or Open Graph tags upon your products.


    If you are stuck on a specific task or can’t find a way to execute a particular job, contact our support team via LiveChat or [email protected] – we’re here to help 24/7.

  • Soft vs hard bounces

    An email bounce describes the non-delivery of your email message. There are two different types of bounced emails.

    Hard bounce indicates a permanent delivery issue to an address. It means that the email address is invalid and the email cannot reach the recipient’s mail server. Sender.net excludes hard bounce emails from any further campaigns automatically. The most common reasons for a hard bounce could be:

    • A domain name does not exist or is not active anymore.
    • Recipient’s email address does not exist.

    Soft bounce indicates a temporary delivery issue to an address. It means that the email address is valid and the email reached the recipient’s mail server. If the email address continues to soft bounce in the same campaign, in Sender.net, that email address (soft bounce)  is considered hard bounce after three attempts. The most common reasons for a soft bounce could be:

    • The receiver’s mailbox is full.
    • The mailbox is incorrectly configured.
    • Mailbox is inactive.
    • The recipient email server is down or offline.
    • An email message is too large.
    • The domain name does not exist.
    • Email messages blocked due to content.
    • Email message does not meet the recipient server’s policies.
    • Email message does not meet the recipient server’s anti-spam or anti-virus requirements.
    • Email message does not meet the recipient server’s sender requirements.

    Here’s full guide of Hard bounce vs Soft bounce in Emails (with Expert tips).


    If you got stuck on a specific task or can’t find a way to execute a particular job, contact our support team via LiveChat or [email protected] – we’re here to help 24/7.

  • Change link language and design

    Here’s how you can change the language of the unsubscribe and preview links.

    Go to Template settings and choose the language under General settings.

    As you can see there’re additional buttons to hide both of these links. However, to do so and be able to send out a campaign you’ll need to add this code: {$unsubscribe_text} to it.

    All of the supported languages:

    • Catalan
    • Chinese
    • Croatian
    • Czech
    • Danish
    • Dutch
    • English
    • Estonian
    • Finnish
    • French
    • German
    • Greek
    • Hungarian
    • Italian
    • Japanese
    • Latvian
    • Lithuanian
    • Norwegian
    • Persian
    • Polish
    • Portuguese (Brazilian)
    • Portuguese (Portugal)
    • Romanian
    • Russian
    • Serbian
    • Slovak
    • Slovenian
    • Spanish
    • Swedish
    • Turkish

    If the language you need is not in the list – you can send us proper translations to [email protected] and we will implement the language for you with no additional cost. The list below consists of sentences that we need you to translate:

    • Is this email not displaying correctly? View it in your browser.
    • If you want to unsubscribe, click here.
    • You have successfully unsubscribed.
    • From now on you won’t receive our newsletters.
    • Error occurred.

    That’s it!

    If you got stuck on a specific task or can’t find a way to execute a particular job, contact our support team via LiveChat or [email protected] – we’re here to help 24/7.

  • Define email marketing automation

    It may be a confusing term for those that are new to email marketing. But do not worry, the whole process is more straightforward than you think.

    In simple terms, email marketing automation is a futuristic-sounding name for a tool that takes your email marketing to a whole new level. It does so by making your campaigns more personalized and precise (time-wise). It simply converts usual manual steps taken into an automated system.

    Setting up automation is relatively easy – here is how it looks in progress:

    automation

    You can create multiple scenarios by implementing different steps and conditions.

    That’s it!

    If you are stuck on a specific task or can’t find a way to execute a particular job, contact our support team via LiveChat or [email protected] – we’re here to help 24/7.

  • Choose a starting trigger

    Automation workflows allow you to create thousands of scenarios for sending automated emails without lifting a finger. Nevertheless, every automation sequence must start with a trigger.

    When creating a new automation workflow, you will be presented with different starting triggers:

    • A Date. For example, you have the  ‘last purchased’ date as a custom field next to each subscriber and want to start a Win-Back Customer email series. In order to activate date trigger subscriber’s custom field must have “date” type selected.
    • An Anniversary Of A Date. Perfect for sending Birthday cards or for any other anniversary date. For this trigger, you need to have a defined date custom field information for each subscriber. The system will require date formatting and automation will start each year automatically.
    • Subscriber Added to a Group. This automation workflow will start when a subscriber gets added to a certain subscriber group via a subscription form or an API call.
    • Subscriber Is Removed From a Group. The automation will start whenever the subscriber is removed from a defined group via an API call or a separate automation workflow. Manually removing subscribers will not trigger the automation.
    • A link Is Clicked. Automation would start its first action whenever a subscriber clicks on a specific defined link. It might be a link to a particular product or any other link used in previous campaigns. After subscribers click on the link, they automatically participate in a secondary automation sequence which starts after the “A link is clicked” trigger.
    • Cart Is Abandoned. Abandoned cart reminders might be a great source of revenue. It starts the automation workflow once a cart is abandoned. Send them emails, add them to tailored-made groups, and get notified if a cart is recovered. This requires integration with e-commerce!
    • A Product Is Purchased. Send customers Thank-you letters, post-purchase feedback requests, or get notified when somebody buys your product or service. This requires e-commerce integration!
    • An API Call Is Made. Start the automation with any of your system’s events. Send an API call from any other system or program and start the automation.
    • Subscriber unsubscribed. Start the automation if any of your subscribers unsubscribes. It can be used to notify yourself about this occasion, move subscribers to a certain group, remove them from future messaging, and even send a confirmation email to the subscriber acknowledging their decision to unsubscribe.
    • Subscriber field updated.  Start the automation sequence when any of the chosen fields receives new information.

    Note: Automation is triggered according to the account’s time zone. If you’re facing any delays, please double-check the time zone set in your account settings. 


    If you got stuck on a specific task or can’t find a way to execute a particular job, contact our support team via LiveChat or [email protected] – we’re here to help 24/7.