Author: admin

  • Create abandoned cart email

    Go to Automations -> Create new workflow. An automated abandoned cart email can be created by choosing the “A cart is abandoned” trigger. Then you should add a delay. Next, select the newsletter template called “Abandoned cart”. This template can be customized as needed – simply leave the section with {$cart_contents} script.

    However, don’t forget to activate the workflow – otherwise, it won’t work. Click on “Activate” button when you’re done.

    Here’s how the whole process looks in motion:


    Note: Abandoned cart trigger requires integration with your WordPress or Shopify ecommerce shop.


    If you are stuck on a specific task or can’t find a way to execute a particular job, contact our support team via LiveChat or [email protected] – we’re here to help 24/7.

  • Create a popup form

    In order to create a popup form click “Forms” in the main menu bar. Then click “Create a new form” and you will be presented with different form options:

    • Embedded form
    • Popup form

    In this case, choose the Popup form.

    Popup forms

    Creating a popup form is an easy process. Once you click on “Create new popup”, you will have a few templates to choose from. Pick one and click on it. You will have an option to change the layout at the design editor if you change your mind.

    In this case, we picked “treat yo self” template – editing the popup form is practically the same process as creating an embedded form. It has the same design options and general settings. Click here for a tutorial on these options.

    In the Behaviour section, you can set up when you want your pop-up to appear on your website.

    Behavior settings lets you:

    • Set a timer when the popup will appear
    • Show form only when a user scrolls through a specific percentage of the page.
    • Enable the popup when a user is trying to leave the page.
    • Choose the popup to appear when a customer clicks on a particular web element.


    Frequency:

    • Set the period when you want to show the popup to the same user again if he or she didn`t subscribe.

    Schedule:

    • Set the timing of your pop-up in advance (set a particular date frame).

    Visibility:

    • Set pages and/or devices on which to show the pop-up form.

    After the subscription form is fully designed – click the “Save and continue” button on the top right side. After that, you will be taken to the final tab. Here you will find the form’s script, which must be embedded into your web page.

    You can access the form’s activity panel by clicking on the “Overview” button in the “Forms” section.

    Note – the form’s modifications will not change the script code. Therefore, you don’t need to re-implement the subscription form’s code after editing. Simply save the latest progress on our platform, and changes will be reflected on your web page.

    WordPress website owners can implement popups using plugin integration. Click here to learn more.

    That’s it!

    If you are stuck on a specific task or can’t find a way to execute a particular job, contact our support team via LiveChat or [email protected] – we’re here to help 24/7.

  • Create an Embedded Form

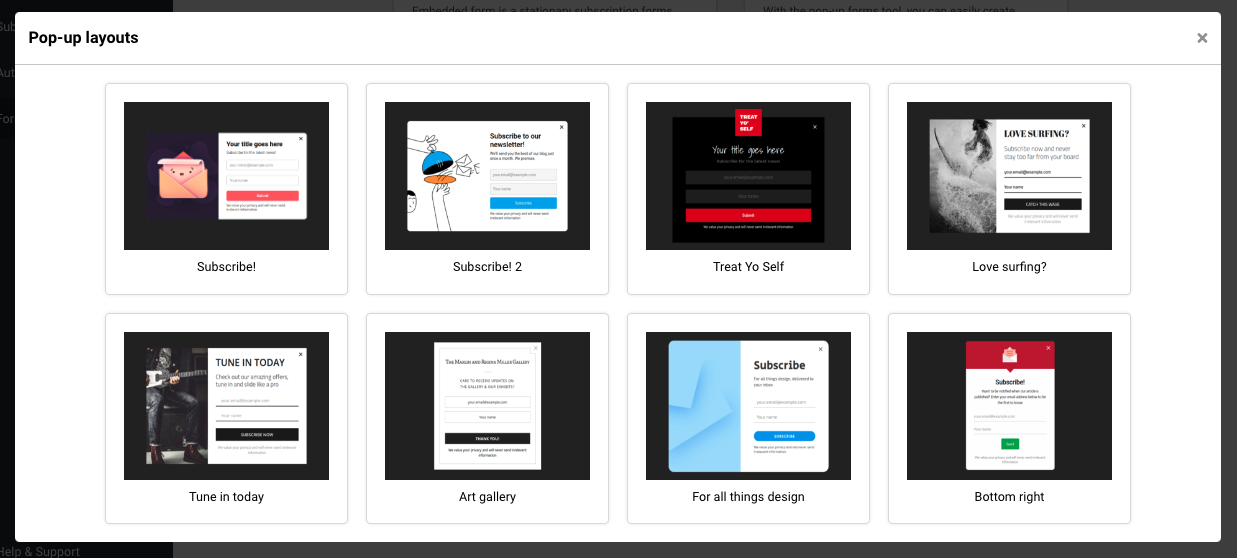
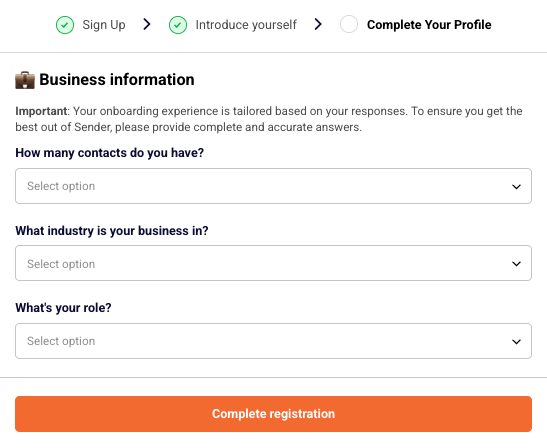
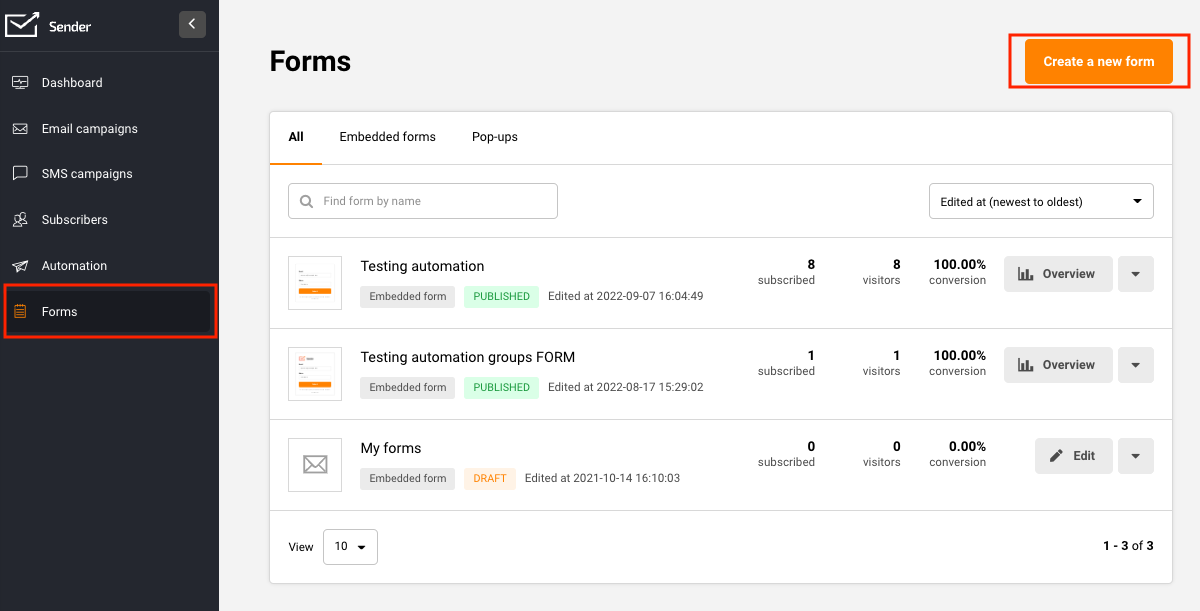
    In order to create a form, click ‘Forms’ in the main menu bar. Then click “Create a new form”. After the last step, you will be presented with different form options:

    • Embedded form
    • Popup form

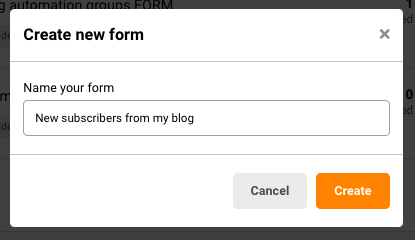
    Then name your form and click “Create”.

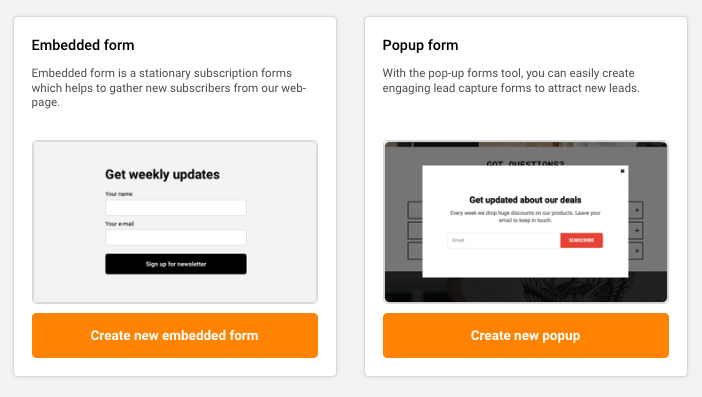
    In this particular case, choose the Embedded form.

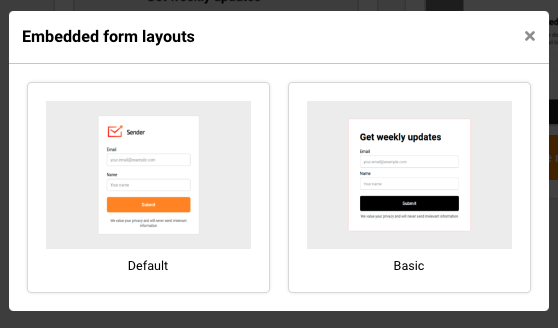
    Choose between Default and Basic layout.
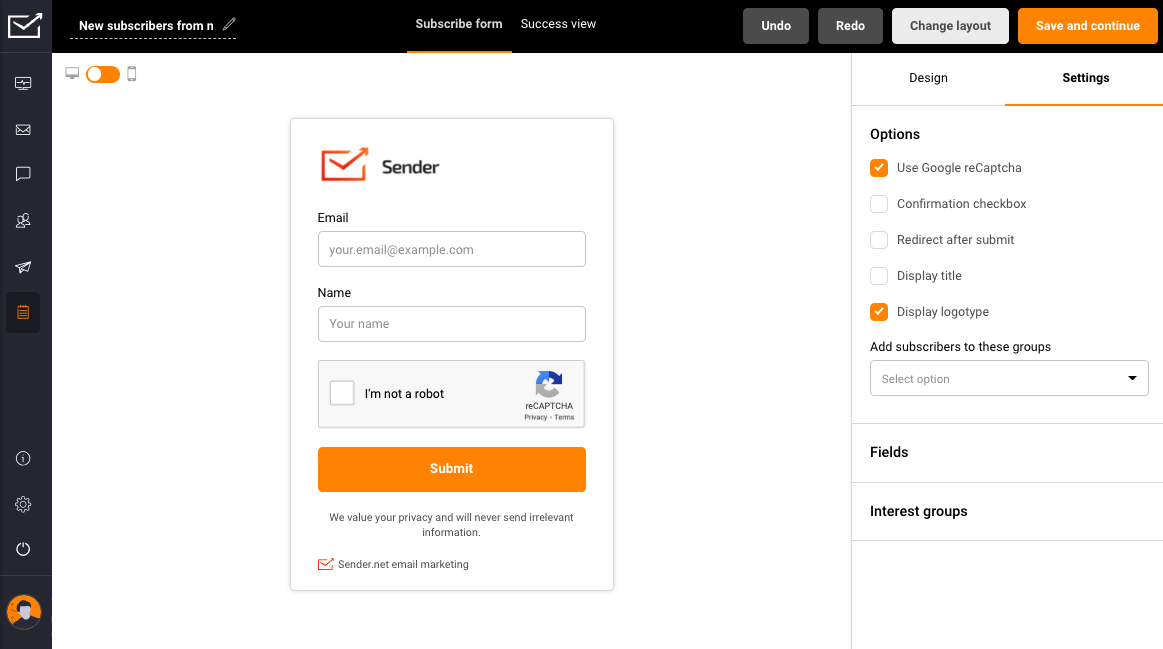
    Embedded form

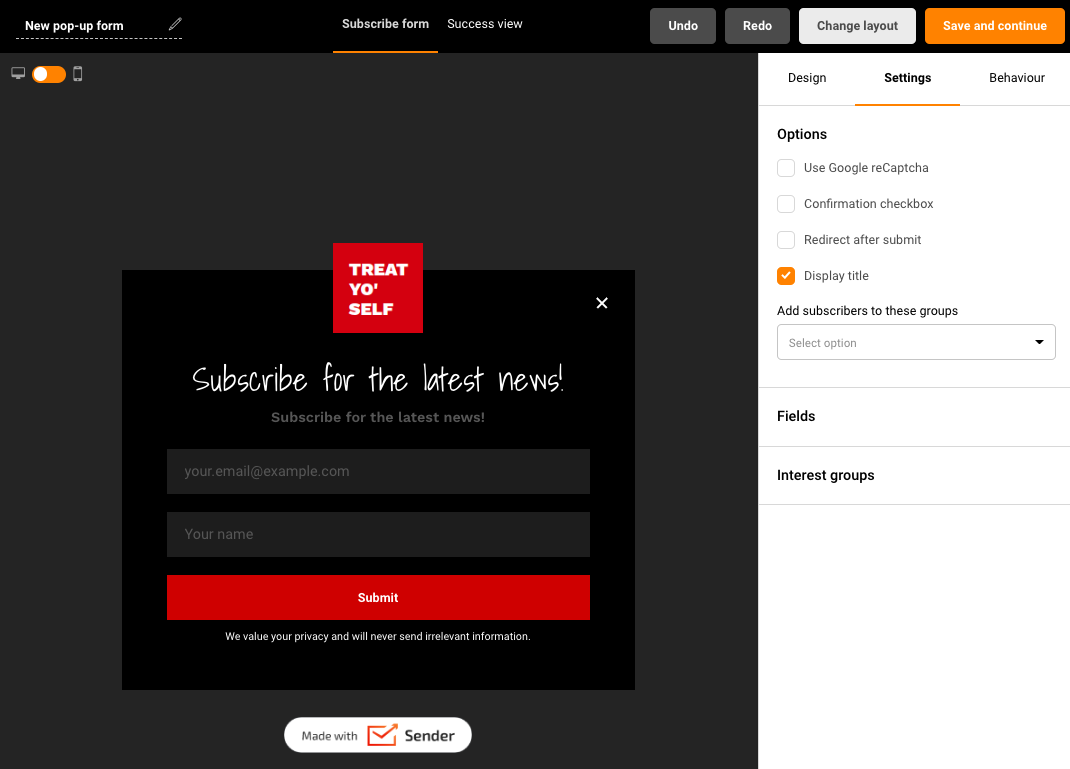
    Creating an embedded form is a simple process. Firstly, you will need to set up the design. The subscription form is fully customizable – each element can be changed and modified according to your needs. Furthermore, the subscription form can have additional pieces like reCaptcha for security, a confirmation checkbox for GDRP requirements, and other options.

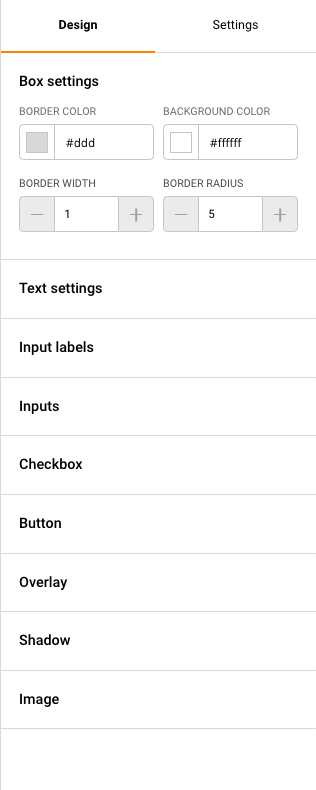
    Design settings offer a variety of different options. Each element is completely customizable:

    • Box settings
    • Text settings
    • Input labels
    • Inputs (fields, e.g. name, surname)
    • Checkbox
    • Button
    • Overlay
    • Shadow
    • Image

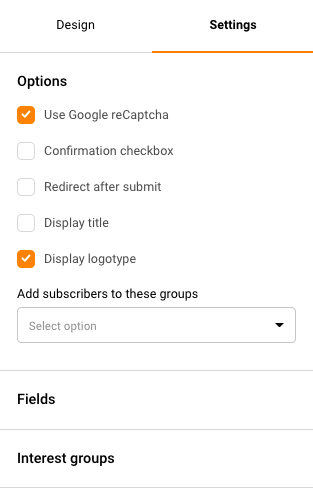
    Second tab is responsible for additional form’s features, like:

    • ReCaptcha – Spam prevention.
    • Confirmation checkbox – usually used for GDPR compliance.
    • Redirection – custom redirection after subscription.
    • Choose whether you want to display the title and logo.

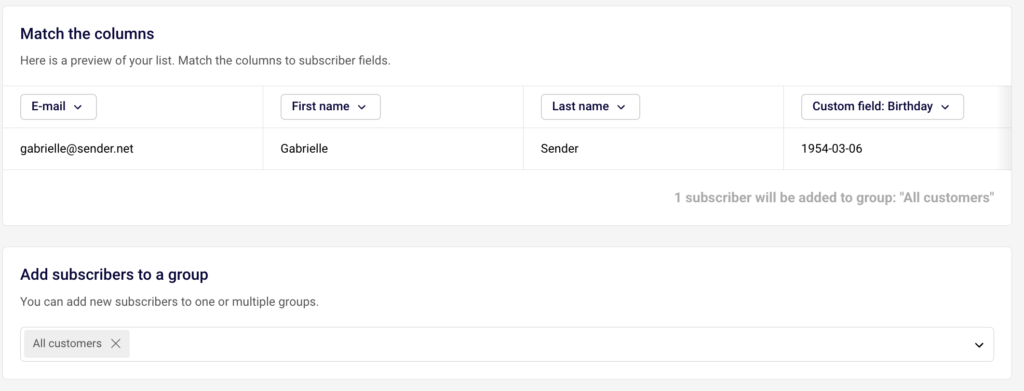
    The fields section is used for adding custom fields. These fields are imported from the general fields section (Subscribers -> Fields), although light edits can be done here.

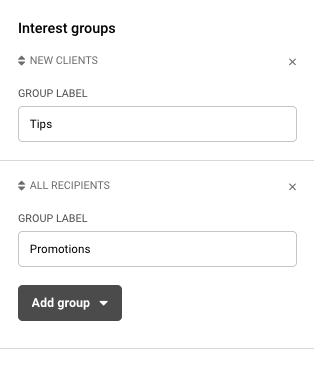
    Interest groups are used let subscribers decide what type of content they might be interested in. They can do so by ticking a box in the form.

    In the image below, you will see what the basic subscription form with a few additional changes looks like.

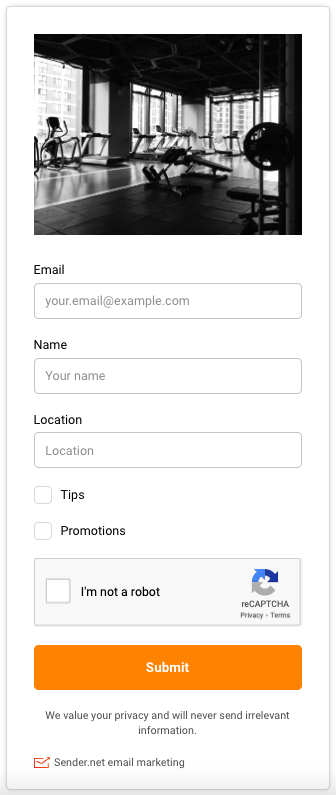
    New recipients will be assigned to a group/groups which they selected upon signup.

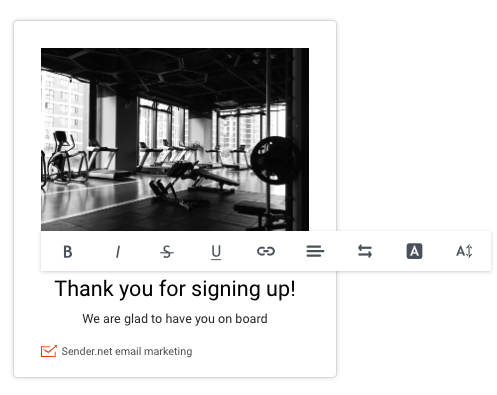
    Furthermore – the thank you page can be customized. Click on the “Success message” button at the top and start editing text by clicking on it. This banner will be shown to new subscribers after submitting the information.

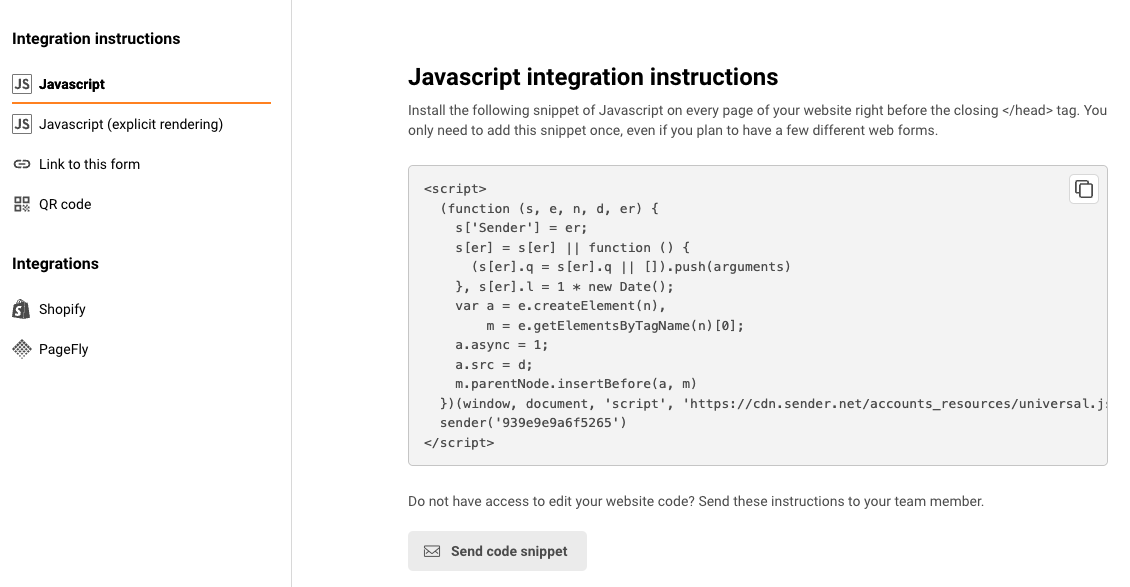
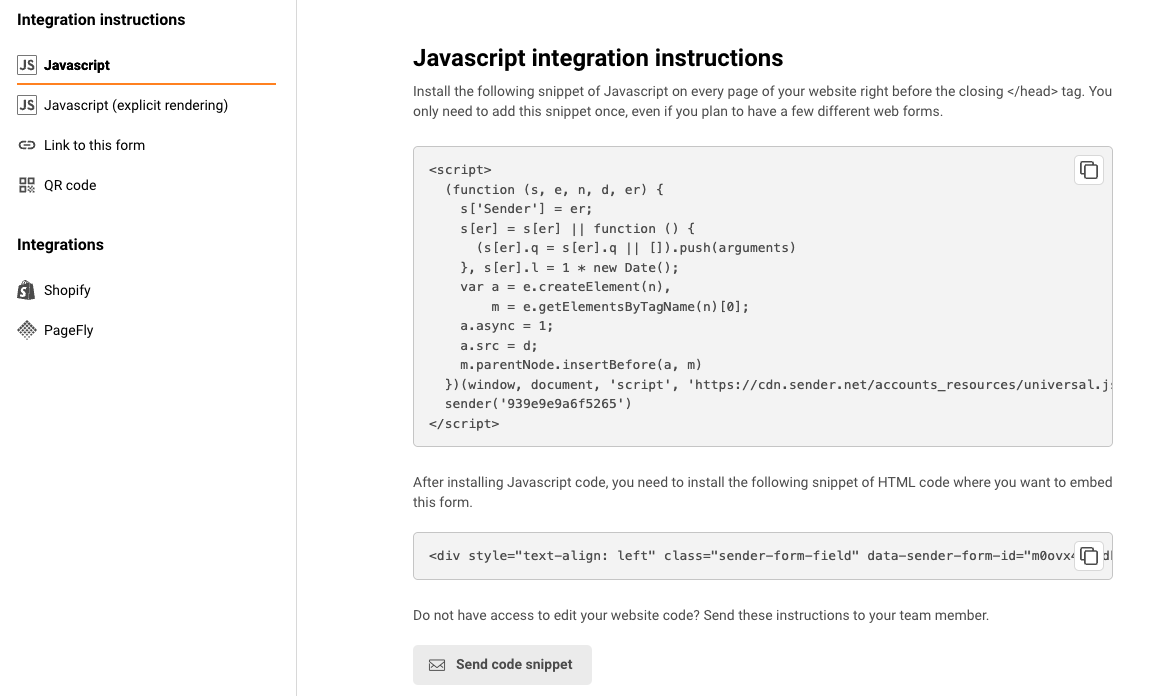
    After the subscription form is fully designed – click the “Save and continue” button at the top right side. After that, you will reach the final tab. There you will find the form’s script (the embedded forms have two script parts), which must be embedded into your web page.

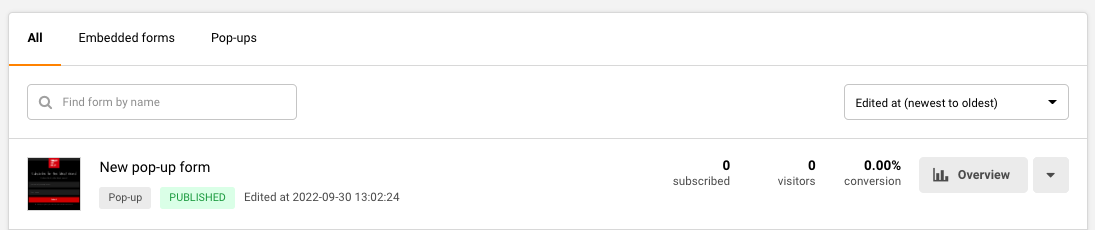
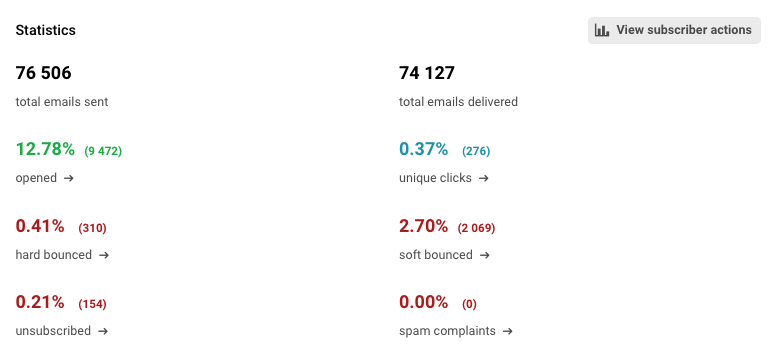
    The activity window can be accessed by clicking on “Overview” button in the forms section.

    Note – you don’t need to re-implement the subscription form after any applied modifications. It will be automatically updated after being saved.

    WordPress website owners can implement subscription forms and popups using plugin integration. Click here to learn more.

    That’s it!

    If you are stuck on a specific task or can’t find a way to execute a particular job, contact our support team via LiveChat or [email protected] – we’re here to help 24/7.

  • Start building a workflow

    First, you will need to pick a trigger and then start creating a required sequence (newsletters must be created within the automation’s workflow). Start by creating a simple welcome email to greet recently joined subscribers.

    This short video guide below will illustrate the whole process and how easily it can be done.


    All automated workflows are composed of different types of action steps. When a particular step is completed, the subscriber will continue moving to the next one. Sophisticated scenarios are easily created using different action and condition steps.

    Creating large and powerful customer journeys to win-back customers should be a necessity. It’s easy to remind people about their abandoned carts and/or automatically manage subscribers’ lists based on their previous activity.

    A brief illustration how such sequence could look.


    If you got stuck on a specific task or can’t find a way to execute a particular job, contact our support team via LiveChat or [email protected] – we’re here to help 24/7.

  • See non-openers list

    Of course, the easiest way to do that is by going to the Campaigns section and clicking on the “View Reports’ button. Then you will be taken to the reports section, next click on “Subscriber actions” and select the “Unopened” tab.

    From here on you will be able to export, view/edit individual subscribers who did not open this particular campaign.

    That’s it!

    If you got stuck on a specific task or can’t find a way to execute a particular job, contact our support team via LiveChat or [email protected] – we’re here to help 24/7.

  • How does ‘Google Analytics’ work?

    In a nutshell, UTM Parameters are tags that you attach to the end of a URL in order to track each click of a link. Once you enable google analytics, the system will automatically add UTM parameters to the links within the campaign.

    There are three types of UTM parameters you can choose from to help you track the traffic. Each one has its own purpose:

    • utm_campaign – indicates the campaign with a certain URL. Sender.net makes the subject line the default identifier.
    • utm_source – identifies the source of your traffic. The default identifier is a username you use on the Sender platform.
    • utm_medium – specifies the medium. In Sender, the default medium is email.

    The UTM parameters can be found in the “Settings” section on the “Account Information” tab. There you can see what the assigned values are. If there is a need to change them, it can be done in the same section by editing the table of the default UTM parameters provided above.

    Here is an example of the youtube.com’s URL and the UTM parameters in it:

    Next time you log into your Google Analytics you will be able to see these statistics.


    If you are stuck on a specific task or can’t find a way to execute a particular job, contact our support team via LiveChat or [email protected] – we’re here to help 24/7.

  • Understand bounce statistics

    First of all, it is crucial to know about hard and soft bounces to be able to fully understand reports. If you don’t know what bounces are, please read the Soft vs Hard bounces article.

    Let’s assume this report is of a campaign you have previously sent.

    There are 76 506 sent emails. The report shows that 0.41% (310) of your emails have hard-bounced and 2.70% (2 069) have soft-bounced. So, the remaining email addresses that have successfully received your campaign are 74 127.

    The open rate percentage is calculated from the successfully reached email addresses, in this case from 74 127 email addresses. This is intentional as the user should focus on the relevant open rates for the valid email addresses.

    That’s it!

    If you got stuck on a specific task or can’t find a way to execute a particular job, contact our support team via LiveChat or [email protected] – we’re here to help 24/7.

  • Getting Started with Sender

    Getting started is easier than you think – we managed to shorten registration process by a mile!

    Let’s start by signing up for a free plan. You can start by clicking here – next you will be brought to a registration page. Fill in the business email address, company name and create a password.

    Next, enter your first name, last name and website URL.

    Now enter your business address, choose the timezone and phone number.

    Lastly, answer three quick questions to let us know more about your business.

    Registration part is over!

    Now login to your account and the dashboard tab will open a list of steps you should finish to complete the setup of your account.

    The dashboard will have a walkthrough marker that guides you through the initial setup. You will learn how to verify domain addresses, manage subscribers, read reports etc.

    Let’s continue by completing the steps:

    Complete registration step will be completed after successful registration.

    Verify email address is pretty self-explanatory – you will need to enter your email address below and click on the confirmation email when it arrives in your inbox.

    This step requires domain’s verification, click here for the guide. 

    Sending a first campaign will complete the  step. Dedicated campaign management guide be found here

    Subscribers import can be done in a few ways – click here for the guide.

    To finish this step, a report must be viewed – a dedicated guide on the report section is found here.

    That’s pretty much it! When steps are complete, you will understand how the platform works and where different features are located.


    If you are stuck on a specific task or can’t find a way to execute a particular job, contact our support team via LiveChat or [email protected] – we’re here to help 24/7.

  • Import subscribers and supported files

    Subscribers can be imported via file import, copy/paste method, API call. Let’s start by opening the Subscribers’ section and clicking the “Add subscribers” button.

    After the button is clicked, the import section will appear. Here we must choose how we’re going to do that:

    • Via file (xlsx, txt, csv)
    • Import manually (Copy & Paste)
    • Import from MailChimp
    • Import from GetResponse

    Next, when the subscriber’s list is imported, you will be asked to attach custom fields; for example, recipients’ names must be assigned to the “First name” column, last name to “Last name”,  phone number to “Phone” and so on.

    After the columns are marked and selected click on start import button and subscribers will be imported.


    If you are stuck on a specific task or can’t find a way to execute a particular job, contact our support team via LiveChat or [email protected] – we’re here to help 24/7.

  • Delete unsubscribed or bounced

    If you need to delete the unsubscribed or bounced email addresses, you can do that with a few clicks. First, go to the subscriber’s section, then click on “Email status” button and select “unsubscribed” or “bounced” when the option is selected, you will be presented with all unsubscribed and/or bounced recipients. 

    Next, select all filtered recipients and click on “Action” button and hit delete.


    If you got stuck on a specific task or can’t find a way to execute a particular job, contact our support team via LiveChat or [email protected] – we’re here to help 24/7.