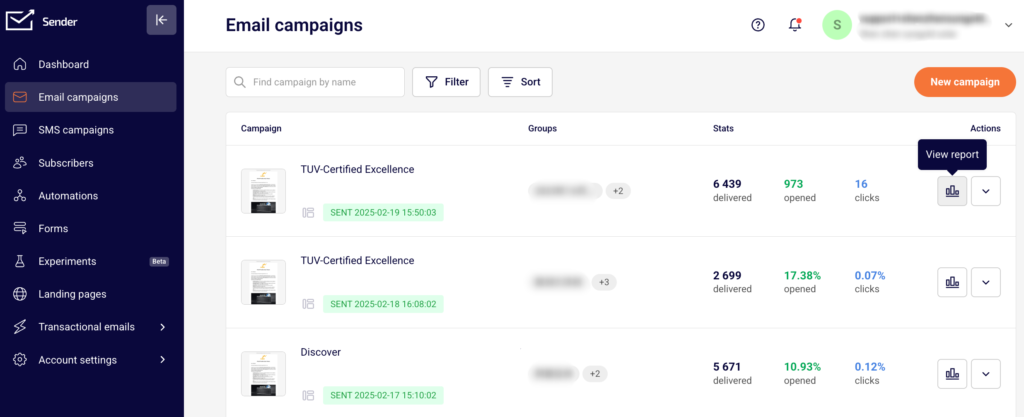
Author: admin

  • Create automated welcome email

    Start by heading to the ‘Automation’ section and then clicking on the ‘Create new workflow’ button at the top. Next, you will need to select a trigger that will begin the whole automated sequence. In this case, we’ll pick the “Subscriber added to a group ” trigger, which means added subscribers will activate automation’s flow.

    After selecting the trigger, add an email step and create the “Welcome” email. That’s enough for the basic welcome email; however, you can add as many steps as you want.

    In the video below, you will see a few additional steps being added, like delay, condition, and action (can be based on previous activity). In our case, subscribers that opened the welcome email will be assigned to different groups/lists.

    Here’s a short video-guide to illustrate the process:

    That’s it!

    If you got stuck on a specific task or can’t find a way to execute a particular job, contact our support team via LiveChat or [email protected] – we’re here to help 24/7.

  • Delete Sender account

    In order to delete the account, click on “Settings” section tap on “Delete account” button on top.

    That’s it!

    If you got stuck on a specific task or can’t find a way to execute a particular job, contact our support team via LiveChat or [email protected] – we’re here to help 24/7.

  • Find active vs unique

    The dashboard section holds several shortcuts. The subscription plan counters’ block is one of them. There is also a table with active subscribers, unique subscribers, and sent email counts.

    Another place where unique and active subscribers can be found is the billing section. Simply go to Settings -> Billing.


    If you got stuck on a specific task or can’t find a way to execute a particular job, contact our support team via LiveChat or [email protected] – we’re here to help 24/7.

  • Verify sending domain ownership

    Domain verification allows us to improve deliverability and it’ll only take a few minutes to do. Here is a comprehensive tutorial on the matter.

    First, open the dashboard and click on “Settings,” then open the Domains tab and click “Add domain”.

    Next, you will need to enter your domain name and associated email address. When these fields are submitted – the confirmation email will be delivered to your email address. 

    What should I do if I don’t receive domain verification email?

    Firstly, please check all the inbox folders – sometimes, the confirmation email ends up in a separate folder, e.g. spam, promotional and etc. If that’s not the case – you should alter the inbox filtration settings by making an exclusion for emails that come from “sendersrv.com”.


    If you still struggle with domain verification – contact your support team via LiveChat or [email protected] – we’ll help you with verification. We’re ready to help 24/7.

  • Manage email campaigns

    Campaigns

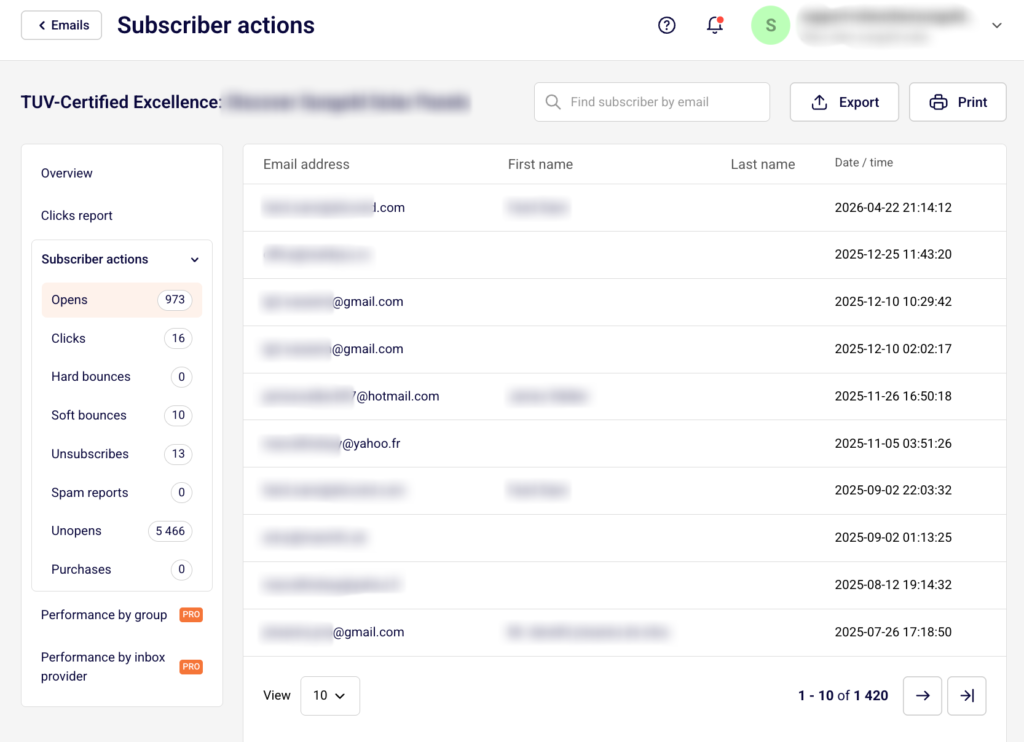
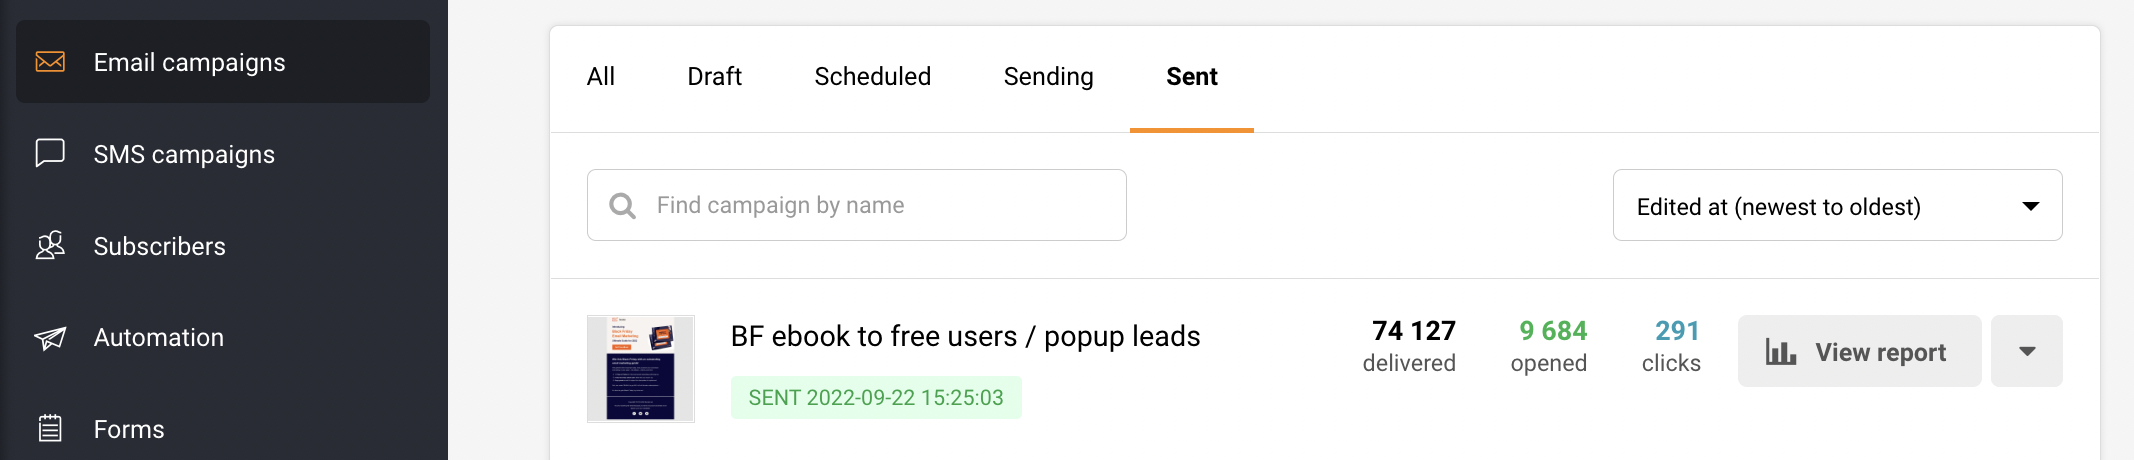
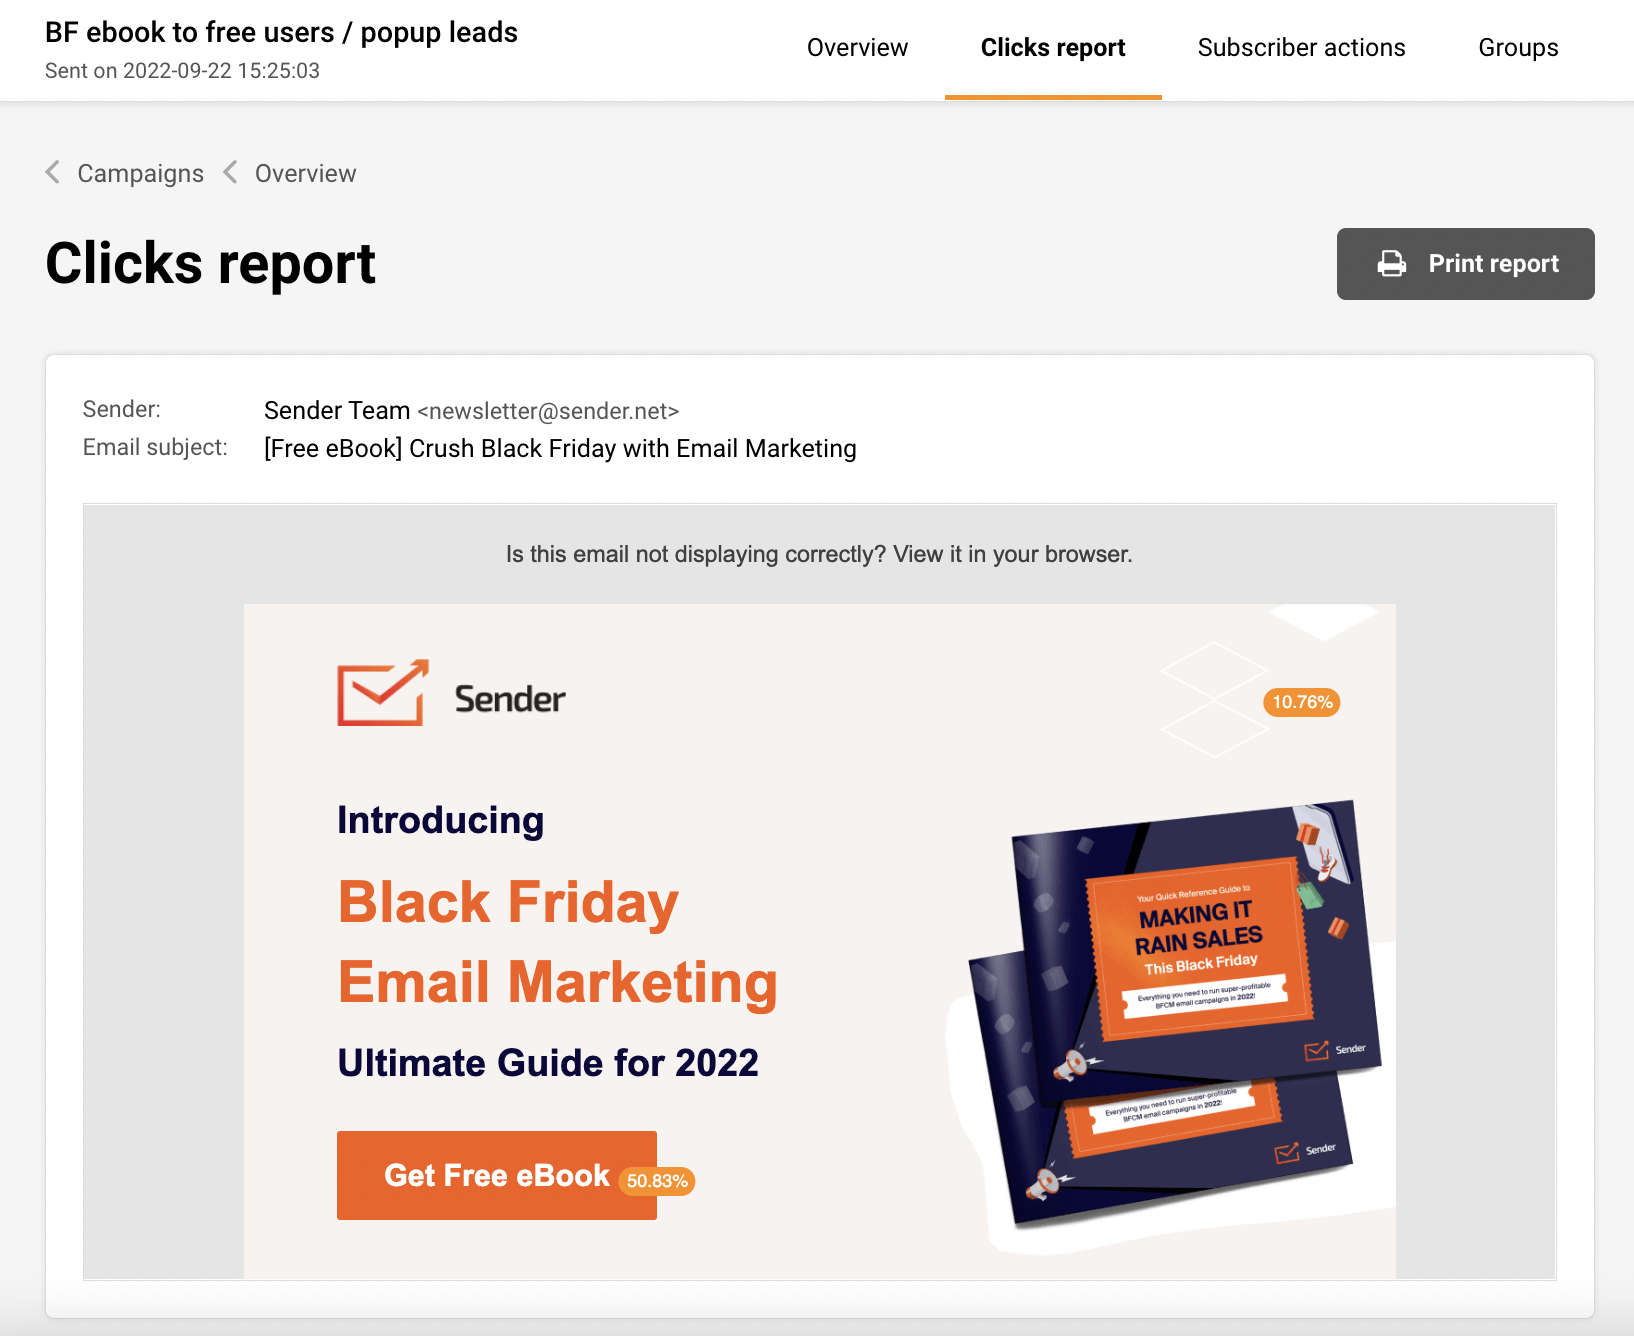
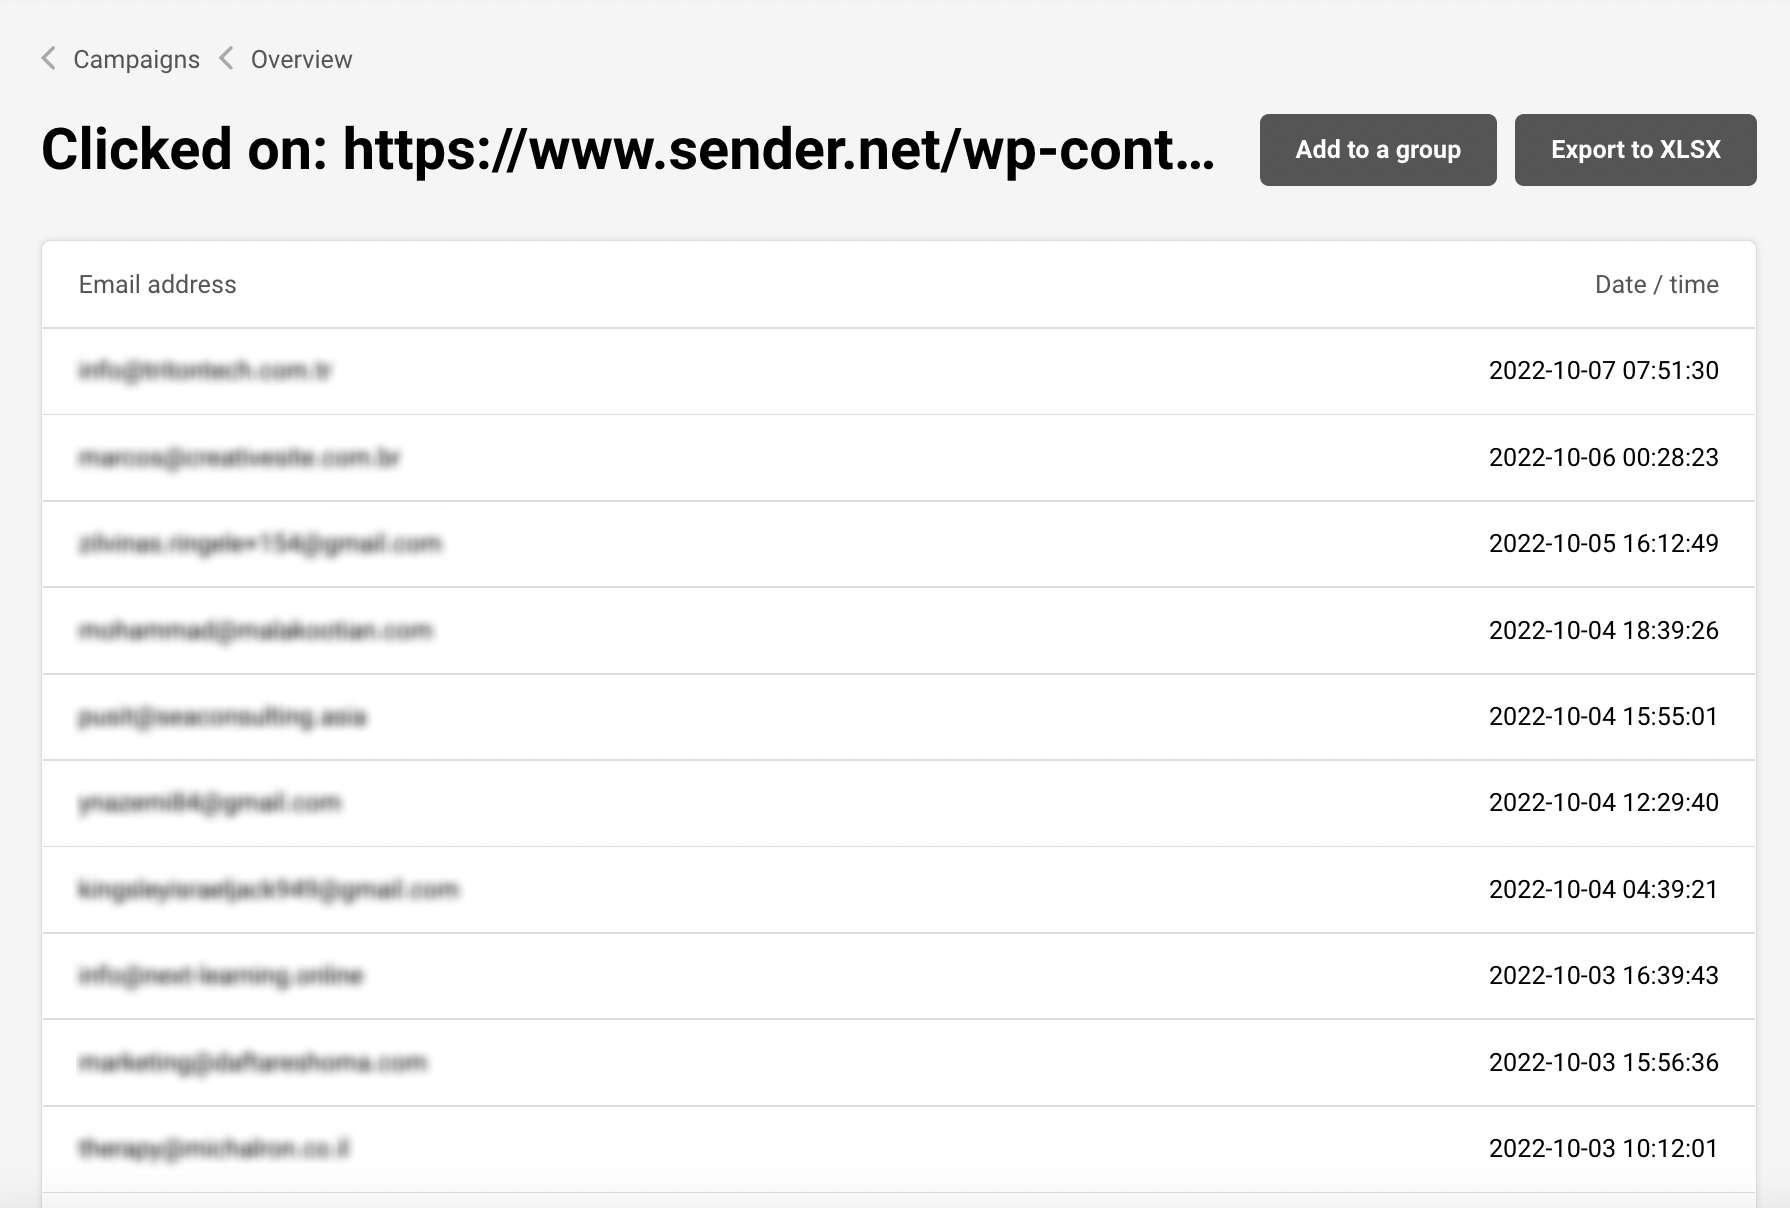
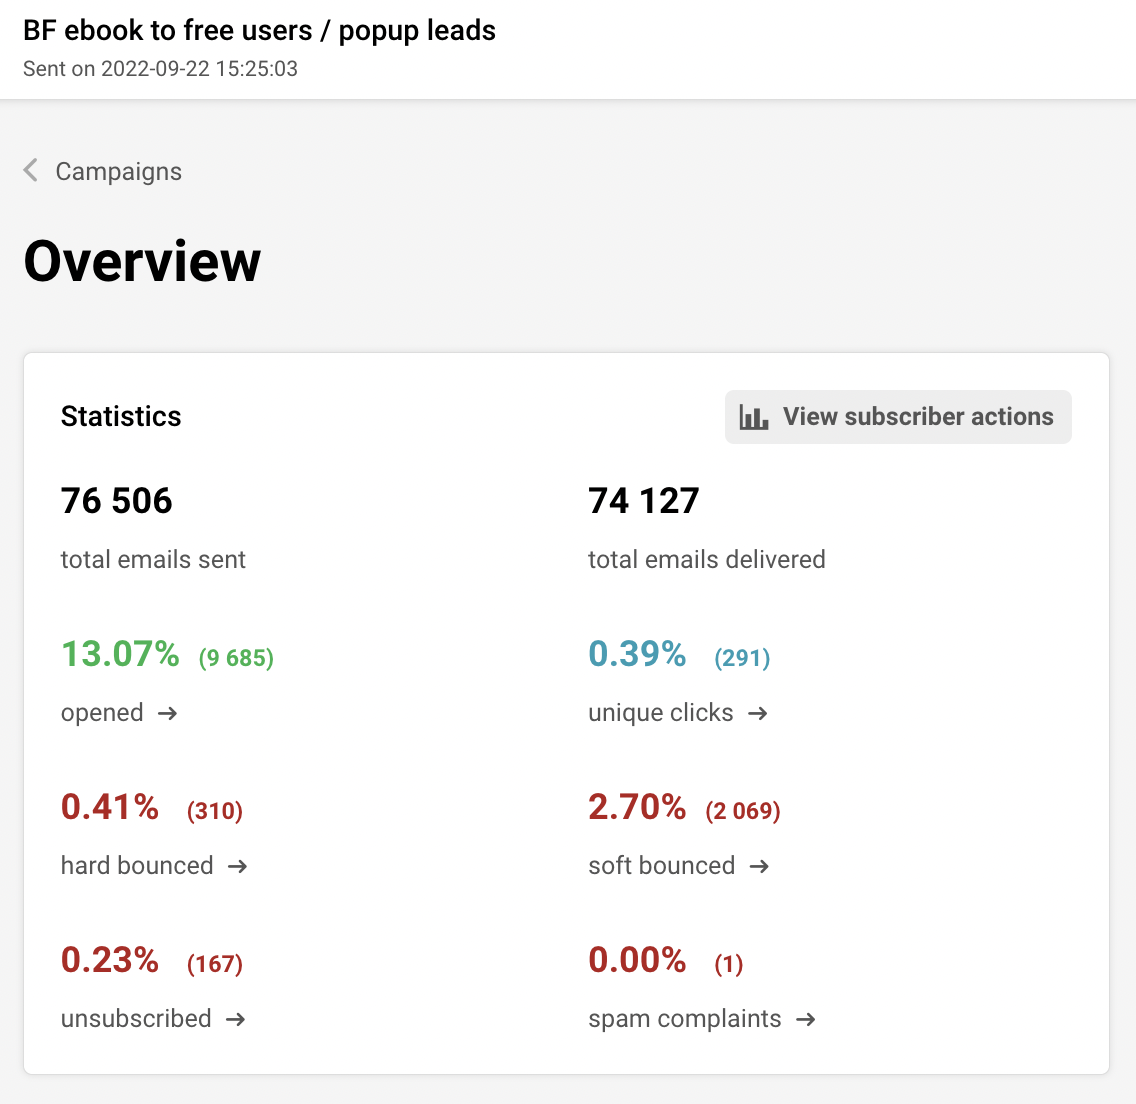
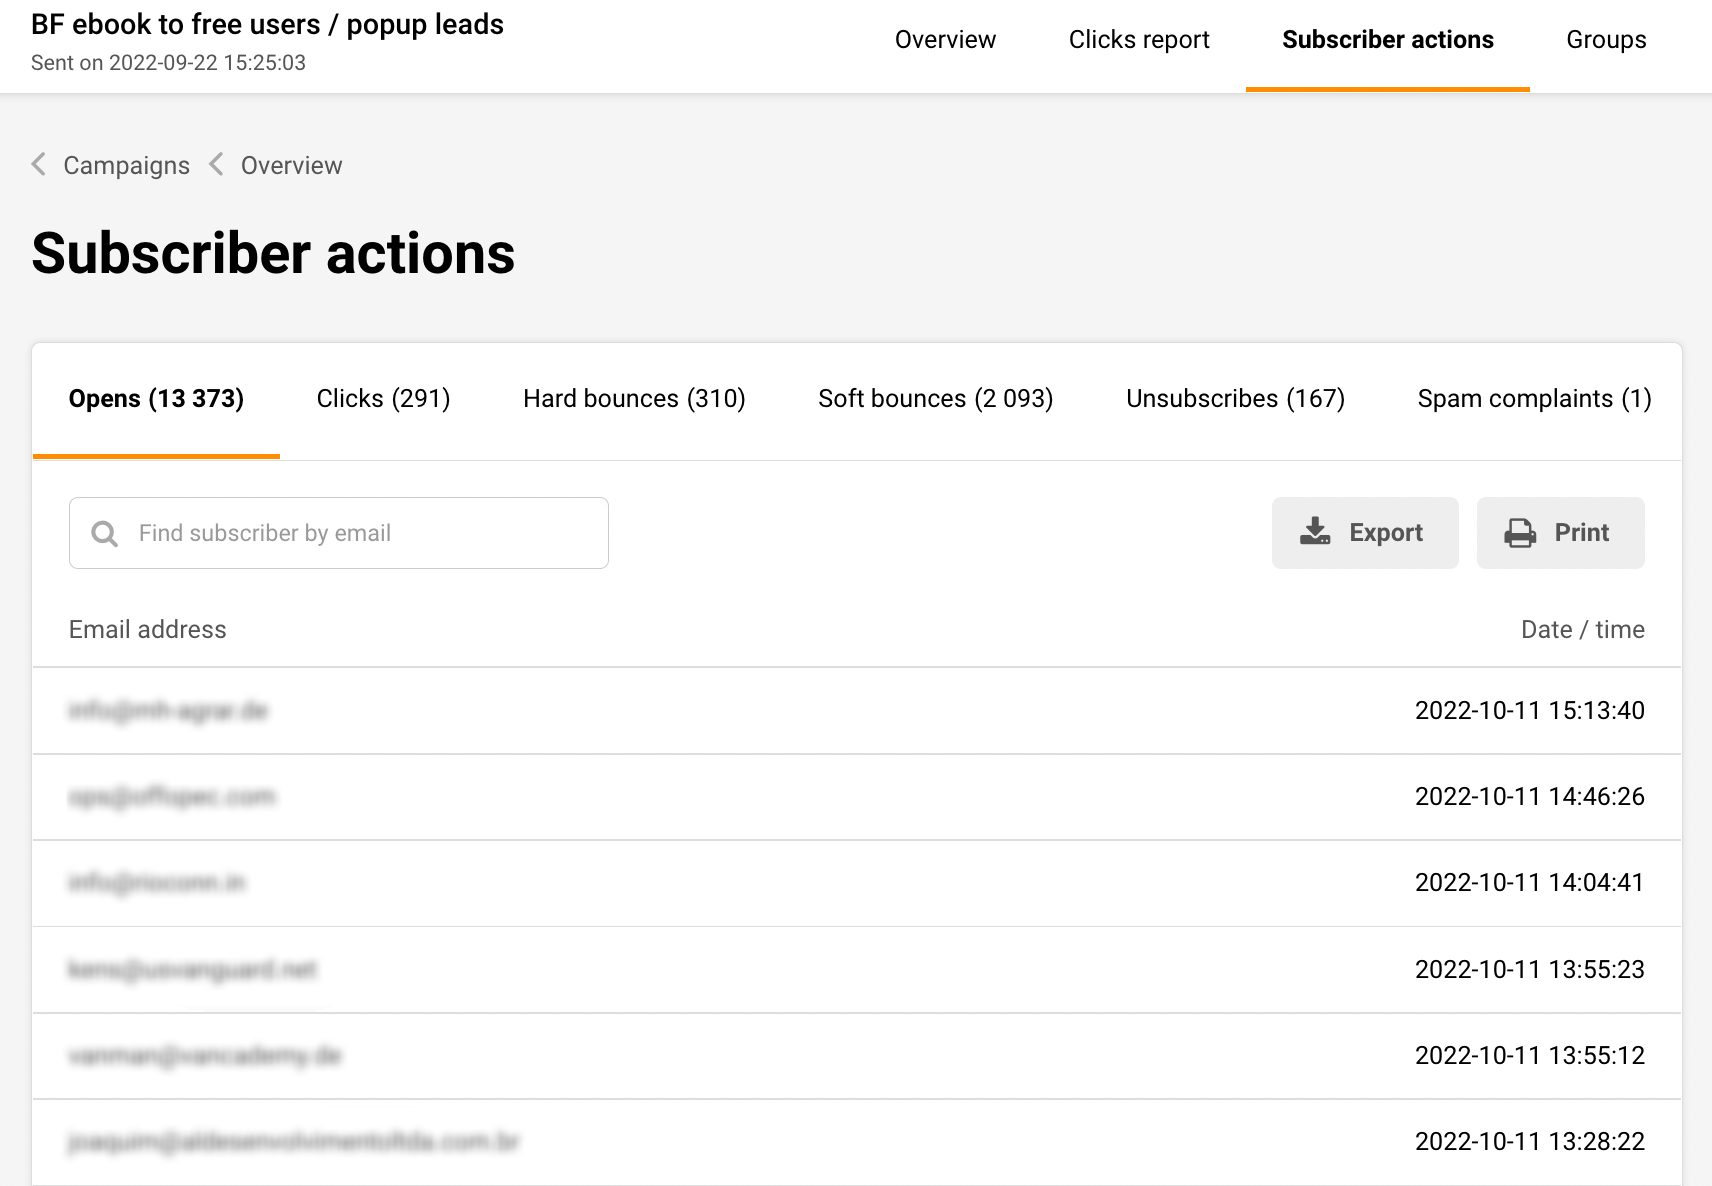
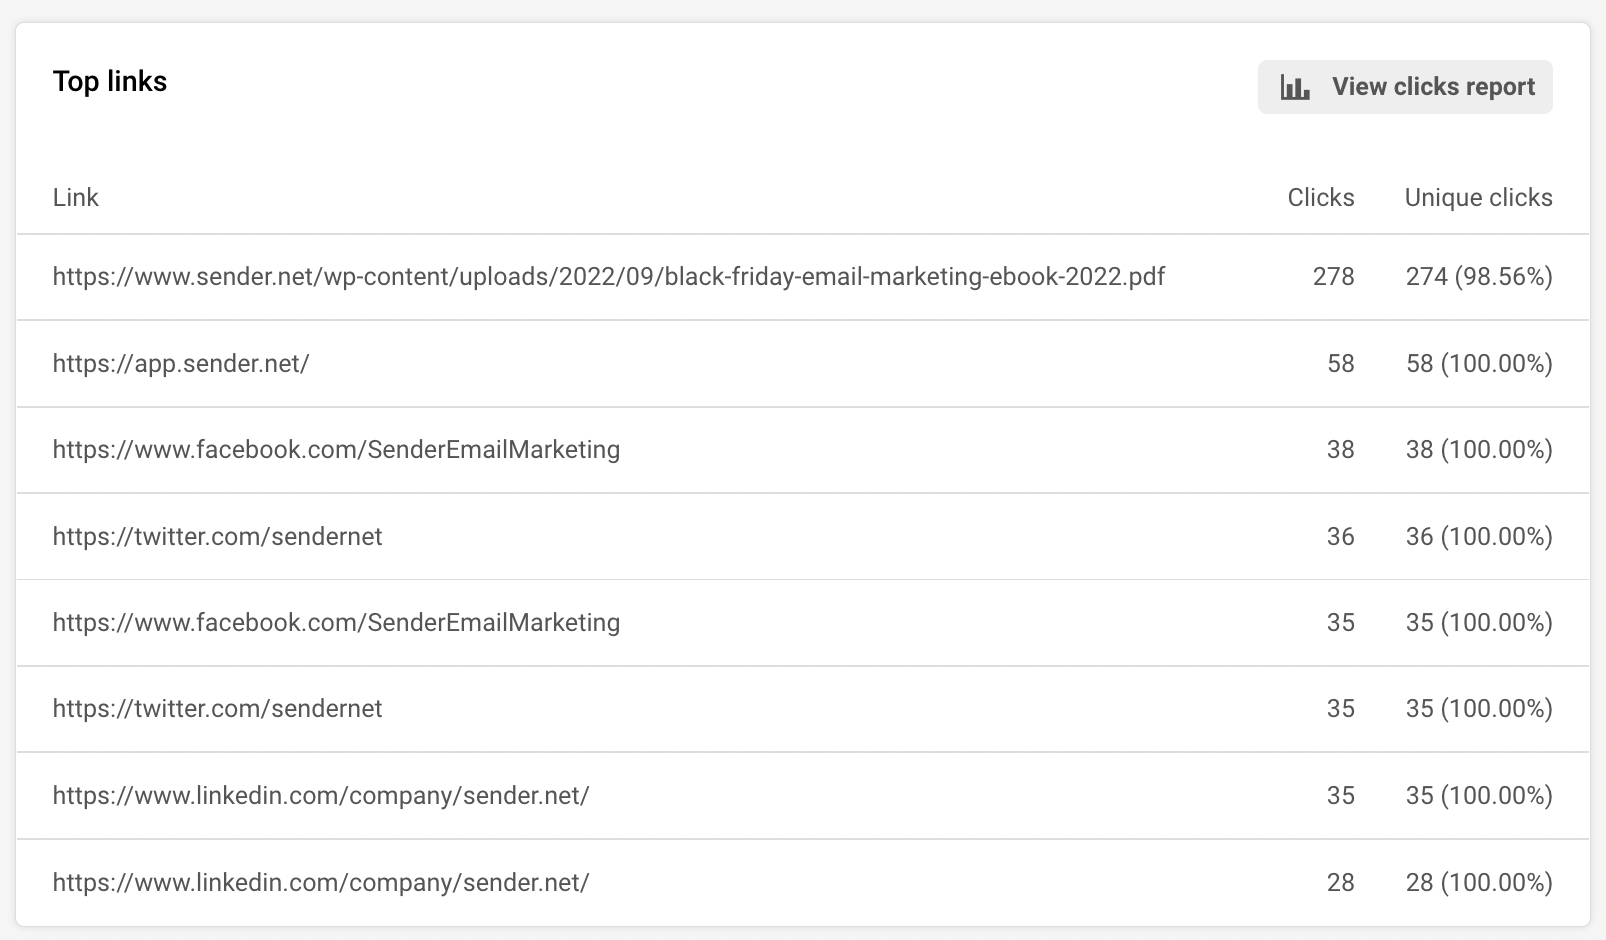
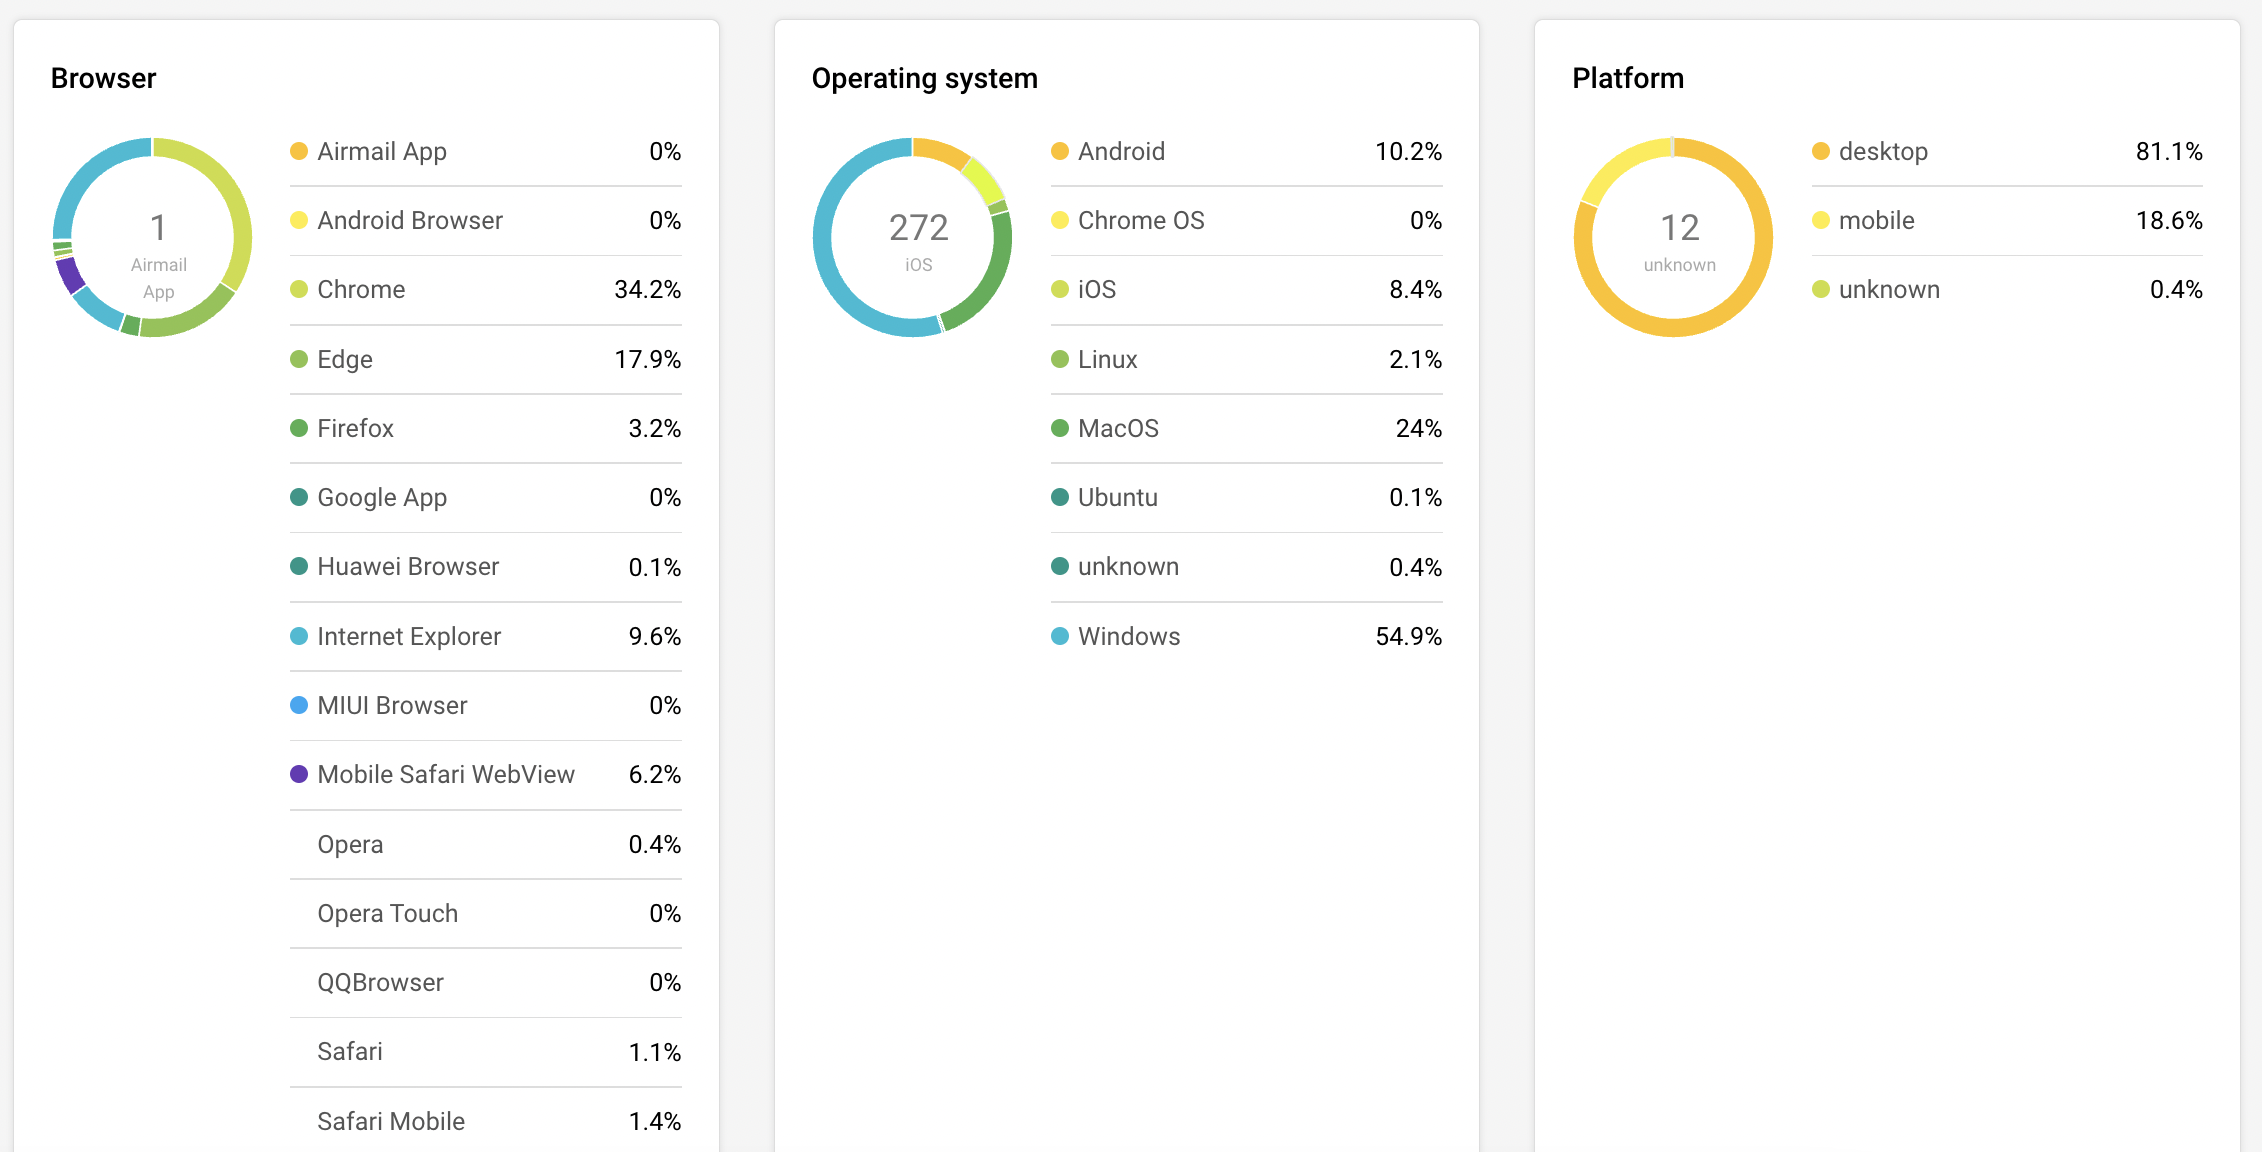
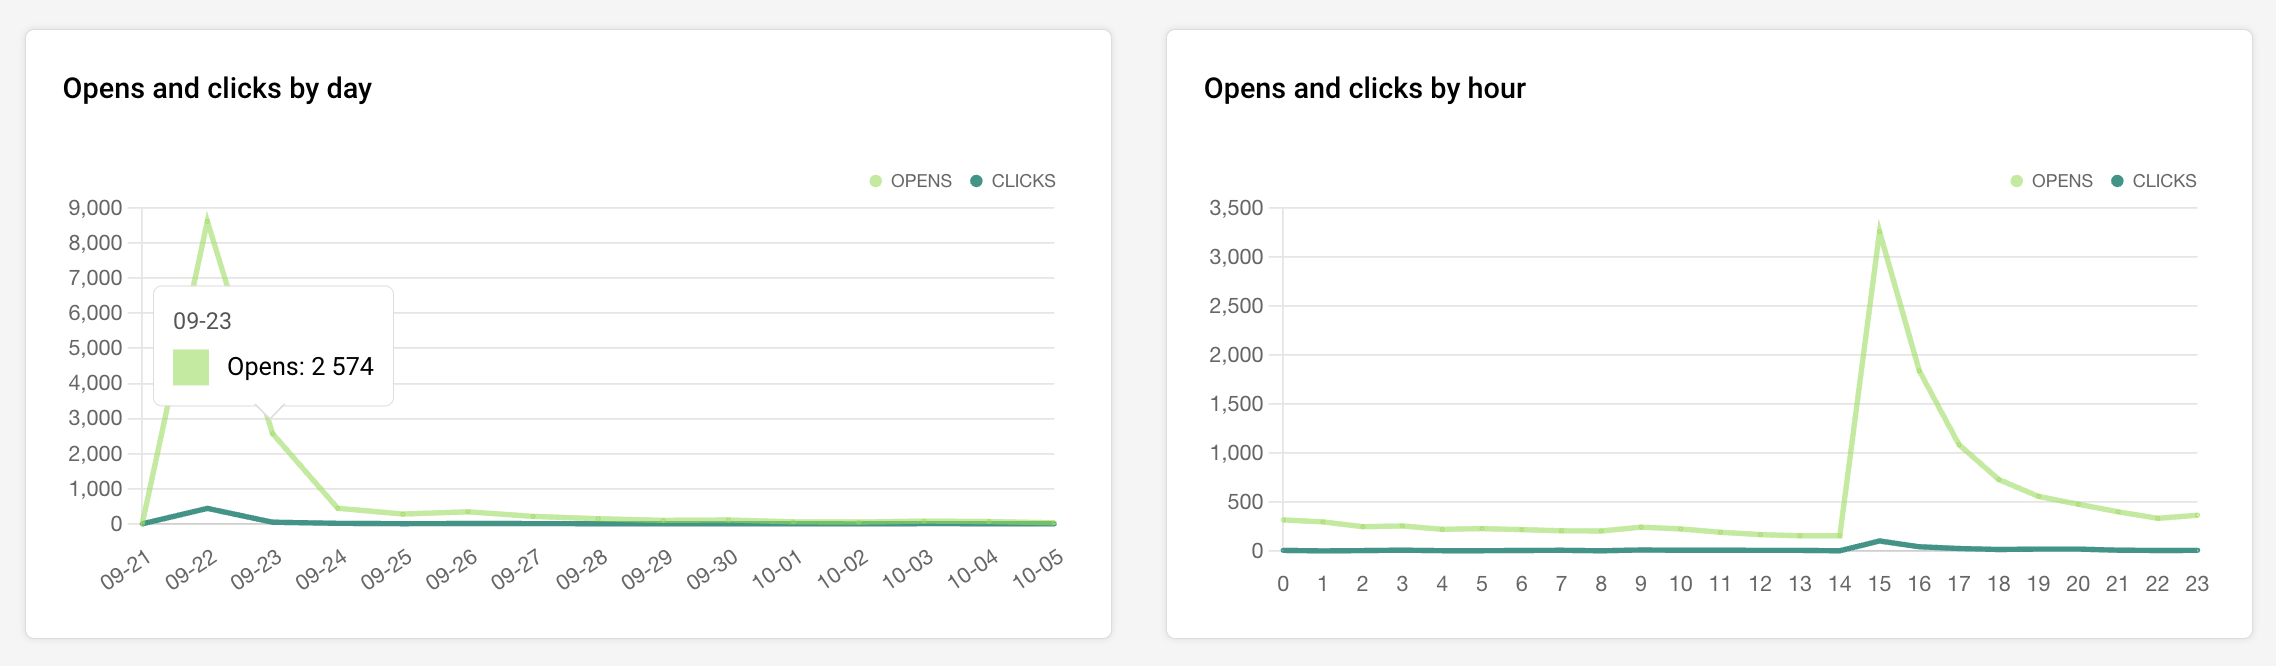
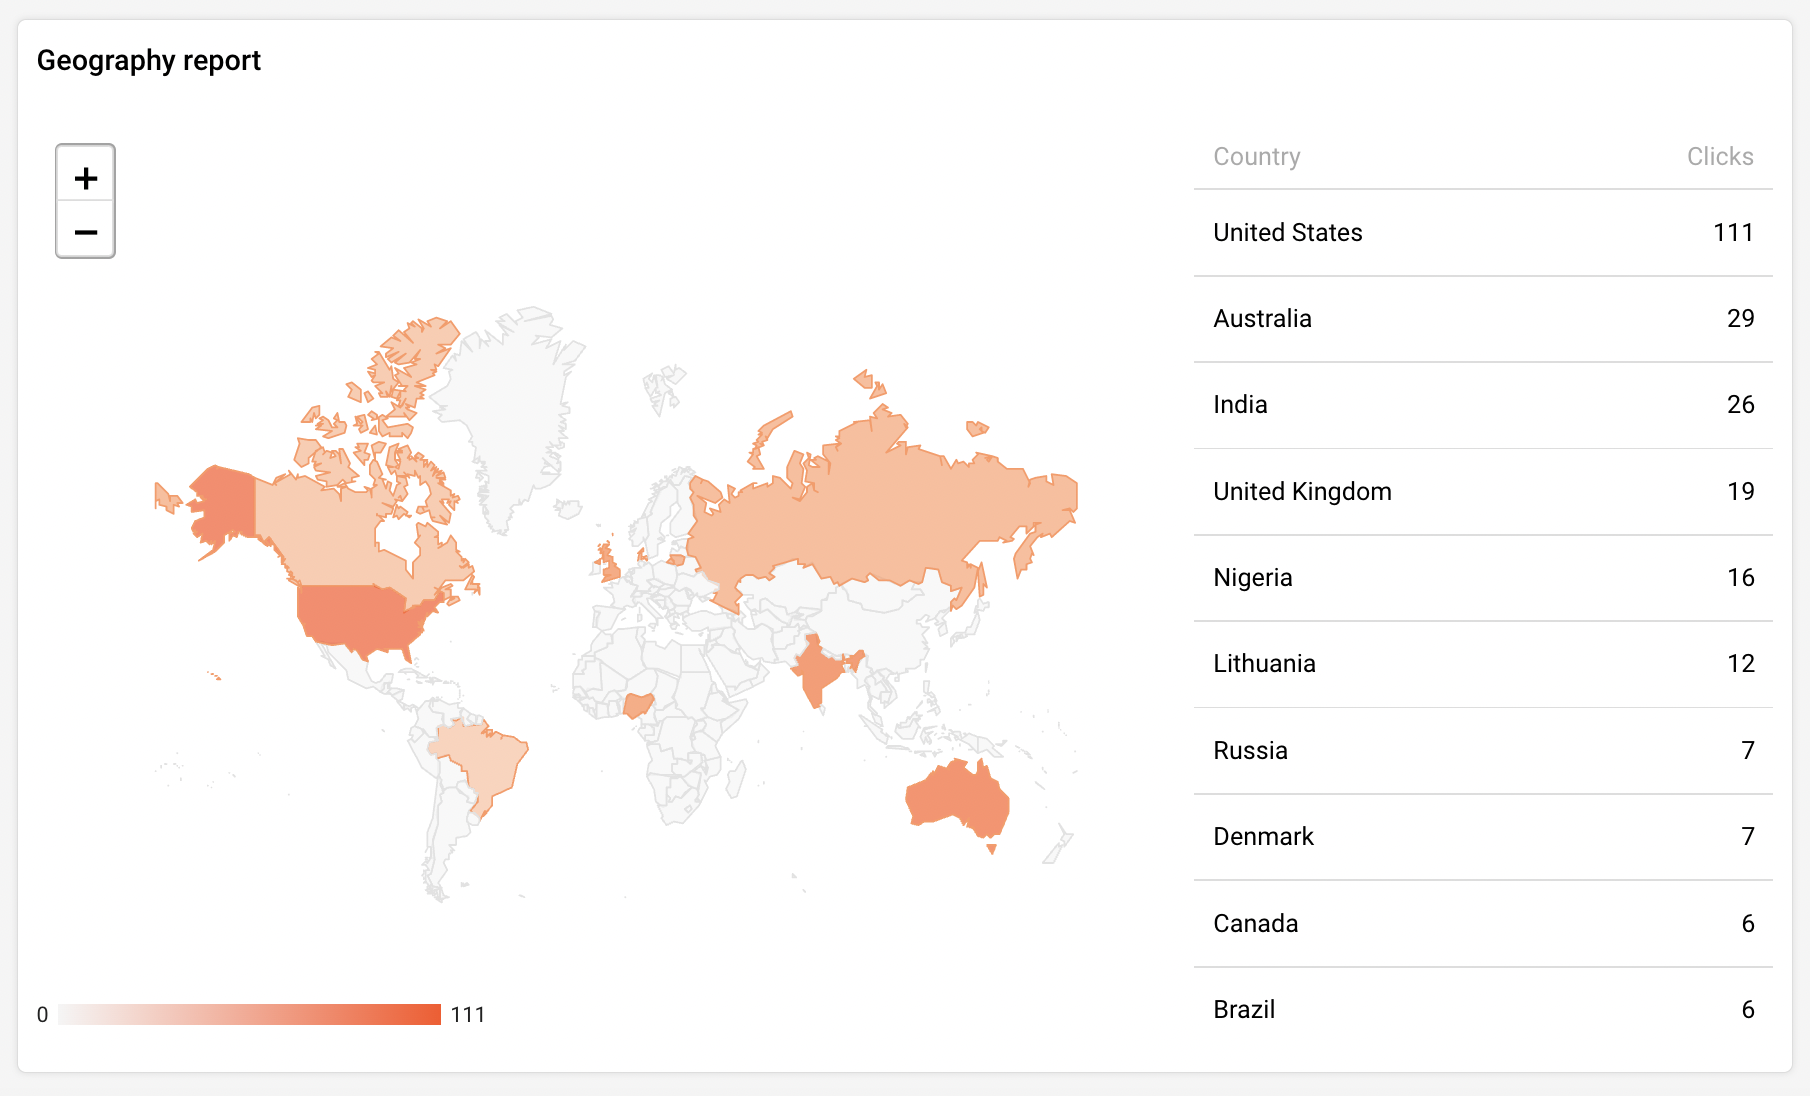
    Here you will start creating email campaigns. When the campaign section is opened, users will access campaign library, which contains sent campaigns, drafts, scheduled campaigns, etc. Moreover, you can open campaign reports as well. More on them here.

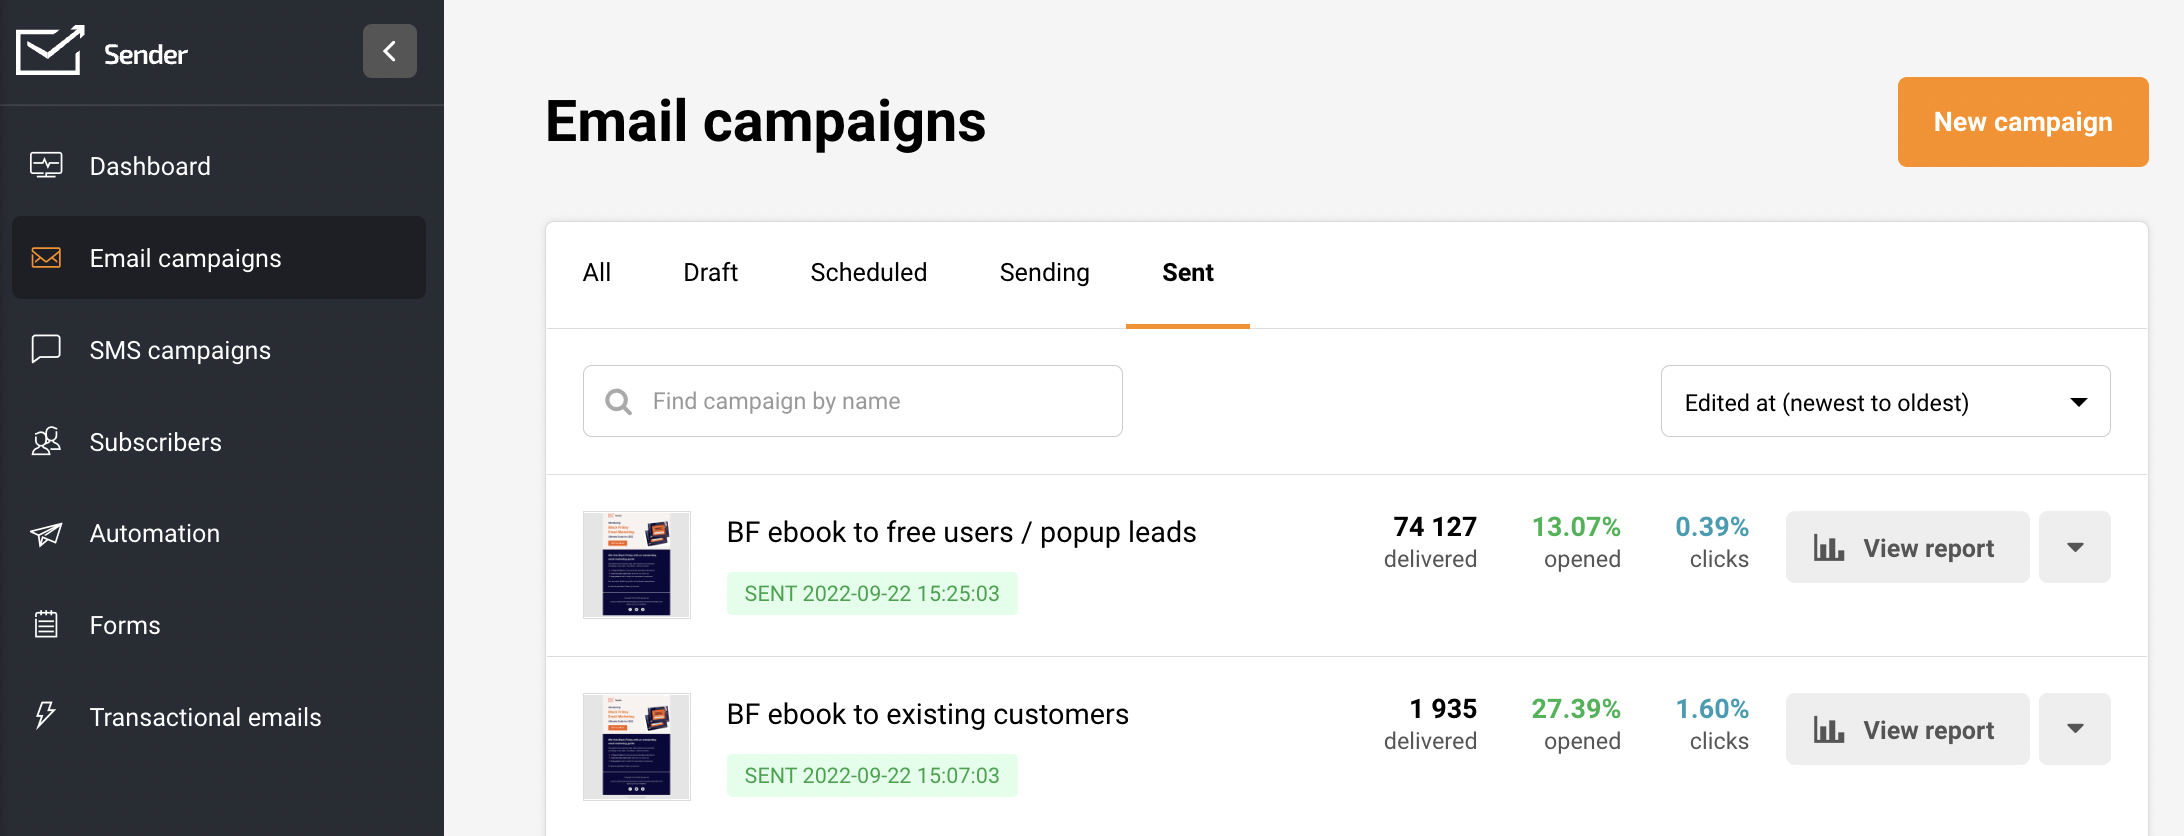
    Let’s start by clicking on a “New campaign” button on the top. After the button is clicked, you will be brought to the first step of campaign creation called “Settings” – Here, you will need to input the email subject, sender’s name, etc.

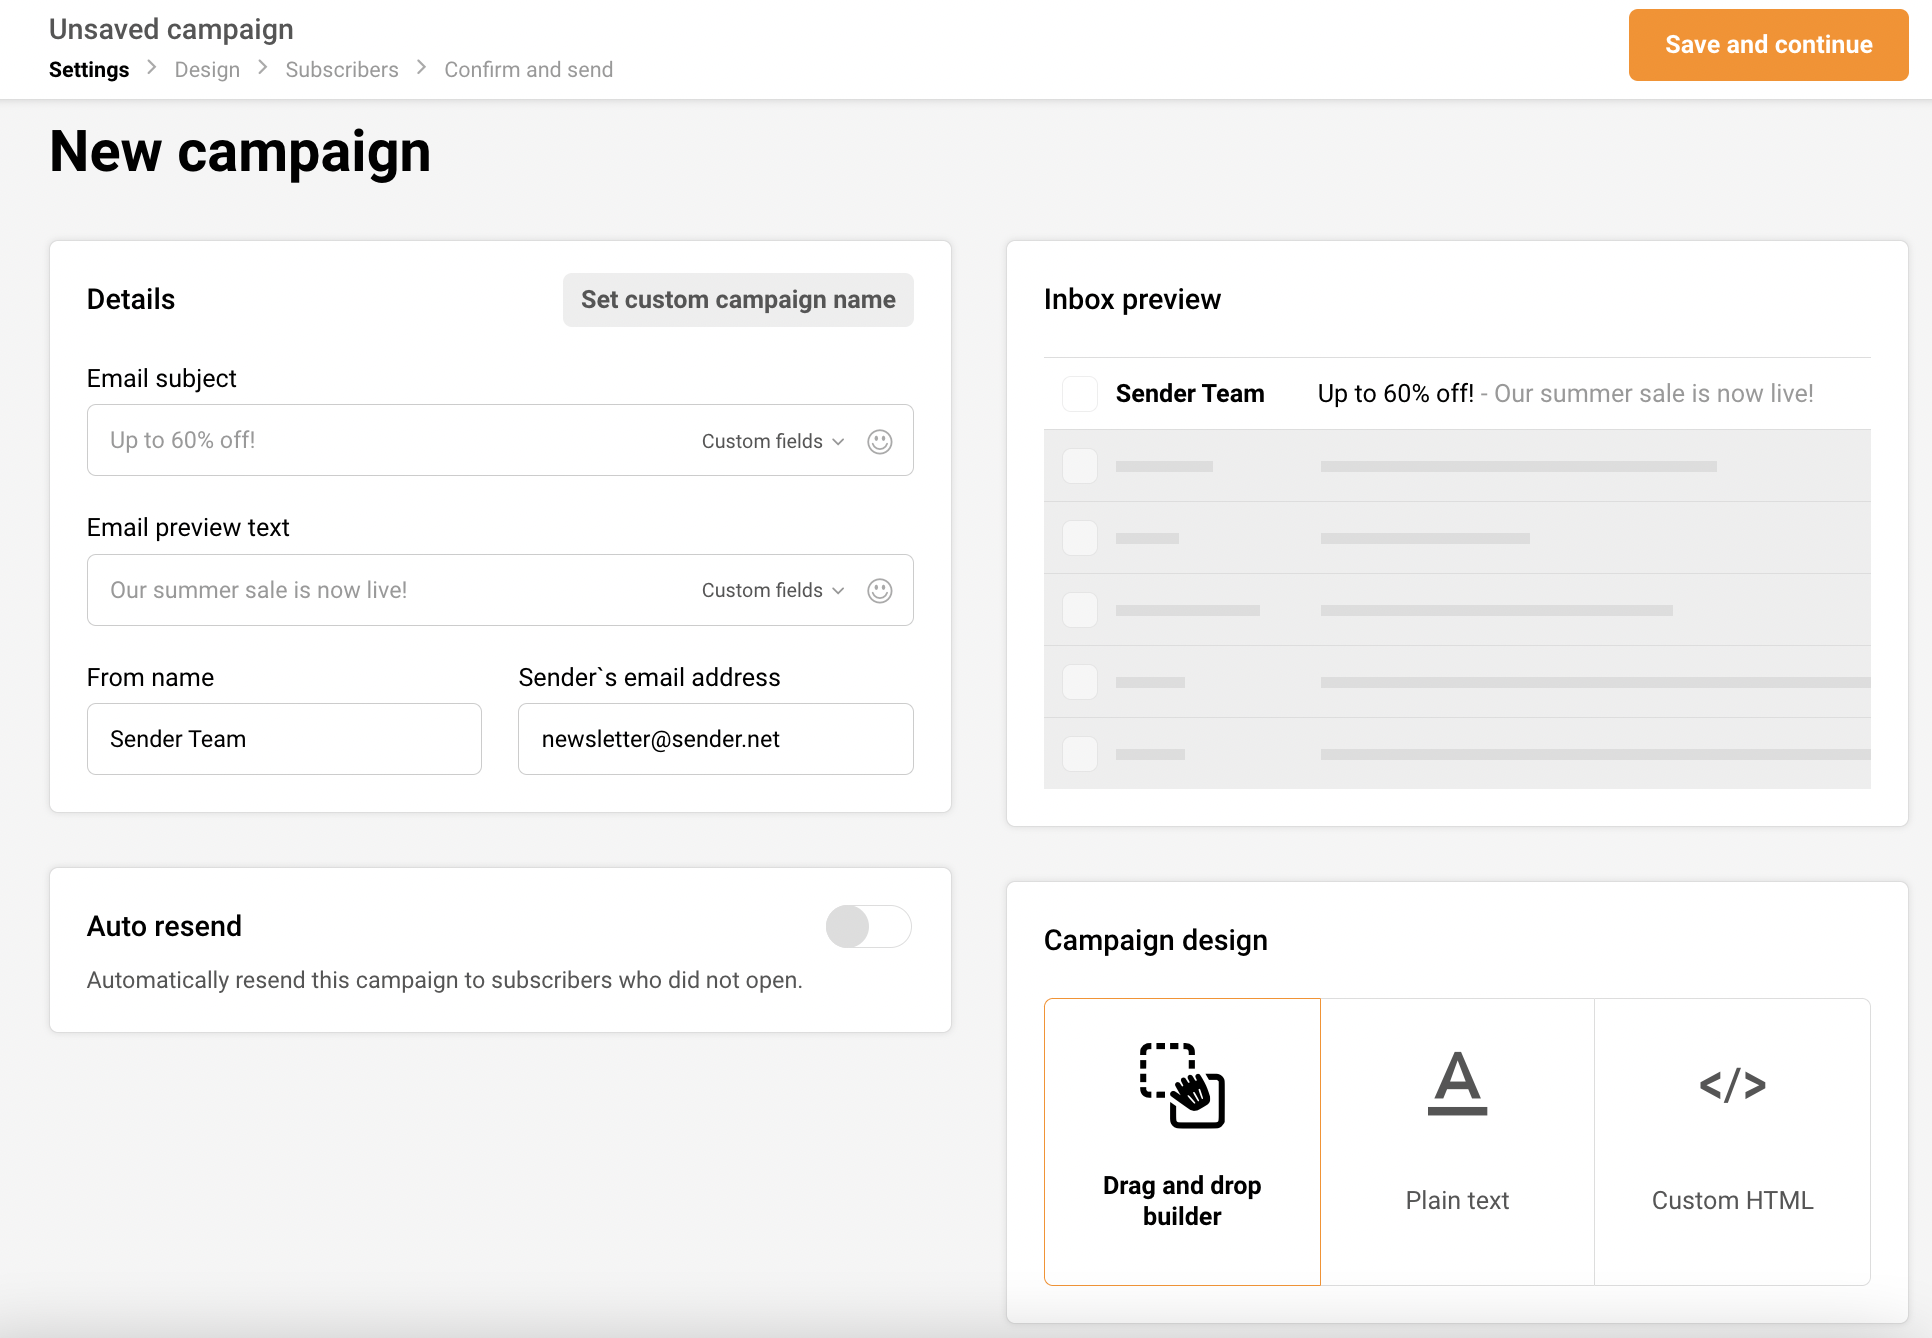
    First of all, I would like to mention that navigation bar can be accessed all the time. You can move from one section to another without losing progress. Therefore if you decide to change sender’s name, just hit the “Settings” and change it.

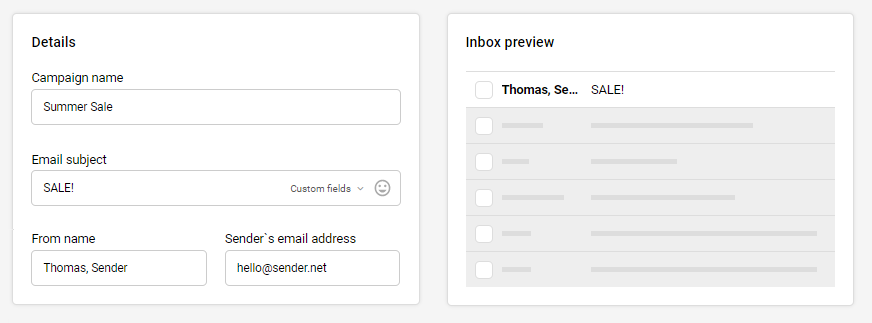
    Next, the first tablet called “Details” is where you type email subject, reply-to address, and “from name”. The second piece, named “Inbox preview” renders how an email will look in the inbox. That’s a handy feature helping to create the best engaging and clickable email preview.

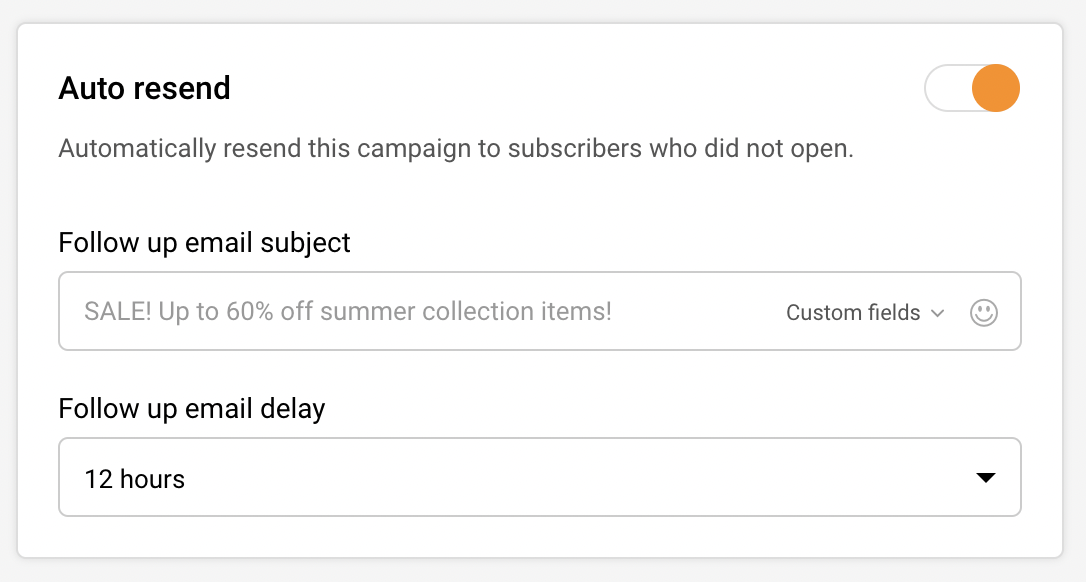
    The auto-resend option is next. If you have a paid plan, you can automatically follow up with recipients who didn’t open a newsletter. Pick a delay and subject line, and continue.

    Alright, we’re left with the last piece. Here you will need to pick which editor you’ll use for the newsletter:

    • Drag & Drop – advanced and easy-to-use design editor. Detailed guide here.
    • Plain text – only text, no design options.
    • Custom HTML ( HTML coded newsletters can be imported choosing this option ).

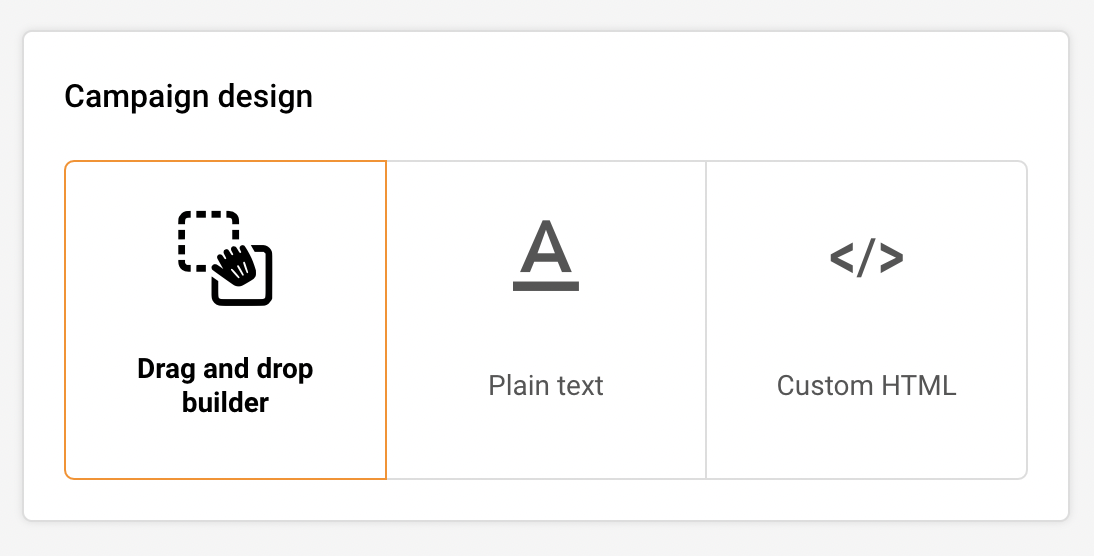
    In this case I will choose Drag & drop editor and continue the creating process.

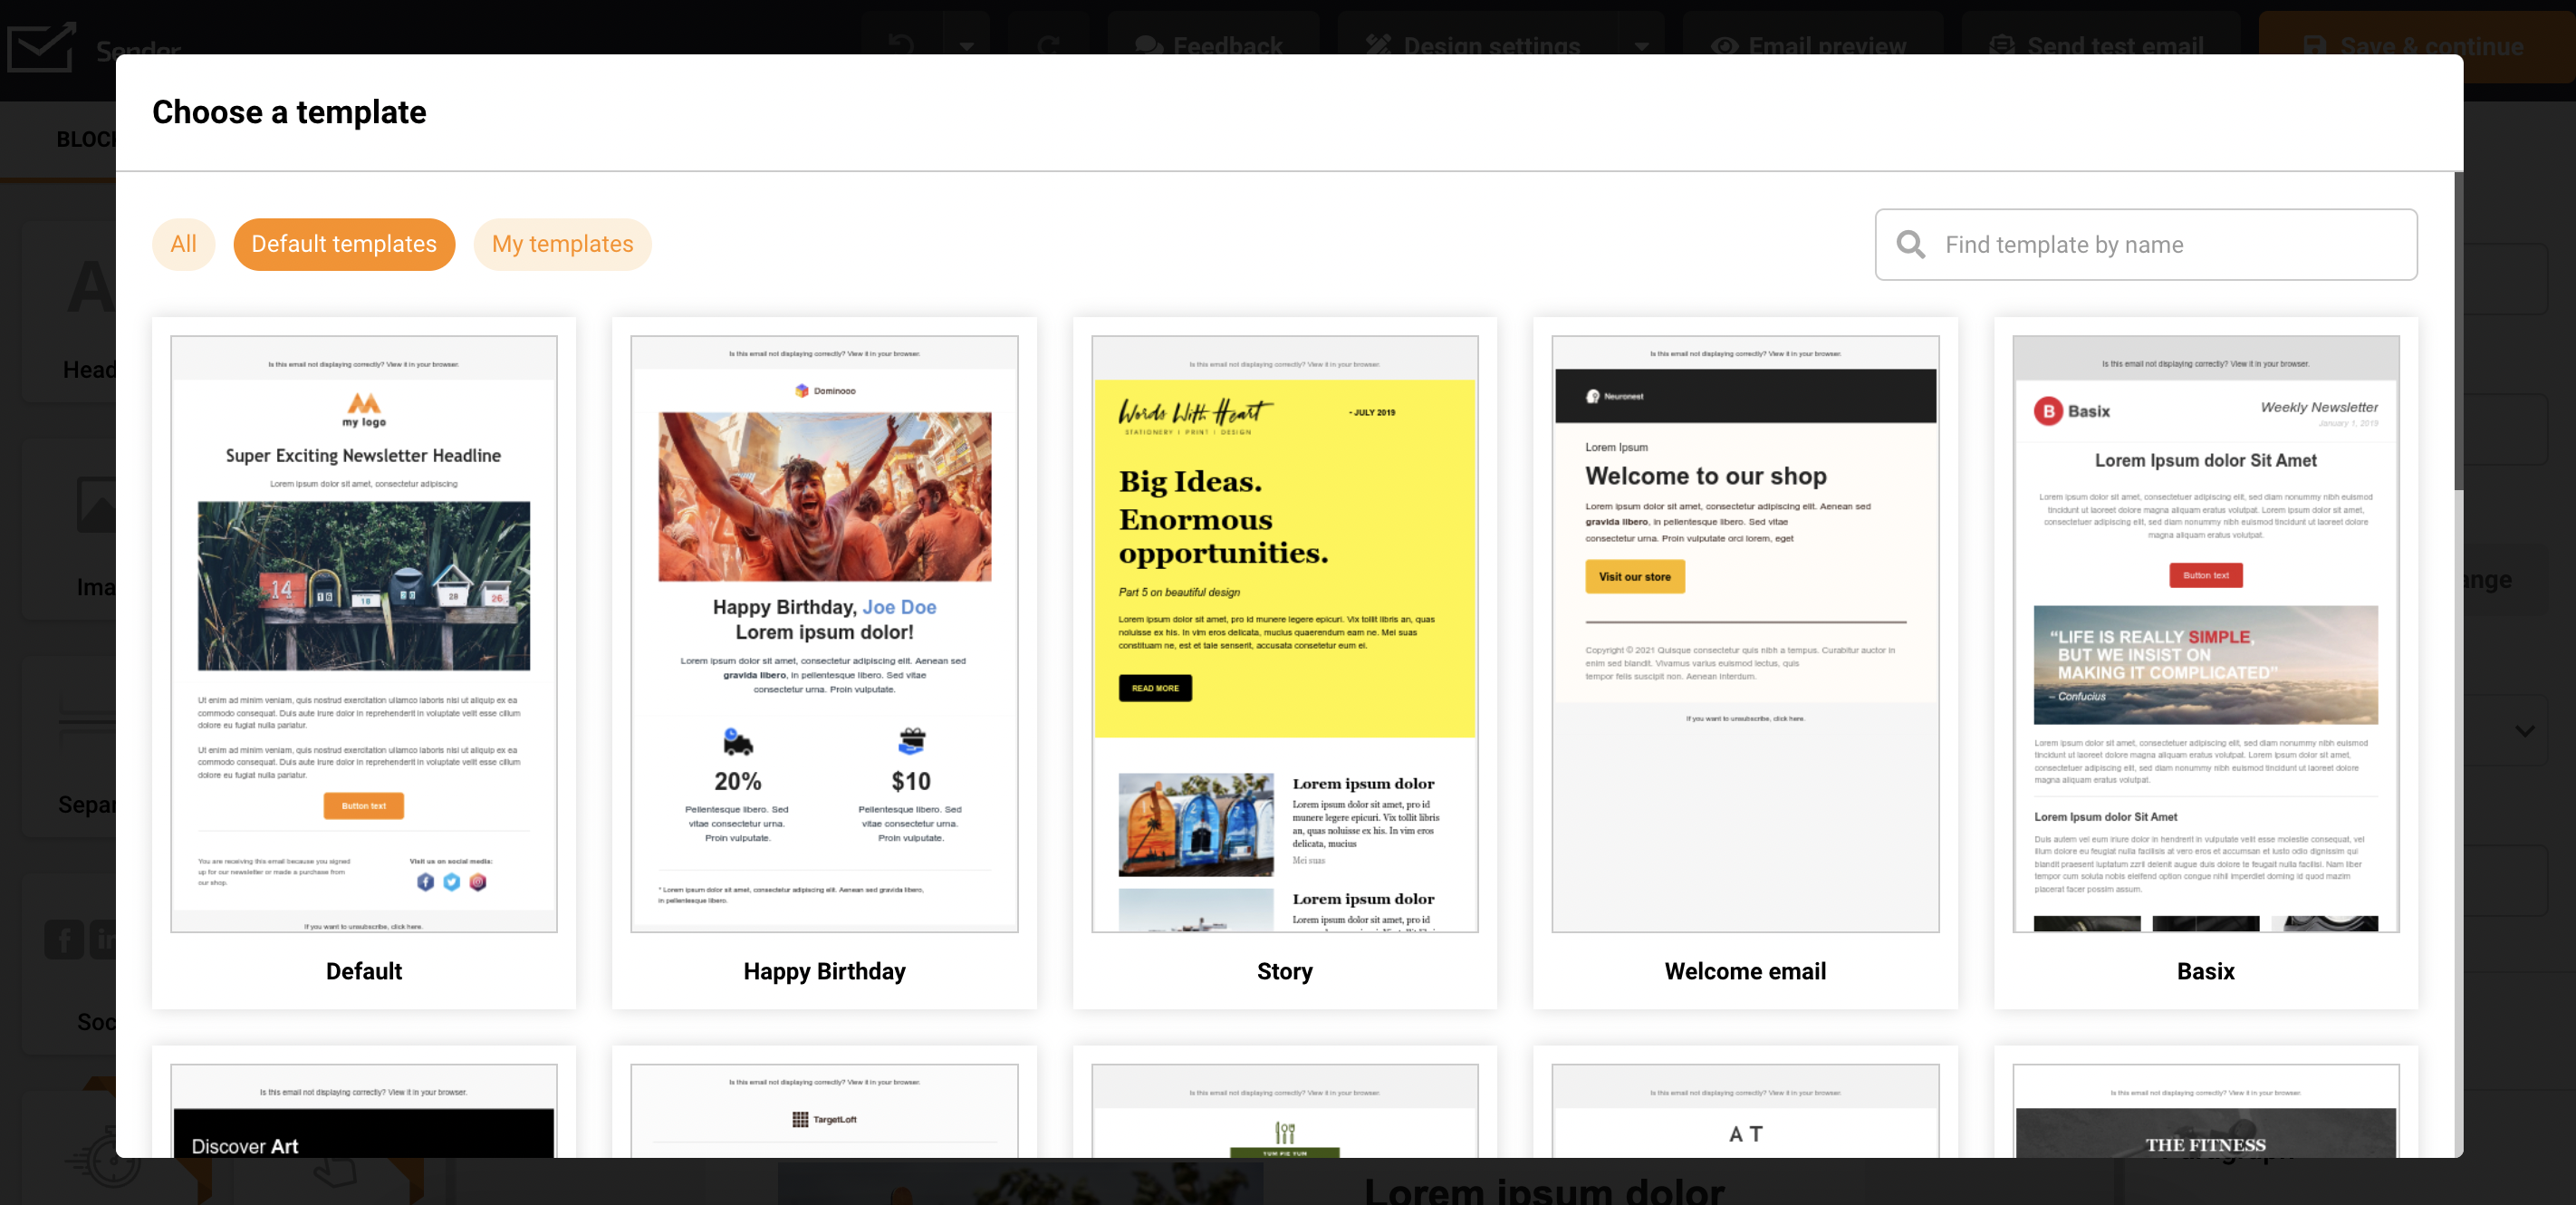
    When the design editor loads, you will need to select a template that will be used for a design. You can use a pre-made template or continue with a blank sheet.

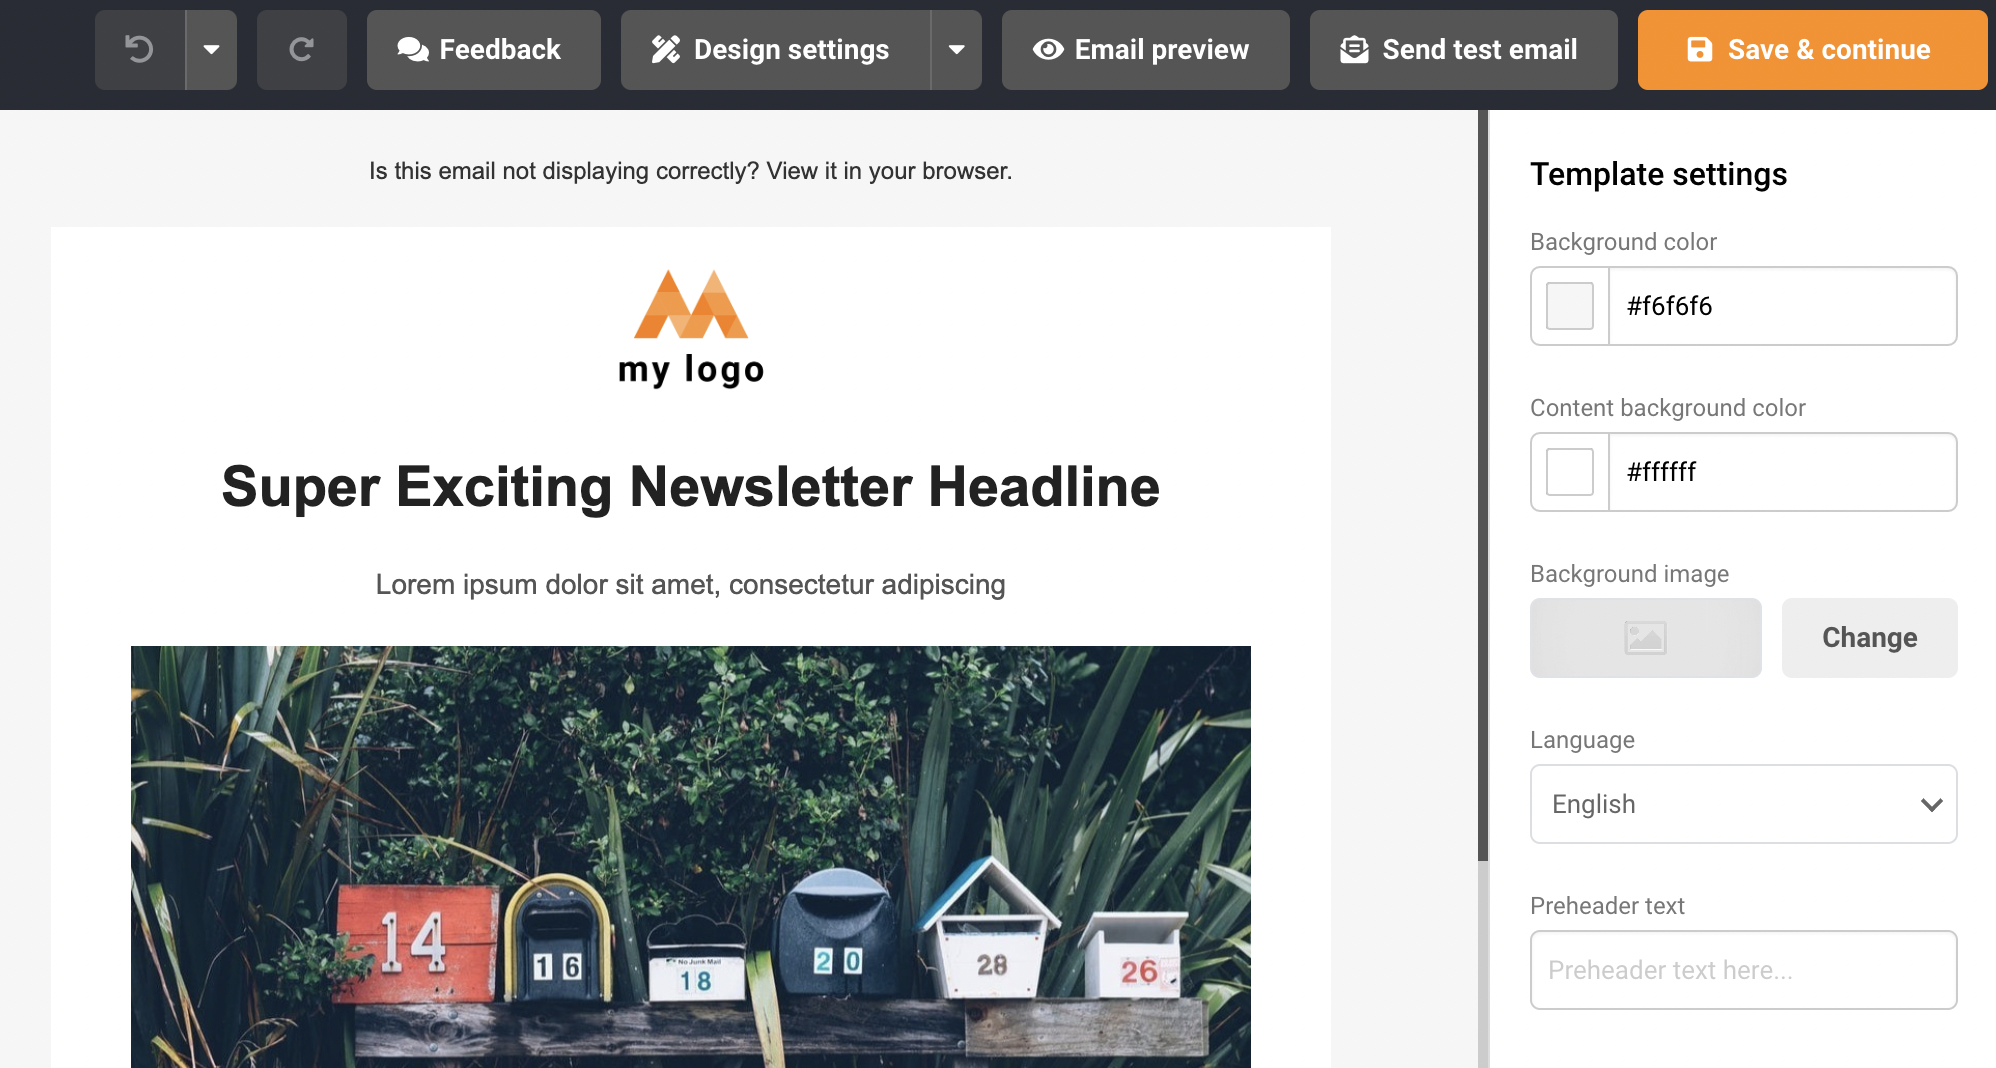
    Next, continue with newsletters design – when you finish with design, click on “Save and continue” and proceed to the next step. A comprehensive guide on Drag & Drop editor is found here.

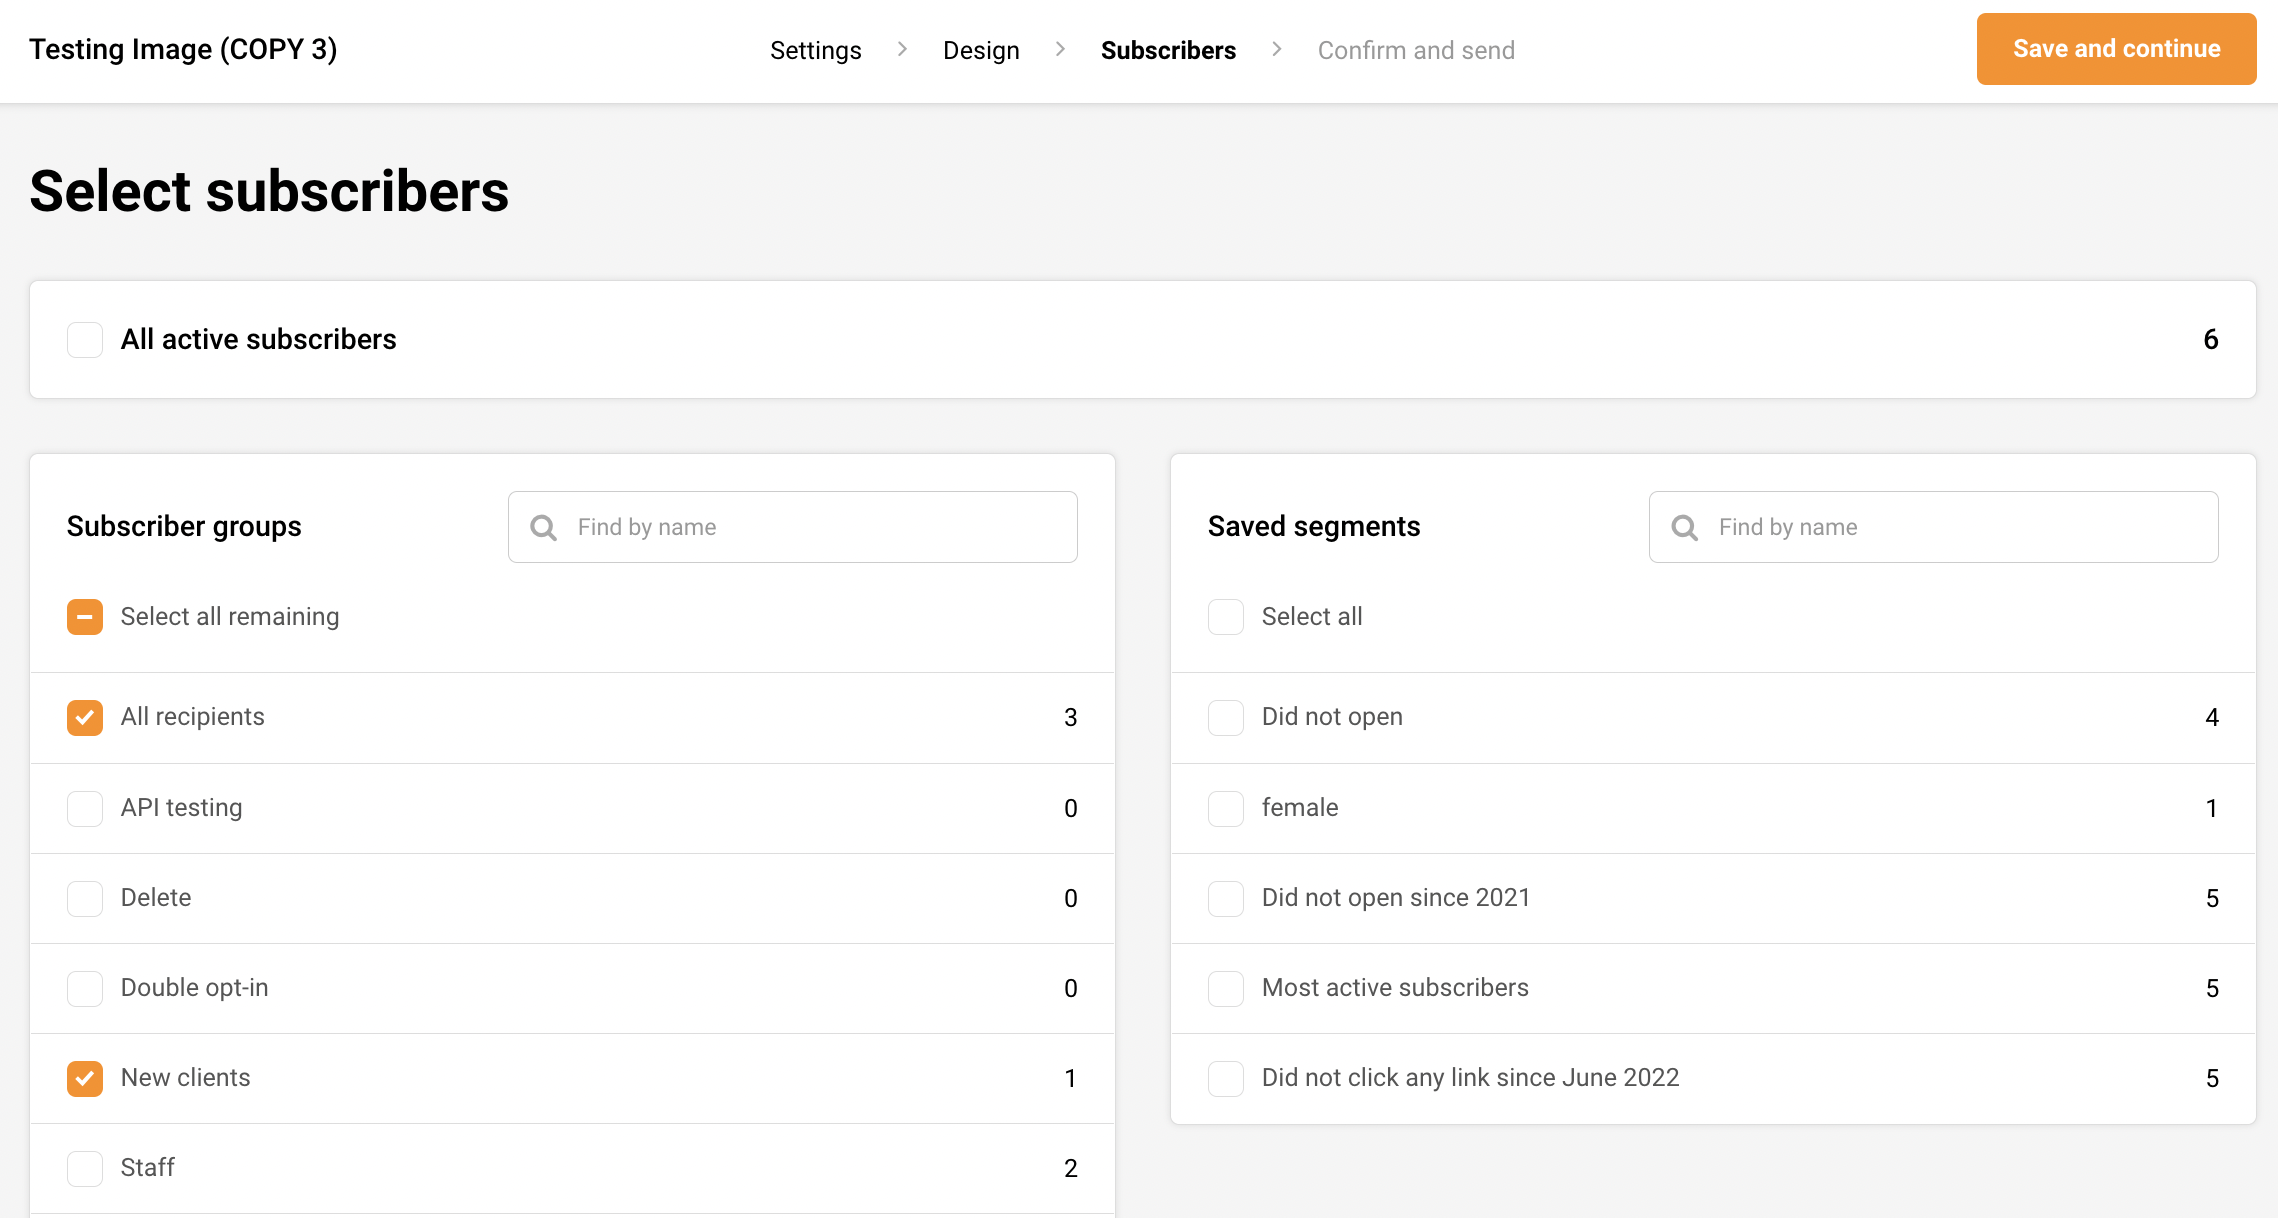
    At this step, you will need to select a group(s) that will receive the campaign, then click the “Save and continue” button. 

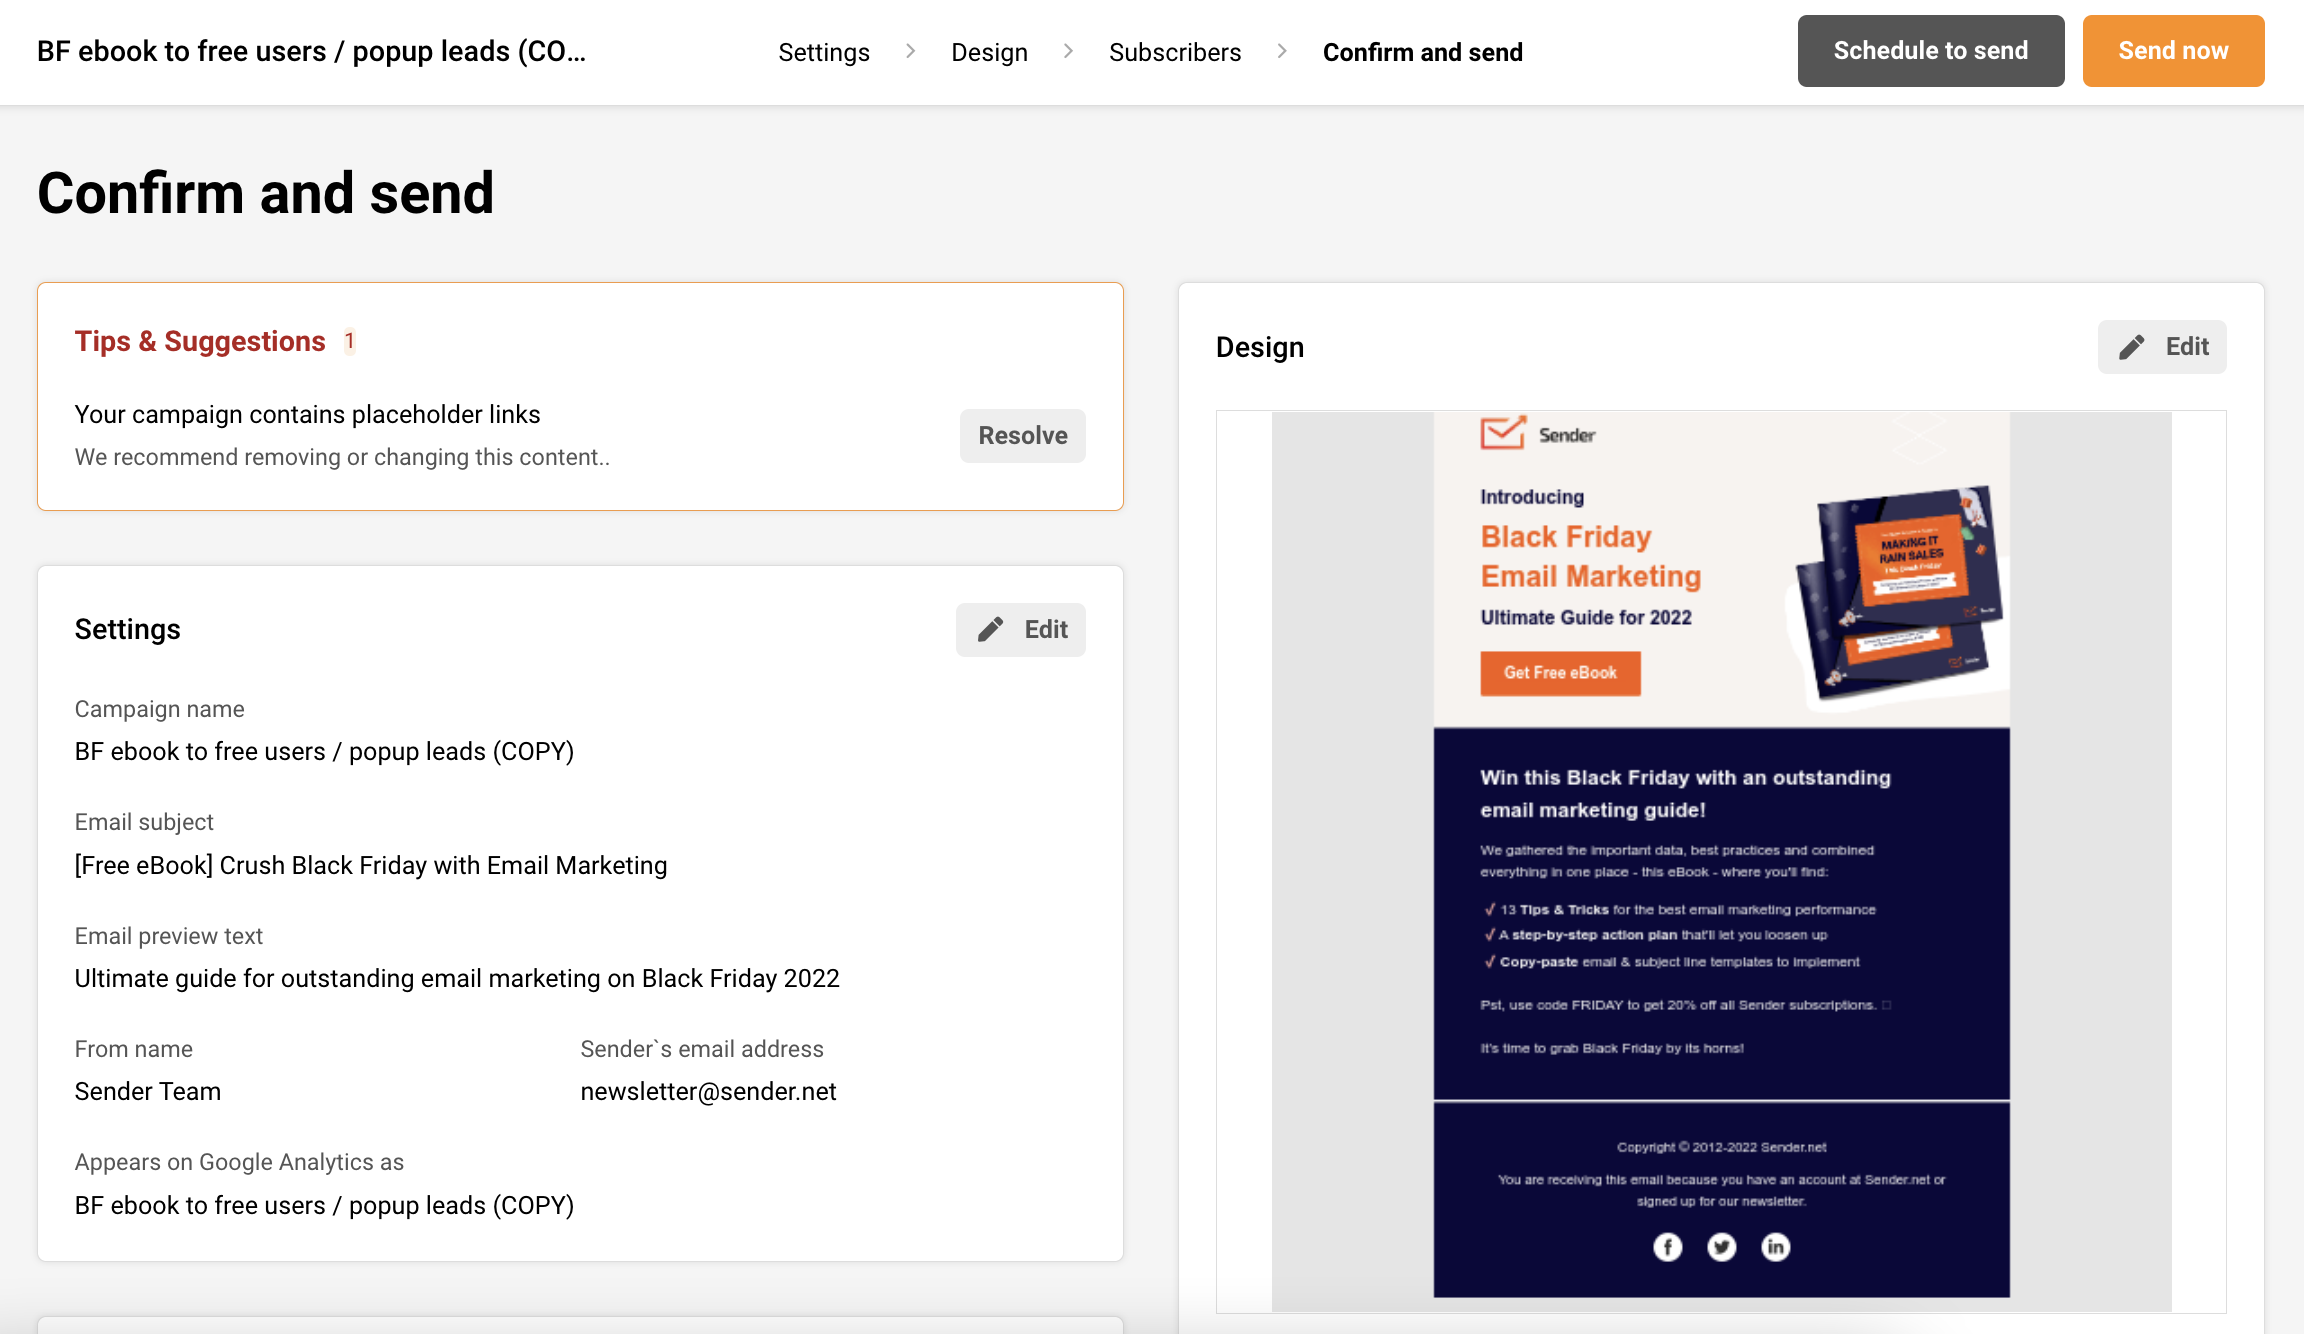
    Now we’re in the last step of campaign creation. The system will check your newsletter for possible errors like invalid links, default links, mistypes, etc. Also, from here, you’ll be able to revisit and change newsletters settings, like subject line and selected groups.

    Also, the campaign’s scheduling is set here as well. Schedule a campaign button resting on the top of the dashboard besides “Send now” button.

    That’s it!

    If you got stuck on a specific task or can’t find a way to execute a particular job, contact our support team via LiveChat or [email protected] – we’re here to help 24/7.

  • Analyze subscriber actions

    Subscribers Actions

    The subscriber’s activity section summarizes campaign performance, e.g., like how many recipients have opened it, how many recipients received the campaign, how many of them clicked on a particular link, how many unsubscribed, and etc.

    Let’s start by going to Email campaigns and clicking the reports icon next to the campaign in question.

    Subscriber actions overview contains multiple tabs:

    • Opens
    • Clicks (recipients that clicked on a link)
    • Hard-bounces (failed deliveries due to invalid email address)
    • Soft-bounces
    • Unsubscribes
    • Spam complaints
    • Unopened
    • Purchases

    The report section has selectable tabs – if you click on any of them, the individual report will display. For example, if you click on the “opened” tab – you will be presented with recipients that opened the campaign.

    Furthermore, listed recipients can be exported if needed.


    If you got stuck on a specific task or can’t find a way to execute a particular job, contact our support team via LiveChat or [email protected] – we’re here to help 24/7.

  • View click report

    Click report section

    The click report shows newsletters click activity – heatmap. You will be able to see where subscribers clicked the most. Newsletters links are tracked and recorded to the report section – from here you will be able to gather required data and execute wanted actions.

    Let’s start by opening dashboard and clicking on campaign > view reports section.

    When a report section is opened – click on “Click report” to open a report. Next, you will see a body of the newsletter and small percent tags next to placed links. 

    When the percent tag is clicked – a new tab will open. Here you will find subscribers who clicked on the link.  By clicking on an individual recipient, you will access its records, basically prior actions (received campaigns, opened, clicked). Furthermore, you can assign these recipients to a group by clicking “Add group” button.  


    If you got stuck on a specific task or can’t find a way to execute a particular job, contact our support team via LiveChat or [email protected] – we’re here to help 24/7.

  • Campaign reports overview

    How do I use reports?

    After the campaign is sent, the system will begin to track, analyze data – clicks, opens, bounces, unique clicks, etc. The newsletters report is located behind the “View report” button on the campaign section. Reports are updated every few minutes.

    Here’s how the general overview looks:

    Overview

    Let’s start with the first section. Just below the overview of your results, you will find six different counters:

    • Total emails sent.
    • Total emails delivered.
    • Opened.
    • Unique clicks.
    • Hard-bounced.
    • Soft-bounced.
    • Unsubscribed.
    • Spam complaints (recipient’s reported spam).

    Each report counter is clickable. Simply click to view every individual report.

    Next, let’s continue with the campaign’s links. As you may already know, system tracks the performance of all campaign’s links and stored the data.

    We got two columns :

    • Clicks (shows all clicks, including duplicates)
    • Unique clicks

    When a user clicked on the link, the recipient’s that click the link will appear. Next, if you click on an individual recipient, you will access its records, basically prior actions. Furthermore, you can assign subscribers to a particular group by clicking “Add group” button.

    Okay, we are halfway through the report section.

    Let’s continue with the browser, operating system, and platform statistics. These charts are pretty self-explanatory. You see the statistics where recipients open newsletters.

    The next graph is a visual chart of your campaign’s opens and clicks. The first graph shows performance per day, other – per hour.

    The last report shows the geographic statistic. You can view the newsletter’s performance according to the recipients’ email providers’ servers location. 

    That’s it!

    If you got stuck on a specific task or can’t find a way to execute a particular job, contact our support team via LiveChat or [email protected] – we’re here to help 24/7.