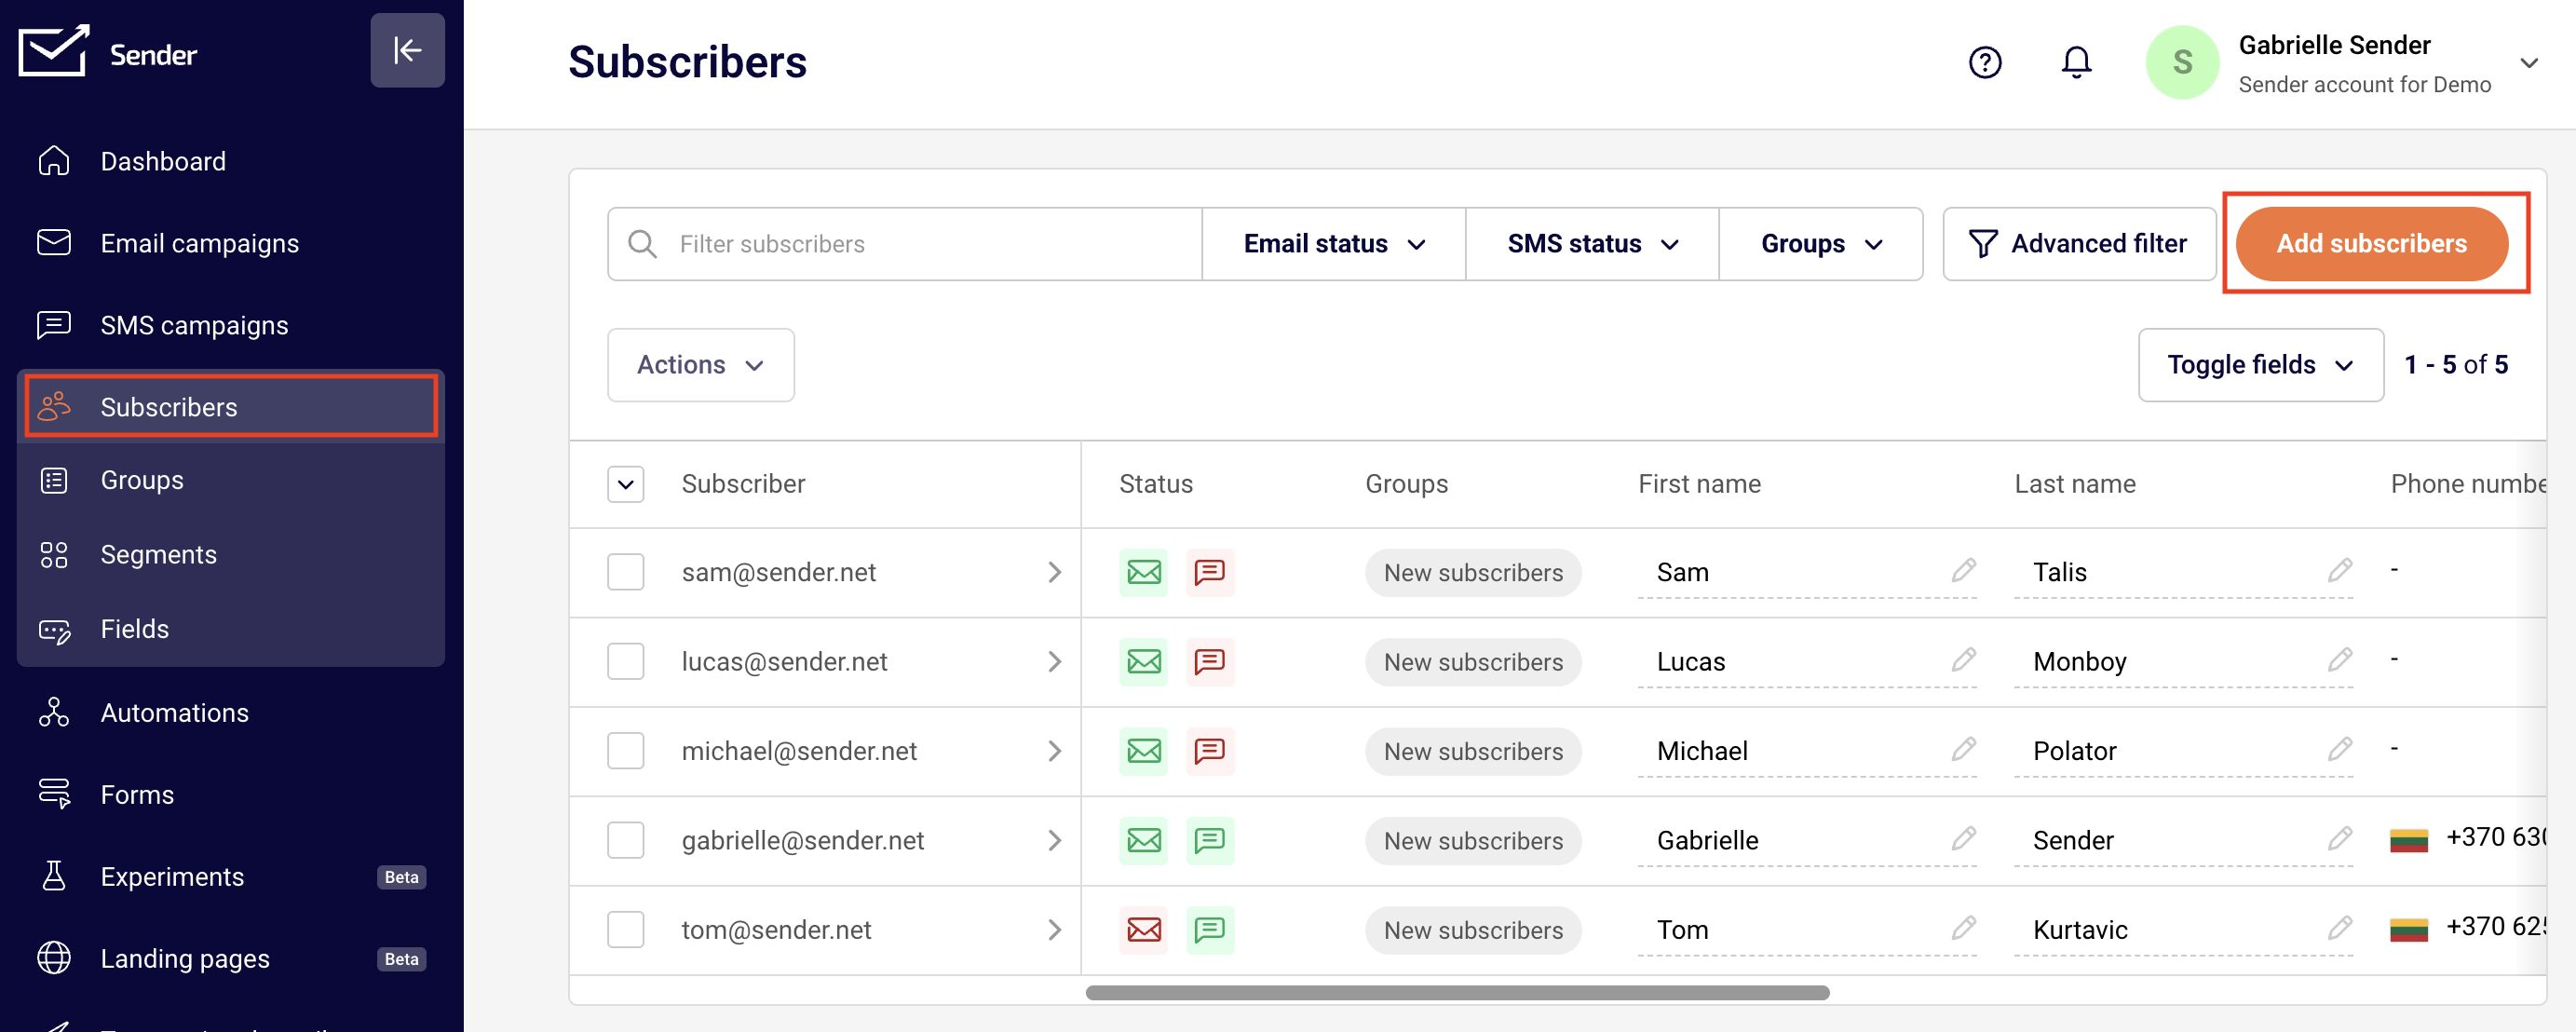
To transfer subscribers from GetResponse to Sender, go to Subscribers tab, then select the “Add Subscribers”:
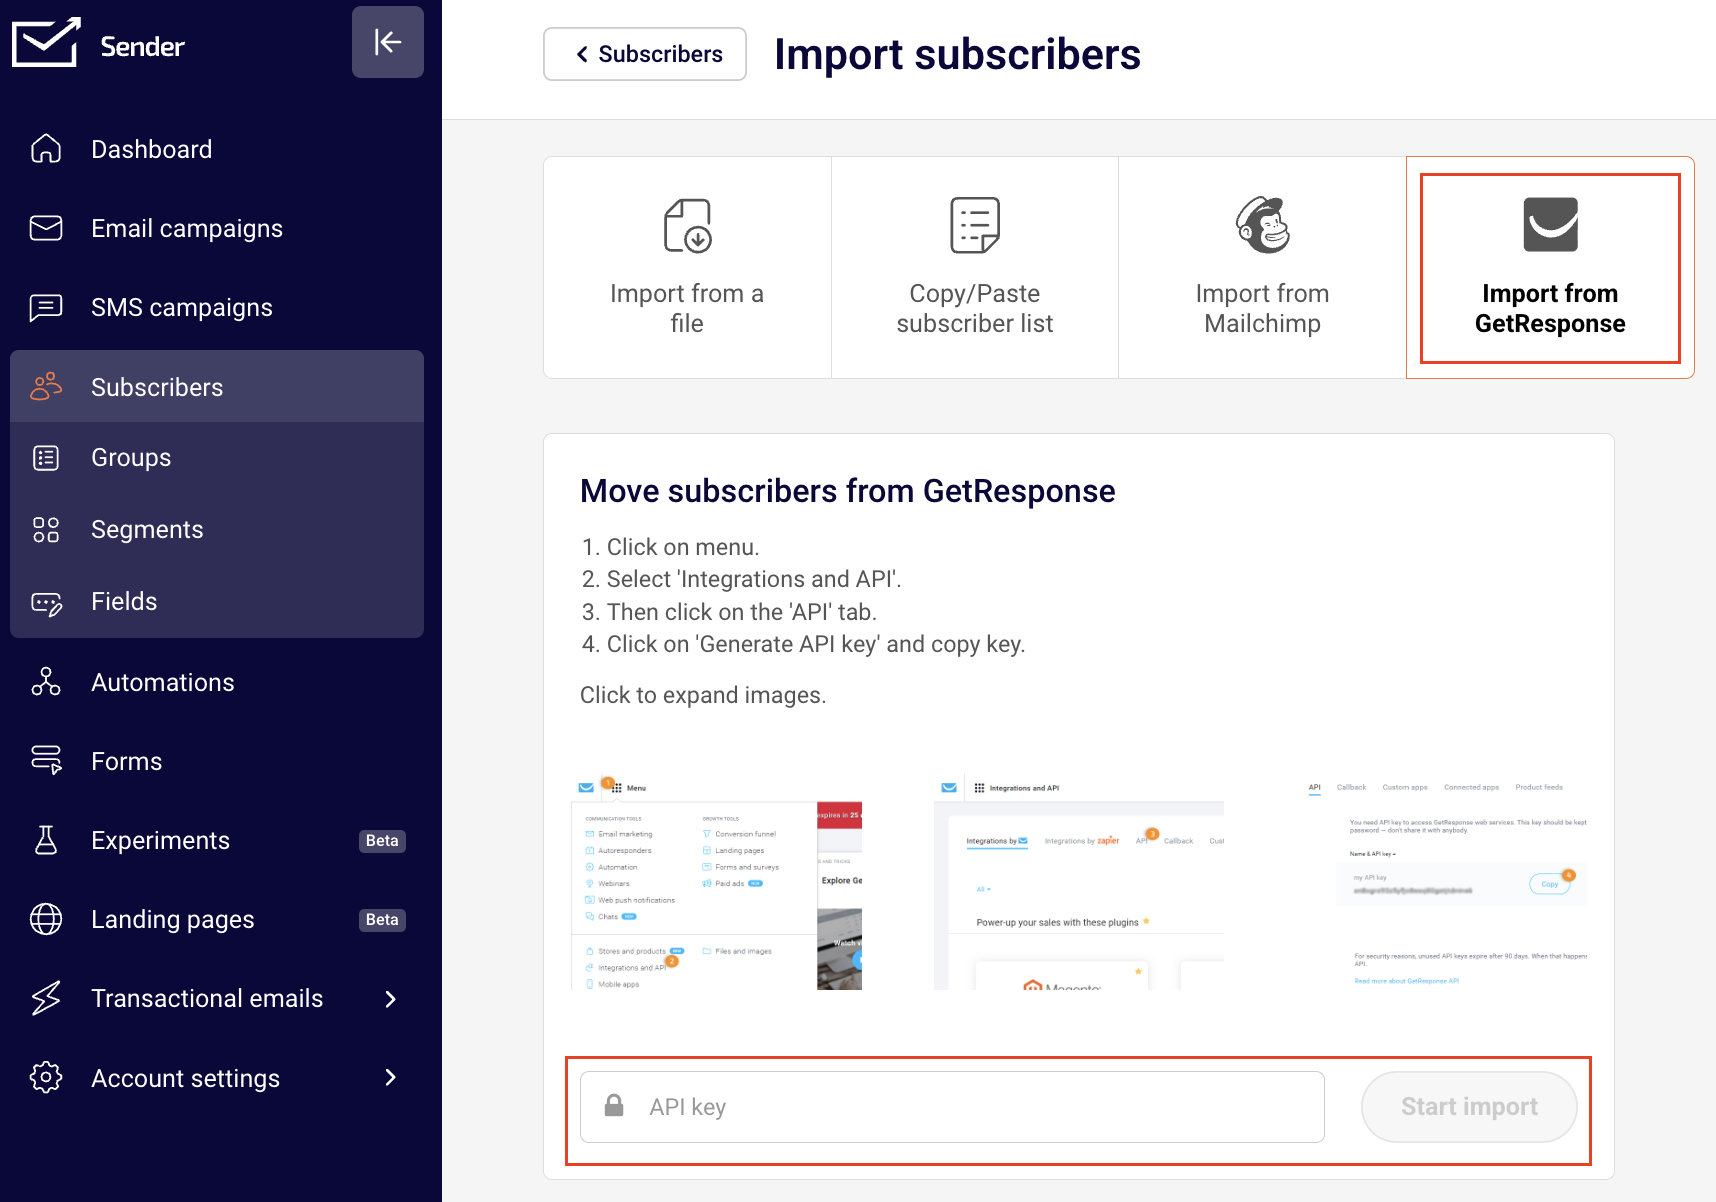
Then click on the GetResponse icon and enter your GetResponse account’s API key in the area below.
After you paste in the API key and hit “Start import” button your mailing lists will be imported from GetResponse. The whole process will take up to few minutes
How to find API key in at GetResponse?
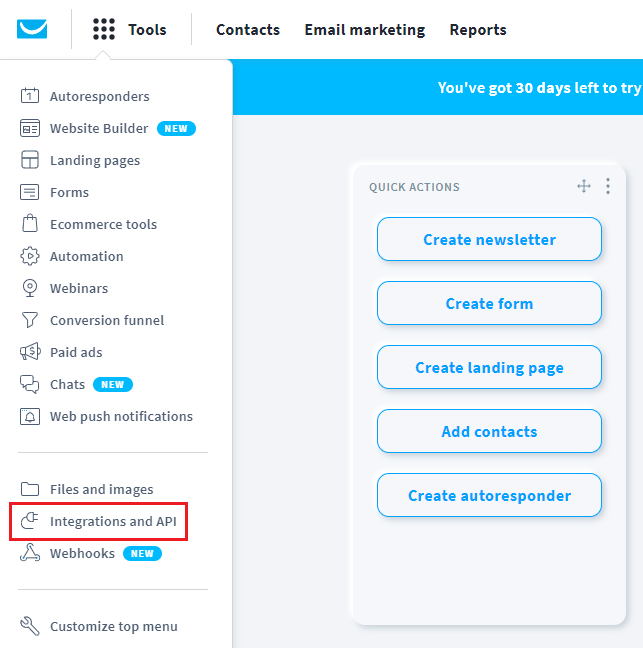
To find your API key, log in to GetResponse, click the Menu button and switch to ‘Integrations and API’.
Switch to the ‘API’ section and click the ‘Generate API key’ button. Copy your new API key. If you don’t have one, click generate API key.
That’s it!
If you got stuck on a specific task or can’t find a way to execute a particular job, contact our support team via LiveChat or [email protected] – we’re here to help 24/7.
Go to your Prestashop admin panel. Go to the ‘Modules and Services’ section. Then click ‘Add a new module’. Next, click ‘Choose a file’ and choose the file you have downloaded from Sender.net
Click ‘Upload this module’
Go to ‘Emailing & SMS’ section, find Sender.net’s module and click ‘Install’. Next click “Proceed with the installation”
You will be redirected to the Sender.net settings page
Activate the “Sender.net email marketing” plugin by inserting an API token and clicking “Authenticate”
Enjoy!
Embedded subscription forms
When enabled, a Sender.net subscription forms will appear in the Module positions menu. It allows you to insert your Sender.net’s subscription form into your web page. All your forms must be created via the Sender.net’s Form creator. Once the form is created, you can see it in your plugins menu.
Enabling/Disabling the ‘Forms’
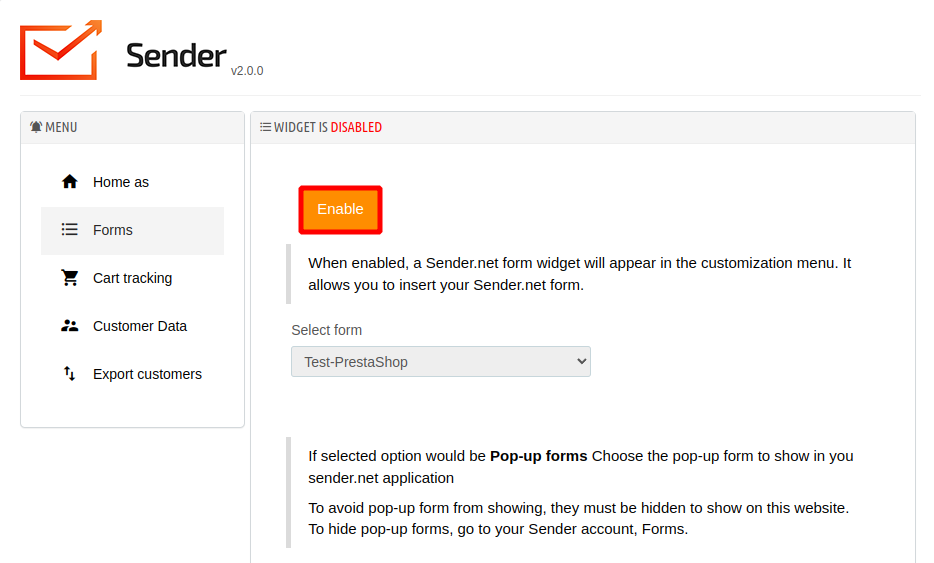
Head to the ‘Forms’ section in your Sender.net’s plugin menu.
The feature is disabled by default. To enable the subscription form click the ‘Enable’ button and select a form.
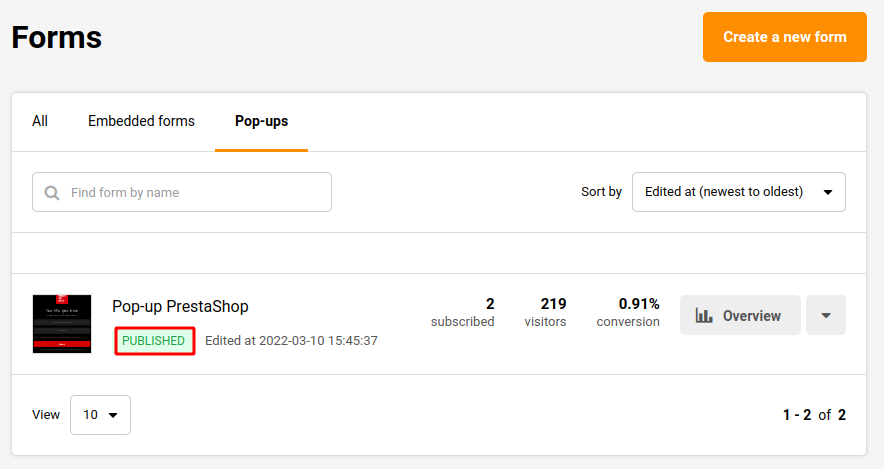
Pop-up forms
Pop-up forms will automatically appear on your website without further configurations. Simply “Active” a required pop-up on Sender.net platform, and it will appear on the website.
Next time you open your website, the popup will appear according to its behavior settings.
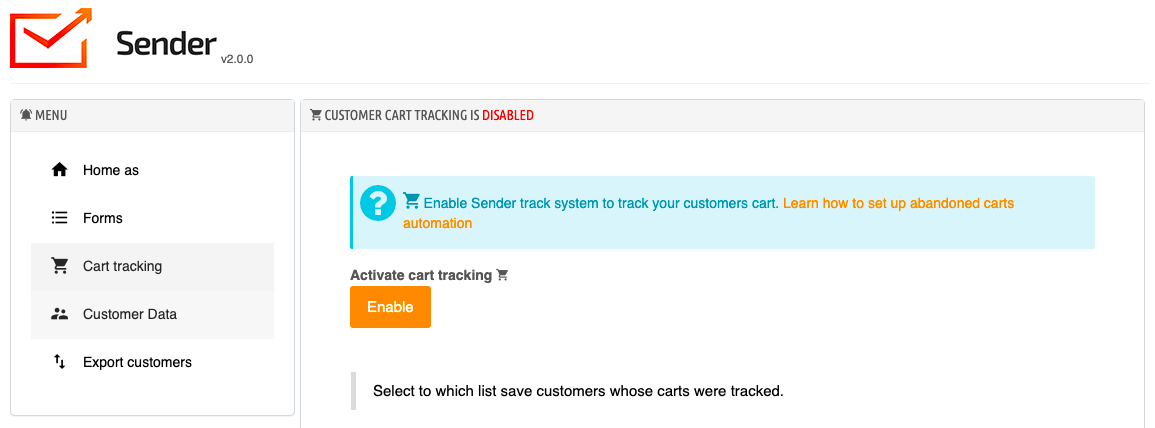
Cart tracking
To turn on cart tracking click Enable.
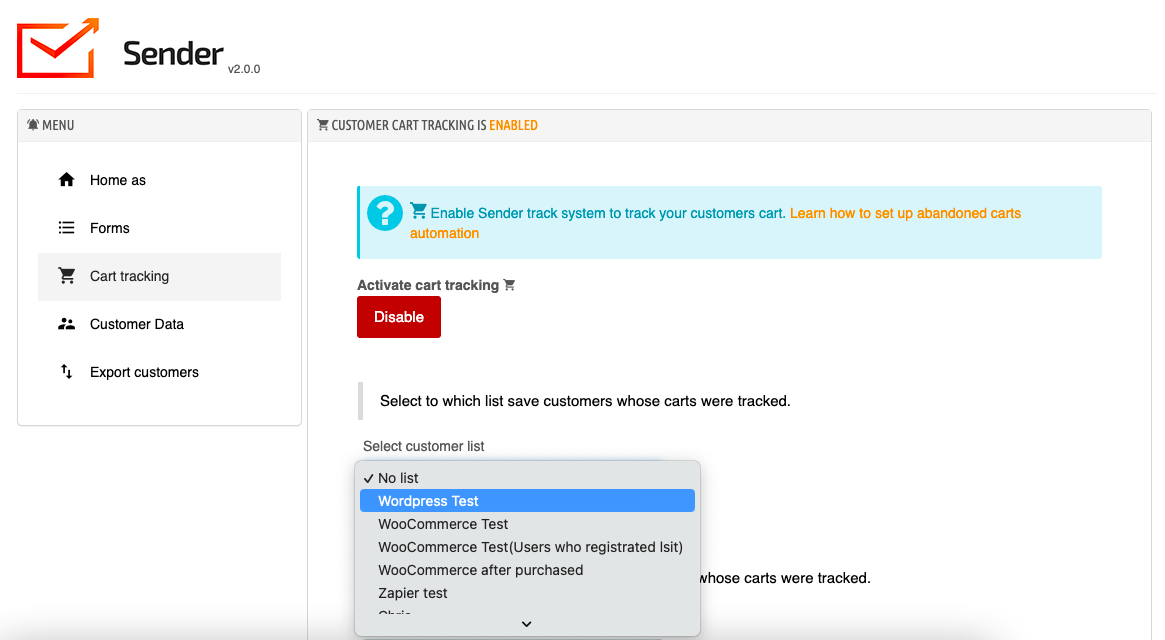
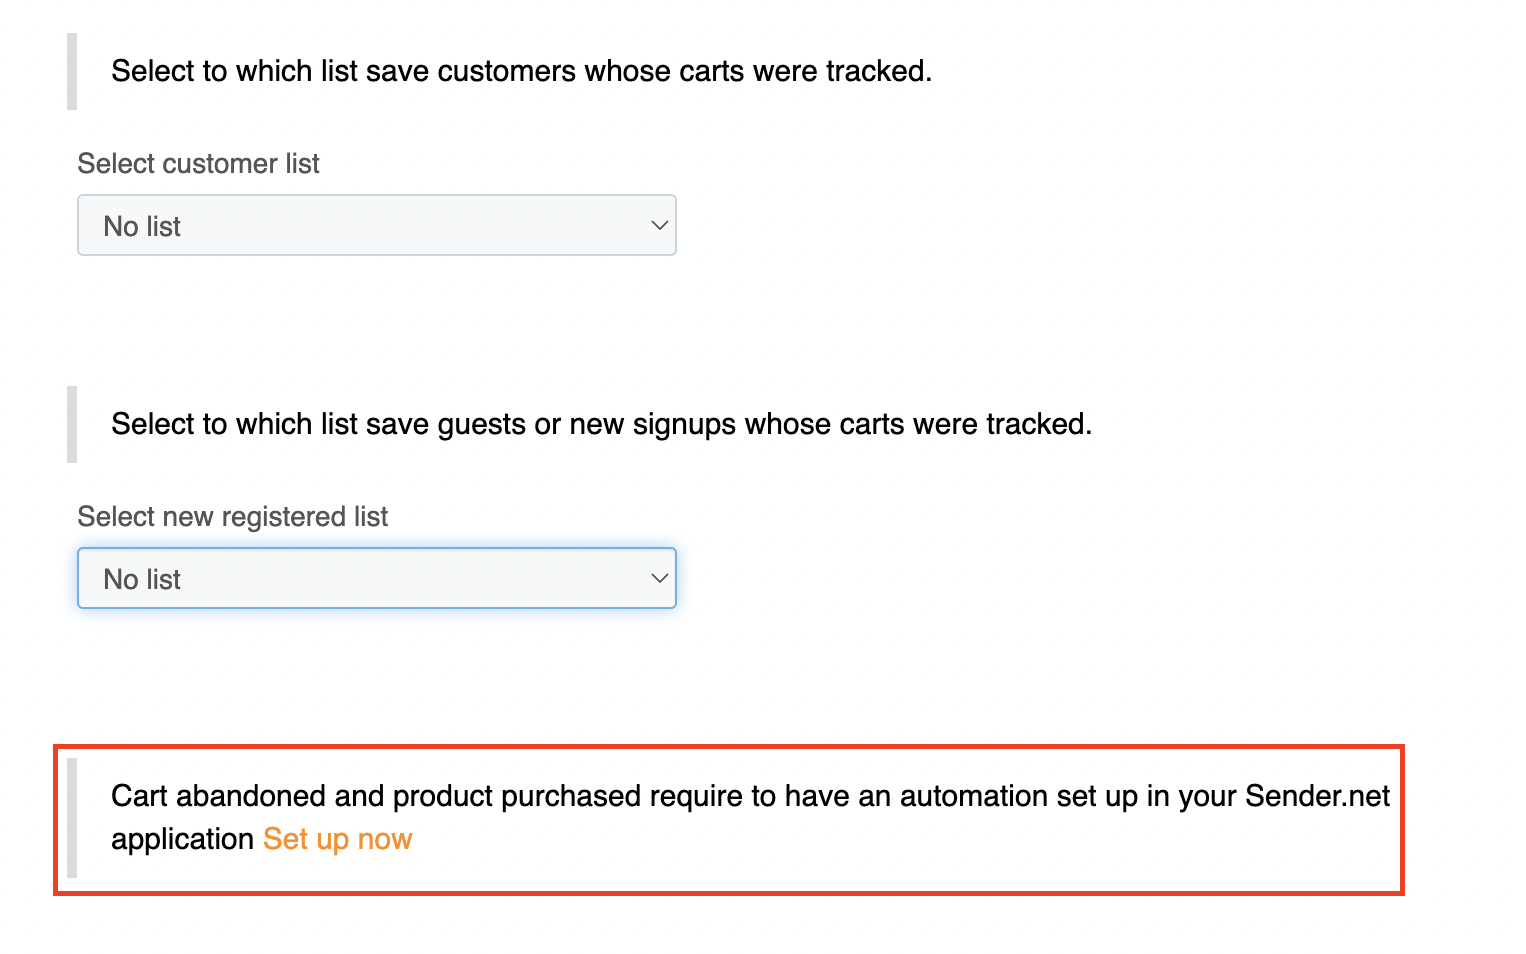
Then select to which list save the customers whose carts were tracked.
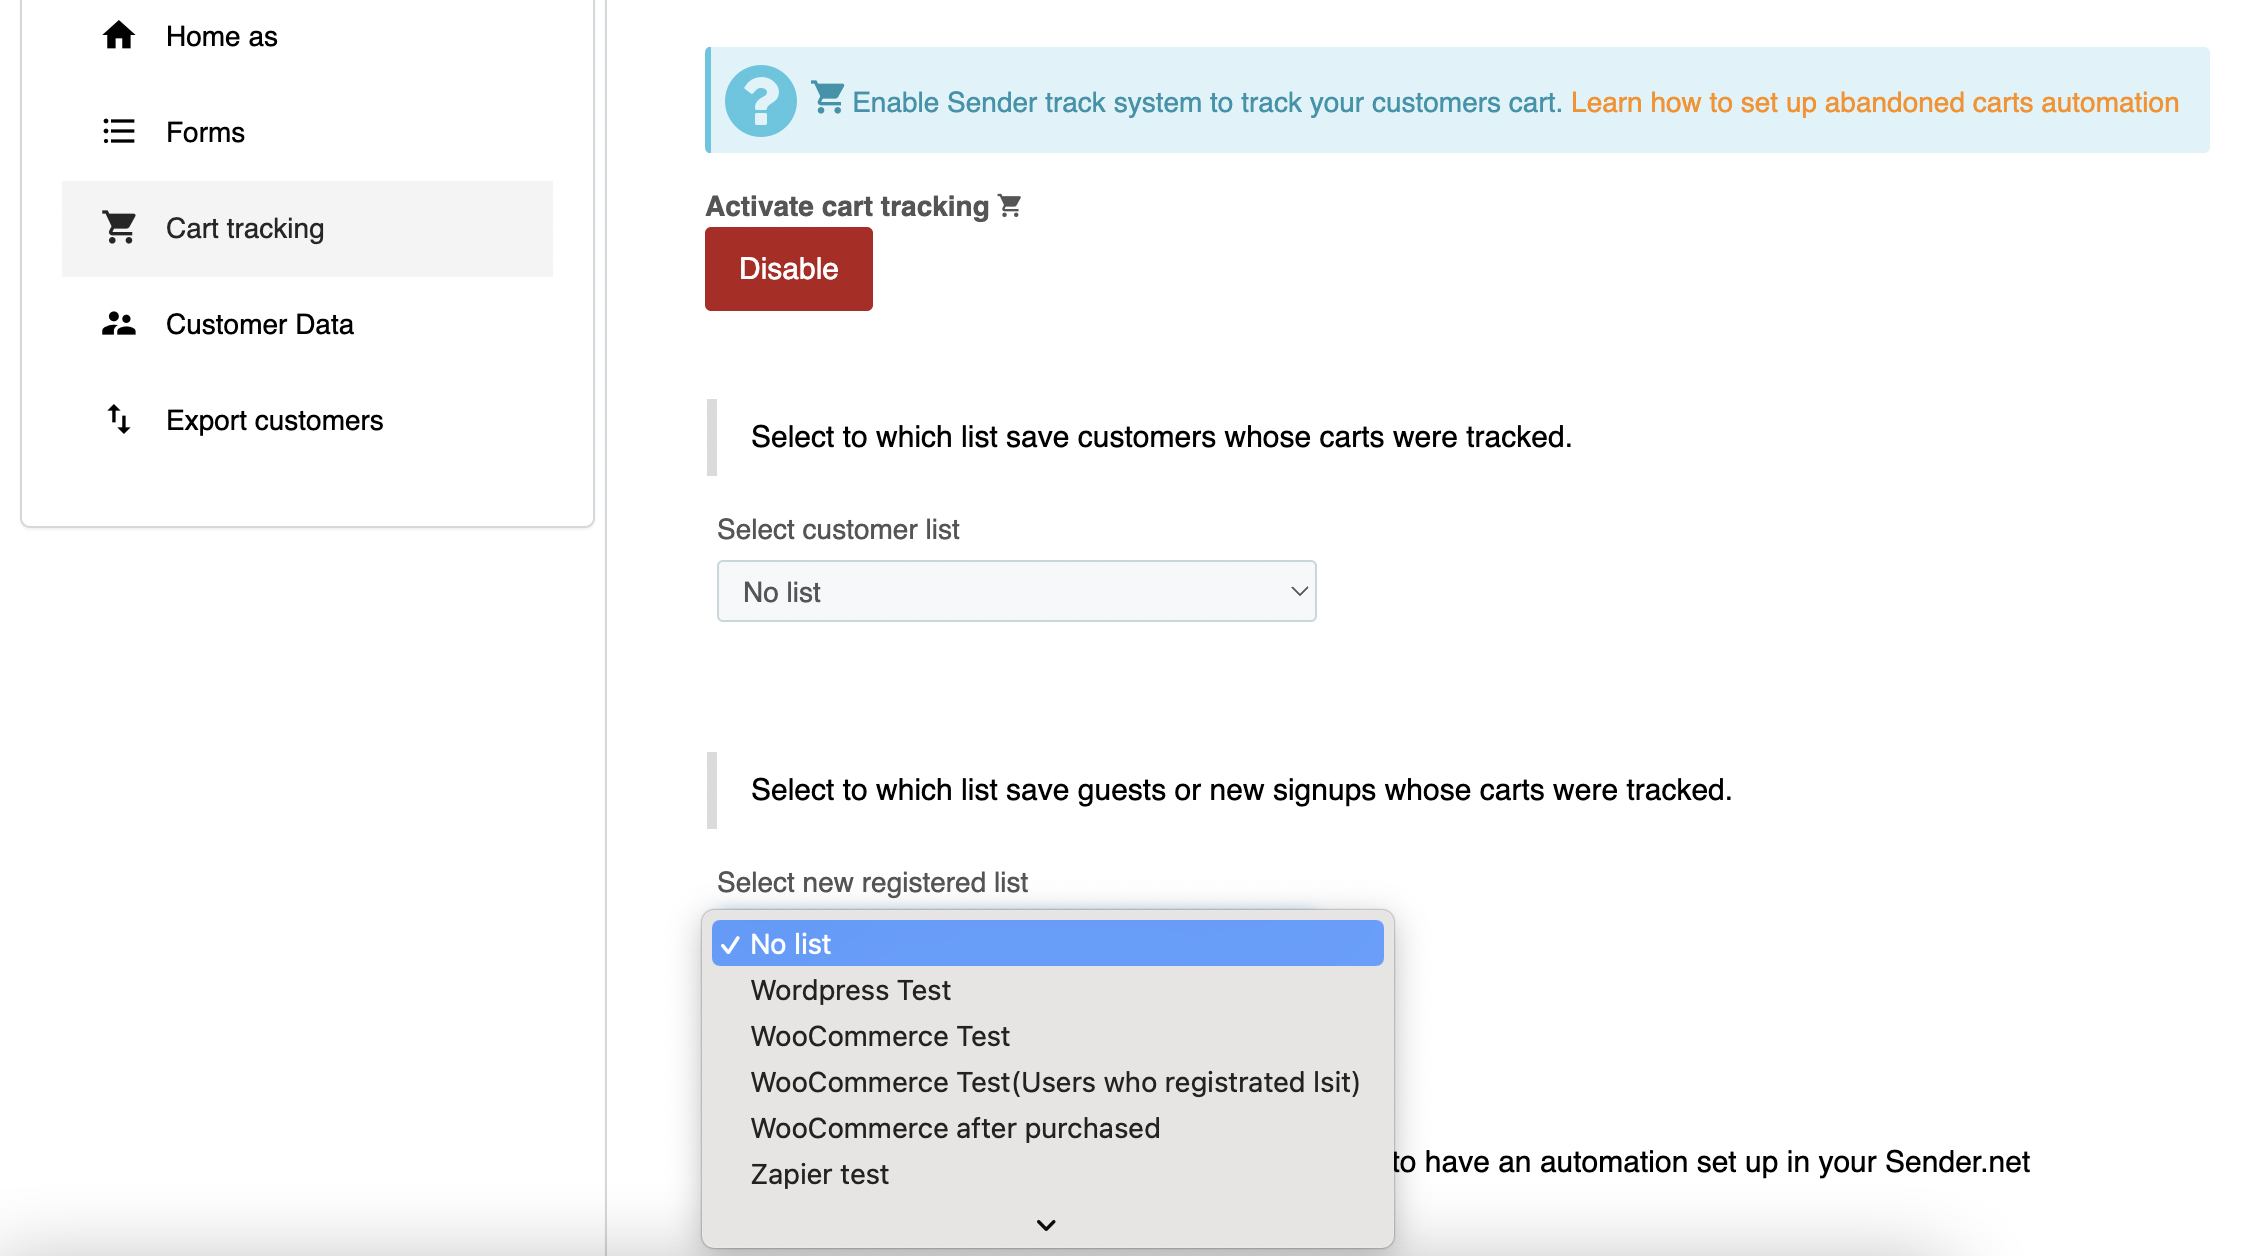
If the customer is new, select the same or a different list to which save guests or new signups whose carts were tracked.
Now it is possible to create automated Abandoned cart and Product purchased workflows. If you do not have one yet, simply click Setup now.
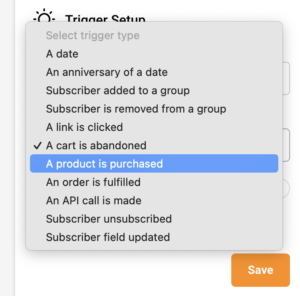
Choose the trigger A product is purchased or A cart is abandoned to set up the automation.
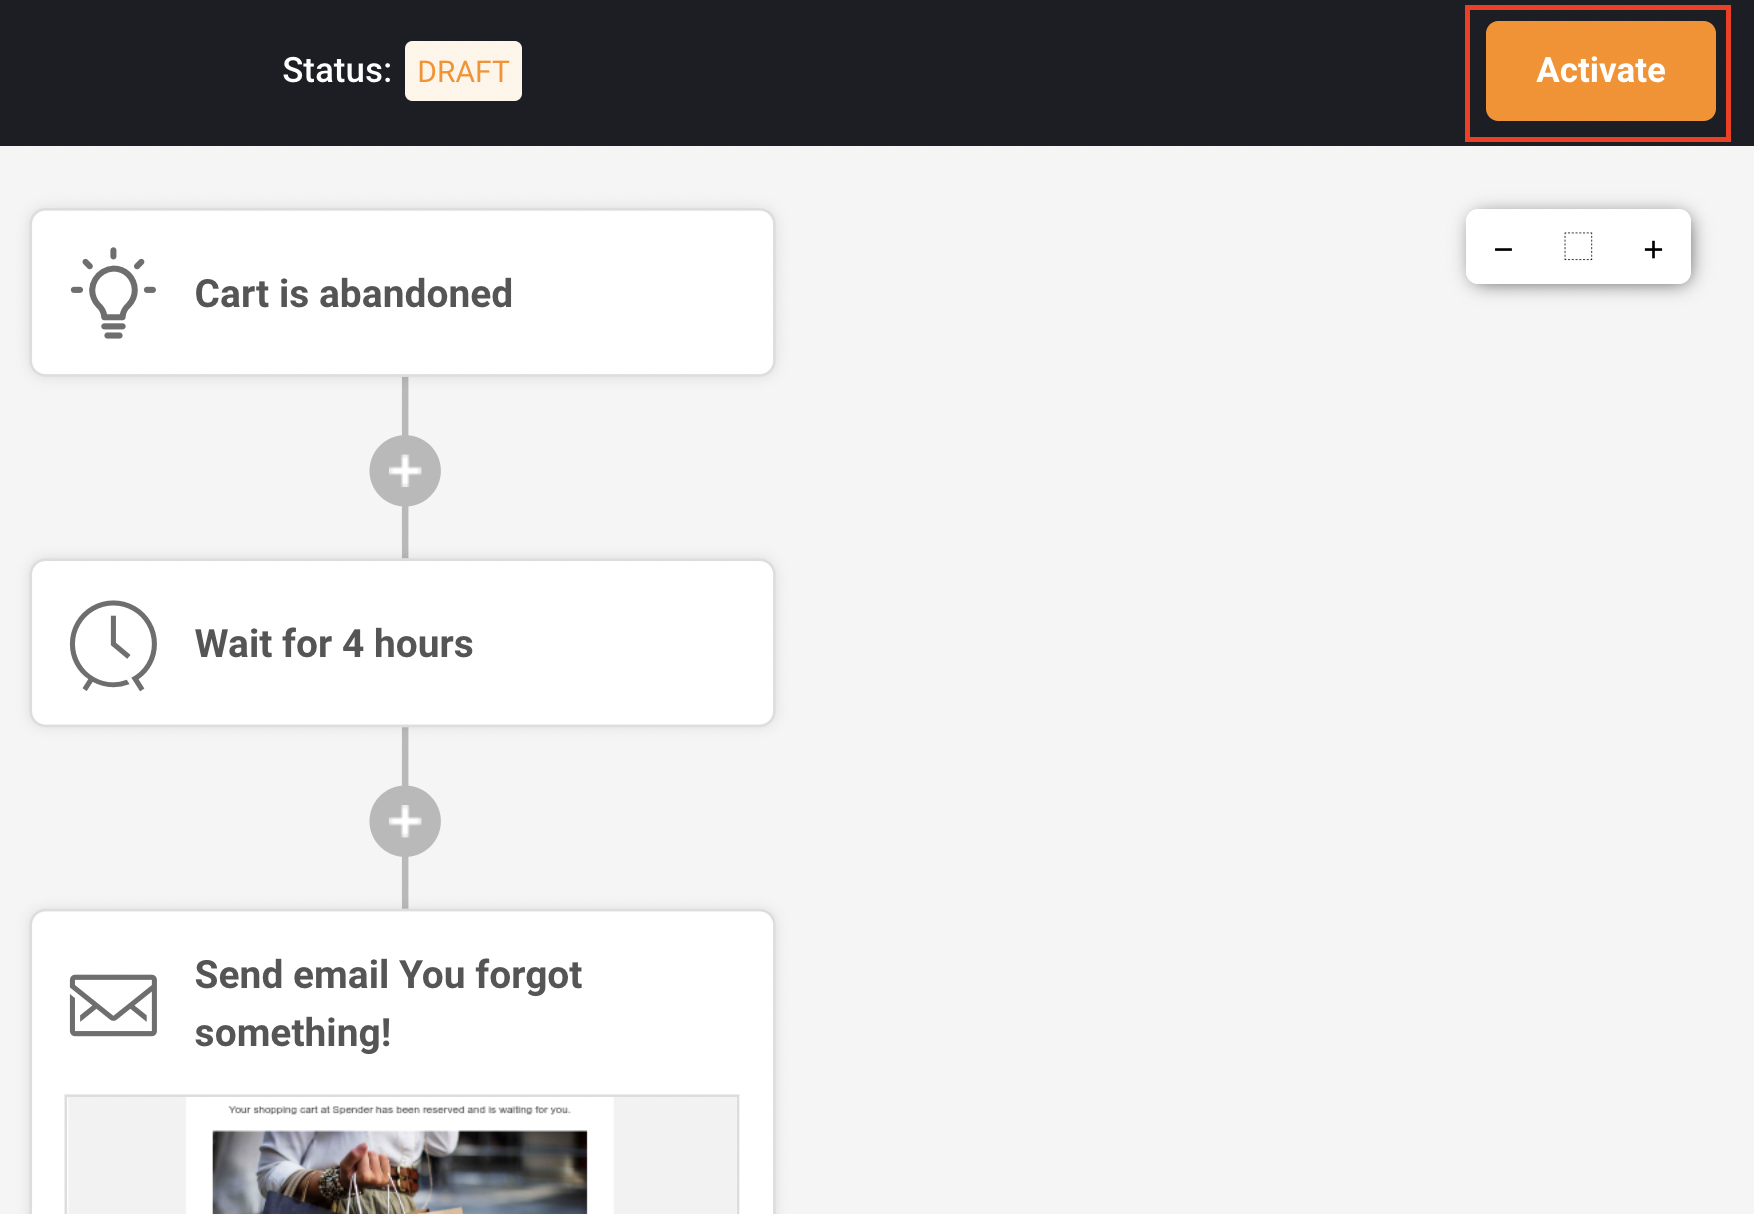
After the trigger, add a delay and any other steps (e.g. an email reminder).
Here is an example of what the abandoned cart automation workflow could look like:
Once the automation workflow is completed, make sure to activate it.
Customer data
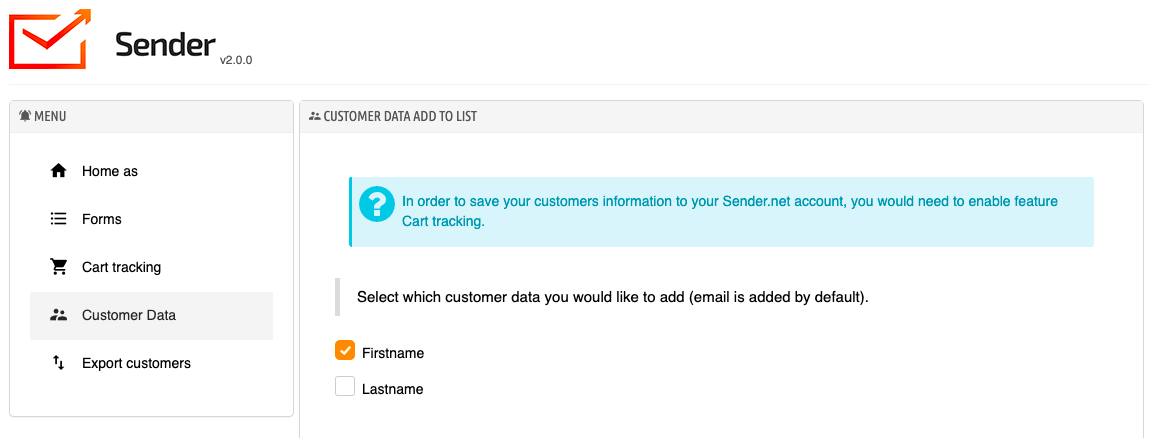
To save customer data, make sure that cart tracking is enabled.
Then click Customer data and select which customer data you would like to add (email is added by default).
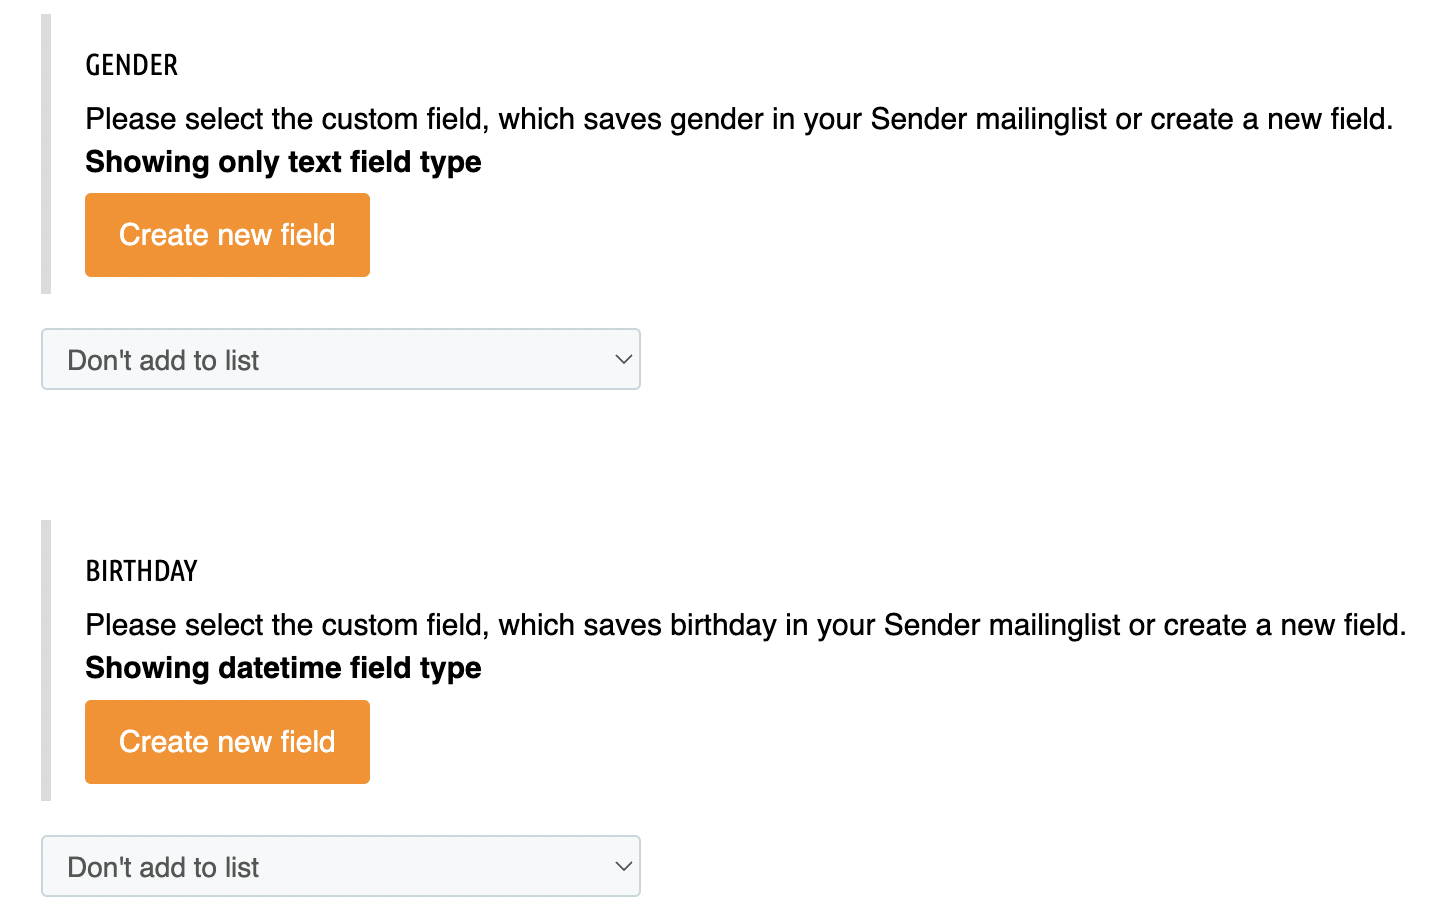
There is an option for the Gender and Date of Birth field information to be collected from the customers. This information can be used to personalize future email campaigns or congratulate your customers on their birthday.
If you do not have such fields created within your Sender.net platform, you can click Create new field.
This data would be saved in your Sender.net application as subscriber information in their custom fields.
Export customers
There is an option to export all your customers into a group in your Sender.net account.
Simply select the list that you want your customers to be added to and click Synchronize this list with Sender:
If you are stuck on a specific task or can’t find a way to execute a particular job, contact our support team via LiveChat or [email protected] – we’re here to help 24/7.
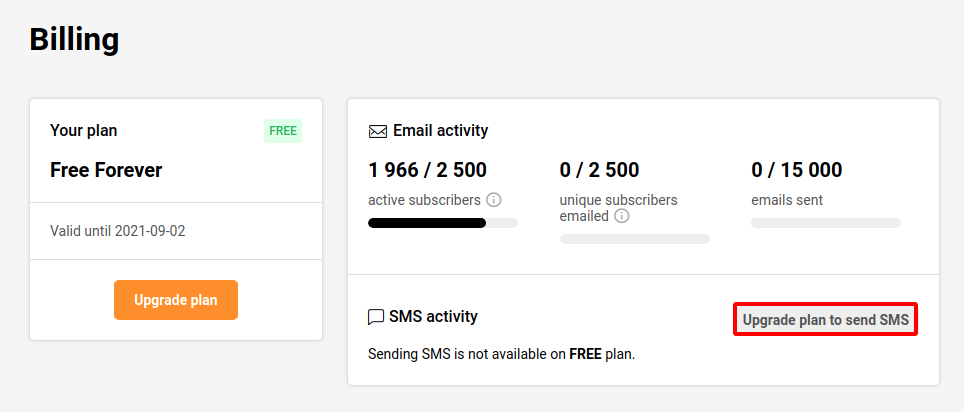
Click on ‘Settings’ and select the ‘Billing’ section at the top
Click ‘Upgrade plan’ to send SMS
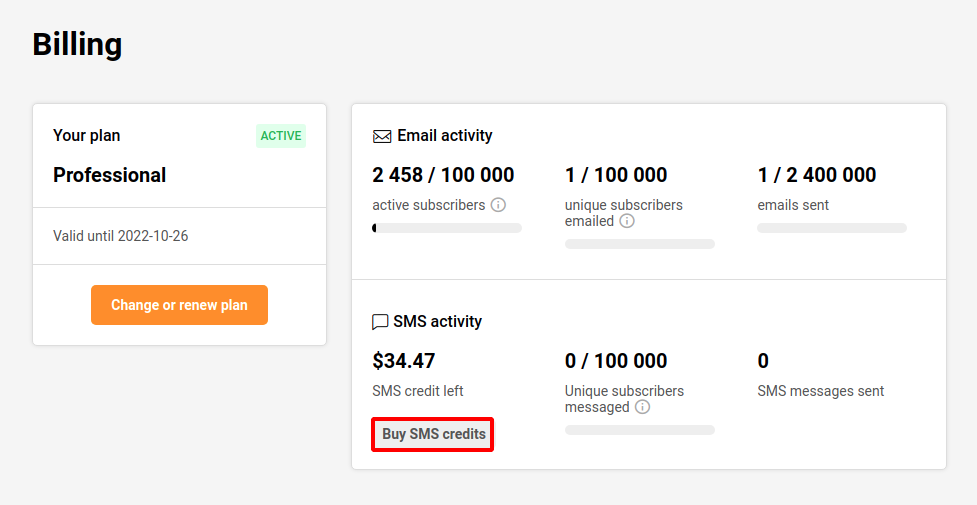
Once the purchase of a standard or a professional plan is made you unlock the ability to buy SMS credits.
When you subscribe to a Professional plan, you will also receive SMS credits. It’s important to keep in mind that the SMS credits provided with the Professional plan expire after one month. More information can be found by clicking here.
The price of the SMS depends on the destination country. The pricing can be found here.
Please note: our SMS pricing is character-based. Once you exceed the 160-character limit, the message is billed as two SMS.
If you got stuck on a specific task or can’t find a way to execute a particular job, contact our support team via LiveChat or [email protected] – we’re here to help 24/7.
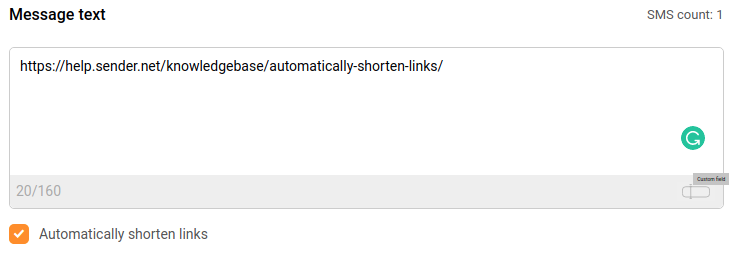
The “Automatically shorten links” option helps you to save on symbols count. For example, there is this link with a lot of characters:
When you enable the “Automatically shorten links,” the system automatically generates a link like this:
That’s it!
If you got stuck on a specific task or can’t find a way to execute a particular job, contact our support team via LiveChat or [email protected] – we’re here to help 24/7.
There are two ways to add sending numbers – Toll-free (available in USA and Canada) and Alphanumeric (not supported in USA and Canada).
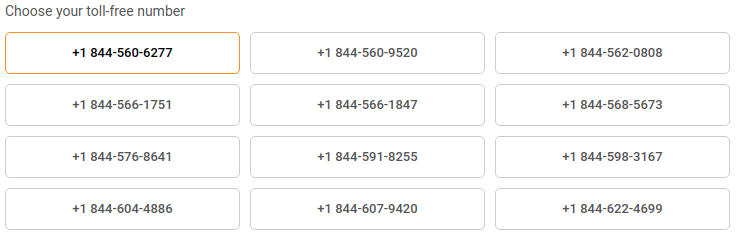
Toll-free numbers
They can be chosen from randomly generated numbers. If you need another number, refresh the page, and the system will generate new ones. There is no option to select a specific number because the system generates them automatically.
Please note that toll-free numbers must be verified. More on Toll-Free number verification here.
Alphanumeric
It is possible to add up to 11 symbols for Alphanumeric numbers. It should be associated with the company name. Once the Alphanumeric number is added, our QA team reviews it.
No multimedia support. Alphanumeric Sender IDs, as well as toll-free numbers are allowed for text only, no MMS or images can be sent.
No two-way or keywords. Recipients cannot respond to messages from this number type.
That’s it!
If you got stuck on a specific task or can’t find a way to execute a particular job, contact our support team via LiveChat or [email protected] – we’re here to help 24/7.
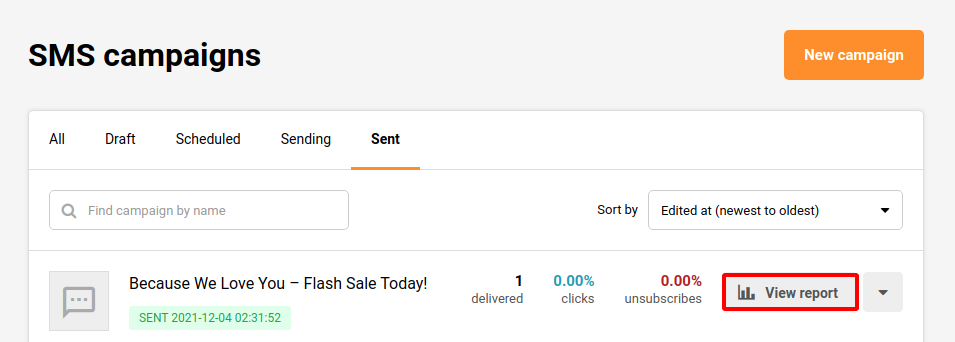
The SMS campaign report is located behind the “View report” button on the SMS campaign section:
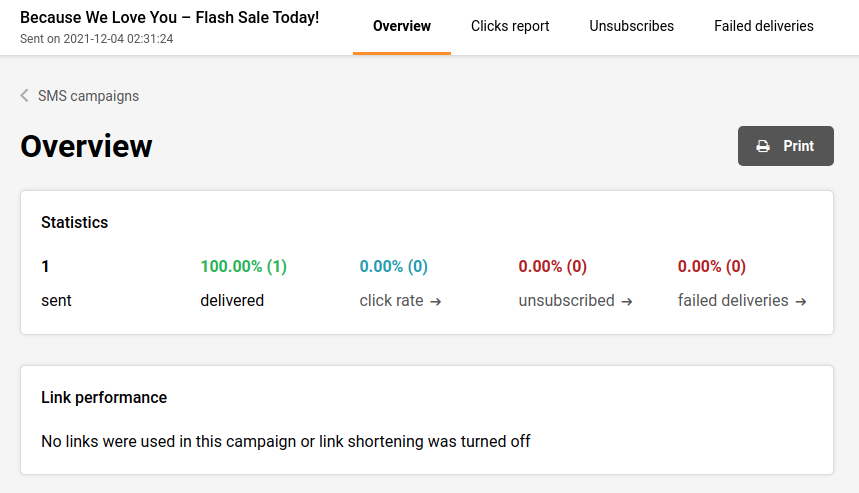
Overview:
Just below the Overview, you will find 5 different counters:
Sent (the amount of sent SMS campaigns)
Delivered (the amount of successfully delivered SMS campaigns)
Click rate (If the is a used link)
Unsubscribed
Failed deliveries
Click to view any of the individual reports:
You can Print and Export any of the specified reports.
If you got stuck on a specific task or can’t find a way to execute a particular job, contact our support team via LiveChat or [email protected] – we’re here to help 24/7.
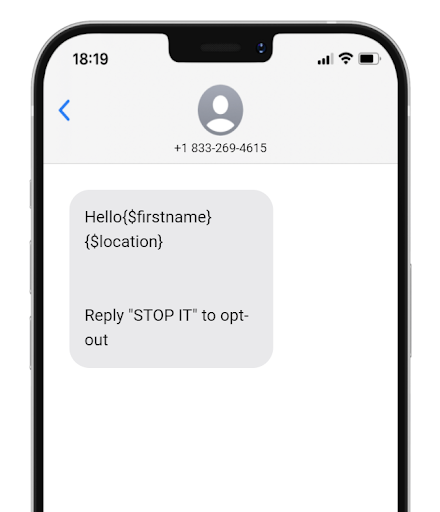
The dynamic text can be used with any custom field: first name, surname, order number, location, or any other information that has been collected about subscribers in the custom fields section.
Here is how the dynamic text looks like:
Here is a tutorial on how to insert the dynamic text:
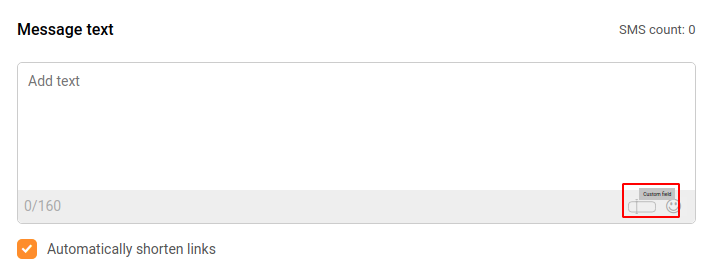
While creating a new SMS campaign, there is a tiny custom field icon in the bottom right corner of the “Message text” box. Once it is clicked, all custom fields appear. Then the desired custom field can be selected.
Here’s a short video guide on how it’s done:
That’s it!
If you got stuck on a specific task or can’t find a way to execute a particular job, contact our support team via LiveChat or [email protected] – we’re here to help 24/7.
The SMS campaign scheduling option appears at the last step of the campaign creation. Once everything with the SMS campaign is done, click on the “Save & Continue” button, select your desired subscriber list, click continue to get into the final step.
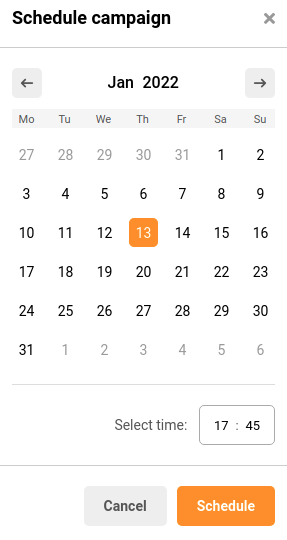
Click on “Schedule to send”
When the schedule button is clicked, a calendar appears, where a date and time can be picked for when the SMS should be delivered.
Scheduled SMS appears in the SMS campaign section together with the delivery date and time.
If you got stuck on a specific task or can’t find a way to execute a particular job, contact our support team via LiveChat or [email protected] – we’re here to help 24/7.
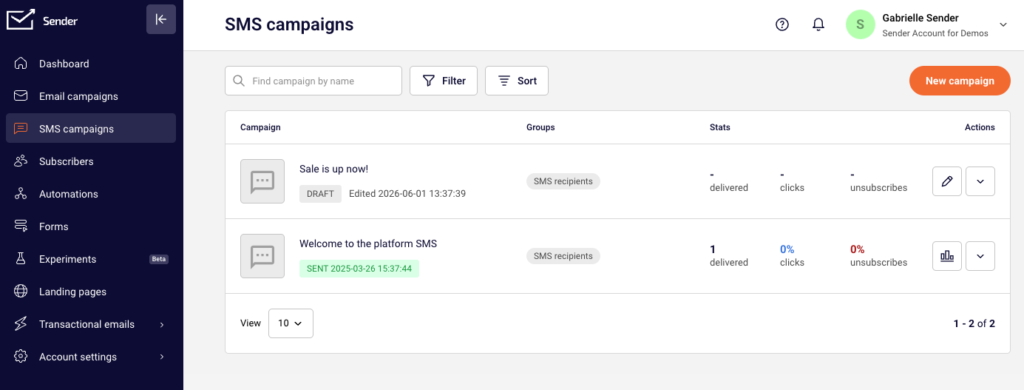
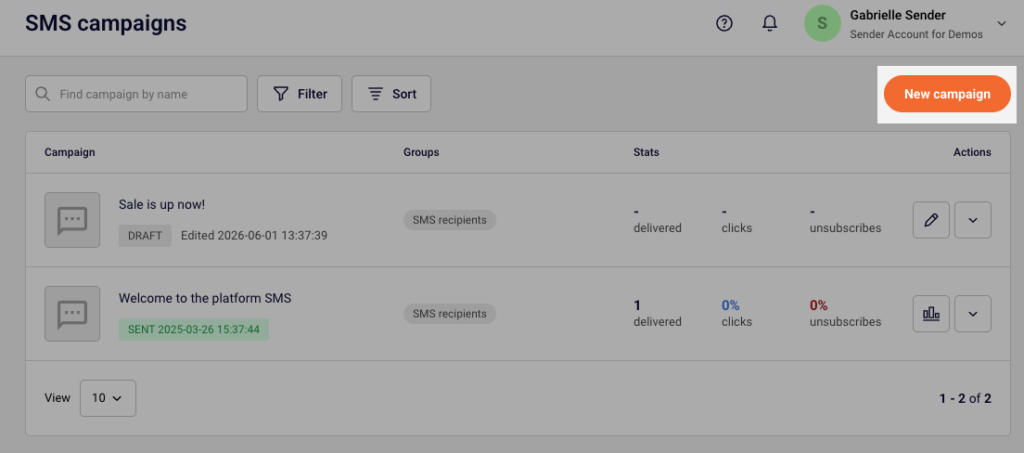
Once the SMS campaign section is opened, the campaign library can be accessed. It contains scheduled and sent campaigns as well as their drafts.
Click the “New campaign” button to start creating a new SMS campaign.
The first stage of creating an SMS campaign:
Moving from one stage to another will not cause any loss to the progress that has been made. Therefore, if the Campaign name needs to be changed, simply press on the “Settings” stage and go back to change it:
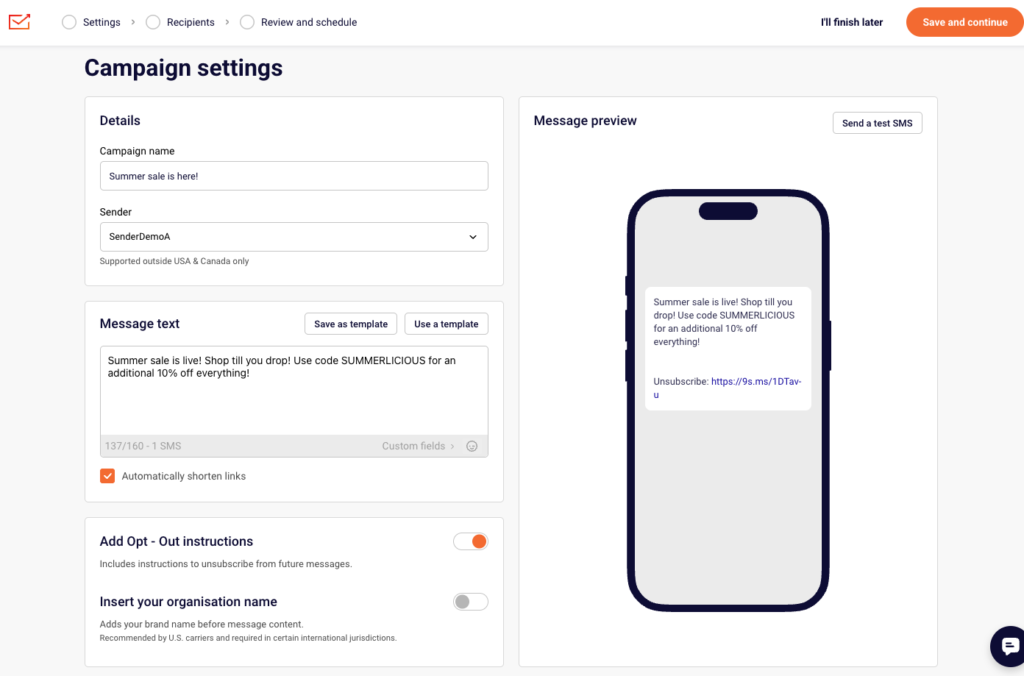
Settings is where the editing of the SMS campaign is done. This stage contains:
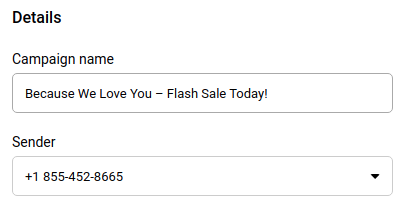
Details (example):
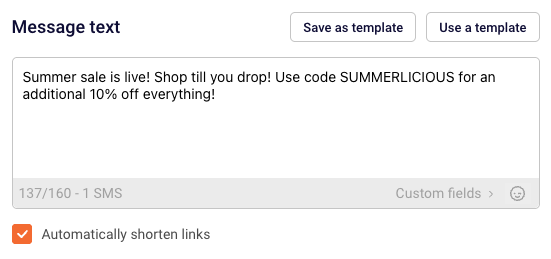
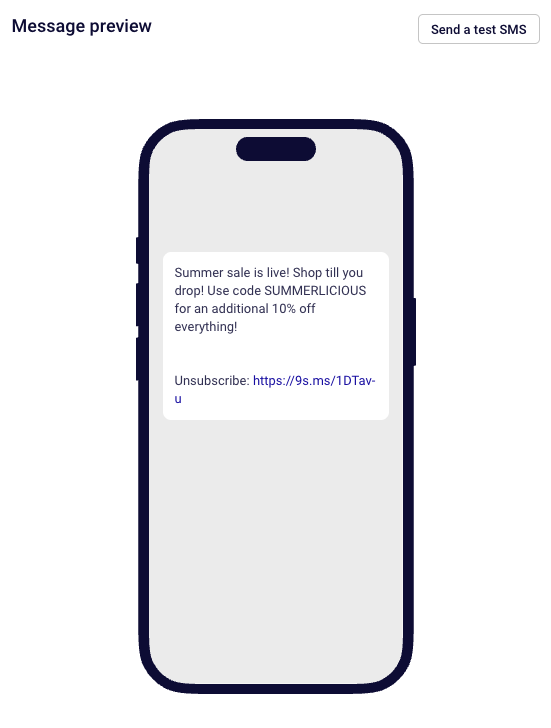
Message text (example):
The preview of the SMS campaign and the option to Add Opt-Out instructions:
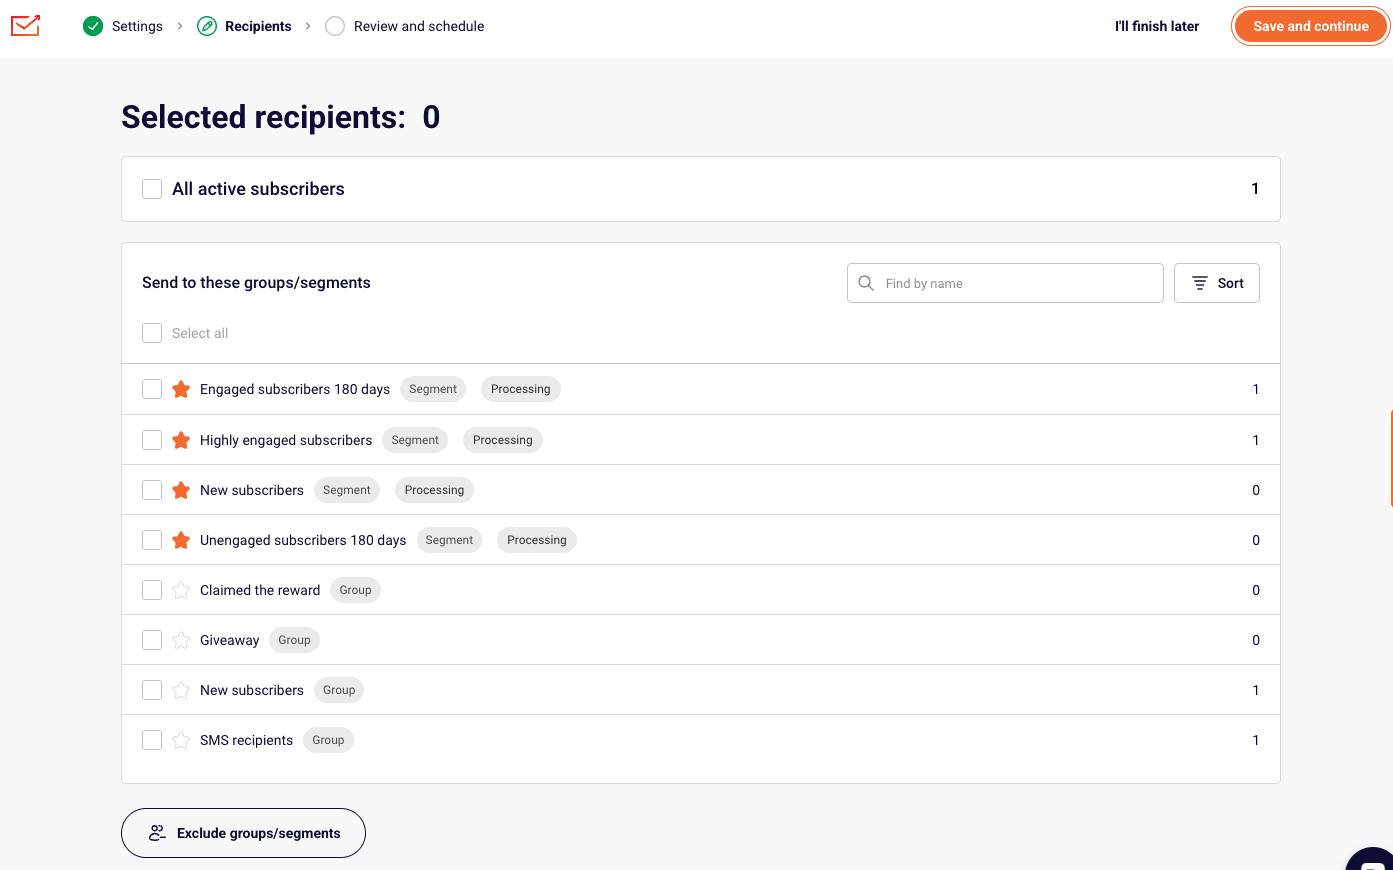
Once everything is completed in the Settings stage, the “Save and continue” button needs to be clicked to save the progress and move to the next stage – Recipients. Here recipients can be selected by choosing specific Groups or Segments that have been created:
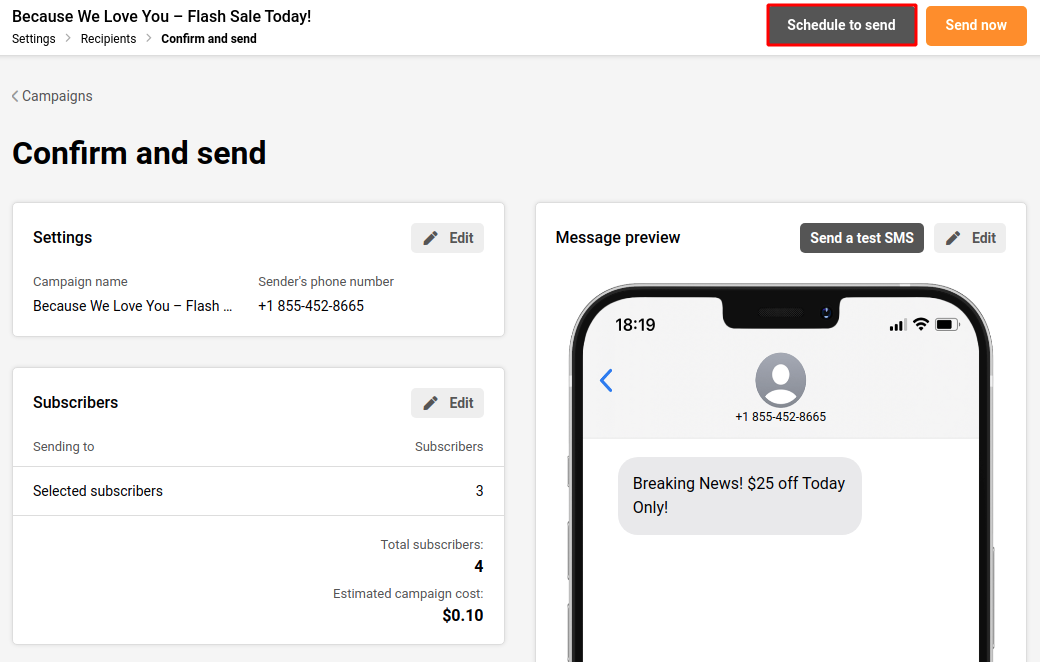
After the recipients (subscribers) are selected, the last thing that is left is to “Confirm and send”. Here the estimated cost of the campaign is displayed together with the total number of subscribers that has been selected and the settings that have been set:
Please note: our SMS pricing is character-based. Once you exceed the 160-character limit, the message is billed as two SMS, if you exceed two SMS character limit, the SMS will be charged as two SMS and so on.
If you include custom fields into the SMS, final price might be more than the estimated one due to various length of customer data that will be included instead of the custom field code.
If you include non latin characters, it will drastically change the number of characters used in the SMS campaign.
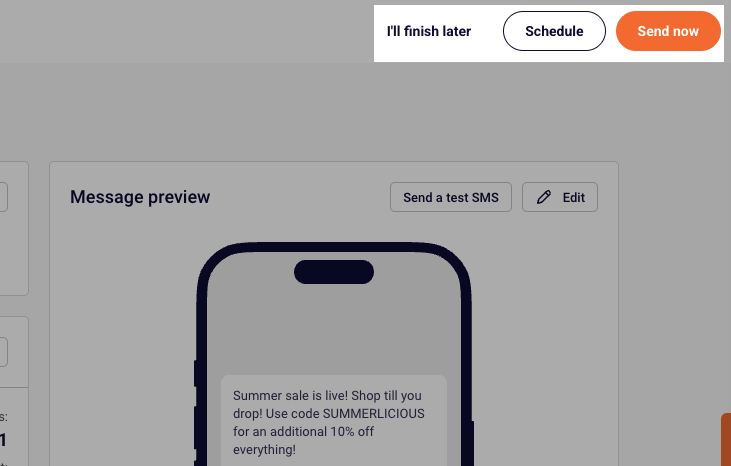
At the last stage, the SMS campaign can be sent as a test SMS, scheduled to be sent later or sent immediately. You can also click “I’ll finish later,” and all of your progress will be saved.
If you are stuck on a specific task or can’t find a way to execute a particular job, contact our support team via LiveChat or [email protected] – we’re here to help 24/7.
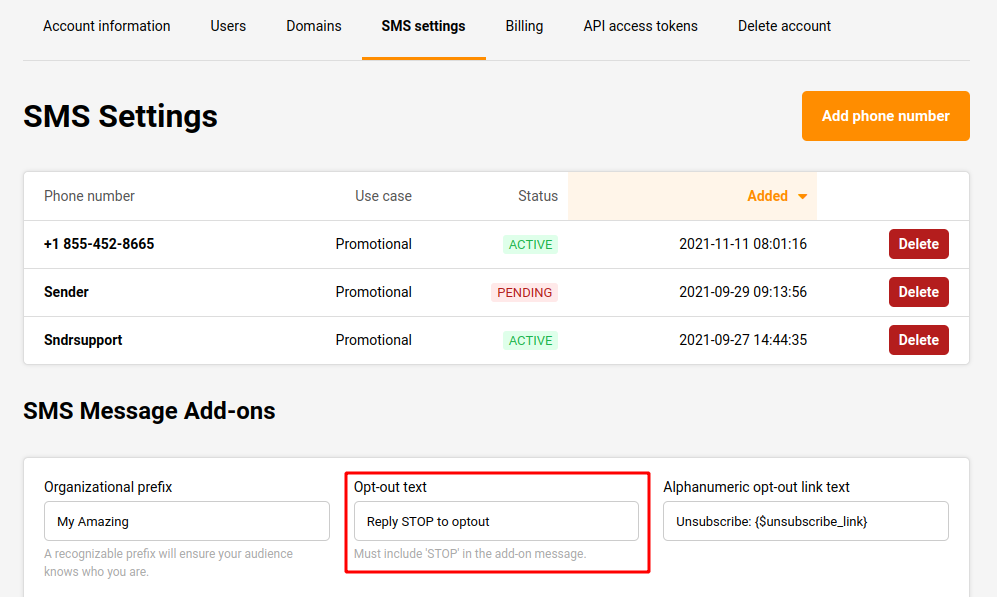
Yes. There is an “Opt-Out” feature in the SMS campaign with customizable Opt-Out text. This feature can be found under the “SMS Message Add-ons” section in the SMS settings.
Go to “Settings” on the left sidebar under the account, then select the “SMS settings” section. The “Opt-out text” box can be seen at the bottom of the page. From here the “Opt-Out” text can be customized.
That’s it!
If you got stuck on a specific task or can’t find a way to execute a particular job, contact our support team via LiveChat or [email protected] – we’re here to help 24/7.