Blog

  • Zapier Integration Setup

    Try it out

    Zapier is an online automation tool that connects your favorite apps, such as Gmail, Slack, Shopify, Squarespace, and 3000+ others with Sender.net. 

    You can connect two or more apps to automate repetitive tasks. It’s easy enough that anyone can create workflows with just a few clicks.

    Use cases

    Due to the integration between Sender.net and Zapier, you can move new contacts straight to your Sender’s contact list and/or activate custom events based on particular triggers. Here are several different examples on automated workflows between Sender.net and Zapier:

    • Start automation workflow based on the custom event, e.g., send welcome emails each time clients fill in a survey.
    • New contacts from in the Google Form are automatically moved to your contacts list on Sender.net
    • Use Zapier to integrate with LinkedIn Lead Gen Forms and automatically move new subscribers to Sender.net
    • And much more.

    How to connect Sender and Zapier

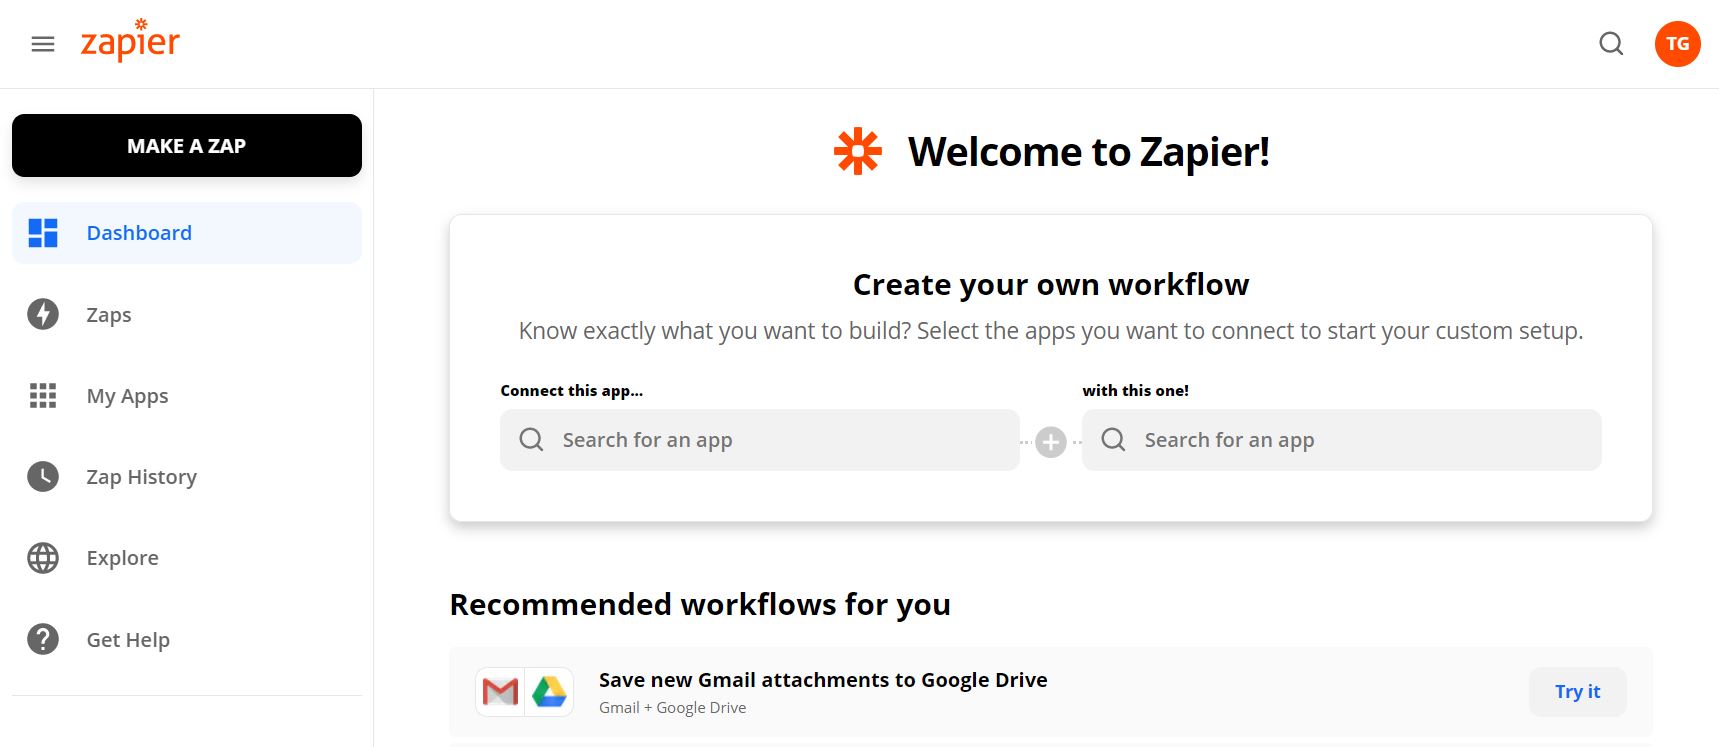
    First, log in to your Zapier account and click on Make a Zap! 

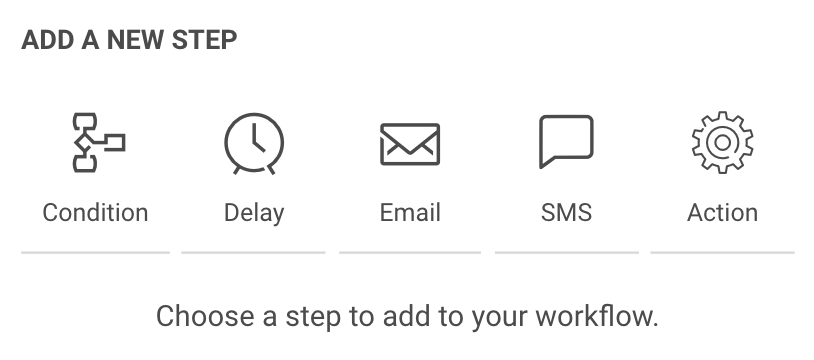
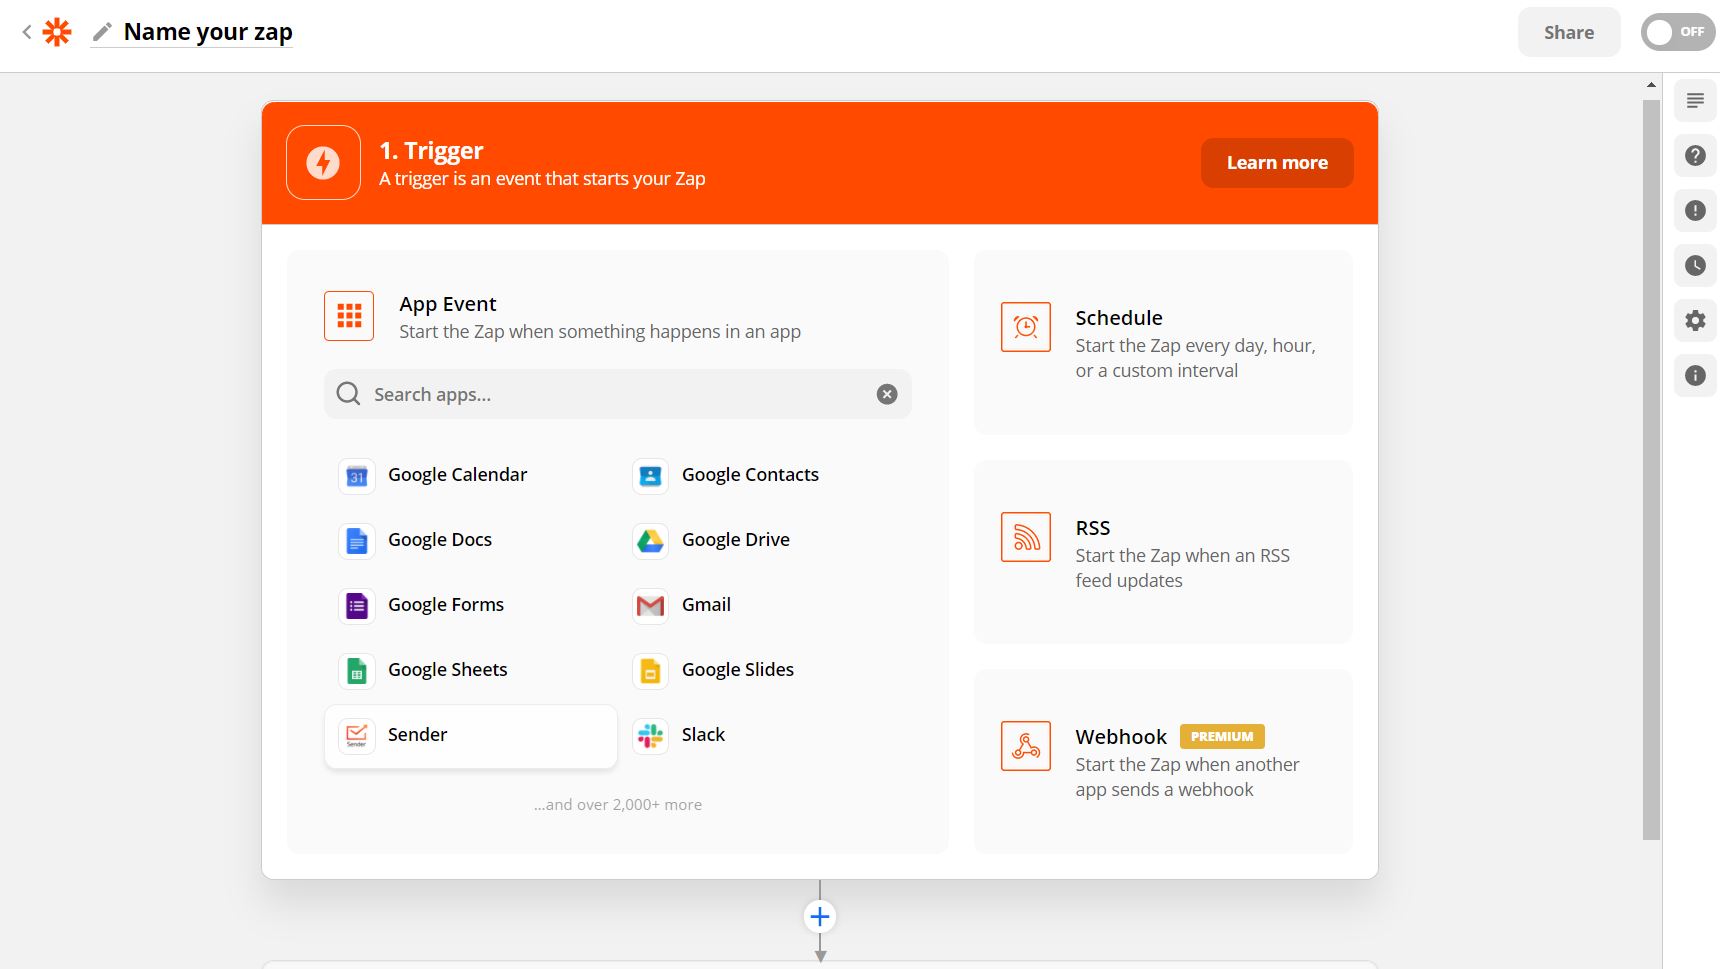
    With Zapier, you can create custom and individual connections with your favorite apps. Each automation sequence is named “Zap” which includes a trigger and action steps.

    Triggers

    • New campaign. Triggers when a new campaign is created.
    • New subscriber. Triggers when a new subscriber is added.
    • New unsubscriber. Trigger when a subscriber unsubscribes.
    • New group. Triggers when a new group is created.
    • New subscriber in the group. Triggers when the subscriber is added to the group.
    • New unsubscriber from the group. Triggers when a subscriber is removed from the group.
    • Updated subscriber. Triggers when subscriber is updated.


    Actions

    • Add/Update Subscriber. Add a new subscriber or update subscriber’s data.
    • Create campaign. Creates a draft campaign.
    • Unsubscribes an email address.
    • Add subscriber to the group. Adds a subscriber to the group.
    • Remove a subscriber from a group.
    • Send campaign. Send a drafted campaign.

    Next, choose the app that will begin the automated sequence and the action trigger. Continue by authenticating the application’s account on the appeared popup and continue building the sequence.

    zapier trigger

    Proceed by selecting a different app and the action step that will be performed according to the workflow – the equivalent procedure applies.

    action

    Here’re the shortcuts to the ready-to-use Zapier templates – click on “Try It” to proceed with a Zap. 

    Add subscribers in Sender for new spreadsheet rows in Google Sheets

    Try It


    Add Shopify customers to Sender

    Try It


    Add Sender subscribers for new records in Salesforce

    Try It


    Add or update new HubSpot contacts to Sender

    Try It


    Add or update Magento 2.X customers to Sender

    Try It


    Create Drupal contents from new Sender campaigns

    Try It


    Add new BigCommerce customers to Sender as subscribers

    Try It


    Add or update Facebook subscribers to Sender

    Try It


    Add or update LinkedIn Lead Gen Forms subscriber to Sender

    Try It


    Add Sender subscribers for new form submission in Squarespace

    Try It

    See all templates


    If you got stuck on a specific task or can’t find a way to execute a particular job, contact our support team via LiveChat or [email protected] – we’re here to help 24/7.

  • Ecommerce Integrations Overview

    Integrations with various platforms and gadgets considerably enhance the product’s overall experience due to continuous and smooth transitioning between systems. Here you’ll find a list of commonly used integrations with Sender.

    Product import

    Product block is designed mainly for e-commerce clients but can be used by all users. With product block, you can easily import items from any online store. The most significant part about that – no integrations are needed.

    Click here to learn more.

    Subscription forms / Popups

    Gathering subscribers was never an easy task, though comprehensive subscription forms or functioning popups help with the matter. With Sender, you’re able to create customizable and easy-to-integrate opt-in forms with ease.

    Click here for a tutorial.

    E-commerce automation

    The best way to save time and increase your revenue is to automate your email marketing. Automation is an irreplaceable feature for creating automated abandoned cart or post-purchase email sequences and keeping profits growing.

    Click here for a tutorial.

    automaiton example

    Integrations with most popular web-platforms

    Sender instantly integrates with leading CRMs and ecommerce platforms, including WordPressPrestaShopWooCommerceZapier.

    Integrate with custom systems using advanced yet easy-to-use API.


    If you are stuck on a specific task or can’t find a way to execute a particular job, contact our support team via LiveChat or [email protected] – we’re here to help 24/7.

  • Automation feature overview

    What is email marketing automation?

    It may be a confusing term for those that are new to email marketing. But do not worry, the whole process is easier than you think.

    In simple terms, email marketing automation is a futuristic-sounding name for a tool that takes your email marketing to a whole new level. It makes your campaigns more personalized and precise (time-wise). It converts manual tasks into automated sequences.

    Developing an automated workflow could appear difficult at first, though the entire process is user-friendly and straightforward. In practice, any needed sequence can be built using different steps, conditions, and triggers.

    Here’s how it looks in motion.


    Automation triggers

    Automated workflows allow you to create thousands of different scenarios of sending automated emails without lifting a finger. Nevertheless, every automated sequences must start with a trigger.

    At the start, you will be asked to select a starting trigger. Starting triggers are:

    • A Date – To activate the date trigger subscriber’s custom field must have the “date” type selected. For example, you have the ‘last purchased’ date as a custom field next to each subscriber.
    • An Anniversary Of A Date – Perfect for sending Birthday cards or for any other anniversary date. For this trigger, you need to have a defined date custom field information for each subscriber. The automation will start each year automatically.
    • Subscriber is added to a group – This automation workflow will be started when a subscriber is added to a certain subscriber list via a subscription form or API call.
    • Subscriber Is Removed From a group – The automation will start whenever the subscriber is removed from a defined group via an API call or a separate automation workflow. Manually removing subscribers will not trigger the automation.
    • A link Is Clicked – Automation starts its first action whenever a subscriber clicks on a specific link. It might be a link to a particular product or any other link used in previous campaigns. After subscribers click on a link, they automatically participate in a secondary automation sequence which starts after the “A link is clicked” trigger.
    • Cart Is Abandoned – Abandoned cart reminders might be a great source of revenue. It starts the automation workflow once a cart is abandoned. Requires e-commerce integration!
    • A Product Is Purchased – Send customers Thank-you letters, post-purchase feedback requests, or get notified when somebody buys your product or service. Requires e-commerce integration!
    • An order is fulfilled – This trigger gets activated once a seller marks an order as fulfilled in Shopify.
    • An API Call Is Made – Start the automation with any of your system events. Send an API call from any other system or program and start the automation.

    When the automation trigger is set, continue by adding the following steps.

    Automation Steps

    Each automation sequence is a combination of different steps: condition, delay, email, SMS, action.

    Automation steps selection
    • Condition – continue the workflow in a different way depending on whether conditions are matched.
    • Delay – wait for a certain period of time.
    • Email – a newsletter which will be sent to a subscriber.
    • SMS – an SMS which will be sent to subscriber.
    • Action – change subscribers details or list membership, notify yourself or sent a web-hook.

    The condition step is one of the most effective ways to create a unique route for different occasions. What activity can be selected?

    Condition options
    • Subscriber details (any custom field)
    • Subscriber status
    • Workflow email activity
    • Campaign activity
    • Group membership
    • Abandoned cart (can be chosen if the trigger “A cart is abandoned” is selected)
    • Purchase product (can be chosen if the trigger “A product is purchased” is selected)

    The Delay step is pretty self-explanatory. Delay can be set for a set amount of:

    • Minutes
    • Hours
    • Days
    • Weeks
    • Months

    Email step is pretty basic, firstly, enter these fields:

    • Email title
    • From name
    • Reply-to address
    • Email Subject
    • Email preview text (optional)

    then click on “Create” button and Drag & Drop design builder will be launched.

    SMS setup is all done within the sidebar. Fill in the following information:

    • Campaign name
    • Sender
    • Message text
    • Add Opt-out instructions

    Then click “Save,” and the SMS is prepared.

    The action step is used for executing activities for specific conditions. These are possible actions:

    • Move subscriber to another group
    • Copy subscriber to another group
    • Remove subscriber from a group
    • Mark subscriber as unsubscribed
    • Update subscriber’s custom field
    • Remove subscriber’s custom field
    • Notify me
    • Send webhook

    Automation reports

    Automation’s reports are located in the particular automation workflow itself, open automation to view extensive report statistics.

    Automation reports

    In order to view the complete report of a particular action step – click on the step and select the “Full Report” button. Next, a new window with comprehensive statistics will appear.

    Full report button
    Statistics view

    If you are stuck on a specific task or can’t find a way to execute a particular job, contact our support team via LiveChat or [email protected] – we’re here to help 24/7.

  • Use feedback block element

    An objective perspective on a particular subject goes a long way in improving customers’ experience and service in general. That’s why feedback is essential.

    With Sender, collecting feedback is clear and straightforward. 

    In order to insert review form into a newsletter design, you’ll need to pick a review block and drag it into a required section. 

    When the campaign is completed and sent, recipients will be able to click on a score and contribute feedback. The feedback score is presented in the campaign reports > clicks report 


    If you got stuck on a specific task or can’t find a way to execute a particular job, contact our support team via LiveChat or [email protected] – we’re here to help 24/7.

  • WordPress Integration (Plugin)

    v.2.9.8 DESCRIPTION

    This is the official documentation for Sender.net’s WordPress v2.9.8 integration plugin.

    This plugin doesn’t require WooCommerce to be installed, you can use it as a separate product. However, to use most of the features, it’s necessary to have Woocommerce installed.

    KEY FEATURES

    • Embedded subscription forms
    • Pop-up forms

    INSTALLATION PROCESS

    1. Head to app.sender.net and log into your account
    2. Download Sender.net plugin integration from WordPress plugin store.
    3. Install the plugin
    4. Activate the “Sender.net email marketing” plugin by inserting API token.
    5. Congrats, you’re done with implementation.

    Here’s a short video guide on how it’s done:


    EMBEDDED FORMS

    First of all, only published (activated) subscription forms on Sender’s “forms” section will appear in the widget’s customization menu. Later, you’ll be able to select which subscription form to use on the website. Newly designed subscription forms will be automatically updated and shown in the widget menu.

    Subscription form selection

    Note: Please remove all manually imported subscription forms script from the website because it will interfere with the plugin. If you have implemented a subscription form or popup in the past manually, remove the script to use plugin integration.

    POP-UP FORMS

    Pop-up forms will automatically appear on your website without further configurations. Simply “Active” a required pop-up on Sender.net platform, and it will appear on the website.

    Pop-up form settings

    Next time you open your website, the popup will appear according to its behavior settings.

    Integration with WP WooCommerce plugin

    If you’re looking for an e-commerce solution for the WordPress WooCommerce plugin, click here for comprehensive documentation.

    That’s it!

    If you got stuck on a specific task or can’t find a way to execute a particular job, contact our support team via LiveChat or [email protected] – we’re here to help 24/7.

  • WooCommerce Integration (Plugin)

    v.2.0 Description

    This is the official documentation for Sender.net’s WooCommerce v2.0 integration plugin.

    WooCommerce is an open-source e-commerce plugin for WordPress. It is designed for small to large-sized online merchants using WordPress.

    Key features

    • Transfer guest customers‘ email addresses.
    • Transfer customer account email addresses.
    • Use the “Cart is abandoned” trigger on the automation feature.
    • Use the “Product is purchased” trigger on the automation feature.

    Installation process

    Note, before the installation process, make sure a WooCommerce plugin is installed on your WordPress website.

    1. Head to app.sender.net and log into your account
    2. Download Sender.net plugin integration from WordPress plugin store.
    3. Install the plugin
    4. Activate the “Sender.net email marketing” plugin by inserting API token.
    5. Congrats, you’re done with implementation.


    Here’s a short video guide on how it’s done:

    When Sender’s plugin for WooCommerce is successfully installed, Sender.net section will appear on the left side. Select “Sender.net” section to open integration settings.

    “Enable tracking” option permits users to enjoy abandoned carts and product purchased triggers with an automation feature and transfer customer’s email addresses to the Sender.net platform. Enable this feature to use “abandoned carts” and “product purchased” automation triggers.

    When tracking is enabled, you’ll be able to:

    • Save “Customers who made a purchase” – feature allows you to capture recent customers ( that made a purchase) and automatically add them to the selected subscriber list. Select a Sender.net subscriber list into which the new user emails will be saved.
    • Save “New registrations” – feature allows you to capture registered clients and automatically and add them to the selected subscriber list. Select a Sender.net subscriber list into which the new user emails will be saved.

    Additionally, integration lets users use the abandoned cart, and the product is purchased triggers on the automation feature.

    • Use the “Cart is abandoned” trigger in the email automation feature.
    • Use the “Product is purchased” trigger in the email automation feature.

    Note, you’ve not required additional configurations. When the “Enabling tracking” is active, abandoned cart and product is purchased triggers will work automatically if a customer on your website meets the conditions.

    Click here for the WordPress documentation.

    That’s it!

    If you got stuck on a specific task or can’t find a way to execute a particular job, contact our support team via LiveChat or [email protected] – we’re here to help 24/7.

  • API Access Tokens (Authentication)

    Authentication is required when activating the Sender.net plugin or validating API requests. Both ways, you’ll need to include an API access token. 

    To generate an API access token, go to Settings > API access tokens or by clicking here.

    Continue by clicking “Create API token” and picking the validation period “Forever.” After that, a unique access token is generated. It authenticates your API requests and is used for plugin activation. 


    If you got stuck on a specific task or can’t find a way to execute a particular job, contact our support team via LiveChat or [email protected] – we’re here to help 24/7.

  • Set subject and preview

    In order to maximize email engagement and opening rates, one must effectively address all parts of the campaign, especially the subject line and preview text. It’s the first thing any recipient sees, and we all know what is said about first impressions. 

    The email subject and preview text are set up in the first step of campaign creation.

    Here’s how email subject and preview text reflects on Gmail application. 

    Use the chart below to find an optional preview text length for different platforms.


    If you got stuck on a specific task or can’t find a way to execute a particular job, contact our support team via LiveChat or [email protected] – we’re here to help 24/7.

  • Add countdown timer

    Adding a Timer to a newsletter can be very useful, especially on limited-time offers. The Timer block can be simply dragged into the campaign.

    The Timer block is customizable. The timer’s settings appear on the right-hand side when the block is selected. 

    You can alter the timer’s background design, pick a time duration, font style, color, and background color, and select a time zone. Additionally, the timer’s text can be changed. It’s useful if your audience doesn’t speak English.

    Please note that the Timer block is available only for Professional or Enterprise plan holders.


    If you got stuck on a specific task or can’t find a way to execute a particular job, contact our support team via LiveChat or [email protected] – we’re here to help 24/7.