Blog

  • Enable double opt-in

    The double opt-in approach has an additional step that is easily set. Basically, the extra action includes a confirmation step where the recipient receives a confirmation email to confirm the signup.

    In order to create a double opt-in flow, you will need to start by creating a single opt-in subscription form – for a tutorial on it, click here.

    Once the subscription form is created – choose a particular group to which the new subscribers will be added (you’ll be able to set that in the form’s settings). It is necessary for the following process. For example, you could create a group called “New subscribers” for new sign-ups and “Confirmed” for the subscribers that successfully completed the double opt-in procedure.

    After the subscription form and “New subscribers” and “Confirmed” groups are created, go to the automation section and create an automation that is activated by the trigger “Subscriber is added to a group”. To learn more about triggers, click here.

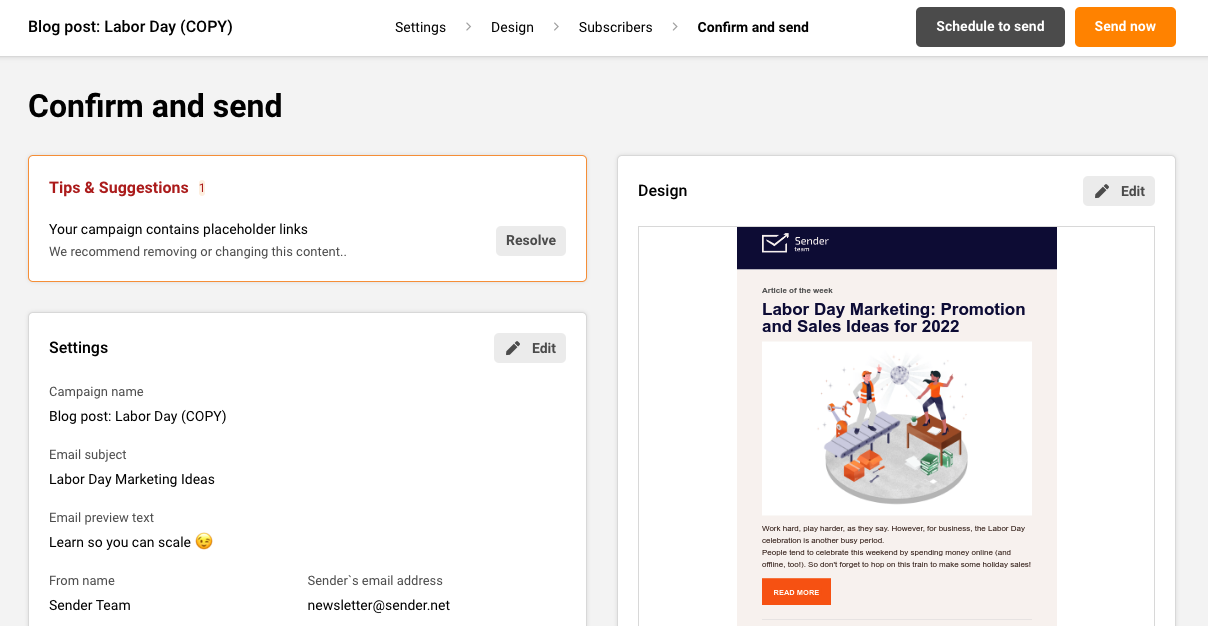
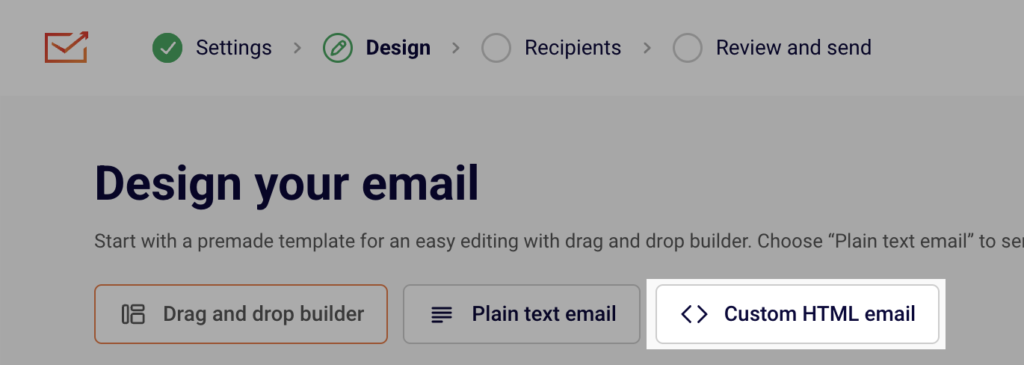
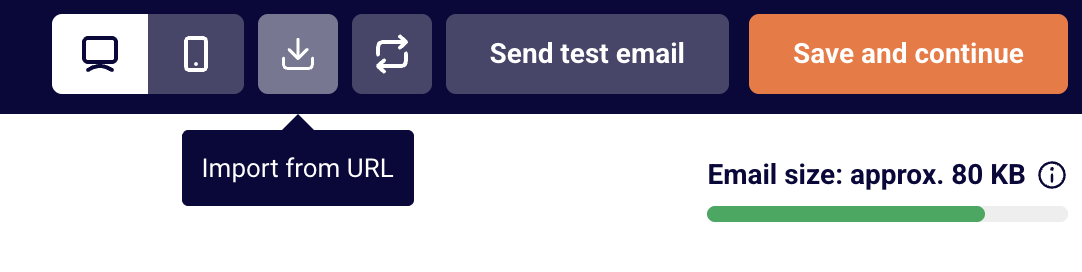
    You will now need to choose the “Email” step, choose Drag&Drop builder. After you create the email, Save the changes and save the step afterwards. Make sure to add a confirmation button in the campaign that will activate the second step after being clicked. Here’s an example below:

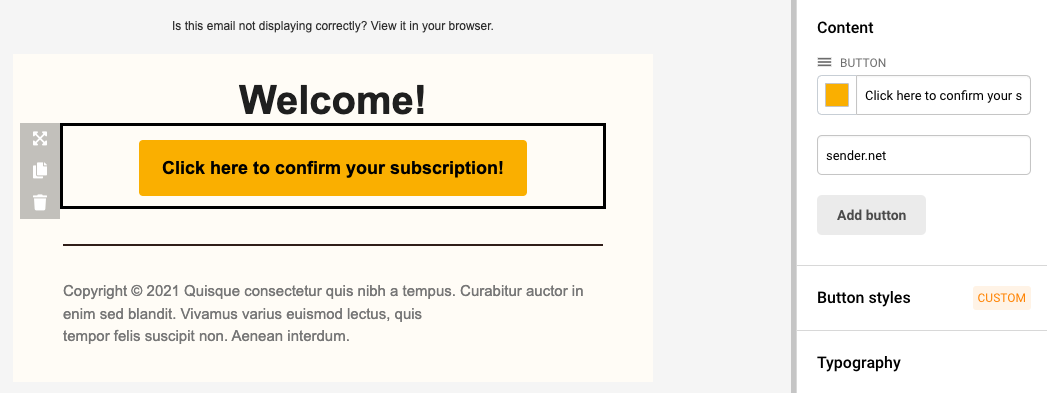
    When a subscriber clicks on the confirmation link, they will be moved to the “Confirmed” group. But a few more configurations are needed. Let’s continue by adding the following steps to the automation’s sequence:

    • Delay (give subscribers some time to go to their email inbox and click the link)
    • Condition (Link is clicked)
    • Action (Move subscriber to another group)

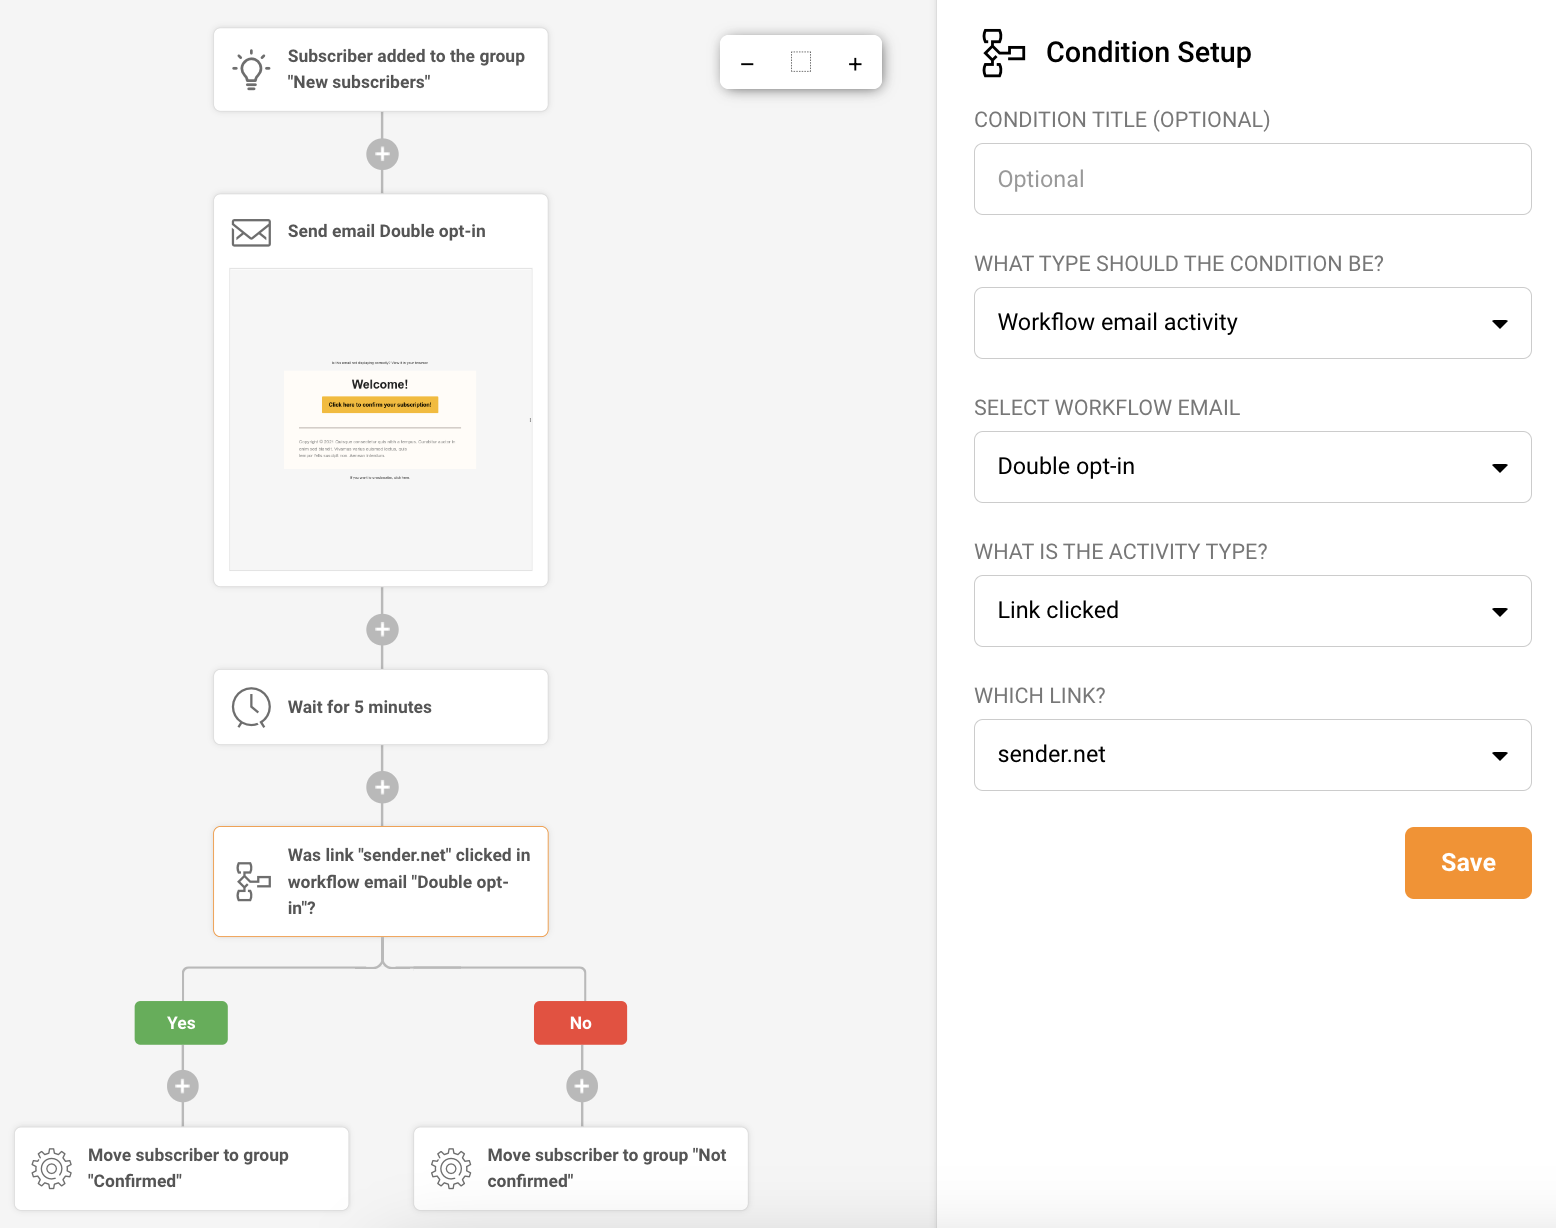
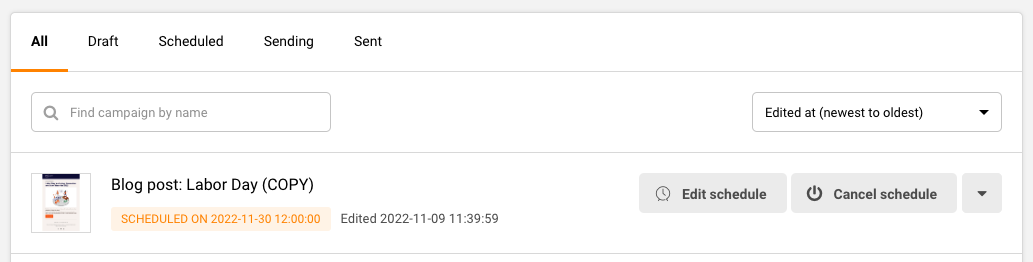
    That’s pretty much it. The sequence is relatively simple. The recipient subscribes via your subscription form, gets added to a group, and the automation gets triggered. Then the automation sends a confirmation email with a button and once it is clicked the subscriber gets automatically moved to the group “Confirmed.” If not, they get moved to the group “Not confirmed”.

    That’s it!

    If you got stuck on a specific task or can’t find a way to execute a particular job, contact our support team via LiveChat or [email protected] – we’re here to help 24/7.

  • Sender API Documentation

    The new platform came with an entirely re-engineering and more capable API software mediator that makes communication between software more manageable and straightforward. Complete documentation of a new API is found and accessed via api.sender.net.

    What is found on the documentation?

    The documentation intends to present all the information you need to work with our API. As you scroll through the page, you’ll see possible requests on the left side of the screen. 

    The code examples of API requests with different programming languages.

    Authentication

    To authenticate requests, include an Authorization header with the value “Bearer {API_ACCESS_TOKEN}”.All authenticated endpoints are marked with a requires authentication badge in the documentation.

    In order to generate a bearer code go a-head to Settings > API access tokens or by clicking here.


    If you got stuck on a specific task or can’t find a way to execute a particular job, contact our support team via LiveChat or [email protected] – we’re here to help 24/7.

  • Export subscriber data

    Subscribers’ export

    If you want to export all of your subscribers, go to your main subscriber list, click the arrow at the top of the list and choose “Select all”.

    Then click “Actions” and choose between the two possible export options: “Export to CSV” or “Export to XLSX”.

    If you want to export a particular set of subscribers, you must filter them according to your needs, such as their email/sms status, group membership, campaign activity, etc. You can accomplish that by using the Advanced filter—more on that here.

    Once you select all the conditions, the system will filter the subscribers that match them. Then select all the filtered subscribers as described above and download them with the preferred file type.

    How to export recipients from the campaign report section?

    Go to “Email campaigns” and click “View Report” next to the required campaign. Then click “Subscriber actions”.

    Now pick the tab that you want to export the subscribers from (e.g. opens, clicks, unsubscribe and etc.) and click “Export”.


    If you got stuck on a specific task or can’t find a way to execute a particular job, contact our support team via LiveChat or [email protected] – we’re here to help 24/7.

  • Create custom unsubscribe link

    Unfortunately, custom unsubscribe text is not an option, mainly due to GDRP law and abuse prevention. The unsubscribe link and text are fixed for each campaign. However, users can change the language of the unsubscribe link by opening Design Settings and finding the Template settings tab on the right side.

    By scrolling down a bit you will find Preview and unsubscribe tab. There is an option to change the font, its color and size, or hide the “View in browser” and “Unsubscribe” links.

    That’s it!

    If you got stuck on a specific task or can’t find a way to execute a particular job, contact our support team via LiveChat or [email protected] – we’re here to help 24/7.

  • Add custom font

    Unfortunately, as of now, it is impossible to add custom fonts to the newsletters. 

    That’s it!

    If you are stuck on a specific task or can’t find a way to execute a particular job, contact our support team via LiveChat or [email protected] – we’re here to help 24/7.

  • Schedule an email campaign

    Scheduled campaigns have more potential for additional reach – it’s no secret that the delivery date and time plays a significant role in newsletters engagement and opening rates. Therefore, we recommend scheduling campaigns as frequently as possible.

    Campaign scheduling is done in the last step of campaign creation – when you’re done with campaign design, continue with the following steps until you reach the final stage.

    When the schedule button is clicked, a calendar will appear – pick a date and time on which the email will be delivered. Campaigns are sent according to your account’s timezone.

    Scheduled newsletters appear in the campaign section with included delivery time.

    Please note that any changes made to the subscribers’ composition of the group(s) you selected for the campaign will impact which subscribers receive the campaign.


    If you are stuck on a specific task or can’t find a way to execute a particular job, contact our support team via LiveChat or [email protected] – we’re here to help 24/7.

  • Send custom HTML emails

    When you are creating an email campaign, you have an option to create a custom HTML one. Once you fill out the campaign details, you can choose between Drag and drop builder, Plain text email and Custom HTML email.

    When the HTML editor loads, the code of your HTML-coded newsletters will need to be entered here. The HTML newsletters can be imported via URL link – to do that, click on the button import icon “Import from URL” at the top and enter the URL. 

    It is crucial to maintain the standard HTML structure. Otherwise, after sending the campaign, the report will show 0s in the report. This structure must be followed:


    If you got stuck on a specific task or can’t find a way to execute a particular job, contact our support team via LiveChat or [email protected] – we’re here to help 24/7.

  • View subscriber activity report

    It’s necessary to track and manage subscribers by their activity – its report can give you a great insight into your subscribers’ behavior. 

    The process is relatively simple: go to the Subscribers’ section, and click “Groups”. Then click the arrow button next to the desired group and choose “Activity report”.

    Next, click on the arrow icon on the far right side of the screen and select “Activity report.” At this point, the activity report will get generated and downloaded.

    The information that will be found in the report:

    • Email address
    • Phone number
    • First name
    • Last name
    • Email status
    • SMS status
    • Emails sent
    • Emails opened
    • Emails clicked

    If you got stuck on a specific task or can’t find a way to execute a particular job, contact our support team via LiveChat or [email protected] – we’re here to help 24/7.

  • Troubleshoot deliverability issues

    Factors affecting email deliverability

    Many factors are at play that determine whether or not your emails go into a recipient’s inbox or not.

    The key ones include:

    • Sender reputation: This is one of the most significant factors impacting deliverability.  Your sending email address, domain and sending IP address should be free from any previous email abuse or spamming history;

    • Email content quality: Your email content should be relevant to the recipient and spam-free. E.g., excessive use of capital letters, inclusion of spam words, exclamation marks, and other spammy tactics are a strict no-no that may trigger spam filters;

    • List quality: You should only ever be sending to opted-in subscribers who’ve expressed interest in receiving your emails. Cleaning up inactive (dead) subscribers and using best practices like double opt-ins is a must;

    • Use of security mechanisms: When you set up secure emailing settings such as SPF and DKIM, it signals that you are a genuine business that is what it claims to be. You can learn more about DKIM/SPF records by clicking here.

    • Engagement: Your open, click-through, reply, unsubscribe and report spam rates are all closely monitored by ISPs to determine your audience’s experience. More opens, clicks and replies tell them that they are finding your content valuable, therefore, more chances of your emails getting delivered to inboxes;

    • Optimizations: Not optimizing your email for viewing over mobile or with popular email clients can result in lower engagement and poorer engagement metrics;

    • Internal firewall issues: Sometimes, especially with corporate and university filters, regular emails look suspicious and are blocked. Check the allow listing information (other providers refer to it as “whitelisting”). If that’s the case, you should alter inbox filtration settings and create an exception/whitelist sendersrv.com.

    • Others: spammy subject lines, sudden increase in sending frequency (or volume), excessive use of images and attachments, lack of segmentation, unclear unsubscribe links and more could also impact deliverability negatively.

    That’s it!

    If you got stuck on a specific task or can’t find a way to execute a particular job, contact our support team via LiveChat or [email protected] – we’re here to help 24/7.